DEMONSTRATION painting live subjects
Many artists who paint portraits do so from life, or from a combination of working from a live model and from photographs. But some subjects are difficult, if not impossible, to paint from life. Among those are animals, who hold still only if asleep and then not reliably, and small children, who may not hold still under any circumstances.
materials list
White Museum Grade Wallis Sanded Pastel Paper
3-inch wide foam hardware store house-painting brush
Extra soft thin vine charcoal
No. 6 flat chisel and No. 1 wide flat paint shapers
pastel pencils
Cretacolor Pastel pencil, light gray
pastels
middle-value green-gray, dark navy blue, dark teal-blue, medium teal-blue, dark grey-blue, dark red-violet, middle-value navy blue, dark violet, middle-value red-violet, black, dark purple, bright cobalt blue, light violet, light turquoise-blue, middle-value yellow-orange, middle-value magenta, reddish-brown, pale yellow, light yellow-ochre, pale yellow-green, pale blue-violet, white

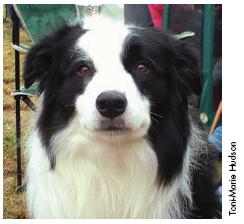
reference photo
Artist Deborah Christensen Secor loves to paint animals, and this photograph of “Buzz” is a great subject.
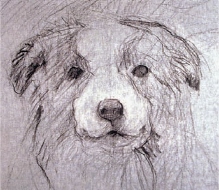
1 Draw Your Subject
Tone white Wallis Sanded Pastel Paper by lightly covering it with green-gray pastel, then rub it in with a foam brush for a medium-light value of a cool neutral color. Use extra soft thin vine charcoal for the underdrawing, lightly sketching the placement on the page. The subject is positioned to leave some “looking room” for the animal, which allows the viewer to sense movement. If the dog was right in the middle of the page, it would be static.
It’s helpful to draw a line through the center of the pupils; note the angle, making sure that a line along the top of the nostrils is at the same angle. An animal’s face doesn’t flex this way, so line up the eyes, nose, mouth and chin if they all show.
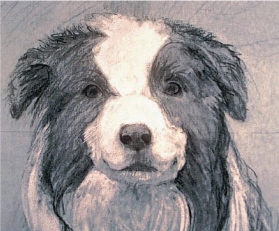
2 Develop and Refine the Drawing
Develop the drawing by refining the values and detailing the shapes. Pay attention to the three-dimensional shapes that make up the head, modeling it with the charcoal. This is the best time for corrections, because you can easily erase the charcoal with a foam brush and redraw. Find the shadows cast by the muzzle, under the ears or brows. Describe the fur with directional strokes, looking for key places where the color of the fur changes. Notice how much darker the value is in shadow, and depict the fur’s texture. Use shorter strokes on the face and muzzle, lengthening them where the hair is longer.
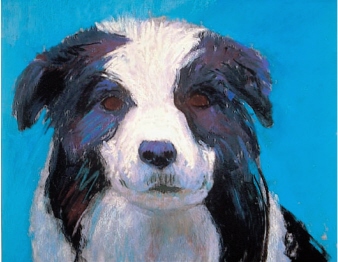
3 Paint the Background
Work the background right along with the portrait so it doesn’t look as though the dog is superimposed on top of it. Remember that the dog’s edges will overlap the background, so keep the layer of pastel near the dog from filling the tooth of the paper. Electric blue is a good background color choice for an active, mischievous-looking dog like this one.
4 Add Color to the Subject
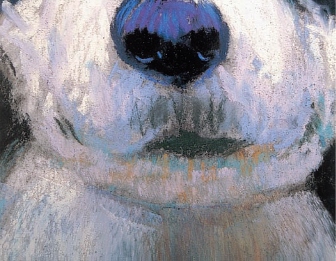
Don’t worry about putting down completely accurate colors first. More interesting colors can be used on what at first glance appears to be black fur—look for blues, purples and other colors to add interest. Start with colors you see underneath, in this case the blues and reds in the black and white coat. Unexpected colors such as lavender, green, peach, blue and yellow can be used to create the modeling of the nose, mouth and chin. Find the correct values of the colors and use more than one to make your painting varied and interesting. You’ll layer more color to make the dog look more realistic later.
5 Begin Refining the Colors
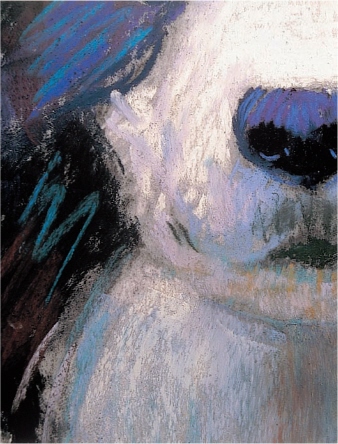
Add more color, but still without using many details. Keep checking the alignment of the angles, measuring where the mouth lines up with the outside of the eye, for example, or how high the left ear is compared to the right one. Further model the forms using colors of the same value: medium-dark red-violet, purple and red in the black fur in sunlight; very dark purple, blue and black in the shadows of the dark fur; pale pinks, greens and yellows in the sunlit white fur; and medium turquoise, lavender and ochre in the shaded white fur. You can use a blending tool like a paint shaper to move the pigment around and begin to create the texture of the fur.
6 Paint the Eyes
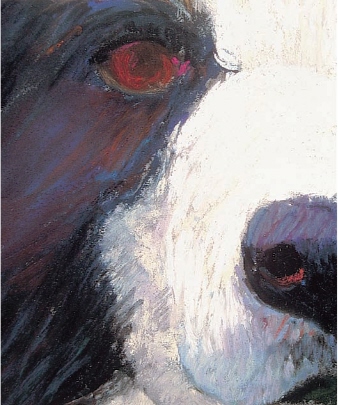
At this stage, you may want to begin to paint the eyes, though some artists prefer to wait until the very end to add such details—if they become smudged, they’ll have to be repainted. At this point, just make sure you have the correct value of the eyes and their underlying color laid in.

7 Develop the Impression of Fur
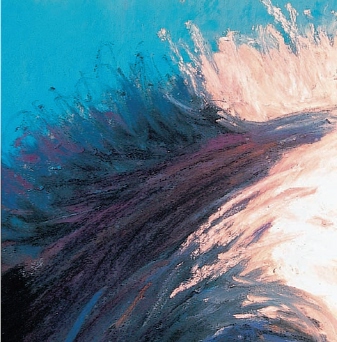
Now a few details can be created, such as the loose fluff along the top of the head and straggly wisps of fur where the black and white overlaps. The direction of your strokes is important, as is the length—short, quick strokes will give the impression of shorter fur, while long, thin strokes will work for longer hair. Use softer pastels to create the soft fur beneath an ear, and a harder pastel, or pastel pencils, for crisp details that create the impression of coarser areas of the coat. Create the drape of longer hair by using long, fluid overlapping lines, or make softly curling strands to enhance the effect.

8 Continue Forming the Face
Merge the shadow under the chin into a warm gray with touches of blue, and form the short hair along the upper lip with blue and gray dabs, making sure that bits of the lavender and pink can still be seen. Cool the red of the nostrils with blue to give them a damp look.
9 Define the Edges of the Fur
The edges of the fur are important—use quick, short strokes to indicate the way it stands up along the top of the head. Use the predominant color over the top, allowing your strokes to stand atop the underlying color with authority. Don’t mix the pastel too much with too many strokes or your edges will look muddy.

10 Develop the Eyes
Make the eyes with simple, layered strokes, with the last strokes being the lightest colors. Reflect the blue of the background in them. It’s best to define the eyeball using at least two colors. For instance, this dog has reddish brown eyes, but in shadow they’re warm rust and they’re golden brown in lighter areas. The eyeball is semi-transparent and round in shape, so define the ball of the eye with shape and values as well as color. The catchlight, or highlight, can be quite light in color, usually reflecting the ambient light around the animal. Paint this using one or two very light colors, such as pale blue and pure white. An elongated, curved catchlight further describes the form of the eyeball. Be sure to locate the catchlight in the same quadrant of each eye so that both eyeballs appear to be turned in the same direction.
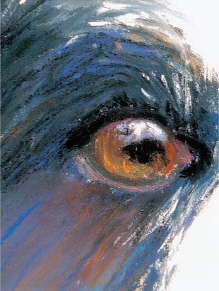
Note that the eyelid is a different color on the top edge than the bottom. Look for the shadow cast by the upper eyelid along the ball of the eye, curving it to describe the roundness, as well as the lower portion of the eyeball that is slightly darker in color. The pinkish color of the inner skin and eye tissues makes the animal look alive. The pupil is very dark in color and is necessary to make the eye look complete even if the photograph doesn’t show it.
The warm reds and pinks below the eyes bring more life to the dark fur and depict the light falling on the face, while cool black is used beneath the brow to show its form. A touch of pale yellow in the outside corner reveals the edge of the very large iris of the dog’s eye.
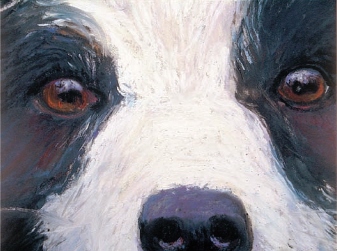
11 Add the Whiskers
After the eyes are painted, touch up the white fur around the eye areas and add the whiskers. You can do this with the edges of soft pastels as shown here, or you may want to use a well-sharpened hard pastel or a pastel pencil for these final touches.
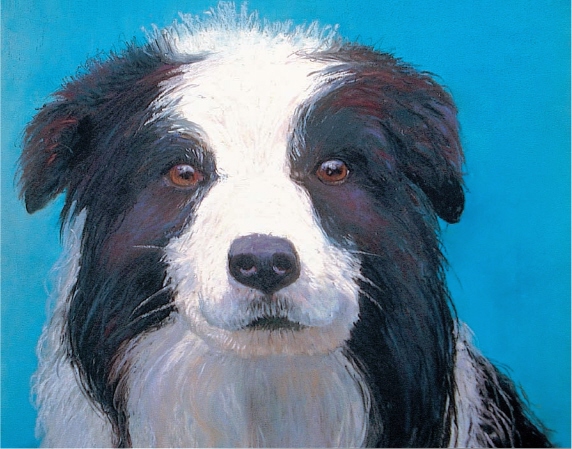
Buzz
8" × 11 " (20cm × 28cm) by Deborah Christensen Secor
12 Finish the Painting
After looking at the painting for a period of time, carefully analyzing the details, add a few last touches; clean up some stray marks along the white of the face and smooth out several raw strokes over the right eye by the ear, and the portrait is complete.