DEMONSTRATION painting a figure from life
Painting a model outdoors presents several exciting challenges. The changing light affects the colors of the landscape as well as skin tones and colors of fabric. Wind may gust and subside; clouds may pass by, each changing the way light describes the forms. Working quickly and staying with your decisions will make the process easier.
Make a Reference
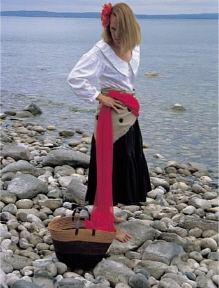
Artist Bill Hosner never uses photographs, except for the purposes of showing the initial view of the scene. He has painted only from life for many years. This demonstration was completed in one session, in a little less than three hours.

Reference Photo
Even when creating a painting from life, it’s helpful to have a photograph of the original scene that caught your eye. By the time this artist began to sketch the composition, the wind had picked up and the scarf was blowing.
materials list
White Professional Grade Wallis Sanded Pastel Paper
pastels
gray-greens (light, medium and dark), warm grays (light, medium and dark), cool grays (light, medium and dark), carmine brown dark, burnt sienna, dark burnt umber, dark raw umber, light red oxide, carmine red medium, permanent red medium, warm black, cool black, dark red purple, light burnt sienna, light ultramarine blue, light and medium red-violet
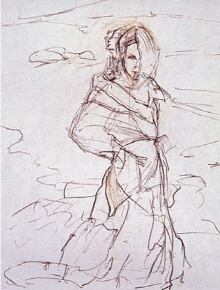
1 Draw the Subject
Using a pastel pencil, sketch the placement of the figure. The drawing will be covered entirely by pastel, but accurate placement of the figure and its relationship to its environment will make the subsequent painting easier.
The initial sketch gives you a map for the painting. Compositional changes are much easier to make before applying pastel.
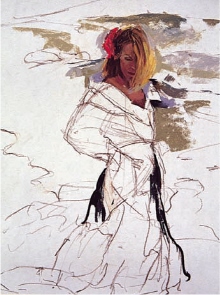
2 Begin Applying Pastel
Quickly apply color with pastel. Since the head is the center of interest, start by blocking in the general colors of skin tone, hair color and so on. Establish the parameters of the lightest light, the darkest dark, and the basic colors and edges.
Keep the background relating to the figure by putting the colors of the scene behind the model around the areas you’re working on.
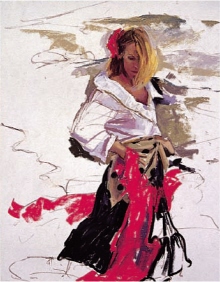
3 Block in the Rest of the Figure
Since working outdoors means changing light—which will affect colors—block in the figure quickly. The black skirt, white blouse and red scarf can be painted loosely, but watch for color and value shifts that help describe the form of the clothing and the model. As you develop the clothing, look for where the landscape touches it and begin putting those colors in.
Note how the scarf is blowing in the wind. Once you paint an object like this that might move later, stay with the decisions you made. If the wind dies down, don’t change the position of the scarf if you’ve already drawn and painted it.
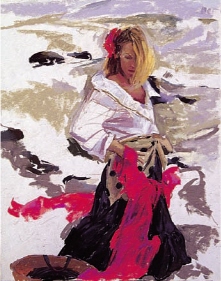
4 Develop More of the Background
With the figure blocked in and some areas nearly completed, pay attention to the background landscape and block in the rest of the colors. As you work near the edges of the figure, you may need to rework some areas to keep the figure and background integrated.
Place the general background colors, working quickly to cover the entire surface.
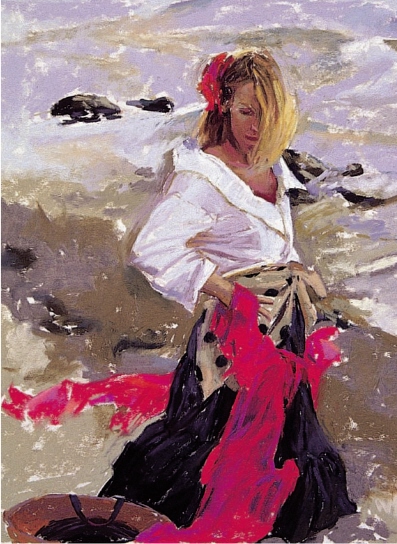
Sleepless Winds
11" × 14" (28cm × 36cm) by Bill Hosner
5 Add the Finishing Touches (But Not Too Many)
As the light begins to change, work toward finishing the painting. Remember that most paintings done outdoors are looser and less detailed than studio work. Capturing the feeling of the landscape, the air, the wind blowing and the quality of light is what makes paintings done outdoors magical and exciting.
Keep the strokes broader and the background more abstract to avoid competing with the figure, which is the focal point of the painting. Touch up edges and make any final corrections.