These are sometimes called roasting trays. Their point is to be flat and rigid, made of heavy-duty steel, usually hard-anodized aluminium, so they conduct heat evenly and slide easily in and out of the oven. Some have slightly sloping edges but mine have one turned-up end, which is useful for getting a grip. They are used for baking meringues, biscuits, pasties and other pastries, bread and pies shaped by hand, and as a base for flan rings and cake hoops. They are useful in the same way for loose-bottomed tart and flan tins, and for pizza. I tend to slide one into the oven when I am cooking a pie or tart that isn’t blind-baked first. The heat of the pre-heated baking sheet helps to cook the base layer of pastry. It’s a false economy to buy cheap, usually flimsy, baking sheets, as they buckle in a hot oven and often turn rusty. Also see Roasting Tins (here) and Swiss Roll Tins (here).
In the summer of 2010 I gave a Cornish pasty cookery demo at the Port Eliot festival. As a bit of light relief after the exactitudes of making authentic pasties I made these extremely simple but utterly delicious little empanadas. They are an unashamed cheat’s recipe using ready-made puff pastry, tinned fried onions and ready-grated Cheddar cheese. They are glazed with beaten egg and finished with a choice of seeds. My favourite is fennel, but poppy and sesame seeds are good too, although a mixture is possibly even better. I made batch after batch before I set off so that I could give them away to friends and everyone who came to the demonstration. They were such a hit that I think it’s worth passing on the recipe.
Serve them with drinks or reheat them as a snack. With a home-made tomato sauce or a big crunchy salad, say green beans, red onion and tomato, they make a delicious light meal. They are perfect, too, to have at the ready for that lull around the barbecue before anything is ready to eat. Tinned fried onions don’t sound very appetizing but you will have to trust me. Eazy onions are imported from Spain, where they are cooked in olive oil. I rate them highly and always have a couple of tins in my cupboard.
375g all-butter puff pastry
flour, for dusting
400g tin of Eazy fried onions
1 egg
300g grated Cheddar cheese
1 tbsp fennel seeds
1 tbsp poppy seeds
1 tbsp sesame seeds
Cut the pastry into 9 equal pieces and roll them lightly on a floured surface until you can cut out 10.5cm circles. I use a cookie cutter. Gather up the trimmings and roll out one or two more circles. Tip the onions into a sieve to drain. Whisk the egg in a small bowl and have some water ready in a ramekin. You will also need a pastry brush, a parchment-lined baking sheet and the seeds accessible.
Hold a circle of pastry on the flat of your left hand (if you are right-handed). Paint a 1cm border with water. Place a scant dessertspoon of onion in the middle and top with a similar amount of grated cheese. Cup your hand so the pastry closes slightly, then, working from one end to the other, pinch the edges to seal. Be quite aggressive about this, poking any trailing cheese back inside the border. After one or two attempts you will work out exactly how much filling the pastry circle can take. Seal the edge with the tines of a fork and lay out on a plate as you go. When you have done all the empanadas, paint them with egg wash and sprinkle the top with seeds. Make a few steam holes with the fork. Arrange, not too close, on the baking sheet(s). Heat the oven to 200°C/gas mark 6 and bake for 15–20 minutes, checking after 15. They will puff and turn golden. Let them rest for a few minutes before eating.
Two of my next-door neighbours have an Australian in their garden, not a real one, obviously, but a big gas-fuelled all-singing, all-dancing barbecue, like my sister has in Sydney and my brother used in Spain. They all cook on it all year round, but, tempting though it seems, I like the campfire spirit of an old-fashioned one. For years I’ve used a neatly designed small portable barbecue that lives in my shed. It gets a bit stressful cooking for more than four but the gift of a large, domed Weber from my son Zach and his wife has broadened my horizons.
I love planning a barbecue and always get carried away, making far too much food. I usually go for one centrepiece, like Moroccan-influenced lemon squid with harissa or Greek-style kofte, with a couple of no-fuss, chuck-it-on-the-barbie favourites, such as sausages, prawns, lamb chops and steaks. I always run with the theme, complementing the meat or seafood with an appropriately colourful big salad and one or two other dishes in case a vegetarian shows up.
I like the fact that all the preparation can be done in advance: the meat marinated, sausages oiled, salad dressings made, beans topped and tailed and potatoes boiled for a salad. It’s vital to have a dip or two – hummus, say, or lemony smoked mackerel with creamed horseradish – and crusty bread to keep everyone occupied when there’s a hiccup with the fire. No barbecue is without a glitch and it’s usually caused by indecision about lighting it. I’m always worried that if I light it too soon the coals will burn down before everyone has arrived and we are ready to cook. I’ve come to the conclusion, though, that it always takes far longer – probably 40 minutes – to reach the desirable red coals with white ash stage. Another important little tip is to soak wooden kebab sticks in warm water for at least an hour, preferably longer, to stop them burning.
I rarely do the actual cooking myself, as there is always someone, usually male, who enjoys it far more than I do. I’ve finally bought some long tongs and a gauntlet-style oven glove to avoid roasted hands. One drawback to my lovely new barbecue is that it stands alone. My little portable fire always sits on a table, so I’d never noticed how important it is to have somewhere to put things.
It’s always intriguing to come across a recipe with a seemingly random ingredient that proves to be the making of the dish. That’s the case with these gorgeously meaty kebabs, and bicarbonate of soda is the curiosity. While its effect seems to encourage stickiness, you will get the best results if the mix of minced lamb and beef is quite fatty to retain moisture and juiciness. The meat is seasoned only with grated onion, salt, pepper and the bicarb. It is kneaded like dough and ends up almost like a paste that is easily formed into big, fat sausages to thread on flat stainless steel skewers. As the kebabs cook, they are basted with melted butter seasoned with crushed garlic and a hint of lime. The last of the butter is mixed with chopped parsley to give a bright green finish to the Persian-style koobideh. Serve with rice, pickled green chillies, crusty bread, hummus and this agrodolce beetroot salad livened up with anchovies. The latter is also very good with hard-boiled eggs or feta cheese.
2 medium onions
500g minced lamb, preferably shoulder
500g minced beef
2 tsp salt
1 tsp ground black pepper
½ tsp bicarbonate of soda
125g unsalted butter
2 garlic cloves, crushed
a squeeze of lime or lemon
2 tbsp chopped flat-leaf parsley leaves
For the beetroot salad:
approx 900g medium-small beetroot
1 large lemon
2 red onions, approx 200g
¼ tsp dried crushed chillies
1 tbsp Belazu balsamic vinegar
200g sun-drenched/sun-blushed tomatoes in oil
10 pickled garlic cloves, from a jar
1 tbsp capers
100g Adriatic anchovy fillets
1 tbsp chopped flat-leaf parsley leaves
Peel and halve the onions. Grate on the large hole of a box grater into a mixing bowl. Add the minced meat, salt, pepper and bicarb. Mix, then knead with your hands for 5 minutes until smooth and almost like a paste. Leave for 15 minutes at room temperature, then, with damp hands, form into 10 or 12 small orange-size balls. Roll into sausage-shapes, transferring them to a plate as you go. Cover with clingfilm and chill for at least 30 minutes and up to 24 hours. Thread on to flat skewers when you are ready to cook.
Make the baste by melting the butter, then stir in the crushed garlic and a squeeze of lime. When the coals are ready (or the ridged griddle very hot), barbecue without resting the meat on the grill if possible, i.e. with one end of the skewer on the back edge and the other on the front. Baste with melted butter as you turn the kebabs, cooking until done to your liking. Mix the parsley into the last of the butter and smear the kebabs before serving.
To make the salad, cook the unpeeled beets in boiling, salted water in a covered pan for about 20 minutes, until just tender to the point of a knife. Drain, then slip into your Marigolds and rub off the skin. With fork and knife, trim away any stalk and cut the beets into kebab-size chunks. Squeeze the lemon over the top and season with salt and pepper. While the beets cook, halve, peel and finely slice the onion. Soften gently, stirring occasionally, in the olive oil in a spacious frying pan. After about 15 minutes, when slippery soft, add ½ teaspoon of salt and the chilli flakes. Cook for a couple of minutes, then remove from the heat. Add the balsamic vinegar and cook briefly until syrupy.
Tip the tomatoes into a sieve to drain. Slice the garlic into thick rounds. Add the prepared beets, tomatoes, capers and garlic. Stir, then tip on to a platter. Decorate with anchovy fillets and garnish with parsley.
I’m probably on my fourth or fifth stick blender. I tend to expect too much of them, because in theory they do everything a regular blender and liquidizer can do but are cheaper, take up less space and are easier to wash up. The truth, though, unless you buy a so-called soup blender with a powerful motor and strong blade, is that a stick blender isn’t a solve-all, like a food processor. That said, I wouldn’t be without mine because it is incredibly useful, particularly for small quantities. A small horizontal blade grinds nuts and spices, makes breadcrumbs, chops herbs, onions, fish and meat, and will purée cooked vegetables and blend soups and sauces in double quick time. My current blender, a mid-price Braun, now several years old, and with a 300-watt motor and 600ml beaker, is wearing well. I have learnt not to overtax it. In my experience a cheap stick blender, or one with lots of attachments, is unlikely to live up to expectations.
There was a time when I was addicted to tandoori chicken. It was a loss leader, sold for a pound a portion, at Khan’s, a fashionable curry house not particularly near where I lived. If you happened to get it fresh from the tandoor, the orange gashes sagging to reveal moist, juicy meat, it was heaven on a plate. It usually came with a naff salad, a lemon wedge and a few slices of half-cooked onion but I liked it with a personal pot of their spicy yet creamy, herby green sauce, the one usually served with poppadoms. This is possibly a Desert Island supper.
6 organic chicken legs, or 12 drumsticks
2 tbsp lime or lemon juice
1 tbsp chilli powder/paprika
5 garlic cloves
40g fresh ginger
1 tbsp ground cumin
1 tbsp ground coriander
¼ tsp ground cardamom
¼ tsp ground cloves
1 tsp ground turmeric
300g thick, natural yoghurt
50g fresh coriander
4 green bird’s-eye chillies
20 mint leaves
½ tsp sugar
3 juicy limes
Joint and skin legs; skin drumsticks. Make a few diagonal slashes on both sides, cutting to the bone. Place in a shallow bowl. Rub lime juice, a pinch of salt and the chilli powder evenly into the slashes. Leave for 30 minutes.
Crush and peel the garlic. Peel and thinly slice the ginger. Place both in the stick blender beaker with the cumin, ground coriander, cardamom, cloves, turmeric, half the yoghurt and 1 tablespoon of oil. Blitz to make a smooth purée and pour over the chicken, turning to evenly coat. Chill, covered, re-anointing a couple of times, for at least 30 minutes and up to 24 hours.
Heat the oven to 200°C/gas mark 6. Lift the chicken out of the marinade, shaking off the excess, then arrange on a cake rack over a foil-lined roasting tin. Brush with oil and roast for 25–35 minutes, turning once, until the chicken is crusty at the edges and the juices run clear when pierced near the bone with a sharp, pointed knife. Set aside a few sprigs of coriander. Trim and split the chillies and scrape away the seeds. Liquidize the remaining yoghurt with the bulk of the coriander, the chilli, mint, sugar, a pinch of salt and the juice from 1 lime until smooth. Arrange the chicken on a platter with the reserved sprigs of coriander, lime wedges and the sauce in ramekins for portion control dipping.
I remember thinking I was a very grown-up cook when I bought my blini pan. It’s such an endearing little frying pan, measuring only 12cm, with distinctive curved sides and a long handle quite out of proportion to its size. The rounded sides encourage the yeast-leavened blini batter to rise evenly and the long handle keeps you at a distance from the heat. Mine is made from cast iron and over the years has become reliably non-stick, but a lightweight cast-aluminium version coated with a durable non-stick surface is probably cheaper. I use it for frying lone eggs but it has all sorts of uses, particularly for home-alone meals or using up leftovers, turning that spoonful of cold mash into latkes or the last egg in the fridge into a spectacular souffléd mini-omelette. It’s perfect for a Tom Thumb fry-up with quail’s eggs and pancetta, or for anything you want neatly round, like drop scones or pancakes.
Surprisingly, the capacity of a blini pan is 200ml, so it holds far more than you might expect. It is not necessary, though, to own a blini pan to make blinis. The batter, traditionally made with buckwheat flour, is thick and sets the minute it hits the pan, so free-style blinis, of any size you like, will cook perfectly in a hot, oiled frying pan or flat griddle. If, though, you want perfect round blinis, use metal food rings, sometimes sold as muffin rings, oiling them thoroughly first.
Home-made blinis are puffy, soft pancakes with a gently chewy texture and mild yeasty flavour. They are usually served with a dollop of soured cream and a fold of smoked salmon, sometimes with caviar too, with chives or dill. Smoked fish and something creamy works well with blinis. Try creamed horseradish with smoked mackerel or eel, or guacamole with white crabmeat and a dribble of sweet chilli sauce. Another good topping is soured cream with orange-red salmon eggs that pop like giant space dust in the mouth.
Blinis can be made in advance and kept covered in the fridge for up to 48 hours, or frozen (layered between greaseproof paper) then defrosted and warmed through in a warm low oven before serving. Share them across the table or prepare small, bite-size blinis canapé-style. Either way, chilled vodka – the glasses frosted in the freezer – or a glass of champagne is a classy accompaniment whatever the topping. Leftover blinis are delicious scone-style, topped with clotted cream and jam.
5g fresh or dried yeast
50ml warm water
100g buckwheat or strong white flour, or half and half
a pinch of salt
a pinch of sugar
100ml milk
2 eggs, separated
150g soured cream
100g jar of salmon eggs
fresh chives
lemon wedges, to serve
Stir the yeast into the warm water and leave for a few minutes to go frothy. Sift the flour into a mixing bowl. Add the salt and sugar, milk, yeast mixture and egg yolks. Stir smooth with a metal spoon. Cover the bowl with a stretch of clingfilm and leave somewhere warm for an hour, no longer, until the surface is popping with bubbles and the mix is slightly risen, looking spongy and smelling yeasty. Whisk the egg whites until firm and holding peaks. Gently fold the whites into the mix.
Heat about a teaspoon of oil in the blini pan over a medium heat, swirl it around, then add 3 tablespoons of batter to the pan. Cook for about 20 seconds, until the surface is covered with tiny bubbles and the undersides are golden brown. Turn with a palette knife or fish slice and cook for a further 20 seconds, until firm and golden. Transfer to a serving platter or parchment-lined tray if reheating or freezing. If using metal food rings, oil and arrange in a flat griddle or frying pan, and proceed as above. If making mini, free-form blinis, drop 4 tablespoons of batter into the pan, each spaced slightly apart, and cook as above.
To serve, top the blinis with a spoonful of soured cream, add salmon eggs and top with a few finely snipped chives. Serve with lemon wedges.
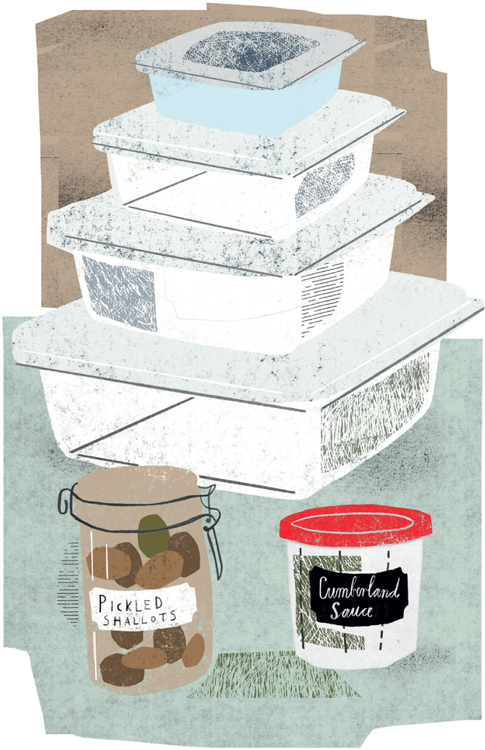
This might seem an eccentric inclusion, but I use plastic food boxes, plastic bags and glass jars in my kitchen for something or other every day. It could be marinating meat, hydrating couscous, stashing food or storing stock. I have all sizes and shapes of box, from catering to dolly’s tea-party size. Keeping them neat and tidy drives me mad. Lids mysteriously disappear or no longer fit their box and stacks implode and multiply. They are the kitchen equivalent of pairs of socks that emerge singletons after a spin in the washing machine. I once read that Paul McCartney is very particular about and addicted to new black socks – well, I’m the same about plastic boxes.
I have two favourite shapes and sizes that cope with most of my day-to-day needs. I discovered the perfect 500ml and 750ml oblong boxes thanks to my local Indian takeaway. They are popular too, I’ve noticed, with Thai restaurants. These boxes are light yet firm and are made of thin, clear polypropylene. Empty, they stack perfectly with the lids on top, and full, they don’t leak and are freezer, dishwasher and microwave safe, although they will eventually wear out. They, and others, can be bought online for a snip in sets of 50 (see here) but you might find smaller packs in your local hardware or houseware shop. I use them for storing everything and anything, from homemade hummus to pomegranate seeds, roasted peppers and tomato halves, opened packs of feta cheese, leftover cold cuts and cooked dishes that I’m taking to friends or my sons. The larger boxes are also perfect for making fruit or aspic terrines and layered jellies.
The other favourite is far sturdier and is cylinder-shaped. I bought four in a hurry from my local cook’s shop when I was after something reliably airtight and a decent size, to transport soups to a Woman’s Hour interview. 700ml is a useful capacity and they will probably last for ever. Irritatingly, they don’t stack well and the Lock&Lock snap-on lids with their blue plastic seals play hide and seek in my cupboard, but I love using them for storing and transporting soups, sauces, stews and bean dishes. I often chill stock in them – their relatively narrow diameter means there is a thick layer of consolidated fat that is easy to remove. If my fridge was bigger with greater space between the shelves, I’d chill stock in kilner jars before freezing it in those brilliant flat-packing, self-standing resealable Pour&Store plastic pouches. I wash mine in the dishwasher and balance them over my extra long jam-making wooden spoon to dry.
I can’t bear disorder in my fridge, although I often end up with it. I also like to see what I’ve got in there. So I border on the obsessive in getting rid of excessive packaging and transferring food into my plastic boxes, but most often I use bags. Herbs and salad keep better in sealed polythene food bags, but spring onions and leeks, carrots, beetroot and spinach, beans, peppers and mushrooms need air to breathe, so are better in open-ended bags.
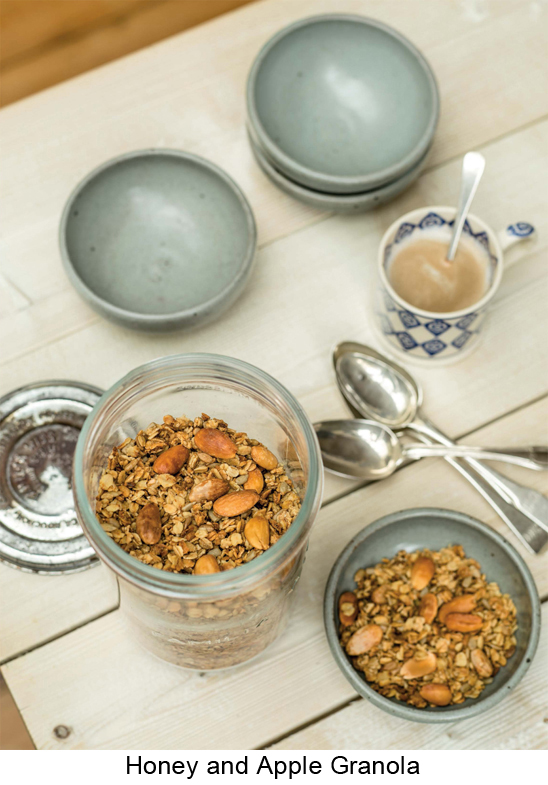
Years ago when my step-children were young and I was in super-step-mum mode, making jams, chutneys and marmalade ad infinitum, they would paint the lids and some still survive, the jars rotating between my sons and me. I save jars of all sizes and friends collect them for me, as these days I make preserves from fruit and veg grown at my allotment. I have quite a collection of different-sized glass preserving jars built up over the years. Some are designated for pickled onions – used repeatedly the glass and lids develop a distinctive smell – but larger ones are used for preserving fruit in alcohol. A very old French jar with a wide mouth and tapering shape is constantly replenished with home-made granola. See here for an inexpensive source of Le Parfait preserving jars and separate rubber seals. The point about these jars is that they are airtight, so smaller ones are useful for glacé cherries and angelica, herbs and spices, larger ones for nuts and seeds, dried fruit, coffee and tea.
A kitchen funnel goes hand in hand with filling jars and it isn’t normally an item to get excited about but I absolutely love Architec’s multi-purpose Prepsfunnel (see here). It clicks apart and can be used separately or together. The rigid nylon base has a wide rim and large hole, perfect for jam and chutney bottling or for decanting pastas and granola, and the smaller, flexible silicone funnel directs dry foods like flour or hot wet ingredients like gravy and syrup with precision. Mine is two-tone green, but it comes in a choice of bright, cheerful two-tone colourways. It’s dishwasher safe and pleasant to use.
Granola is crisp and crumbly, nutty cooked muesli. It becomes addictive once you start making your own, controlling what goes into it. I make it every week, changing the recipe slightly all the time, using different honey and oil, seeds and nuts. Sometimes I make it with organic barley and rye flakes but other times I use brown rice flakes or rolled oats. Millet and spelt flakes are worth trying too. I use apple juice and honey to sweeten it and a mixture of seeds and almonds, but you can tailor the add-ons to your taste and diet. Dried fruits, such as cranberries, blueberries, figs, apricots and mango, even chocolate, can be added once the mix is cold, but I don’t bother. Buying the ingredients by weight or in large bags from health food shops and Middle Eastern shops, and stores like Nuts About Nuts, Nuts, and The Nut Tree (see here) keeps the prices down. Granola makes a great gift, tied prettily Sally Clarke-style, in cellophane bags with a handwritten label. It keeps in an airtight container for up to three months but is unlikely to sit around that long.
150ml apple juice
2 tbsp runny honey, such as Ogilvy’s Himalayan Highland
4 tbsp groundnut or grapeseed oil
300g rolled oats, or 150g organic rye flakes plus 150g organic barley flakes
75g blanched almonds
75g sunflower seeds
1 tbsp oat bran
2 tbsp sesame seeds
3 tbsp organic linseed
dried fruit of choice
Heat the oven to 160°C/gas mark 3. Mix the first three ingredients; you may need to heat them together to blend properly. Place all the ingredients in a mixing bowl and mix thoroughly, not worrying if the mix clumps because that’s what you want.
Spread it out in a large, shallow, heavy-duty roasting tin; mine is 28 × 48cm; it is important that the mix isn’t too thick. Bake on a middle shelf for an hour, turning every 20 minutes, tossing thoroughly so it bakes evenly, continuing for a further 10 minutes if necessary, until dark, golden brown, dry and nutty. Cool in the tin before adding any dried fruit – I rarely bother, as I eat the granola over fresh fruit with yoghurt – then transfer to jars/bags, whatever.