Level 8
Sign Language: HUD and Icon Design
PICTURE, IF YOU will, another dimension balanced between game and the real—a dimension of sight and sound, a realm of things and ideas. No, it isn’t the Twilight Zone, but the zone known as the HUD.
Heads Up!
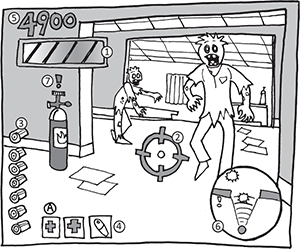
Named after the heads-up display found in modern aircraft, the HUD is the most effective way of communicating with players. The HUD refers to a visual screen overlay that communicates information to the player. The mini-screens and icons found in a HUD are some of the best tools in a video game designer’s bag of tricks. They can communicate information, emotion, even tell players where to go and what to do. Let’s look at some of the HUD elements found on an average game screen:
- Health bar/lives
- Targeting reticule
- Ammunition gauge
- Inventory
- Score/experience
- Radar/map
- Context-sensitive prompt
Health Bar
A staple of action, adventure, platform, and shooter games, the health bar represents how close players are to death, or at least how close they are to restarting the game or a level. Health bars are the most flexible of the HUD elements and come in a variety of forms and imagery depending on the game:
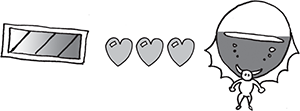
- Many health bars are bars “filled” with color (often red) or icons. As players take damage, they lose a percentage of the bar, or the color empties from the icon. You can even make the color change—from green when healthy to red when damaged. When the bar is gone, that player dies.
- Or vice versa; you can have a damage bar. When this bar is full, the player dies.
- The health bar may represent the status of some sort of on-board defense system, as seen in the Metroid games.
- Both shields and health can be expressed as a numeric percentage (as seen in Doom). Health can be represented as shields. When all the shields are gone, the last hit destroys the player, as seen in Star Wars: X-Wing (LucasArts, 1993).
- Health can be represented as a story device. In the Assassin’s Creed series, the health bar represents the game’s narrative. Stray too far from the “correct story,” and the narrator says, “That’s not the way it happened.” Then the character is “reset” back to the proper point in the story.
- Just because players lose health, that doesn’t mean they can’t get it back. If Halo players find cover and wait, their health bar eventually recharges back to full. This “wait for health” technique is becoming increasingly popular in action games, and I think it’s a pretty good compromise in lieu of a game over/death screen, which pulls players out of the game. On the downside, the pace of the game really slows down as the player waits around to heal.
- Recently, health bars have been replaced by first-person-style effects that are also used in third-person view. In Uncharted 3: Drake’s Deception (SCEA, 2012), damage is indicated by blood smears or a red blur effect that “points” in the direction of the source of damage. Just don’t obscure the players’ view so much that they can’t see the action.
- In Metroid Prime and Batman: Arkham Origins, if players are hit by an electrical attack, the screen “fritzes” for a brief moment.
- As players take damage in the Call of Duty titles as well as Uncharted 3, the screen darkens, accompanied by heavy breathing and a heartbeat sound effect. In Silent Hill, the controller’s actuator simulates a heartbeat as the player is dying.
Targeting Reticule
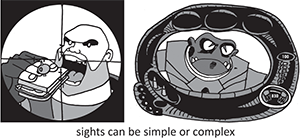
A targeting reticule helps players locate and/or lock onto ranged targets. Types of reticules can vary from a simple “dot” of a laser sight to a complex lock-on system that also provides target information such as health and range.
- A reticule shouldn’t dominate the screen, but you should not make it so small that it’s hard to see.
- Although I have seen reticules rendered in white, this can make them hard to see on some surfaces and backgrounds.
- Reticules are commonly activated in a zoomed-in mode, such as a sniper’s scope. Some reticules change size to allow for more precise targeting when zoomed in, as seen in Red Faction: Armageddon (THQ, 2011).
- Have the reticule change color or “sharpen focus” when over a target. This gives players a clue when to fire.
- Give your reticule some “stickiness,” also known as “aim assist.” When it is aimed at a target, make the reticule gravitate toward it, allowing for faster targeting. This works great for vehicular weapon targeting.
- Build gameplay into your reticule. Team Fortress 2’s zoomed-in sniper’s reticule also projects a laser pointer spot. If enemy players see this spot on walls, they can make an effort to avoid being shot.
Ammo Gauge
Whether your ammunition gauge displays bullets or a simple number, it will be one of the most watched gauges on-screen. Because some games sparsely distribute ammo (Resident Evil 2, I’m looking at you!), placing this gauge in an easy-to-see location is particularly important.

- If you have the screen space, display both clips and individual bullets, like in Operation Wolf (Taito, 1987).
- If the player has to track multiple types of ammo, such as grenades or rockets, make sure that they can be brought up with a button press (as they are in Ratchet & Clank: Tools of Destruction).
- I know this one seems like a no-brainer, but always display the ammo gauge of the weapon currently armed by the player.
- Even if your player’s weapon holds an infinite number of shots, still display it to let the player know what weapon is armed. (The Metal Slug games do this.) Replace the number with an infinity symbol.
Inventory
A staple in adventure games and RPGs, inventory allows players to track and manipulate objects collected during the game. Keys, potions, puzzle items, and weapons are common inventory items.

- Players need quick access to items such as potions and spell components. Hotkey or drag-and-drop systems will help players grab items quickly.
- Allow players a location to see their inventory items in all their glory. Tomb Raider (Eidos, 1995) shows the items in Lara’s backpack on a larger scale for easier inspection.
- Diablo has a limited inventory in which each item has a specific size. Inventory becomes a bit of a puzzle if the player has to fit as many items as possible into a limited space.
- If you have lots of inventory items, let players sort them by type, name, rarity, and so on.
- Inventory items can be represented either realistically or as icons. Whichever graphic style you choose, make sure that the items have clear silhouettes and use simple color schemes.
- If you are going to create a restricted inventory system, allow players to expand it later in the game. For example, start with a pouch, expand to a backpack, and eventually expand it to a magic bag of infinite holding.
- Make sure players have another permanent location in the game (such as their home base) where they can store their items. Players don’t like losing their stuff, especially stuff they’ve bought.
- Why not use a “magic box” for storage, as in Resident Evil 2? Whatever items are stored in the box appear in boxes found further in the game. That way, players never have to run back and forth through the game world.
Score/Experience
In the beginning, there was scoring.

Can you believe the earliest video games had only single-digit scores (Pong and Computer Space)? I guess no one expected games to last that long! Scoring quickly jumped to four digits (Space Invaders), then six (Galaxian), and by the time the arcade boom started in the early 1980s, the high score was king. Entering your initials into a game’s high score table was the sign of true mastery—provided the arcade owner didn’t reset the machine and wipe it out!
As the home market grew, high score became less important in games (perhaps without networking, there was no one to brag to!) and stat tracking replaced high-scores. Percentages of the game completed became more important than scores. Text-based combo meters replaced score bars in games like Devil May Cry (Capcom, 2001). Players would be congratulated (or judged) on their performance. It’s one thing to earn a low score, but another when the game criticizes your performance! And whoever thought up Resident Evil’s rating system must have been traumatized by grade school. There’s nothing more insulting than surviving the zombie apocalypse only to be told you are graded a “C.” Sheesh. However, with the increased popularity of online gaming leaderboards, scoring has returned to live harmoniously alongside combo meters, stats, and achievements.
Scoring indicators can take a variety of forms. They are still most commonly found in arcade-style games and Japanese RPGs like the Final Fantasy series, but scoring is starting to creep into Western-developed RPGs like Borderlands (2K Games, 2009).1
Positive Messaging
A high score provides validation to the player, but there are other ways to do that as well. Mortal Kombat’s “Finish Him!” and “Fatality!” text and voice prompts are just as rewarding as seeing high score points flash across the screen. Other games will display “Good job!” and “Awesome!” messages to keep the player excited about their performance. Author Jane McGonigal postulates in her book Reality is Broken2 that one of the reasons why video games are so popular is that players are getting the positive re-enforcement for their actions in games that they don’t receive for their actions in their everyday lives. I think she makes a valid point. (Good job, Jane!)
Whatever form these positive messages take, make sure that when it happens, it’s big and flashy. Video game developers are great at making players feel unskilled and stupid, but bad at making them feel good. There’s no such thing as overdoing it when congratulating players. Zack & Wiki: Quest for Barbaros’ Treasure (Capcom, 2007) does a great job of making even the worst player feel like the smartest, most skilled player in the world. Every little successful action results in a shower of fireworks, congratulatory text, and happy pirate rabbits flipping through the air! And let me tell you, nothing stokes your ego more than back-flipping bunnies!
Here are a few pointers to make your rewarding feel more rewarding:
- Use voice and sound effects to call attention any time a player gets a reward.
- Match your voice-over talent and music to the tone of your game. Candy Crush Saga (King.com Ltd., 2012) has the strangest mix of cheery candyland graphics and depressing funeral parlor music topped off with a dour sounding narrator. It’s distracting and downright bizarre.
- Freeze gameplay to allow players to savor the moment of reward or have the hero celebrate along with players with victory animations, sounds, and effects.
- You can never have too many particles, especially when celebrating an achievement or awarding a high score.
- Players need to see a clear “cause and effect” for scoring so that they understand how they achieved their score. For example, as a player collects a gold coin in the world, the coin “travels” up to a tally. Don’t forget the cool “Las Vegas-style” sound effects. Cha-ching!
- Choose an easy-to-read font. Ornate fonts (like medieval script) with heavy stylization or even serifs can be hard to read. Watch text length because you may run out of screen space!
- Fill up as much of the screen as possible with your celebratory effects, but don’t interrupt or cover up gameplay.
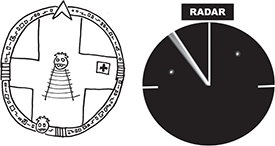
Radar/Map
The first game radar/map was found in Rally-X (Namco, 1980), which allowed players to see the location of power-ups without seeing the game map or enemy cars. Since then, map screens have provided much more detail to players, from outlining the playfield to revealing secret clues.
- Make your map large enough to be legible, but not so big that it fills up the whole screen. If you must have the map fill up the whole screen, do your players a favor and pause the gameplay.
- Make it easy for players to move/travel and look at the map at the same time. It’s too much of a chore to open a map, memorize the locations, and then close the map to return to the game. Modern sandbox game designers let the players add markers onto the map, which lead players right to the objective!
- Create a legend for your map’s icons so players can easily identify and find checkpoints, doorways, quest items, traversal goals, or story points. Also include pop-ups or some other text to remind players what these icons represent.
- Be sure to indicate changes in elevation on your map if you have them in your game world. Players can easily get confused when dealing with levels with multiple elevations. Use a color code or an “onion-skin” effect to show what layer players are currently on.
- Show the players’ current direction by using an arrow or some other icon. Alternatively, rotate the map to face the direction the players are facing. This way, players won’t have to reorient themselves in relationship to their goals.
- The fog of war occurs when a map is obscured until players actually “clear the fog” from the area by moving through it. You can always give your players ways to expose the whole map. Refogging areas is common in RTS games and is part of the strategy, but I have to admit, I’m not a fan of this mechanic. I find players can get lost when areas are refogged. If you need to have it in your game, fine. But don’t come crying to me when your players complain.
- Add other information to your map to aid players. Batman: Arkham Origins provides a distance-to-goal counter, and the Metal Gear series shows the “detection cone” of enemy guards. Harry Potter and the Order of the Phoenix (EA, 2007) displays the names of NPCs on the “Marauder’s Map.”
- Incorporate visual themes into your mini-map. Fantasy maps look good on parchment, a sci-fi game might use a high-tech holographic display, and so on. Even the map can add to the game’s gestalt.3
Context-Sensitive Prompts
A context-sensitive prompt is an icon or text that appears when players are next to an object or character with which it interacts. The most common context-sensitive prompt displays the icon of the button or control that players have to use to make the event happen. For example, in Grand Theft Auto 3, an icon of the “Y” button appears whenever players stand next to a car they can hijack.
Using context-sensitive prompts is a great way to teach players what to do without having them resort to button mashing, memorizing control schemes, or even reading a manual. An added benefit is that using these prompts makes players feel more in character. Because the context-sensitive prompts in the Batman: Arkham series let you know when you can carry out an awesome move like a silent takedown or interrogation move, you end up feeling more like Batman.
In Maximo: Ghosts to Glory, we created a variation of context-sensitive prompts called plings—emoticons that told players when they couldn’t do an action as well as when they could. Need ideas to know when to use these guys? Here’s a short list of suggested uses for context-sensitive prompts:
- Use prompts to indicate whether doors, gates, and/or hatches can be opened or are locked.
- Use prompts to indicate what controls are required to operate mechanics such as cranks, levers, and pushable objects.
- Use them as NPCs. Because they are not only for talking anymore, you can use plings and emoticons to show their emotional state. Catch them in a good mood, and you’ll get a better response/reward than if they’re angry, scared, or sad.
- Use context-sensitive text to see what items and weapons players can collect. Take a page out of the Uncharted series to show players where compatible ammo can be collected or from the Borderland series to see if an item drop is better than the one you are currently have equipped.
- Use context-sensitive prompts to indicate use of a vehicle or minigame. Numerous games allow players to man a machine gun turret during the middle of regular gameplay.
- It seems a bit strange, but you can use context-sensitive buttons to indicate where players can jump, as in The Legend of Zelda: The Wind Waker. Because Link cannot jump on his own, the prompts teach players where they can interact with the world and where they can’t.
- Use them as quick-time event prompts, as seen in the God of War series: a preset sequence of events that progress if you press the right button (see the quick-time event section later in this chapter).
- Use them as combat notification—icons that show when an enemy is vulnerable to a certain type of attack or even warn when an attack is about to happen so players can perform a blocking or counter move.
- Use them as secret treasure items. Have your icon appear when players are close to a hidden item.
In addition, some HUD elements are self-explanatory, such as fuel gauges, speedometers, and countdown timers. As with the others mentioned previously, keeping it clear, clean, and simple is the winning formula for making a successful HUD system.
The Clean Screen
Ah, reality. It’s a double-edged sword. You want your game to look like a … dare I say … cinematic experience … but you still need to communicate gameplay and controls to your players. What to do, what to do?
Well, the first step in keeping your screen clear is to make your HUD elements move or fade off-screen while they are inactive. Of course, they need to reappear whenever they are valid (such as when players are taking damage or collecting treasure), and you should always make sure that players have a quick and easy way to bring them back up if they need to know the information. A simple shoulder button press usually does the trick.
Some games strive to remove HUD elements altogether. Peter Jackson’s King Kong: The Official Game of the Movie (Ubisoft, 2005) utilized a few prompts at the beginning of the game but mostly conveyed game information through sound, animation, and visual effects. The result made for a very cinematic and immersive experience. If you want to go this route, here are some suggestions:
- Have characters react to things in the world to indicate function or interaction. Have them look at collectable items, reach for places they can get to, comment on things in the world that they are supposed to interact with, and so on.
- Opt for full-screen-sized effects over smaller or subtle ones. It never hurts to overemphasize. Use whatever you can to get your point across—sound, voice, visual effects, color, and lighting.
- Use glows or other attention-drawing effects on items to make them stand out. Or use what I call the “Scooby Doo effect.”4
- Use cinematic characters to lead your players through the world. If you can’t afford that much work or it doesn’t fit your story or gameplay needs, at least illuminate the path using color or lighting effects. You could even give a subtle clue such as having leaves blow in the direction players need to travel. Something is better than nothing at all.
If you don’t completely want to eschew (bless you!) the HUDs, you can at least keep them out of the way. Using a temporary HUD is a good way of keeping things clear. I remember Crash Bandicoot having one of the first HUDs that “got out of the way” when it wasn’t being used. If players collected a mango or an extra life or they took a hit, the HUD would pop onto the screen. If it went a minute or more without any of these events happening, the HUD would slide back off-screen, keeping the screen clear so players could enjoy the pretty game art. The Infinity Blade series displays a directional arrow only as players perform a move. This arrow acts more like a guide than a true control path, but it helps eliminate any confusion as to where players need to swipe.
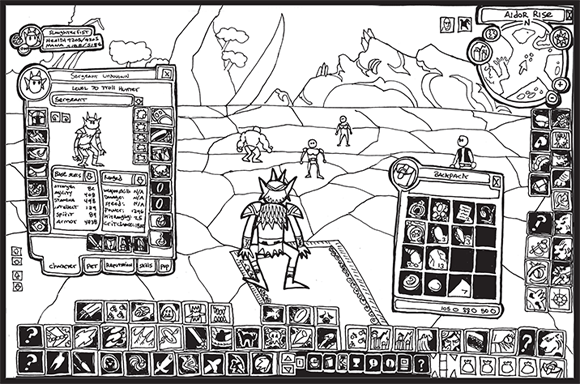
If video game interfaces were a galaxy of planets and on one side of the galaxy was the planet “No Interface,” then all the way on the other side of the galaxy would be the planet “Gobs of Interface.” I might add that both of these are very dumb names for planets; I mean, what do the inhabitants of these planets call themselves? “No Interfacians” or “Goblings”? But I digress. This is where the RPGs, RTSs, simulations, adventure games, and some slumming shooters all live. Hello there, friendly life forms of planet Gobs of Interface; let’s examine your interesting markings and plumage.
Icon Has Cheezburger?5
The first thing you’ll notice on many RTS and adventure games is that there are lots of icons on-screen. Icons for tracking stats, icons for weapons, icons for magic spells, icons for the contents of bags of holding and whatnot. I believe part of the allure of these icon-heavy games is that players make lots of choices and have lots of things to build and collect. That’s OK; not every game needs to be like one made by Oscar-winner Peter Jackson.6
So, because you are making icons for your game, here are 1577 things to think about:
- Pick the right image for your icon. If pressing your icon builds tanks, then guess what picture should be on the icon?8
- Make sure the image that you use is current and accurate. I was working with a team who had an icon for a stamp function (like an ink stamp) that looked like a postage stamp. Many of the younger testers didn’t even know what a postage stamp was! Kids these days!
- Color-code your icons. Fiery punch? Make it red! (Or at least orange.) Chilling hand of frost? I’ll give you one guess (blue). You can take color coding one step further and make the image or background of the icon a representative color. For example, all the icons that advance players to the next screen could be green, and your sword combat icons could all have a red background or feature that colors in the artwork (make sure it’s a different shade of red than the one you are using for fire attacks!). The goal is for players to understand similarities between icons and be able to choose the correct one at a glance.
- If color isn’t enough, use shapes as a differentiator—circles for ammo, squares for health pickups, and so on.
- Try to avoid text in your icons. Not only will you have to change them for localization, but they may be too small to read.
- If you are going to use text (like a word) as an icon, make sure it is legible and looks more like a button than straight text.
- Never, ever combine several visual elements (such as text and a character and a logo) on one icon. Keep them separate graphic files for easier editing, especially when localizing for different languages.
- Surround your icon with a strong black or white outline to make it “pop” off the background or give it a soft surrounding glow or a drop shadow.
- Look at all your icons together to make sure you aren’t creating any similar-looking ones. Try to make each one of them as individual as possible.
- A good trick is to have text of an item’s name (“spell” or whatever) appear if players move their cursor over the icon. Any reminder for the players never hurts!
- Ensure artists create the icons. Don’t leave it up to other team members.
- Learn from the experts. Apple, Adobe, and Microsoft have dedicated icon artists who create clear and clever icons for their software and operating systems. Go online and see what icons others have used for their websites. Games that use lots of icons like RTSs and sims are great sources of inspiration. When we were making Maximo’s ability icons, we were inspired by the designs on Boy Scout merit badges. You can find icons everywhere. Don’t feel you have to reinvent the wheel.
- When players select the icon, make it do SOMETHING. Change color, make a clicky sound effect—anything to register user interaction. I recommend that you avoid using a voice effect, though, because players don’t want to hear “Good choice, commander!” every time they press a button. If you need voice, repeat it only once every three or so clicks. And make sure to record a few extra voice cues to avoid repetition. So, to make this point clearer,9
- The most important button on the interface should be the biggest.
- Make the most-used buttons easy to reach from the middle of the screen or wherever the players’ cursor will spend the most time.
- Make your icons a little “sticky” so the cursor will easily gravitate toward them.
Creating Icons for Mobile Games
In mobile gaming, an icon is used to represent your game in the marketplace. It might just be the most important piece of art you will create for your game. It’s like a movie poster or a book cover. Some customers might buy your game just because the icon looks cool, or conversely, choose to skip it because your icon looks lame. When designing your game’s icon, strive to give your icon the following traits:
- Clarity—Make the images in your icon easy to see. Use silhouettes to create simple, easy-to-understand images. The stronger the silhouette is, the easier it will be to “read.”
- Iconic design—I often compare a game’s icon to the logo on a superhero’s chest. It should represent the character in a single image. Make it memorable, cool, or funny—whatever you think will best sum up your game. Because your icon will become your game’s identity, make sure it looks great. Try not to use multiple images in one icon. Stick with one image that sums up your game—whether it is your main character, a puzzle piece, or an image that captures the game’s tone.
- Color—Use color to your advantage. There are lots of books on color theory that can help guide you. For example, primary colors like red and yellow always grab the eye more than dark blues, purples, and blacks. Plus, they’re easier to see on small screens. Contrasting colors (like blue and orange or black and white) make images pop. Pick a simple color scheme that will visually represent your game.
- No text or numbers—If you use raster artwork, text runs the risk of aliasing or blending together to become unreadable, especially when scaled down. Consider skipping text altogether if you want your game to be sold to an international audience.
Ultimately, the rule of thumb when creating icons is
KYSS = KEEP YOUR SYMBOLS SIMPLE
Today’s audiences are familiar with icons, from comics and cartoons10 to the desktop of their computer, so take advantage of this familiarity. Over the years, video games have developed their own vocabulary of icons. Here are a few classic examples:
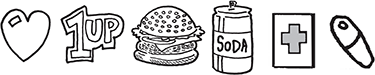
- Red cross—Designates healing items.11
- 1 Up—Is universal video game-ese for an extra life. Also, the head or little “doll” version of the character works well for this.
- Heart—Can be used as a replacement for a red cross or 1 up.
- Food/soda can/pills—Means energy or healing, as in “Elf needs food badly.”
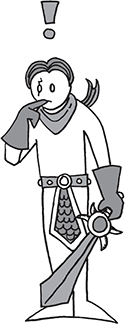
- Exclamation point—Shows surprise when put above enemies’ heads. Put one above your hero’s head to show he can interact with something.

- “No” symbol—Means that players cannot use or do not need this item. Also used for busting ghosts.
- Skull—Means poison, death, or danger. And sometimes pirates.
- Coin—Represents money, gelt, dough-re-mi. How about a nice big sack o’ cash lusted after by bank robbers?
- Controller icons—Used as a shorthand to prompt players to press a specific control for a specific action. You find these a lot in quick-time events, which I describe next. And here we are!
Don’t Get QTE
Quick, press the button!
Now press it again. Too late! You died. Congratulations. You have just lost the first book-based quick-time event. Fortunately for you, you have an extra life.

Originally called a “quick-timer event,” a quick-time event (or QTE) is a prompt that forces players to make a split-second action or suffer usually painful or fatal consequences. Other times it is used to make cutscenes more interactive.
Dragon’s Lair (Cinematronics, 1983) first featured QTE gameplay—heck, the entire game is a quick-time event—but after a brief spurt of similar arcade games (Cliffhanger, Space Ace, Thayer’s Quest), QTEs almost went the way of the text adventure. Shenmue (Sega, 1999) brought them back and christened them QTEs at the same time. They’ve become a gameplay staple since Resident Evil 4 and God of War popularized them. In motion-controlled games, you can use player motions to replace the button press of the QTE, but the effect is still the same: the player has to quickly react to an on-game action. QTEs are pretty flexible, which is why game designers like them.
Here are just a few things you can use QTEs for:
- Avoiding getting hit by a bolt out of the blue like a falling object, moving car, or soccer ball.
- Fighting off an attack from a biting dog, a hungry hydra, or a killer crocodile man.
- Finishing off a boss with a life-or-death shot or throwing a hail-mary knife at an escaping villain.
- Doing extra damage to an enemy during combat or countering, blocking, or disarming an enemy’s attack. You can even throw a grenade back at an enemy!
- Responding to a moral choice such as choosing whom to save from a horde of zombies.
Players either love or hate QTEs, but they are here to stay. There’s no need to hate them, though; they’re just one more gameplay tool in a designer’s toolkit. The trick is to use them responsibly:
- Never use a QTE for something players can do for themselves in the game. I prefer to use them as shortcuts to cinematic sequences. Save QTEs for big exciting moments and nigh-impossible actions.
- Timing is everything. Give players a “beat” to process the appearance of a QTE icon and another “beat” to press the appropriate button.
- Don’t string them out for too long; most QTEs need to be repeated if the player fails the sequence, and there is nothing worse than having to repeat the QTE over and over and over again.
- Wait! There is something worse than repeating a QTE, and that’s a QTE that doesn’t play fair. While using random QTE icons sounds like a good way to introduce variety, this is the one time you want predictability in your game. Once players memorize the pattern, they can concentrate on watching the cool actions. Now, I know what you’re saying. “Wait a second! There are video games with random QTEs in them.” And I’d respond, “You are correct.” However, I just don’t like them. They make players feel as if they won because they were lucky, not by their own skill.
- Keep your QTE controls to a single set of controls. Most games use the buttons or sometimes a stick. Try not to use the harder-to-reach shoulder buttons.
- Make sure the QTE icons are big and easy to see. Keep their placement consistent; don’t move them around.
- Try not making the QTE mandatory. Both Uncharted 2 and Batman: Arkham Asylum offer QTEs as options for dispatching enemies; however, if players miss that opportunity, they still have plenty of other ways to take out the bad guys.
- A “button mashing” QTE, in which players repeatedly press the button, can heighten an emotional situation or simulate physical effort.
- You can use QTEs for purely emotional effect such as in Heavy Rain’s infamous “Press X to Jason”—in which the player must press the X button to call out for his lost son.
- When using motion-controlled QTEs, keep the waggling short. And if you are going to make players waggle the controller, don’t do it too many times in a row. Gamers want to play your game, not get wrist injuries.
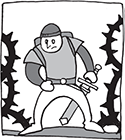
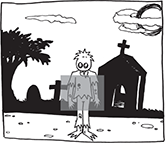
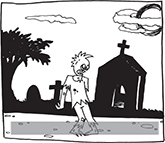
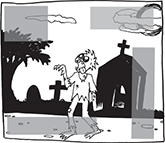
HUDs and Where to Stick ‘Em
Now that you have created a whole mess of beautiful icons, what are you going to do with ‘em? Why, slap ‘em up onto the screen, of course! But before you start displaying them willy-nilly, let’s see where they can go. Our zombie friend is going to help us out with this one.
Because the middle of the screen is where the action is, please refrain from putting your HUD there. (Unless it’s for targeting, or identifying game objects.) If you have to bring up a full-screen display, consider making it translucent like the holographic screen in Dead Space (EA, 2008). This way, players don’t get disjointed from their environment and “lose their place” in the game world.
The upper left side of the screen is traditionally used for the most important information: health, score, and so on. As the (Westerner’s12) eye travels from left to right when reading information, putting icons to the left so the eye can travel back “into” the game on the right usually feels comfortable to the player.

Displaying icons along the bottom of the screen works well too, as long as you watch out for clipping that can occur if a player is using a monitor or TV screen that isn’t calibrated for your game. Assume at least 50% of your audience have a crappy television set; heck, even gamers with excellent HD LCD rear-projection sets still can get clipped images on the sides of their screen. Get that information as close to the safe frame as possible (and always offer screen calibration options).
If you are going to use the right, left, and bottom of the screen, be careful of the “bracketing effect” that happens; this will make your game screen seem smaller and claustrophobic. I’ve seen some RTS screens so filled with HUD elements that it felt as though I was looking out of a mail slot!
If you are going to have lots of icons on-screen, why not consider letting players choose which ones they want and prioritize where they should go. This way, the players can choose what they feel are the most important icons for them. Just make sure you don’t give them the option to obstruct the main gameplay field.
Some icons open up other screens, like inventory lists. Make sure players have a quick way to get back to the game. You may want to consider allowing players to pause the game so they don’t get bushwhacked by an enemy while they are trying to find their +6 rod of killing. Of course, you could be like the designers of Dead Space and intentionally allow enemies to attack while your character is rooting around in his holographic space backpack for another air canister. According to interviews with the team members, this was an intentional choice: they wanted players not to be able to rely on the “gamey” mechanic of the world freezing (as happens in, say, Resident Evil) while looking for inventory items. This type of gameplay really conveys the sense of dread as necromorphs are bearing down on you when you realize that you just don’t have time for a break.
There Are Other Screens Than the HUD
Oh, video game screens. There are so many of you. Where to start? At the start, of course!
- The first thing your players see (other than the box cover13
- The movie poster title screen that mirrors the cover of the box.
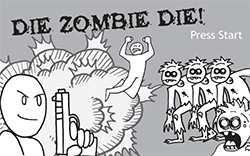
- The heroic pose title screen where the hero is standing on some high bluff, long hair blowing in the breeze, giant sword and/or gun at the ready.

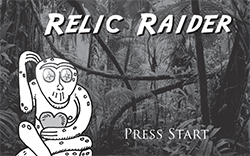
- The enigmatic image that brings up all sorts of questions: Why am I in a jungle? What is that monkey statue doing there? Is it a relic I will be raiding? The image is something important to the game, but players have no idea because they haven’t played the game yet. When they finally learn the significance, their minds will be blown!
- The logo screen, where a large image of the game’s logo is displayed. Not very exciting but effective. Make it more exciting with strobing colors, rotating effects, bouncing text, anything to get some motion in there.
- The movie poster title screen that mirrors the cover of the box.
Title screens often feature menus that offer selections such as save/load, number of players, options, bonus features, and difficulty. How much you include depends on how many button presses you want the players to make before they get into the meat of the game. I find that players just want to get to the good stuff, so you should keep the button pressing to a minimum. Remember, this very important rule I never, ever try to break:
YOU SHOULD NEVER HAVE TO PRESS A BUTTON MORE THAN THREE TIMES TO REACH ANY GAME SCREEN
Why? Because players don’t want to spend the entire game pressing buttons to reach interface and inventory screens! They want to play the game! Let them play the game! Why aren’t you letting them play the game? Think of the children! Oh, the humanity!
Sorry. Lost it there for a moment.
Seriously, don’t make the players dig to find the options and get to the gameplay. Make everything in the game reachable within a button press or two. Consolidate screens if you have to, but keep track of how many button presses it takes to get to that information. I once managed to reduce the “start to play” from 16 button presses to 4 button presses. Not too shabby if I do say so myself.
- Pause—The well-designed pause screen can do more than give players a break. It can be used to save a game; access the options screen, game map, or inventory screen; or even just exist to be enjoyed, as with Banjo-Kazooie’s (Nintendo, 1998) lovely acoustic version of the theme. Whatever you do, just make sure players don’t feel that they are missing any of the game by pausing. Remember, most people use pause screens to take bathroom breaks. Of course, you can always remove the option of a pause screen altogether, like in Dead Space, but that could be taxing on their bladders.

When designers create pause screens, they have this bad habit of making the first choice “resume” and the next one down something like “options.” Usually, the map and save game options appear a few more choices down in the list. This placement makes no sense to me. Let’s say you use the start button to bring up the pause screen. Think of all the times you are going to have to press the start button, then D-pad down the list to the “save game” selection, save the game, and then return back up to the resume button? Why not use the start button to close it again? Why do you even need the resume option? If the save button is the most common selection the players will be making, make it the first thing they can select. If it isn’t, make it the map or the inventory. Plan out your pause screen as carefully as you do your level! Your players will thank you for it.
Wow! Look at this next graphic. All these options can stem from a pause screen:
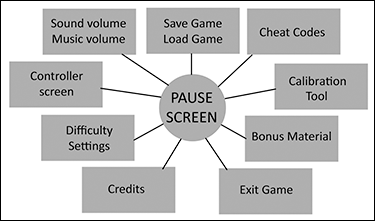
- Options—Like the ancient labyrinth, the option screen usually leads to more screens. But don’t lose your players in a maze of choices. Think of the option screen as a hub, with the choices the spokes that radiate from it. Sound and music volume controls, controller settings, difficulty settings, and even bonus and cheat codes can be placed under the options heading.
- Calibration tool—If your game is particularly moody and dark in theme and visuals, I suggest having a screen calibration tool. A calibration tool allows players to adjust the screen’s contrast on a dark-colored image or set of color bars. While it’s fine for this tool to live in the options screen, I prefer to have players adjust it before starting the game, to see the game in the best light … er … darkness possible.
- Save/load game—This option is one of the most important aspects of your game, so keep it simple and automate the process whenever possible. Always start a new game with the option to create a new save file. Don’t make players hunt around for this option, and make sure they quickly pick up on where it is—even in the tutorial if possible.
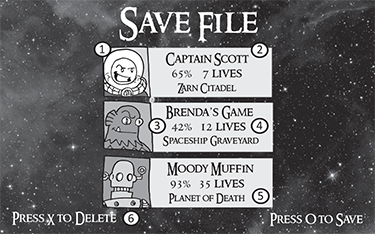
I highly recommend that you allow players to have several (at least three) save files. Players often restart new games after completion, want backup files in case they make catastrophic choices during gameplay, or even just want to let someone else play the game concurrently.
Customization goes a long way when creating a save file. Let the players name their own files. Store playtime, titles of game levels or chapters, and even inventory items like lives or gear to help the players remember their progress. Show icons or images to help jog the players’ memory further. Everything helps.
Autosave is a useful function that acts as a backup if players are too engrossed in playing. Give players the option to load a game from a saved file or the autosave. Make sure you display an icon warning players that the game is autosaving so they don’t shut off the system and lose their file.
When designing the save system, be careful that it doesn’t become a “reset system.” In many games, it is easier and faster for players to reload the game than to die and start again. Don’t let players use the save system as a gameplay mechanic because it breaks the immersion of the play experience.
- Loading screen—Many players consider loading screens as a necessary annoyance, but that’s just because developers fail to treat these screens as part of the game. Eliminating loading screens can be difficult to implement technically. It may even be impossible to do, given the technical limitations of the game. As a designer, you need to know the limitations of your game code up front.
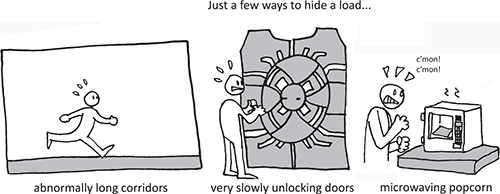
More recent games strive for a “seamless” loading-screen-free experience by disguising the loading screen with slowly opening doors, long elevator rides, or dissipating fog. Just don’t make what happens on the loading screen too complex—loading screens need to be loaded too!
If you must have loading screens, here are some ways to spruce them up:
- Show concept art.
- Ask trivia questions.
- Have a playable minigame.14
- Display the game map.
- Display a character bio.
- Provide tips on gameplay or control (but be careful not to repeat them; even the most useful tip becomes annoying after several viewings, so don’t display control tips that players have already seen).
- Fill in gaps in the game story or provide a recap of players’ progress and remind them of their goals.
- Play a short video briefing players on the upcoming mission or location.
- Have players fight endless waves of enemies or destroy a large object.
- Provide “beauty shots” of your character or items in the game.
- Have players manipulate an interactive object such as the game’s logo or a significant story item.
Hardware manufacturers require that there be some moving image on a loading screen so players know that the game hasn’t crashed. No matter what your loading screen displays, you should provide a progress bar or percentage loaded indicator so players know how long they have to wait.
- Controls—When showing the control screen, first and foremost, you need to display an image of the game controller, as shown in the following image:

Some games show the character that performs an action when you press the appropriate button. At the very least, display text explaining the control.
Make sure the controls screen is easily accessible from the game for quick player reference. Also, consider allowing players to customize the controls or at least give them several options to remap controls schemes.
- Scoring/stats—Otherwise known as a “tally screen,” the scoring/stats screen appears at the end of a level. It displays the players’ progress and performance in the game. You can tally just about anything on a tally screen. Here are just a few ideas:

- Score
- Time of completion
- Accuracy of shooting
- Enemies slain
- Money remaining/collected/spent
- Number of lives
- Rating (can be an A–B–C grade or a “word” rating, like “Awesome dude” or “Master of the Universe”)
- Objectives reached/completed
- Secrets found (usually expressed as an X/Y value)
- Gallons of blood spilled/distance traveled/chests smashed … you get the idea
- Legal/copyright—These screens are required by publishers and hardware manufacturers. Make sure that they are legible and, more importantly, accurate. Just remember that console manufacturers require that they cannot be skipped.
- Credits—Allow me to pull out my soapbox for a moment. People work very hard on games. Too many people in the video game industry get screwed out of the credit they deserve due to egos, politics, and old-fashioned neglect. I am a firm believer that if you work on a game, you should get a credit. That credit should reflect the title on the person’s business card. Sadly, it doesn’t always happen that way: it’s something in the gaming industry that needs to change. I like to follow this simple but very important thing:
GIVE CREDIT WHERE CREDIT IS DUE
Credit screens are an important part of the game. They are a celebration of the people who made and contributed to the final game. They deserve to be seen, but these screens should be as entertaining as possible. Some games get it: LittleBigPlanet, for example, has an amazingly entertaining credit sequence. Typing of the Dead (Sega, 2000) has a playable minigame where the player can type the credits!
If you need more inspiration for great-looking screens or credit sequences, take a look at most movie DVDs. DVD designers do a great job at creating a gestalt built around the film. This level of attention to detail takes a lot of time and effort on behalf of the art director and designers, but it’s always worthwhile.15
There are other screens to consider as well, such as the game over, bonus materials, and store screens. Don’t worry; I cover these screens in greater depth later in the book.
A Final Word on Fonts
As you make your HUD and display screens, you need to think about fonts. I find that fonts follow many of the same rules as icons when it comes to legibility and clarity. However, they do present some of their own issues:
- Theme your font to your game, but don’t use overly ornate fonts that are hard to read.
- In many cases, fonts require a license to use. I know of a game that had to be re-worked at the eleventh hour because the developer didn’t have the rights to use the font. Fonts are like any other piece of artwork. It’s only fair to pay the artist for his work.
- Be mindful of the color of your font and your background. For example, never place red text over a black background, because it usually blurs on many TVs, particularly older ones or ones where the console is hooked up on composite cables.
- Now that HDTVs are the industry standard, developers should use higher resolution fonts. I have found that any font size under 18 points is very hard to read on a standard definition television. Remember that not every player has a state-of-the-art screen!16
Remember, the goal of all these screens is to communicate clearly and efficiently to the players. Now let’s move on to the good stuff: the game itself! But first, the obligatory Universal Truths and Clever ideas section …