This section illustrates a simple example of creating a TkInter GUI. In the first seven lines, we import the two modules we'll need to create our interface. This import method, while complex, allows us to import these two modules in a Python 2- or Python 3-specific way.
The first module imports all of the default objects needed for the TkInter GUI design. The ttk module imports the themed TkInter pack, which applies additional formatting to the interface depending on the host operating system and is a simple way to improve the overall look of our interface. In the last line, we create our root window.
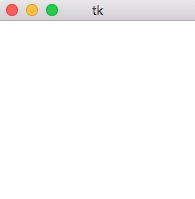
When typed into a Python interpreter, the execution of the last line should display a blank 200 pixel × 200 pixel square window in the top-left of your screen. The dimensions and location are a default setting that can be modified. See the following code block:
>>> import sys
>>> if sys.version_info[0] == 2:
>>>     from Tkinter import *
>>>     import ttk
>>> elif sys.version_info[0] == 3:
>>>     from tkinter import *
>>>     import tkinter.ttk as ttk
>>> root = Tk()
The following screenshot displays a TkInter root window created when executing the code block on a macOS system:
With the root window created, we can begin to add items to the interface. A good first item is a label. In the code block mentioned later, we add a label from the themed ttk pack to the window:
>>> first_label = ttk.Label(root, text="Hello World")
The Label parameter requires two arguments: the parent window it should be displayed on and the text to display. Additional attributes can be assigned to the label such as fonts and text size.
TkInter uses geometry managers to determine the placement of objects within the window. There're three common managers: grid, pack, and place:
- The grid geometry manager places elements based on a row and column specification
- The pack geometry manager is simpler and will place elements next to each other, either vertically or horizontally depending on a specified configuration
- Finally, the place geometry manager uses x and y coordinates to place elements and requires the most effort to maintain and design
For this example, we chose to use the pack method as seen on the second line of the code block. Once we describe which geometry manager to use, our interface is updated with the label:
>>> first_label.pack()
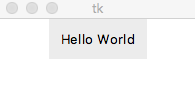
The following screenshot reflects the addition of the label to our GUI:

As seen in the preceding screenshot, the root window has shrunk to fit the size of its elements. At this point, we can resize the window by dragging the edges to shrink or grow the size of the main window.
Let's add some space around our Label object. We can accomplish this by using two different techniques. The first adds padding around the Label object, using the .config() method. To add padding, we must provide a tuple of padding, in pixels, for the x and y axis.
In the example, we add a 10-pixel padding on both the x and y axes. When the following line is executed, it'll automatically update in the GUI since the geometry manager is already configured:
>>> first_label.config(padding=(10,10))
The padding is shown in the following screenshot:

This only adds padding around the label itself and not the entirety of the root window. To change the dimensions of the root window, we need to call the geometry() method and provide the width, height, position from the left of the screen, and position from the top of the screen.
In the following example, we'll set the dimensions to 200 pixels wide by 100 pixels high with an offset 30 pixels from the left of the screen and 60 pixels from the top of the screen:
>>> root.geometry('200x100+30+60')
The new resolution of the GUI is displayed in the following screenshot:
Let's introduce the other two GUI elements we'll use, Entry and Button. We'll now initialize the Entry object, which will allow a user to enter text that we can capture and use in the program. In the first line, we initialize a StringVar() variable, which we'll use with the Entry object. Unlike prior scripts, we need to set up special variables that can respond to the event-driven nature of GUI interfaces:
>>> text = StringVar()
TkInter supports a variety of special variables such as the StringVar() function for strings, BooleanVar() for Booleans, DoubleVar() for floats, and IntVar() for integers. Each of these objects allows for values to be set using the set() method and retrieved using the get() method. The preceding code shows the initialization of the StringVar(), setting it to a default value, assigning it to a created Entry element, and packing it into the root window. Finally, we can gather the input from the user via the get() method:
>>> text.set("Enter Text Here")
>>> text_entry = ttk.Entry(root, textvariable=text)
>>> text_entry.pack()
>>> text.get()
'Hello World!'
The following two consecutive screenshots show the updates to the GUI with the new code block we've implemented:
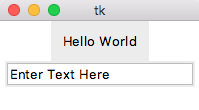
The preceding screenshot shows the default text in the Entry box, whereas the following screenshot shows what it looks like with modified values:

The Button object is used to initiate an event when the button is clicked. To set an action into motion, we need a function to call.
In the next example, we define the clicked() function, which prints a string as seen in the following code block. After this function, we define the button using the ttk theme pack, setting the button text to Go and the command parameter of the function name. After packing the button into the root window, we can click on it and see the statement printed in the Terminal, as seen on the last line of our following code block. Although this functionality isn't very useful, it demonstrates how a button calls an action. Our script will demonstrate further uses for the Button object and its command parameter:
>>> def clicked():
...     print "The button was clicked!"
...
>>> go = ttk.Button(root, text="Go", command=clicked)
>>> go.pack()
The button was clicked!
The addition of this button is shown in the following screenshot:
