|  |
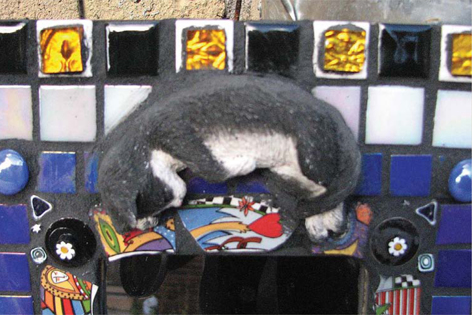
Cat Nap
“Creativity is the quality that you bring to the activity that you are doing. It is an attitude, an inner approach—how you look at things . . . Whatsoever you do, if you do it joyfully, if you do it lovingly, if your act of doing is not purely economical, then it is creative.” —Osho
Catalyst for this project: Two black and white cat figurines procured from a thrift store.
|
The Cat Nap project is the first in a series of three basic picture frame projects, which concentrate on the technique of hand-cutting china. These 8-by-8–inch picture frame projects were selected to help you concentrate on basic cutting techniques, using different china patterns and glass objects.
Yes, you can break a plate— under a towel—with a hammer, but while therapeutic, it’s not the most precise method. When you want to control the break, use a wheeled glass nipper for the best results. See the Cutting chapter for detailed information on how to cut your china they way you want it.
Cutting tile and china takes practice. The more you cut, the better you get at it. One of the perks of pique assiette is that you don’t have to have straight, smooth edges unless you really want to. It’s supposed to look funky. If you ask me (which I’m going to assume you just did, since you’re reading this book), the imperfect nature of this whimsical craft is one of its most appealing aspects.
It really is all it’s cracked up to be (slight pun intended). Have fun!
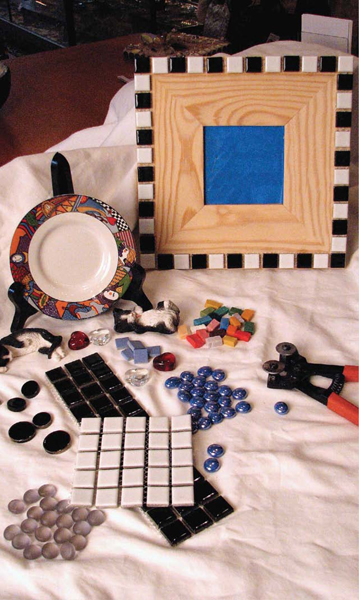
Materials
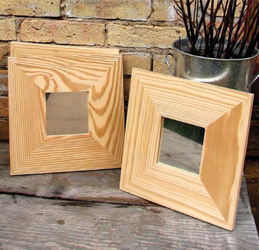
- 8-by-8-by-¾–inch basic wooden picture frame. Precut craft frames and assorted wooden shapes are available at some craft stores, but mostly online. Kudos to you if you have a family member that has a table saw and knows how to use it.
- Paint color of your choice (if you plan on painting the raw wood)
- Black and white cat figurine
- Small dessert plate with a funky border
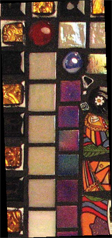
- One hundred (fifty of each color) ¾-inch black and white ceramic tiles
- Eight flat-bottomed gems (four red, four blue)
- Twenty ½-inch tapestry mirror tiles (gold)
- Assorted millefiori (black)
- Thirty-two pearlescent glass ¾-inch tiles
- Thirty-six cobalt glass ⅝-inch tiles
- Four ¾-inch ceramic circles (black)
- Clear glass heart with decoupage image
- Sanded grout (charcoal)
Tools
- Wheeled glass nipper
- Tile cutter
- Safety glasses
- Paintbrush or foam brush to paint frame
- Sandpaper
- PVA (Weldbond) adhesive was used for this project, but mastic can also be used
- Roll of painter’s tape
- Disposable latex-free gloves
- Large Ziploc bag
- Paper towels
- Q-tips, skewers, toothpicks, or small tools for prodding and cleaning
- Mirror insert (if it didn’t come with the frame)
- Vinegar and water
Directions
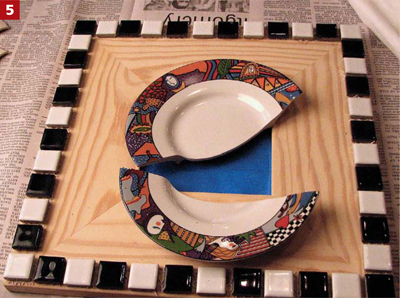
- Cover your workspace with newspaper.
- If you want to paint the raw wood, do it now and let it dry completely. Keep a little extra paint for any touch-ups that may be needed after grouting.
- When dry, lightly sand the frame in all of the places where pieces will be glued.
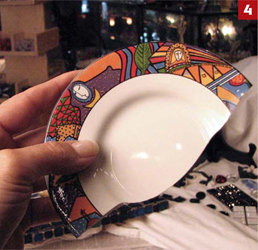
- With the wheeled glass nipper, remove the border from the china plate. You’ll notice that we didn’t have to worry about preserving the center of this plate so cutting it in half right across the middle was the best way to start removing the border of the plate easily.
Tip
If the cut dishware pieces don’t lie flat, cut them smaller.
- Butter the backs of the black and white ceramic tiles with adhesive and start to glue them around the outer border of the frame. Leave at least ⅛-inch in between each tile for the grout line.
Tip
Starting with the outer border on this project helps to give you a guide to follow while filling in the rest of the frame. If you start gluing the inner and outer edges first, you won’t have to guess how much room you’ll have left to fill.
- Glue the plate border around the mirror opening. Be sure to leave enough room at each corner to glue the black round ceramic circles into place.
- Attach the ⅜-inch iridescent glass dark blue tile next, leaving a space once again at each corner to glue the four flat gems.
- Cut a corner off of two pearlescent tiles. Working your way to the inside of the frame, glue the ¾-inch pearlescent glass tiles, again leaving a space in each corner to attach the red flat gems. Use the two cut tiles to border the glass heart on the bottom row.
- Fill any empty space around the black ceramic circles with assorted millefiori.
- Glue one gold tapestry mirrored tile on top of each one of the white ceramic tiles around the outside border for contrast. Layering tiles adds interest and is always a unique option to center the piece.
- Once you’ve glued all of your pieces into place, let the glue set for at least 30 minutes or more before attaching the final cat figurine.
Extruded Objects
The cat in this project is extruded, meaning it sticks out further than everything else. Weldbond has been known to hold larger objects into place quite well, although mastic is a better choice in certain circumstances. The following picture frame projects are non-functioning mosaic tile pieces; they won’t experience constant use, so Weldbond will work just fine. In more advanced and larger projects, oddly shaped pieces should be embedded into mastic for a much stronger hold.
-
- Butter the glue or mastic onto the back of the entire figurine. Don’t get carried away with the amount of adhesive being used. You really don’t want to have excess glue (or mastic) seeping out from underneath set objects. If you do have excess peeking out, let it set up for a bit to make the cleanup easier. I prefer using a wooden skewer and a paper towel for cleaning up wayward adhesive.
- Carefully glue the cat figurine directly on top of the semi-dry tiles, just above the picture/ mirror opening at dead center. Check that pieces are securely glued and free from excess adhesive. Let everything dry for a minimum of 24 hours before grouting.
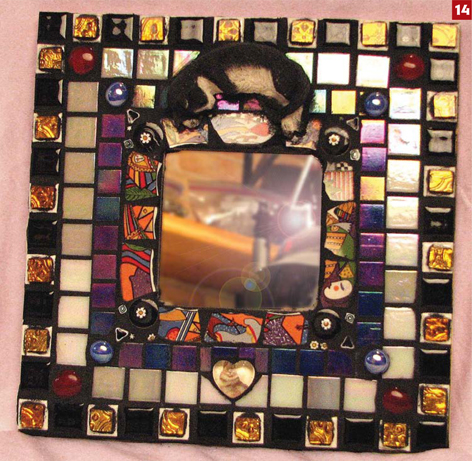
- Remember to protect delicate objects and painted areas with painter’s tape before you begin the grouting process. Grout the picture frame, building up a layer of grout around any large objects, such as the figurine, to secure them. Clean and polish the frame, then insert a mirror or picture.