Let's go ahead and add a bloom filter to our game so we can see how to set these guys up. The bloom filter automatically integrates with glow maps, so it's easy to use it to make halos around glowing objects.
- Open a
WorldClass_01.py. - We need to import the filters before we can use them, so add this code to our import section at the top of the file:
from direct.filter.CommonFilters import CommonFilters
- Now that we're importing
CommonFilters, we need to create an instance of it. Add this code right before therender.setShaderAutocall. It doesn't really have to precede that call, but that's as good a place as any.self.filters = CommonFilters(base.win, base.cam)
- Next, we'll turn on the bloom filter and give it some parameters to work with. Add these lines right below the line we added in step 3:
filterok = self.filters.setBloom(blend=(0,0,0,1),
desat=-0.5, intensity=3.0, size=2)
- Okay, now we just need something to bloom. We've got a glow effect in our new cycle bam files, so let's change the
Cycleclass to use those. OpenCycleClass_01.pyand find the line where we loadcycle.bam, down in thesetupVarsNPsmethod. Remove that line. Then, scroll up to where we set the position ofself.rootbased on the position the cycle is starting in. Change that section to look like this:if(startPos == 1): self.root.setPos(5,0,0) self.cycle = loader.loadModel("../Models/RedCycle.bam") elif(startPos == 2): self.root.setPos(-5,-5,0) self.cycle = loader.loadModel("../Models/BlueCycle.bam") elif(startPos == 3): self.root.setPos(5,-10,0) self.cycle = loader.loadModel("../Models/GreenCycle.bam") elif(startPos == 4): self.root.setPos(-5,-15,0) self.cycle = loader.loadModel("../Models/YellowCycle.bam") - Resave the file as
CycleClass_02.py, then bounce back over to theWorldclass and modify the imports to useCycleClass_02.pyinstead ofCycleClass_01.py. Then, resave this file asWorldClass_02.pyand run it from the command prompt.
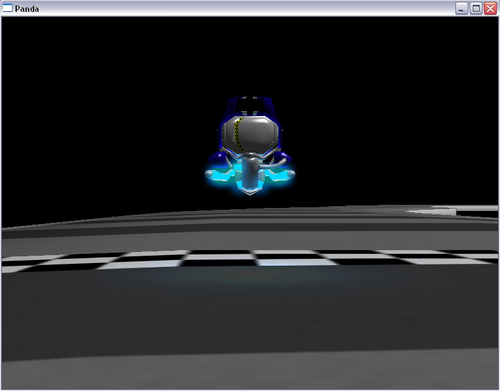
That's all it took! We've got a nice blue halo around our glowing bits. Let's talk about the code we used to set up the filter real quick, and then we can move on.
The first line we added was this one:
self.filters = CommonFilters(base.win, base.cam)
This line sets up the CommonFilters class and makes it ready to use. It needs to know which window we're outputting to, and which camera we're using to render the scene from, so we passed those into it. The other two lines set up the bloom filter by itself.
filterok = self.filters.setBloom(blend=(0,0,0,1),
desat=-0.5, intensity=3.0, size=2)
The properties of the bloom filter aren't very complicated. Blend determines how the bloom filter measures the brightness of pixels. The values we give it are weights that tell it how much emphasis to put on the R, G, B, and A channels respectively. Since we only want our Glow maps to be considered, we put R, G, and B to 0 and put A to 1. The Desat property tells the filter how much it should desaturate the halo it creates. A value of 0 means the halo is the same color as the pixel that created it. A value of 1 makes the halo white. Intensity is a variable that controls how bright the halo is. The last property, size, determines how far the halos spread.
The filterok temporary variable will receive the return of the call to setBloom, which tells us if the graphics card responded favorably to our attempt to turn on the bloom filter. If we have trouble getting the filter to work, we can print out filterok to see if the graphics card is preventing us from using it.