
Belt loops are great if your waistline changes size throughout the day. Wear a belt and adjust it!
1. Cut one long strip of fashion fabric 1¼”-wide. Press under ¼” on each long edge and fold in half. Press.
2. Edgestitch along each long edge.

TIP: Cut one edge on selvage and make strip 1″ wide. Fold under ¼” on raw edge. Fold in half.


The easiest way to make and sew belt carriers is to cut a 1¼”-wide strip of fabric and run it through the 18mm bias tape maker, pressing as the fabric comes out the other end. This helps you evenly press ¼” toward center. Then fold in half and press. If you can’t force your fabric through the tape maker, use a pin. Belt loops are generally on the straight of grain, but they can be bias, depending on the look you want.
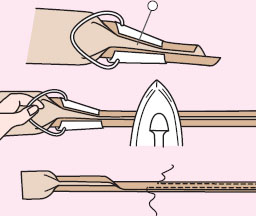
3. Cut carriers a length that can accommodate the width of the belt you plan to wear plus about ¼” for ease and another 3/4″ for plenty to turn under on each end.

4. Pin or baste them to the side seams, center back, and between center front and each side on each side of the front so top edge is ¼” above waist-line seam. Alternatively, at the center back, place two carriers 1½” apart.
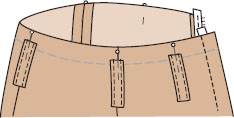
5. Sew waistband to pants.
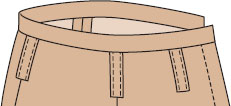
6. Bring belt carriers over the top of band to wrong side and hand stitch in place or machine edgestitch through all layers at top.
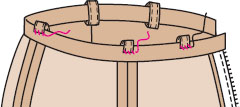
TIP: If you have already finished the waistband, turn under each end of carrier and topstitch to pant about ¼” below waistband and at top edge.
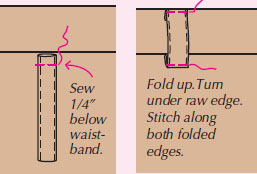
NOTE: For a wider belt, use a longer strip and sew it farther below the waistband.