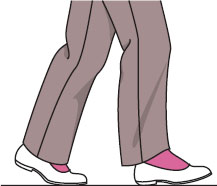
The longer the pant leg, the longer your legs will appear. Length of pants varies with fashion and with leg width. Length also varies with the height of the heel you wear. When establishing length, try pants on with the shoes you plan to wear with them. Pati’s friend Cleo used to call out, “Your pants are too short!” when she would see Pati walking out the door wearing a trouser for a seminar she was about to teach. Standing, the pants touched the front of Pati’s shoe, but walking exposed a lot of ankle. Now you will see Pati with pants that break on the front of her shoe. It is however, personal preference.

During tissue-fitting, you should have determined your approximate length leaving at least 1¼” to 1½” hem allowance. If you are not sure of the shoe, make the hem allowance 2½” for safety.
Now is the time to fine-tune the length. Pin up the hem and try the pants on with shoes you plan to wear with them.
A slight break on the front of the shoe is nice. The slight extra length helps keep ankles from showing when you sit. Also, the break disappears when you bend your knee while walking.
If your pants fit properly, you can turn up the same amount of hem on both legs. If one leg is longer, compensate at the waistline, not at the hemline.
Hem depth should be 1¼”-1½”. If the pant has a side slit, the hem allowance needs to be the length of the slit plus about 1″.
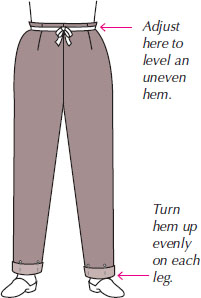
Narrow legs must be shorter in length.
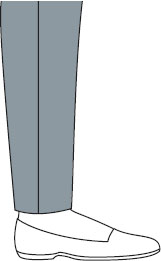
Narrow legs can be made longer in back.
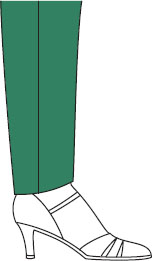
Straight legs can touch the top of the shoe in front.
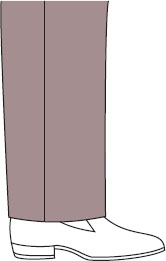
Straight legs can break on top of the shoe so that when you sit and cross your legs, less leg shows.
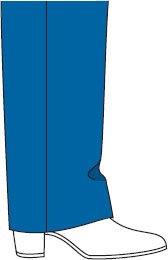
Wide legs can go nearly to the floor.
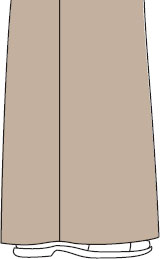
1. Trim seam allowance in hem area to ¼” to eliminate bulk.

2. Never press over the top edge of a hem. You’ll get a ridge on the right side. Press from the fold to within ½” of the hem edge.
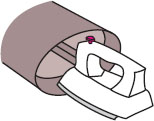
3. Finish the raw edge ONLY if necessary. Pinking is second best and zig-zagging or serging is fine if the threads won’t show through. Use a 2-thread serger stitch for less thread bulk.
4. Use a quality thread and a fine needle.
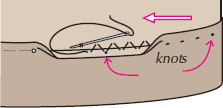
This is the most invisible and nicest on fine fabrics. Use a long loose blind stitch under the hem edge staggered between hem and pant. Catch only a single fiber of your outside fabric. You can do this if you use the smallest needle you can thread—a size 10 sharp is best, but we now use a larger size 8—because of our AGE!
NOTE: Every 6″, pull to loosen stitches so they will be more invisible and secure by knotting in hem allowance. This protects you in case you accidentally step into your hem.
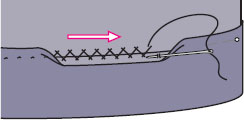
Using a catchstitch or herringbone stitch instead of a running stitch adds a little more strength and for knits is quite flexible. It can show more if you pull your thread too tight. Stay loose!
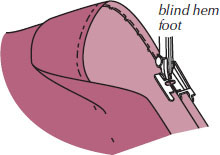
This makes a very sturdy hem for activewear or children’s clothing. You will need to fold the pant back, instead of the hem allowance, as shown, making a crease that can show on the outside. It will show less on medium-to heavy-weight fabrics. (See your machine’s manual for complete blind hemming instructions.)
Use fusible web for a very fast hem on knits. Serging the edge first will keep lightweight knits from curling. Steam-A-Seam is a paper backed web.
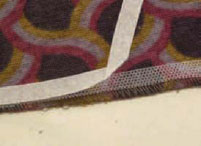
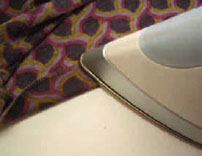
Stick Steam-A-Seam to the inside edge of the hem. Peel away the paper and turn up the hem. Fuse 10-15 seconds.
Turn up ¼” and then 3/8″ and topstitch, then edgestitch.
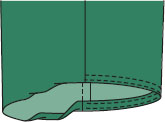
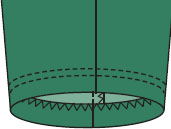
Topstitching with a twin needle or a cover stitch works well on knits as they create a zigzag on the underside that will give, preventing popped hem stitches. These also give wovens a sporty look.
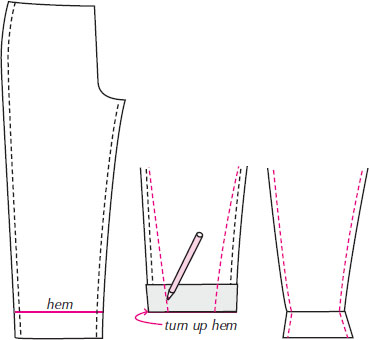
If you taper your legs, you will need to mark your hemline, fold up hem, and mark new stitching lines. Use a pen that will go through both layers of tissue. Unfold and trim away excess tissue. Now the hem will fit the pant leg when turned up.
A 2″ hem depth is better when you have a slit.
Mark hemline. Make a dot 1½” above and below hemline at side seam.
Stitch side seams to first dot, backstitch. Backstitch at second dot and stitch to lower edge.
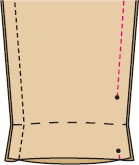
Turn hem to outside matching dots. Stitch opening on each side of slit. Trim seam and cut corners diagonally.
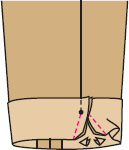
Turn hem to inside. Press. Finish hem edge. Hem pants.
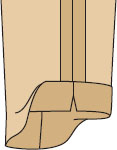
These won’t be faced as you won’t want that deep a hem.
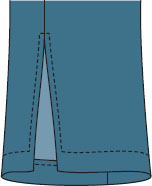
Finish hem and seam allowances.
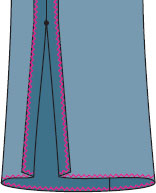
Mark hem, allowing a 1¼” hem allowance.
Turn up 1¼” to outside and stitch seam.
Trim seam, cut corners diagonally, turn to right side, and press.
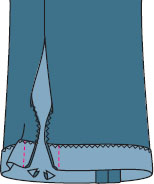
Stitch 1″ from lower edge, pivoting at corners and stitch ¼” from opening edges, squaring stitching above slit.
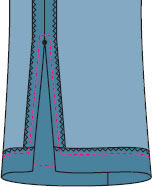
Cuffs come and go in popularity. They show up on any leg width and in many cuff widths. For correct hem allowance, double the finished width of cuff and add a 1″ hem. Here is a handy chart to help you add enough hem allowance for the cuff width you choose.
| Width of Finished Cuff | Hem Allowance |
| 1″ | 3″ |
| 1 ¼” | 3½” |
| 1 ½” | 4″ |
| 2″ | 5″ |
| 3″ | 7″ |
1. Before hemming, try on pants and mark desired finished length. Cut away any extra length.
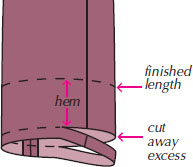
2. Turn under the following amount:
| Cuff Width | First Turn Up |
| 1″ | 2″ |
| 1 ¼” | 2 ¼” |
| 1 ½” | 2½” |
| 2″ | 3″ |
| 3″ | 4″ |
3. Crease slightly with an iron.
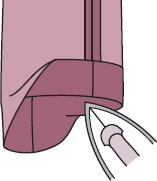
4. Trim seam allowances in hem area to ¼” to eliminate bulk.
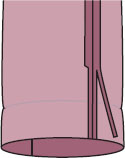
5. Finish hem edge.
6. Hand sew hem.
7. Turn up cuff. Press.
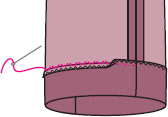
TIP: To hold in place, make a swing tack at side seams between cuff and pant.
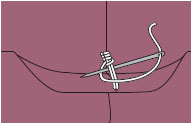
Since stirrups are generally in pants that stretch, make sure that when you are barefoot, the pant will stretch comfortably to the floor on both sides of your feet.
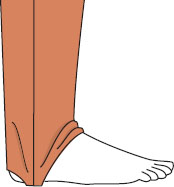
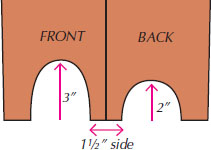
1. Cut an arch from side to side for front and back with the front cut higher than the back.

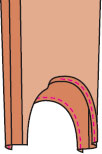
2. Hem the arch by turning up ¼” and topstitching. Or, you can serge and turn up ¼” and top-stitch.
3. Stitch 3/4″ or 1″ wide elastic to ends.
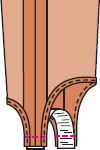
4. Press seam allowances toward pant and topstitch ¼” from seamed edge.
