CHAPTER 19
Emailing with Outlook
Compose and Send a Message
You can use Outlook to compose and send email messages. When you compose a message in Outlook, you designate the email address of the message recipient (or recipients) and type your message text. You can also give the message a subject title to identify the content of the message for recipients.
You can compose a message offline, but you must be working online to send it. If you do not have time to finish composing your message during your current work session, you can save the message as a draft and come back at a later time to finish it.
Compose and Send a Message
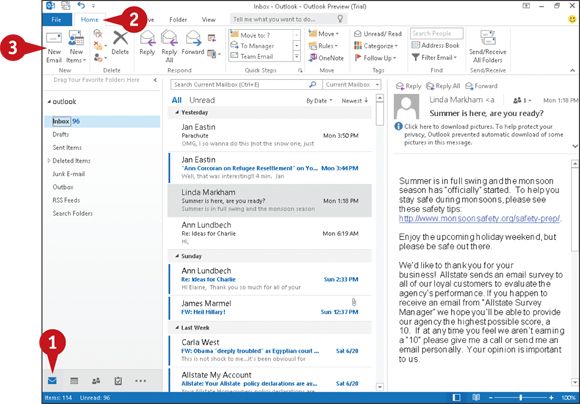
 In the Navigation bar, click Mail (
 ) to display the Mail component.
 Click the Home tab.
 Click New Email.
Outlook opens an untitled message window.
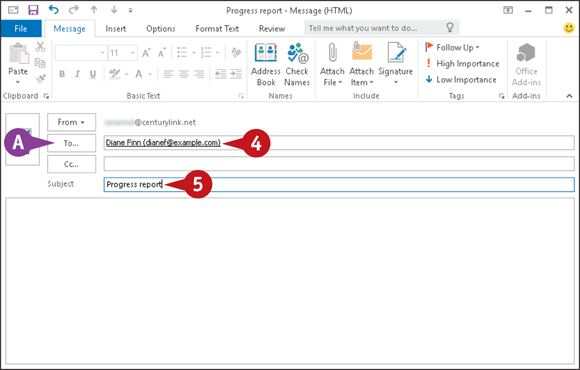
 Type the recipient’s email address.
 If the email address is already in your Address Book, you can click the To button and select the recipient’s name.
If you enter more than one email address, you must separate each address with a semicolon (;) and a space.
 Type a subject title for the message.
Note: Subjects are optional but polite.
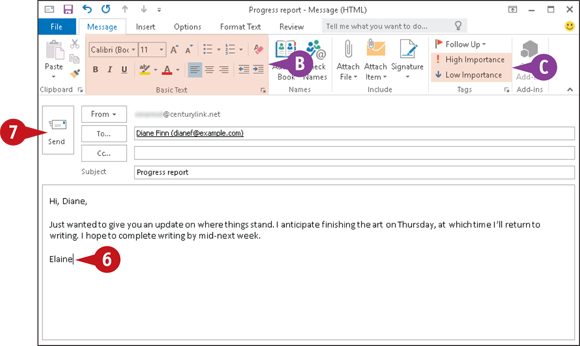
 Type the message text.
 You can use the formatting buttons to change the appearance of your message text.
 To set a priority level for the message, you can click High Importance or Low Importance.
Note: By default, the message priority level is Normal.
 Click Send.
Outlook places the message in your Outbox.
Note: You might need to press  or click the Send/Receive tab and click Send All or Send/Receive All Folders to send the message.
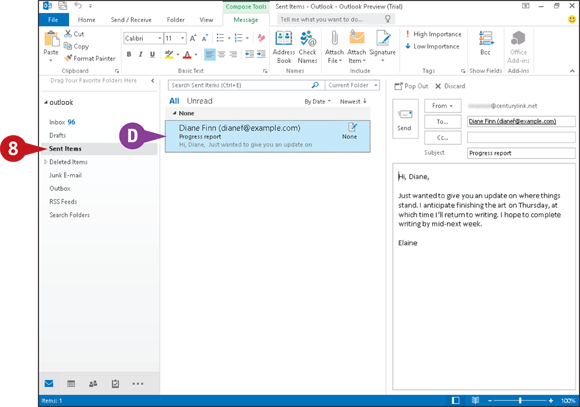
 Click the Sent Items folder.
 The message you sent appears in the list; Outlook stores a copy of all messages you send in the Sent Items folder.
Send a File Attachment
You can send files stored on your computer to other email recipients. For example, you might send an Excel worksheet or Word document to a work colleague, or send a digital photo of your child’s birthday to a relative. Assuming that the recipient’s computer has the necessary software installed, that person can open and view the file on his or her own system.
Note that some email systems are not set up to handle large file attachments. If you are sending a large attachment, check with the recipient to see if his or her system can handle it.
Send a File Attachment
Create a new email message as described in the previous section, “Compose and Send a Message.”
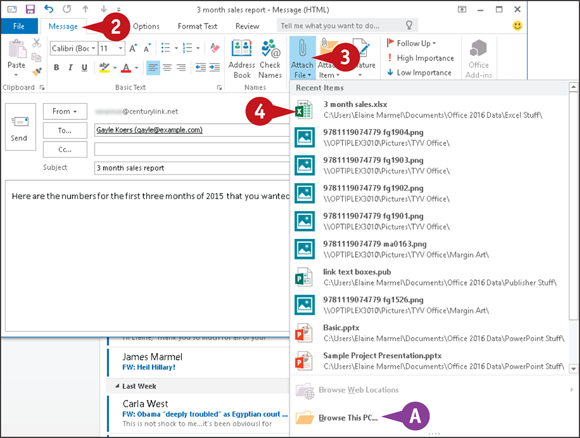
Click the Message tab.
Click Attach File.
The Recent Items list appears, showing attachments you have sent recently.
Click the file you want to send.
If the file does not appear in the Recent Items list, click Browse This PC, navigate to the folder containing the file, and select it.
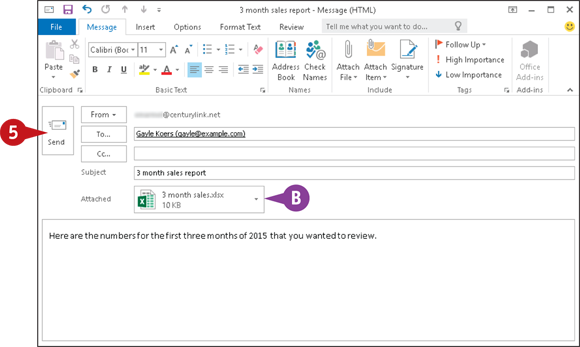
Outlook adds the file attachment to the message, displaying the filename and file size.
Click Send.
Outlook sends the email message and attachment.
Read an Incoming Message
You can use Outlook’s Mail feature to retrieve new email messages that others have sent you and view them on-screen. You can view a message in a separate message window or in the Reading pane, as described in this section. By default, the Reading pane appears beside the list of messages, but you can place it below the message list.
Note that you must be connected to the Internet to receive email messages.
Read an Incoming Message
Click Mail ().
Click the Home tab.
Click Send/Receive All Folders.
Outlook retrieves new email messages.
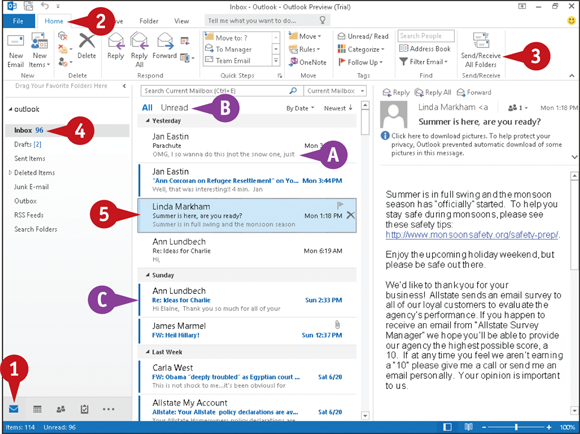
If the Inbox is not selected, click the Inbox folder.
Messages appear in the Message list pane, with a preview.
You can filter the list to show all or only unread messages.
Messages you have not opened display a vertical bar.
Click a message.
The contents of the message appear in the Reading pane.
Note: You can double-click a message to open it in a message window.
 Messages containing attachments display a paper clip.
Note: To open an attachment, open the message and double-click the attachment. A warning dialog box might appear; click Open to view or click Save to save the attachment. Never open a file unless you trust the sender.
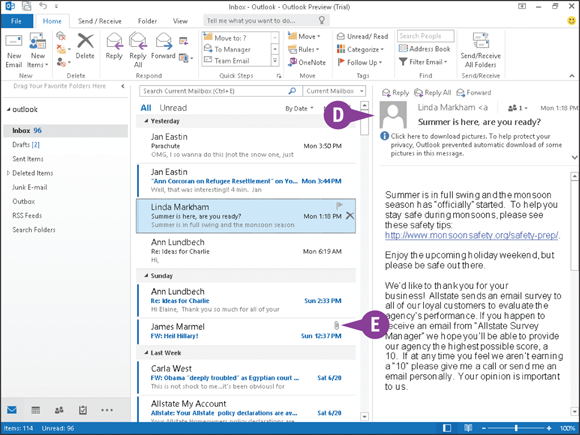
Reply To or Forward a Message
You can reply to an email message by sending a return message to the original sender. For example, if you receive an email message containing a question, you can reply to that email with your answer. When you reply to an email, the original sender’s name is added to the To field in the message.
You can also forward the message to another recipient. For example, you might forward a message that you receive from one co-worker to another co-worker who will find its contents useful. Note that you must be connected to the Internet in order to send replies or forward email messages.
Reply To or Forward a Message
Reply To a Message
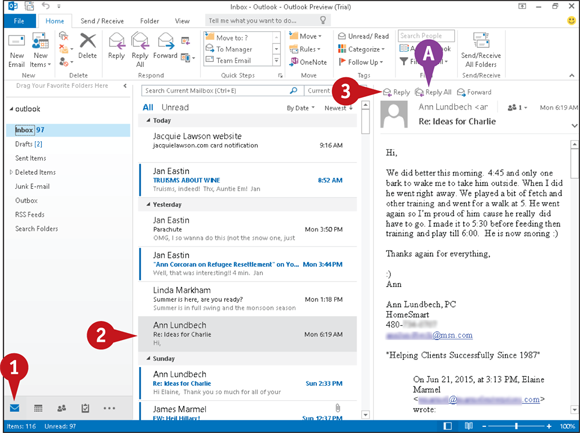
Click Mail ().
In the Message list pane, click the message to which you want to reply.
In the Reading pane, click Reply to reply to the original sender.
To reply to the sender as well as to everyone else who received the original message, you can click Reply All.
The original sender’s address appears in the To field.
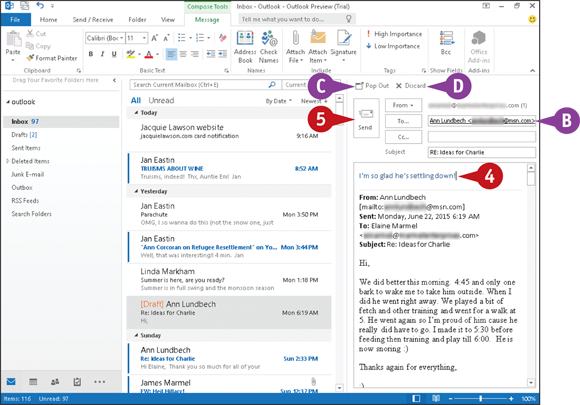
You can click Pop Out to open your reply in its own message window.
Type your reply.
If you change your mind and do not want to reply to the message, you can click Discard.
Click Send.

Outlook places the email message in the Outbox.
 Outlook sends the message at its next automatically scheduled send/receive action; to send the message, click Send/Receive All Folders on the Home tab.
Forward a Message
Click Mail ().
In the Message list pane, click the message you want to forward.
In the Reading pane, click Forward.
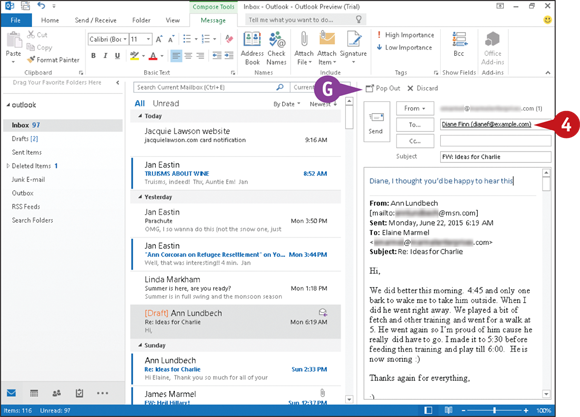
Type the recipient’s email address in the To field.
 You can click Pop Out to open your message in its own window.
Perform Steps 4 and 5 in the previous subsection, “Reply To a Message.”
Add a Sender to Your Outlook Contacts
Suppose you receive an email message from someone with whom you expect to correspond regularly, but you do not have a record for that individual in Outlook contacts. You can easily add the contact information of the sender of any message you receive to your Outlook contacts, directly from the message. If, at a later time, you want to send a new message to that person, you can click the To button and in the Message window choose his or her name from the Select Names: Contacts dialog box.
Add a Sender to Your Outlook Contacts
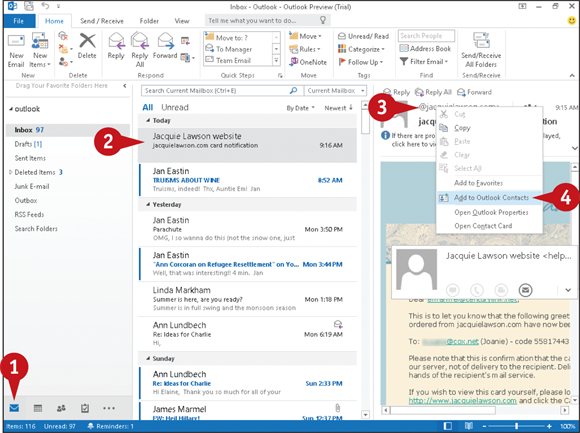
Click Mail ().
In the Message list pane, click the message from the sender you want to add as a contact.
In the Reading pane, right-click the sender’s name.
Click Add to Outlook Contacts.
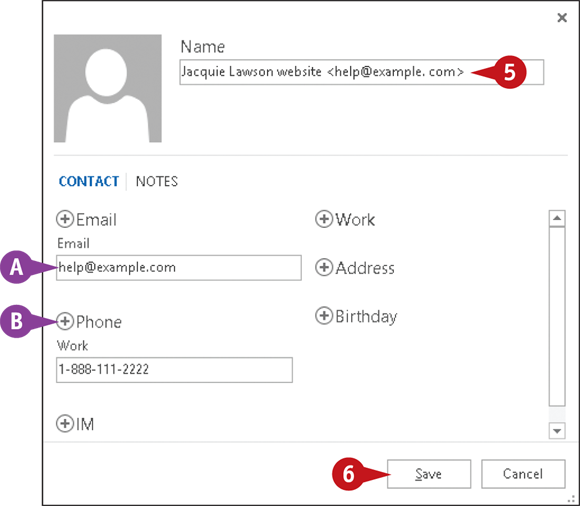
A window opens with the sender’s email address already filled in.
Type a name for the contact.
You can click any Add button ( ) to add additional information.
Click Save.
Outlook saves the contact information and displays a page you can use to schedule a meeting, send an email, link contacts, and more. You can click  to close the window.
Delete a Message
As you receive email messages, you can eliminate clutter and keep things manageable if you delete messages you no longer need from your Inbox and other Outlook folders.
Note that when you delete a message from your Inbox or any other Outlook folder, Outlook does not remove it from your system. Rather, it moves it to the Deleted Items folder. To permanently remove deleted messages from your system, thereby maximizing your computer’s storage capacity, you should empty the Deleted Items folder on a regular basis.
Delete a Message
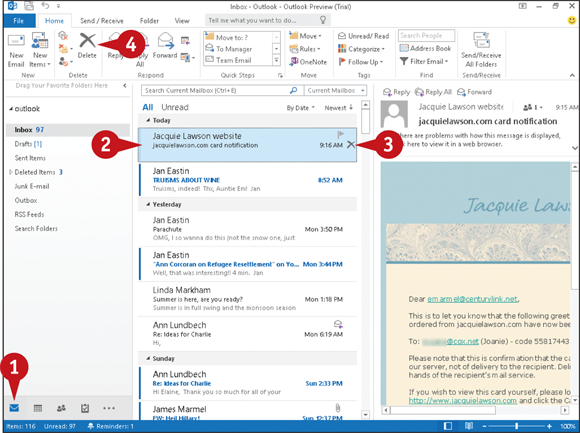
Click Mail ().
In the Message list pane, click the message you want to delete.
Make sure the mouse ( ) remains over the message you clicked in Step 2.
The Delete button ( ) appears.
Press  , or click the Delete button () in the Message list pane, or click Delete on the Home tab.

Outlook deletes the message from the Inbox and the Message list pane and adds it to the Deleted Items folder.
You can click the Deleted Items folder to view the message that you deleted.
To empty the Deleted Items folder, right-click it and click Empty Folder.
Work with Conversations
You can view your email messages as conversations in Outlook. In Conversation view, Outlook groups related messages that are part of the same thread — the electronic term for a conversation — in the Message list pane.
Using Conversation view, you might find the Message list pane easier to navigate because all related messages, including messages that you have sent as replies or forwarded to others, appear under a single heading — typically the subject of the message. By default, Outlook does not display all messages in Conversation view, but you can change this behavior.
Work with Conversations
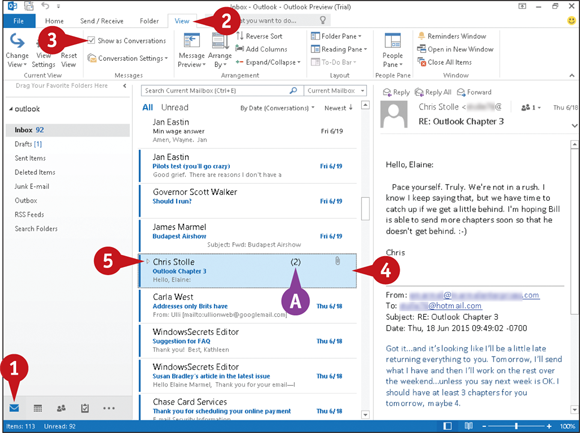
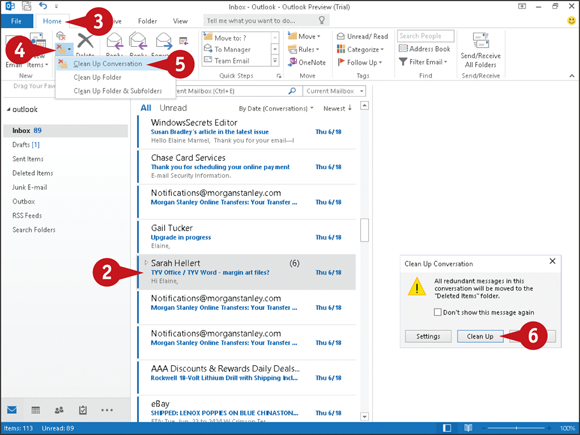
Clean Up a Conversation
Perform Steps 1 to 3 in the previous subsection, “View a Conversation.”
Click a message in the conversation you want to clean up and note the number of messages it contains; this example contains six messages.
Click the Home tab.
Click the Clean Up button ( ) in the Delete group.
Click Clean Up Conversation.
The Clean Up Conversation dialog box opens.
Click Clean Up.

Outlook displays a message explaining that the action will apply to all items in the selected conversation; click OK.
Outlook removes redundant messages from the conversation, and the number of messages in the conversation changes.
Outlook places the removed messages in the Deleted Items folder.
Note: To permanently remove the messages, right-click the Deleted Items folder and click Empty Folder.
Screen Junk Email
Junk email, also called spam, is overly abundant on the Internet and often finds its way into your Inbox. You can safeguard against wasting time viewing unsolicited messages by setting up Outlook’s Junk Email feature. This feature enables you to make sure that Outlook bypasses email from specific web domains and instead deposits those messages into the Outlook Junk E-mail folder.
Note that Outlook might erroneously place email that is not spam in the Junk E-mail folder. For this reason, you should periodically scan the contents of this folder to ensure that it does not contain any messages you want to read.
Screen Junk Email
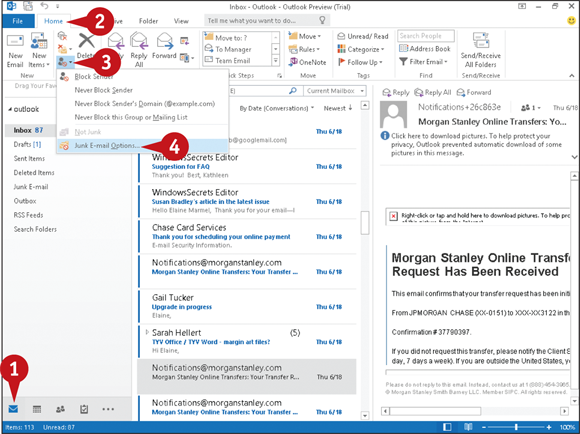
View Junk Email Options
Click Mail ().
Click the Home tab.
Click the Junk button ( ).
).
Click Junk E-mail Options.
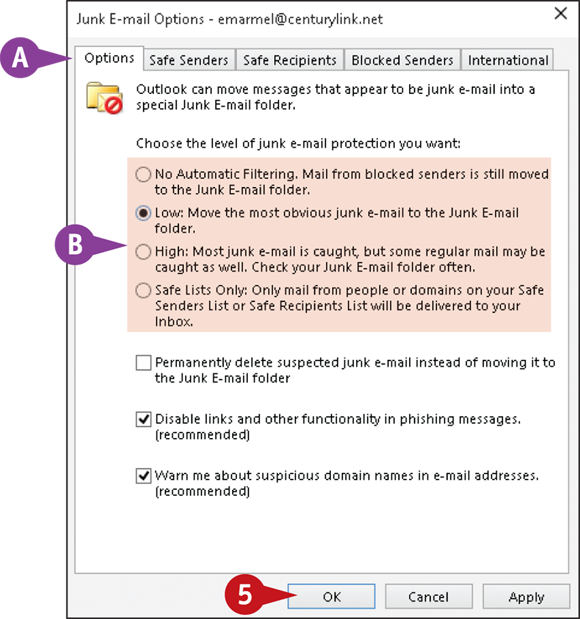
The Junk E-mail Options dialog box appears.
You can use the various tabs to view and change junk email settings, blocked domains, and safe senders.
You can click one of these options to control the level of junk email filtering that Outlook applies.
Click OK.
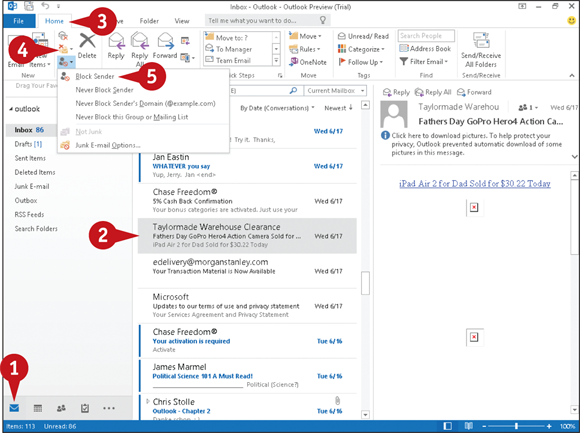
Designate a Message as Junk
Click Mail ().
Click the message in the Message list pane.
Click the Home tab.
Click the Junk button ().
Click Block Sender.
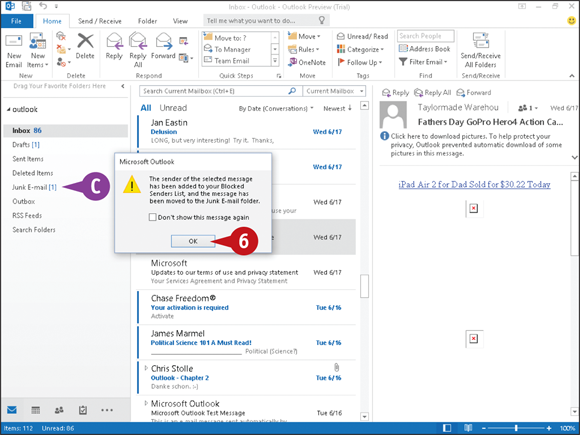
A dialog box appears.
Click OK.
Outlook adds the sender’s email address to the list of filtered addresses and moves the message to the Junk E-mail folder.
 changes to
  ).
). appears on the left side of the entry.
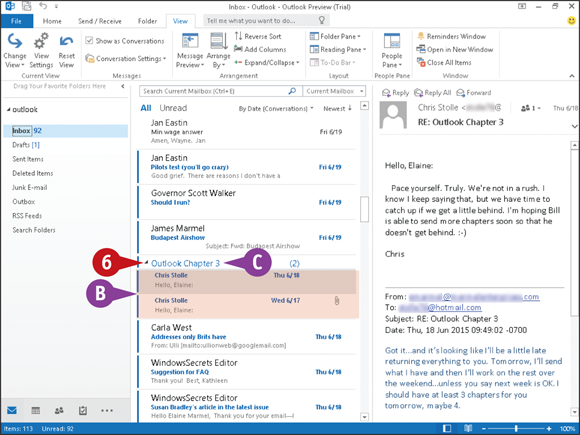
 ).
).