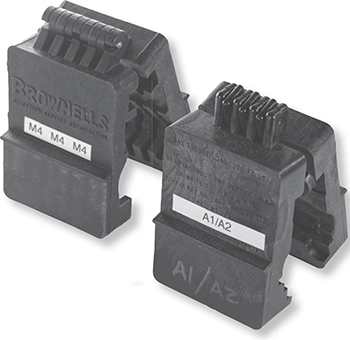
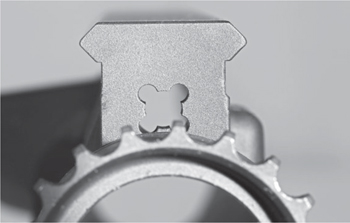
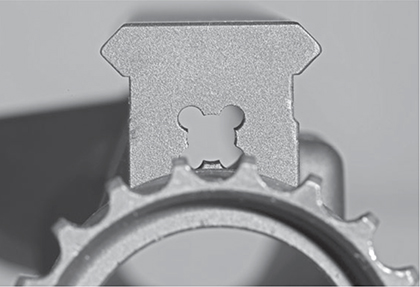
The clamshell fixtures hold upper receivers just fine. The M4 one holds both old and new. The A1/A2 holds only A1 or A2. So, get the M4.
Now we’re to the point where your barrel is toast. How long does that take to happen? Good question. The mil-spec guys will tell you that the spec is 7,500 rounds. Well, OK. If you are willing to swap out your chrome-lined, Colt barrel at 7,500 logged non-military-use rounds, and install another, I’d be happy to buy that supposed shot-out barrel from you. I'll give you $20 for the thing, with the swap.
My Faux A2 began life with a no-name barrel. After a couple of fun-filled winters shooting in Mad Minute matches, and lots of practice competing in monthly 3-Gun, it was starting to show a bit of wear. By then it had chugged through roughly 15,000 rounds and wasn’t holding minute-of-angle (MOA) groups. It was still well under the mil-spec acceptance accuracy level, which equates to about 3 MOA (roughly 3 inches at 100 yards).
The clamshell fixtures hold upper receivers just fine. The M4 one holds both old and new. The A1/A2 holds only A1 or A2. So, get the M4.
The second barrel lasted a bit longer than that, but it too started to lose accuracy. The rifle is now on its third barrel (with the same bolt) and it is doing fine.
If you see this from your rifle, one of two things is going on. Either your barrel is worn out or you have a bullet that is too long for the twist rate of your bore.
To illustrate, at a recent class, one of the students was having trouble getting his rifle zeroed. The groups just wouldn’t settle down. He had no idea how many rounds he had put through it in the twenty years or so he’d owned it, so we stuffed an erosion gauge down the throat. Typically, the erosion gauge will show some wear past the “new” point, and once it shows an inch or two of wear you can count on the barrel being used up. The erosion gauge went more than halfway down his barrel — about two-thirds of the way to the muzzle! For a moment, I thought it was going to fall out of the muzzle end. And he’d only recently noticed a drop in accuracy.
Now, had an NRA High Power Master shot it, he or she would have noticed an accuracy problem years ago. But, he was concerned about its potential use in his law enforcement job where a gunfight might be conducted at the length of a Buick.
So, how worn-out is too worn-out? That depends. The military 7,500 round figure takes into account a healthy routine of full-auto or burst-fire use, in harsh and unforgiving climates and with little or no maintenance. If that’s you, then yes, 7,500 rounds is a reasonable figure. At today’s ammo prices that represents a minimum of $2,000 to $2,500 in ammunition, so the price of a new barrel really isn’t a big deal. You should be able to put a good quality replacement in there for a tenth of the ammo cash you burned up practicing and competing.
Another possibility is that you haven’t worn out a barrel; instead, you’re perusing the pages of an AR maker’s catalog trying to decide which barrel to get.
So, let’s first look at barrels, length, weight, gas system and rifling methods and expectations.
There are three common barrel lengths. Two are specific and one is general. The two specific are rifle and carbine, 20 and 16 inches, respectively. The general one is “SBR” or short-barreled rifle. There’s also a single length found in 3-Gun and multi-gun competition, which is 18 inches.
Rifle barrels are 20-inches long for one simple reason: that was what the original was made at, and what the government first bought. It delivers a very good velocity for its length and, unless you are a really short person, it is a handy size except in tight quarters or vehicles.
The carbine is 16 inches for a very simple reason — that is the shortest allowed under Federal law. It is a handy length, but it isn’t the handiest in the situations that require the handiest, so the category of SBR fills that need. Anything shorter than 16 inches is what is called a “short-barreled rifle” in regulatory parlance and is controlled by the National Firearms Act of 1934. NFA/34 means you have to ask permission to buy one (if allowed in your state) and pay a one-time tax of $200. SBRs can be as short as 7 inches, but those also can be very persnickety to run reliably, they have shorter service lives and you lose lots of velocity. You gain noise as well.
If you use aluminum barrel blocks, and you find the barrel nut is too tight, you’ll end up with aluminum scuff marks on your barrel.
What length, weight, twist and material barrel you decide to install is between you, your aspirations and your wallet. Just one suggestion, though. It is a whole lot easier to buy too heavy, than it is to buy too light. Heavy barrels are hard to carry, light barrels are hard to shoot. At least a light barrel can be carried — and thus shot.
And in case you ever wondered, why a 14.5-inch barrel? Colt had spent a lot of time and money making the various “Commando” models work properly (this was before the M4). They had 11.5-inch barrels on the guns, which sold well for Colt. Then, an overseas customer wanted compact rifles, but had an odd request. Could Colt make them take a bayonet?
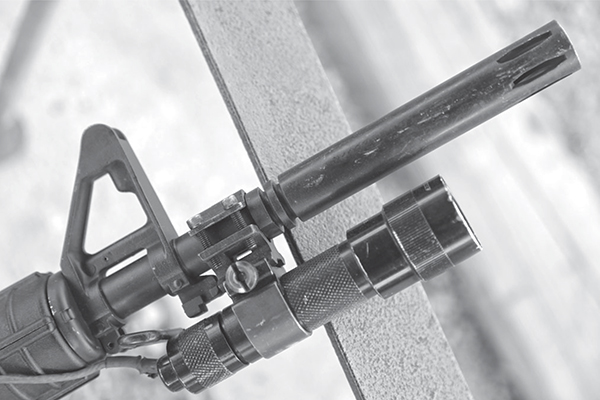
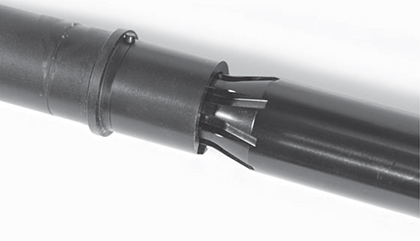
This is one of the old barrels, from an earlier assault weapons ban panic. It is an 11.5-inch barrel, with a 5-inch flash hider.
Colt no doubt scratched their heads over this, but if the customer was willing to pay, then why not? So, the carbine-length gas system, with a barrel extended just long enough to mount a bayonet, was developed. It came out to 14.5 inches in length, which also happens to provide pretty much the same gas dwell time as the regular rifle.
When Colt settled in to develop what later became the M4, they used the 14.5-inch barrel as the standard, because, well, if you’re going to have a more-or-less general issue rifle or carbine, it had to have the means to mount a bayonet. And in the convoluted logic of the military, it was easier to have a carbine with a non-standard barrel length, and use any of the warehouses full of normal bayonets, than it was to make a rational barrel length and special bayonets for them.
If you want to use a USGI M4, 14.5-inch length barrel, on a non-SBR build, you have to find some way to extend the barrel past 16 inches. This you do with an extra-long flash hider, which is pinned and welded to permanently secure it on the barrel.
Most of us take a different path. We either just build it as a 16-inch-plus barreled carbine, or we SBR it and go with an 11.5-inch tube. Me, I don’t see the attraction of a 14.5-inch pinned and welded barrel.
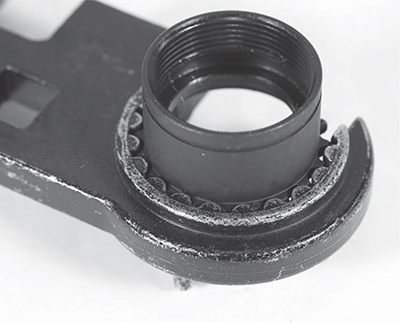
If you’re going to swap barrels, you need tools. No matter how strong you are, you can’t hand-wring a barrel nut off, nor get it back on. Let’s start with the originals, the USGI barrel wrench and barrel blocks. In the pantheon of awful gear, the USGI barrel wrench, and the aluminum two-sizes-that-fit-nothing blocks, are awesomely craptastic. If someone tells you they are the proper mil-spec tools for the job, you have my permission to ignore them and go buy good gear. If you take their word for it, and try to use those tools, you’ll wish you had listened to me.
Here’s the problem. The wrench has three stubs that are supposed to fit the notches of the barrel nut. The two opposing stubs are 180 degrees apart. Was it too much to ask for someone to have paid attention to simple geometry, spacing them just a bit further around the circumference? Despite your best efforts, the spring-loaded slip ring will push the wrench so the stubs no longer have a secure hold on the barrel nut. When that happens, your torque will be applied to your knuckles banging into the bench, or will lever the wrench handle bar into your groin.
Too much torque? Yes, there is such a thing.
And no, you can’t use the lever you use on the wrench to help, either. You are supposed to use a regular torque wrench, or a ratchet handle from a wrench set, as your lever. But since the wrench handle locks into the barrel nut plate by means of the square hole in the plate, there’s no real attachment, no security. The handle can’t resist the tipping force of the delta assembly, and you find yourself needing three hands — one to keep the plate pressed in against the delta assembly, one to keep the wrench secure on the USGI plate, and one to loosen or tighten the nut. The more you position yourself to keep the plate in place, the less leverage you have on the wrench handle.
Plus, the three lugs don’t offer enough gripping area. If you encounter a really obstinate barrel nut and have only three points of contact, you’ll end up bending one of the nut or wrench lugs. It is usually the nut that gives way, and once it does, you have to switch to another set.
The USGI wrench exists only because the Army has not seen any need to change it. Yes, people have been doing it like that for decades, but that’s no excuse to stop you from looking for a better way. The barrel blocks fit only the USGI-diameter barrels for which they were made, and those are held only sparingly. If you encounter a particularly resistant barrel nut, or one that needs just a bit more elbow grease to time-up, the barrel will slip in the blocks. “Just use some rosin,” say the mil-spec folks. No, I say — get a better holder.
The first step is to get a proper wrench, one with multiple teeth to grab the barrel nut; such a tool will be less likely to be pushed off by the slip ring. In addition, by spreading the force across more teeth, you are less likely to slip or deform the USGI wrench. I have wrenches from a few makers and when they were new it mattered which one you ordered. Now, Brownells has a whole page of nothing but good barrel nut wrenches, so get one.
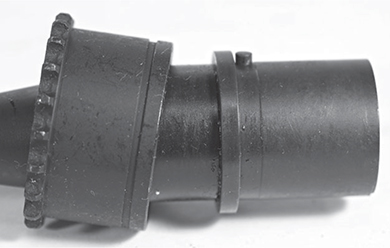
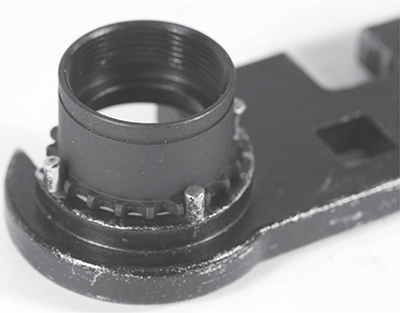
Second, you should have, at the very least, the Brownells clamshell holder, which grasps the upper receiver (instead of the barrel). This clamps onto the receiver with no chance of slippage. However, if the Brownells clamshell has a fault, it is this — it works only with forged uppers of the A1/A2 or flat-top type. If you have anything else that is milled, extruded, reinforced or non-standard, the clamshell won’t fit.
As good as these are, there are even better tools. The top tool for holding all this is the Geissele Reaction Rod. It’s basically a steel bar you clamp in the vise (with flats, not round) and a toothed section that engages the locking lugs of the barrel extension. The torque you are creating is held by the locking lugs, not the receiver or the clamping force of the aluminum blocks on the barrel exterior.
As for a wrench, you cannot do any better than the one offered by 2 Unique. It starts as the USGI wrench, but instead of that tool’s three barrel nut lugs, 2 Unique secures a trio of lugs at each location. That gives you nine times the gripping surface, and there is no way you can bend any one lug.
Better yet, 2 Unique doesn’t expect you to attach a ratchet handle to the wrench. Oh, they make a compact one that looks like a USGI wrench, for those impressed by the mil-spec look, but the full-sized version is the one to get. That wrench features a welded steel handle, giving you 2 feet of leverage with which to loosen or tighten a barrel nut.
Now, this wrench is perhaps too much of a good thing. You have lots and lots of leverage coupled with a super-tough engagement surface. You can slip a tube over the wrench handle for even more leverage. It is entirely possible to generate enough force with this, and with the barrel held by a Reaction Rod, to break the aluminum threads on the receiver if over-tightened. The idea of better tools is to make the job easier, not to break things faster. So, if you are going to use manly tools to tighten things, be careful. For removing an overly tight barrel nut, this would be the ticket to stardom.
The threads on the upper receiver are aluminum. The barrel nut is steel. Keep that in mind.

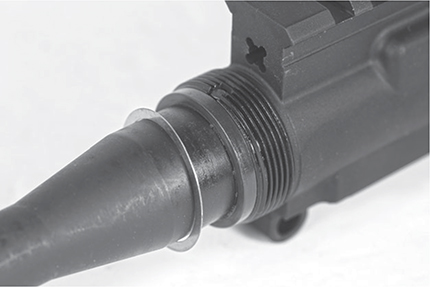
The barrel is screwed into the barrel extension, which contains the actual locking lugs for the bolt to hang on to.
I’ll assume for the exercise that you have already unloaded the rifle, taken the upper and lower apart, removed the bolt assembly and charging handle, removed the handguards, taken the gas tube off and have decided if you are going to salvage the slip ring assembly or not.
If you are using the clamshell holder, slide the center rod of the clamshell assembly into the receiver and close the ejection port door. Fit the upper into the clamshell, close it, and then nestle the assembly down into the vise jaws. Tighten the vise. Don’t crush it, but make sure it is tight enough so the clamshell can’t move. Make certain that you position the clamshell so it is held completely within the vise jaws. If things have to stick out, make them stick out the back end, where you won’t be wrenching. Better yet, use a bench vise big enough to completely encompass the clamshell.
If you are using the Reaction Rod, clamp the rod in the vise and tighten as much as is humanly possible. You aren’t going to damage rod or vise, so make it tight. Then slide the barreled receiver over the rod, making sure the teeth on the rod engage the locking lugs of the barrel.
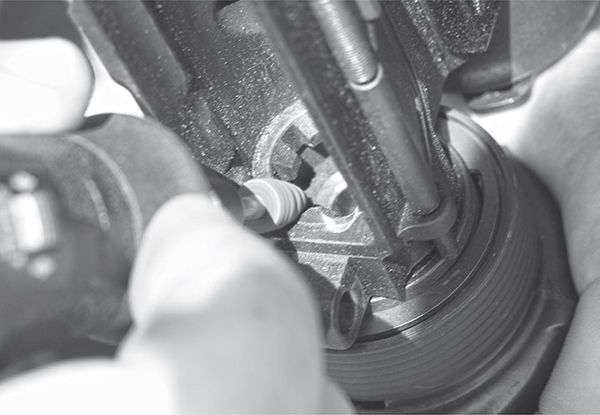
Now position the wrench on the barrel nut so the wrench handle is sticking up at about the 10 o’clock angle. You want to have some downward movement to your exertions, but you don’t want to be working below your waistline. To do so will tempt you into putting weight on the wrench handle, and if it slips, you crash to the floor. No, I learned this not from personal experience, but from someone who landed on the wrench when it came loose — inadvertently locating the wrench in a delicate location.
And remember the time-honored mnemonic: lefty-loosy, righty-tighty. As you stand there, on the muzzle end of your clamped upper receiver, the barrel nut will come off when turned counter-clockwise.
If you have done things properly, and the assembler didn’t over-tighten, you will find that a pull on the wrench unlocks the nut. It will resist and, sometimes with a snap, pop free.
The barrel is drilled for the gas port, and port dimensions vary depending on the end-use of the barrel and its length.
What to do if it doesn’t pop free with a pull? Re-position the wrench. Position it as horizontal as possible. If the wrench can’t be dead-level, then set it a notch above level. Stand belly-up to the wrench, putting one hand on the handle and your other so it pushes the tool into the barrel nut. Yes, I made you buy a wrench that doesn’t need this, but now it does. Press the wrench into the nut with your right hand, press down with your left, and lean in, putting some body weight into it.
If this does not loosen the nut, then you have to take a step back in the process. Loosen the vise, take the upper out, remove the clamshell, and stand the receiver with the muzzle down, in a corner. Put the muzzle in an old coffee can. Squirt or spray penetrating oil into the joint between the receiver and the barrel nut. Gravity and wicking action will carry the oil down into the threads. You are not going to try again that day, so move on to something else. The longer you wait, applying oil a couple of times a day, the easier your task will be. Patience beats exertion.
Once you can’t wait any longer, go back through the steps above. You should find that the barrel nut comes loose with exertion. If it doesn’t, then you have a difficult choice — machine tools or quitting.
Once the barrel nut comes loose, put the wrench away and hand-turn the barrel nut off. Grab the barrel and pull it straight out of the receiver. If it doesn’t come out, resist the temptation to wiggle it. Think about it. You’ve got a long steel lever that fits tightly into an aluminum shell. If you rock that 16- or 20-inch lever enough you could bend the receiver.
The barrel is held in the receiver by the barrel nut (missing in this photo) with the gas tube riding above. There’s a lot going on right in that small area.

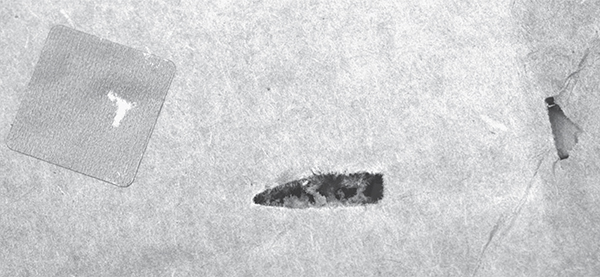
A longer bullet needs a faster twist to stabilize. The 55-grain bullet (left end) is happy with a 1⁄12-inch twist rate. The 100 grain (right) will sulk with anything slower than 1⁄6.5-inch twist.
If the barrel won’t come out, it may be carbon-welded or Loctited. Remove the receiver from the clamshell, fire up a propane torch and apply heat to the receiver threads and barrel. If you’ve ever burnt out Loctite you know that once it gets to the decay temperature it starts to smoke. If you get to that temp (it won’t take long) and you don’t see, smell and hear the sizzle of burning Loctite, you know it was carbon-welded. The heat will help loosen it, but you need to apply more penetrating oil. Put it back into the bucket/coffee can, and oil regularly.
If you want to speed the process, you can knock the barrel out. For this you’ll need a steel bar that is slightly smaller than the diameter of the chamber and longer than the receiver. Drop the rod into the chamber, hold the receiver in one hand, and tap the rod with a ball-peen hammer. You want to gently loosen or tap out the barrel, do not try to do the work in one hit. With a few taps you can push the barrel forward, and then once the locating pin clears the receiver slot, twist it to loosen the bond, allowing it to be pulled out.
And while all this work and effort is going on, consider your situation. You’re expending how much time and effort to pry the parts off of an upper receiver, a part that costs less than a hundred bucks? OK, just so long as we’re all clear about this.
First you need a receiver, either brand new or the one you just spent an afternoon or three wrestling with, as above. And of course a replacement barrel. Let’s put them together, so you can get to the range. First, clean everything. Scrub the receiver, paying particular attention to the external threads and the interior bore where the barrel will rest. Clean the barrel extension, the chamber end with the collar on it.
Now check the fit. If the barrel slides in easily and even rattles around a bit, this will not be a happy marriage. You want as snug a fit as you can get, short of having to use a hammer to get them together. If you have the parts, swap uppers and barrels until you find a satisfactory fit. If you have only the one receiver and one barrel, then you’ll have to live with it, at least for now.
The barrel nut clamps the barrel into the receiver.
Once you’ve achieved proper fit, you need to prep the barrel. Barrels typically come with the front sight and delta ring assembly installed. If you are going to build the rifle with regular handguards, you’re set. If not, then you’ll have to remove the delta ring assembly. It comes off the front, which means removing the front sight tower. For this you’ll need the Brownells front sight block. Even if your rifle does not have taper pins (shame on you) the block still works. If the front sight is held on with set screws, or clamping screws, undo them. You can re-install the front sight once the barrel is in place.
Check again to make sure the mating surfaces are clean.
Slide the receiver onto the barrel extension, line up the receiver slot with the small pin and press it into place by hand. Now install it in the clamshell or slide it over the reaction rod. You do not want to be using tools, or force, at this point. The risk of damaging the receiver is too great.
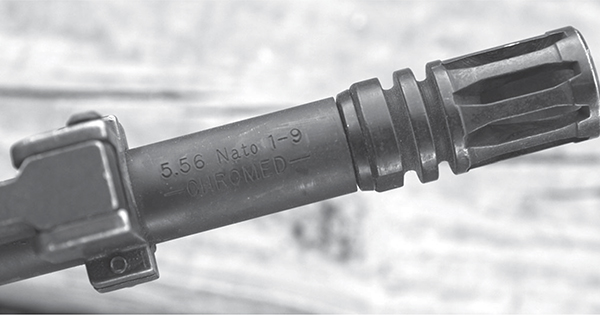
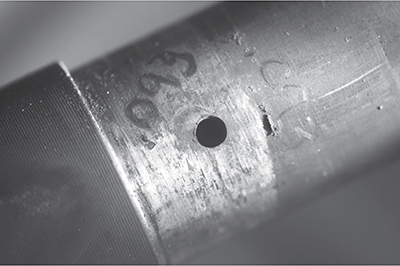
This barrel is marked “5.56 NATO chromed.” That means it was chromed, but it wasn‘t a 5.56 NATO throat. Markings can’t be trusted, with a few exceptions.
Once the receiver is snugly in place, apply light oil to the threads and wipe around until they’re covered. Use a shop cloth to clean up the excess. Some people will tell you not to use oil, claiming it will cause the nut to come loose. Not likely, considering the torque values we’ll be applying. Others go the other extreme, shrinking back in horror at the thought of galling, seizing or mangling threads — leading them to apply so much anti-seize compound it oozes out the sides when tightened. Both are wrong.
You want a little light oil to prevent stiction of the threads, that being where the friction of dry surfaces sliding over each other prevents a proper reading of torque values. Yet you are not going to be applying so much torque that you need to worry about seizing.
Slide the barrel nut over the barrel, and spin it onto the receiver by hand. Once it stops, take a look. Notice how the notches, or teeth of the barrel nut, create gaps for the gas tube to pass through? That’s the plan. My method of installing a barrel nut is a bit involved, but I’ve found that doing it properly, once, saves a lot of extra work and heartache later. With the barrel nut hand tight, place your barrel nut wrench on the toothed rim of the barrel nut and tighten. Once it stops, note where it stops. Use a marker or Sharpie to denote the topmost tooth. Loosen it, remove the wrench, and hand tighten the nut again. Did it advance past the first spot? Good. Loosen once again, and repeat the process. This is where your barrel nut stops.
At this point, the mil-spec crowd will interject, deriding you for what the torque specs are supposed to be. Uh, huh. Before we go into that, look at the gap in your barrel nut through which the gas tube passes. Is the notch dead center? You can eyeball it or you can gauge it. The best gauge is one made specifically for the job. Stick the gauge into the gas key on your carrier, and slide the carrier (you can take the bolt out, or leave it in, it won’t matter) and look for the gauge when it pokes out of the upper receiver. If you do not have a gauge, a #16 drill bit will do. Since the drill, 0.177 inches in diameter, costs you $3.99, and the gauge, diameter 0.178 inches, costs you $5.99, unless you already have the drill on hand I don’t see the point in saving $2, just to get the product that is a pretty good substitute.

The barrel nut has to be correctly timed, or the gas tube can’t pass through.
This is a mis-match of feed ramps that will cause you headaches. An A1 barrel, with an M4 receiver? That will bring things to a screeching halt.
Be sure your alignment is correct: the gauge will poke out of the receiver and pass through the flange of the barrel nut without touching said flange. If it gently rubs against the flange, you can tweak the barrel nut a bit tighter (if it hits on the left side of the nut gap) but I would not be keen on loosening the nut if the gauge passes through and rubs but does not bind against the barrel nut flange.
So your barrel nut install passes the gauge test? Congratulations, your job is done. Torque? Who cares? If you used a proper wrench, and you are not a literal 85-pound weakling, you have easily exceeded the minimum military spec for barrel nut torque. The military spec calls for no less than 30 ft. lbs. of torque, with up to 80 ft. lbs. allowed, in order to correctly align the gas tube.
Back when I was working real jobs for a living, I could practically wring a barrel nut on with my bare hands, torquing it by feel to 30 ft. lbs. With a wrench in the barrel nut, I’m not sure it is physically possible to stop below 30 ft. lbs. Do the “tighten three times” drill. If your barrel nut lines up perfectly, you are done.
A regular barrel nut wrench only holds the barrel nut with three studs. It is prone to slippage.
If not, you have decisions to make. Take a long, hard look at the alignment of the barrel nut teeth. There’s a flange in the path of the gas tube. Is that flange straight up? Or does it tilt to the right or left? If it is more than halfway past the gas tube gauge location, you can tighten the nut some more, and get things lined up. If it isn’t, you cannot simply tighten the nut some more to make it line up. There is a limit — the aluminum of which the upper receiver is made.
As we’ve discussed in previous volumes, threaded fasteners work like springs. Thread tension increases as you tighten, and that tension keeps the assembly tight. The tensile strength of ordinary steel can be as low as 47,000 psi, and depending on the alloy and heat treatment it has received, can be as high as 220,000 psi. Aluminum? The 7075 alloy of which your upper is made has an ultimate tensile strength of 83,000 psi. You can torque the threads right off that receiver if you get ham-handed and have a breaker bar on your wrench.
So, there are limits to how much more you can heave that barrel nut over, to provide clearance for the gas tube. What to do? One option is to spin that barrel nut off and try the next one in the bin. Oh wait, you don’t have a bin full of parts to select from? Darn. OK, next step; washers.
The new wrench design, with a cast-in socket, grabs the barrel nut around two-thirds of its circumference.
Randall Rausch of AR15barrels.com calls these barrel nut indexing shims, but everyone I’ve ever shown them to goes, “Oh, washers.” They are flat, shim material hoops that are 0.001-inches thick. The process is simple; you tighten your barrel nut according to the above instructions, and determine that either it can’t be tightened more, or it’s too loose when correctly aligned.
Rausch refers to the two situations as either “one-third too far” or “two-thirds too far.” The shims are designed to correct one-third of an index location. If you tighten the barrel nut, and the tooth on the nut that is uppermost is crowding the gas tube hole from the left, as viewed from the muzzle, it is one-third too far. If it is crowding the gas tube hole from the right, it is two-thirds too far.
Once you have ascertained the degree of misalignment, unscrew and remove the barrel nut. Slip the shim/washer, or two, over the barrel, and carefully press onto the barrel shoulder. You can use a drop of oil to create a seal between washer and barrel shoulder. Then slide the barrel nut back on and hand-spin it into place, tightening as explained above with the wrench. You should find the barrel nut tightening to perfect alignment.
If you have not removed the sight, because you’re installing a barrel as-is, use scissors to clip a slot in the washer. Don’t just clip it, clip a section out of it, 1⁄16th of an inch or so. If you don’t, the washer can stretch as the barrel nut rides over it in the last bit of tightening, and it could overlap.
When I first learned of these indexing shims, Rausch was the only one offering them. Since then, a multitude of makers have jumped into the field, many from China. People who love to save money love China. People who expect items to conform to a certain stated specification are not so enamored. You see, the washers from China are often metric. That means that they are not necessarily 0.001 inches thick. If you order a set of shims that are advertised as 0.0254mm, then they should be .001 inches thick. Still, measure them with your calipers. They could be a fraction of millimeters, such as 0.050 or 0.033 inches. In that case you’ll have to do some math to convert the adjustment, or simply slap one on and see what it does.
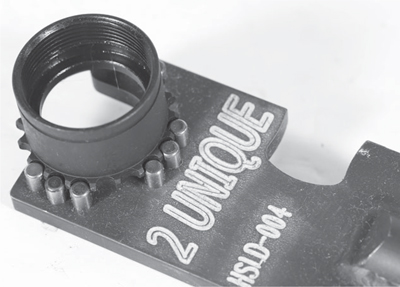
2 Unique makes their barrel nut wrench with nine studs, grabbing the barrel nut flange in trios of studs. No slippage, and a two-foot long handle for leverage.
The gas tube can be bent to squirm past the offending barrel nut tooth and still work. But you’ll have problems if you take that more than just a little off of alignment. That’s because of tabs inside the slot of the regular USGI handguards that ride on the barrel nut. Also, the front handguard cap has both a clearance hole for the gas tube and stamped detents to hold the handguards, which aren’t supposed to rotate freely around the barrel.

If your feed ramps have a mis-match, you may see bullets with marks like this. This one failed to feed, but didn’t get driven back into the case.
If you leave the barrel nut cock-eyed, the handguard will only fit under the delta ring if it, too, is off. When you do that, it won’t align in — or with — the front tabs. And you can’t tilt the front cap to match the handguards because the gas tube and its hole in the cap don’t have much wiggle room.
And all this gets worse if you’re installing a free-float handguard, one that clamps directly onto the barrel nut. In that case, not only will your handguard be tilted, but the top rail will be, too. If your front sight is on the handguard, it will be tilted off-center and you won’t be able to zero your rifle. Nor will you be able to use your iron sights, but your friends will be able to mock you mercilessly.
Get the barrel nut properly aligned. Life will be a lot easier.
How tight is tight enough? The military manuals are not much help. They offer such a wide range as to be useless. Many claim 30 to 80 ft. lbs., until the barrel nut is aligned to allow proper installation of the gas tube. Gee, thanks.
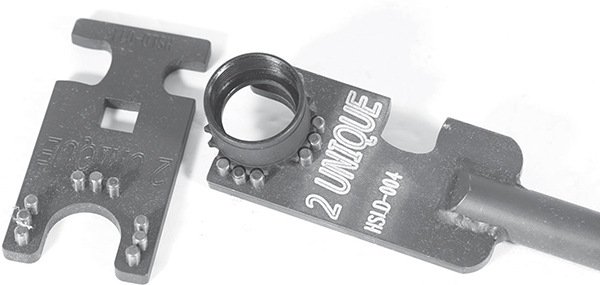
If you need a compact tool to couple with your torque wrench, 2 Unique makes a very good one.
My late father had a saying about that kind of fit; a derisive “Bend to fit, paint to match.”
Truth is, 30 ft. lbs. is not a lot. A strong man could just about do that bare-handed. With a wrench, you can deliver 30 ft. lbs. before you realize it. On the other hand, 80 ft. lbs. is getting close to the limits of aluminum. Use a torque wrench to test these limits for yourself.
Here’s the procedure for the non-torque wrench set. Use a regular ratchet wrench. Spin the barrel nut into place by hand. Do the tighten-loosen-tighten-loosen dance. When you tighten it the final time, do so by hand, noting where the nut stops. Now, put some muscle to it with the wrench. Can you get the nut to line up using the additional torque provided by the wrench? If you can, then you are within the 30-80 ft. lbs. range.
However, if the teeth still don’t line up and you must shift from muscling the wrench to putting a bit of body weight on it, you’ve likely exceeded 80 ft. lbs. You need to start over, either with a new barrel nut, shims or face-dressing.
From here, you can either install the standard handguards or jump ahead to the handguard chapter to learn how to install aftermarket products. However, you may not be happy with the accuracy a plug-in barrel installation delivers. Put your accuracy expectations on hold and let’s delve into the reasons why rifles might not be accurate.
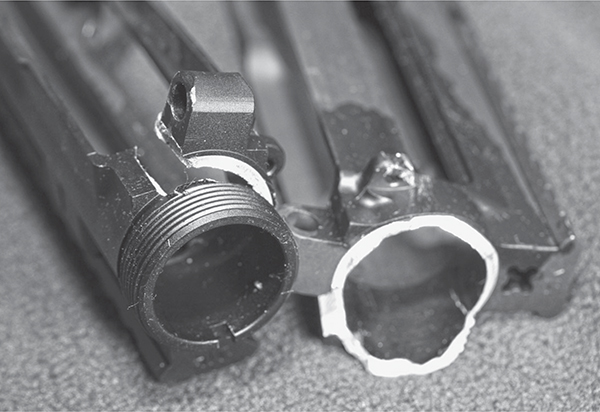
The barrel extension slides into the receiver up to the collar, and rests against the front flange of the upper receiver. Sounds simple, what could go wrong? First, is the extension a tight fit in the upper? Second, are the flange and the collar both axial and perpendicular to the bore? If not, then you could have a curable — or incurable, albeit minor accuracy — problem. First, the extension fit.

This is from a pair of barrel blocks. A “one size fits two” barrel diameter usually means it doesn’t fit any of them very well.
The barrel extension is a simple cylinder, 1.000 inches in diameter, and 1.000 inches in length. In a best-case scenario, the cylinder is 1.000 inch in diameter, and the bore in the upper receiver is 1.000 inch in diameter — perfect. But what if the dimensions aren’t perfect?
Let’s do some quick math. Suppose the barrel extension is only 0.999 inches in diameter. That means there is .001 inches of play. First of all, a cylinder inside of a cylinder cannot move the full distance of the measured difference, or play. That there is .001 inch difference between the two diameters does not mean the interior cylinder can move that much. Students of three-dimensional geometry can calculate the movement such space permits, but it isn’t the full .001 inches.
Second, the barrel flange constrains movement in the receiver. Despite this constraint, there is some movement and unwanted vibration. How to fix this? Well, there are ways, but you won’t like them, and they are to be done only when you are trying to wring the last quarter-MOA out of an already accurate rifle or components.
The first, and easiest way, is to use Loctite. Apply it liberally in a thick layer. Red, dark green, any of the strong ones will do. Avoid the wicking types. You need it to fill the gap between the barrel extension and the receiver, nothing else.
Make sure everything is clean and dry. Do this after you have determined the correct barrel nut and receiver-to-barrel flange parts. That is, if you need shims, you must know that before you start applying Loctite. Oil the threads of the upper receiver and the barrel nut. Apply a thorough coating of Loctite to the barrel extension and insert it into the receiver. Wipe off all Loctite that has oozed to the exterior. Install and bring to full torque the barrel nut. Remove the assembly from whatever holding fixture you have it in, and wipe all the excess Loctite from the interior of the receiver. Check one more time that the barrel nut is correctly timed, and set the assembly aside for at least two or three days. You want the Loctite to fully cure. The Loctite will now have filled the gap between barrel extension and upper receiver. You have decreased or eliminated the potential wobble.
If you want to remove the barrel, heat is your friend. Loctite degrades at 425 degrees Fahrenheit, and it will produce smoke while doing so. Once you’ve “burned out” the Loctite, you can wrestle the barrel out of the receiver.
The second approach isn’t so permanent, but can be more fussy. You simply wrap the barrel extension with steel foil, to fill the gap. You’ll need steel (not aluminum) foil the thickness of which is on-par with the aluminum foil you use in cooking. Use a single wrap, making sure it stays in place as you plug the barrel into the upper receiver. Once wrapped and inserted, potential wobble in the fit should have been reduced or eliminated. How much improvement can you expect? We’re talking fractions of an MOA here. If you have a rifle that will only shoot 3-4 inches at 100 yards, there are a lot of other things you need to be looking at to make groups smaller, including your own skill level.
A foil-wrapped barrel extension will be able to trim half or a quarter of an MOA off of an already accurate rifle. If your gun is not accurate, then foil wrapping is a waste of time. Wrestling with foil installation on a rifle that currently does its best at 3.5 MOA can wind up being a frustrating waste.
One last aspect of accuracy that you can take control of is the squareness of the upper receiver barrel ring. If the front edge of the ring is not square, the barrel will bolt down only onto the high spot, and you will be inducing tipping into the barrel fit. It won’t tip much, if at all, because of the fit of the extension shank to the upper, as we discussed above. But the tendency will be there and, at the very least, the unwanted added vibrations will cause problems. Also, you can experience a zero wander as the rifle heats up, since aluminum and steel expand at different rates.
How to solve this problem? Use a receiver squaring reamer from Brownells. The facing tool has a smooth cylindrical shank that rides inside of the upper receiver. On it, at the correct diameter, are cutting teeth. Use this tool to make delicate, light cuts. You are not looking to remove the entire face of the receiver down to bare metal. All you want to do is dress down the high spots, or correct a slightly off-square face. So, unless your receiver is way out of spec, use the cutter to simply clean up the face of the ring, which usually entails not much more than three-quarters of the circumference. It just needs to be smooth and square, enough to lock the barrel into place. If you cut more, you will be cutting below the hardened layer created by the anodizing, exposing soft aluminum to the barrel collar. That in itself is probably not a bad thing, but it goes against my grain to just cut it all off. If you want to, go ahead, but don’t blame me if it causes problems.
Correcting feed ramp problems is easy. It just takes nerve, a steady hand and a power tool.
One last detail on the face reaming. If you have already tried to fit the barrel nut, and had to do some work to get it properly timed, congratulations; your face-reaming/dressing just changed that. Remember, a shim of .001-inch thickness adjusts the barrel nut timing by one-third of a tooth. You just took metal off of the face of the receiver, where the barrel bears against it. How much? We don’t know, because every fitting job is different. And, you only took metal off of part of the circumference. So, was it .001 inches you took off the top? .002 inches? Unless you have very precise measuring tools, there’s no way to know for sure. But odds are you will find that the barrel nut now has to be re-timed. If you didn’t time it before, then you won’t have to do it all over again, just this once after dressing.
Lastly, a timed barrel nut on one barrel will not necessarily be a timed barrel nut on the next. Each fitting is unique to a receiver, barrel and nut.
It seems that in some circles it is taken as a birthright that a personally owned AR-15 be a sub-MOA rifle. That many are, or can be, is clear. But not every rifle makes the grade. What does it take to up the odds?
First, get a quality barrel. A barrel with no pedigree, no name and bought at the gun show for cheap is unlikely to deliver sub-MOA groups. Second, fit it properly to the upper receiver, with a squared front ring and a properly timed and torque barrel nut. Third, feed it proper ammo (to match the twist rate, among other details). And lastly, be sure your shooting skills enable you to shoot sub-MOA
The military acceptance methodology is not an MOA measurement. Instead, it is a more statistically valid method, but one that is a royal pain in the butt to use. The method, in short, goes like this: the government fires a test group, out of a sample rifle, with known ammunition and pulls the target. The target is measured, and the geometric center of the group is determined. Then, each shot is measured to determine its distance from that center point. The mean distance, or average, is computed. If the rifle or ammo being tested has produced a mean average for each shot that is less than the stated, accepted value, it passes.
Does the government care if the accuracy is a lot better, just barely improved, or not at all? Nope. Remember, “The minimum becomes the maximum.” As long as it passes, it goes into inventory.

Here are the corrected feedramps. This will work just fine for years to come. I know, I did it the first time back in about 1988.
Now, that doesn’t stop some enterprising unit or individual from scrutinizing the tests and finding the production lots of ammunition that have produced the smallest groups. That’s one way to gain an advantage in competition.
Generally speaking, the allowable accuracy level for government work is around 3.5 MOA. That’s horrible, you say? Perhaps, but a 3 MOA dispersion nets you an 18-inch group at 300 yards. Since a person measures roughly that across the shoulders, that means a center hold at 300 yards nets you a hit on the bad guy.
As the saying goes, “Good enough for government work.”

The result of an overly long (heavy) bullet in a slow twist. The top is match heavy bullet ammo in a 1⁄12-twist barrel. Below, a 1⁄9-inch twist barrel.
How do you treat your new barrel? There’s a very strong feeling in some circles that you shoot once, then clean once, to ease a new barrel in. On a very expensive precision barrel, I can see giving it a try. However, having done so and seeing nothing for my efforts, I’m a lot less interested in such processes. I have two approaches, depending on the barrel quality or provenance.
Basic “blaster” barrels get no help. These are the ones you buy from the catalog on price — the cheapest rifled tube you can find in supply catalogs. You check headspace, plug it on, make sure everything is straight and get shooting. It gets cleaned when it gets cleaned. But doesn’t that hurt accuracy? I’ve done the exact process I’ve outlined and taken a new barrel to a five-day class. I’ve handed the newly barreled rifle out as a loaner while I fix students rifles, jumping in to get some practice when there is nothing that needs fixing, and ending the week hosing the 300 meter pop-ups. Somewhere between 500 and 1000 rounds — with no cleaning except chamber scrubbing to keep it running — and I’m still going one-for-one on the pop-ups, out to 300 meters.
Barrels just don’t need much care.
On the expensive, precision-accuracy barrels, I’ll be a little more forgiving. And the care comes as I tune the rifle. A precision rifle is going to have optics, and optics have to be zeroed. The so-called “break in” for an expensive barrel goes like this: Inspect, check headspace, install. Test-fire to zero iron sights, and use a patch with copper solvent on the bore. How much it fouls will determine how much care I give it. Does the bore clean up fast? Then it gets little or no care. Does it foul a lot? Then I’ll scrub the bore clean, in between groups to check the iron sight zero.
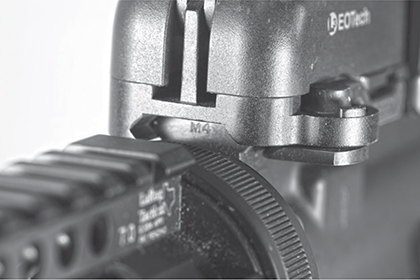
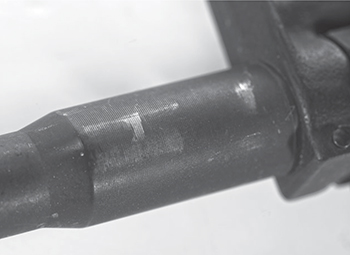
The front of M4-ramped receivers usually have a stamp, an “M4” to indicate their status.
Then I repeat that process while I zero the optics.
If it doesn’t foul much, the fouling cleans easily or decreases quickly as the bore gets broken in, then once I have the irons and the optics zeroed I don’t give the bore any more thought other than general cleaning when I’m done shooting. At that time, I’ll punch the bore with a copper-solvent patch, brush and dry, but only as a basic clean. No more.
The beauty of an expensive barrel is that the processes that make it more accurate are often the very same that make it easy to clean. Precision reamed and honed barrels, especially hand-lapped ones, have very smooth surfaces and stay clean.
One detail that is important, if you are going to clean the bore, is to use a bore alignment, or guide tube. I cover this later in more detail, but it bears a reminder here; pushing rods through bores bend the rod. The rod will rub against the bore, and this can be bad for accuracy. So, if you push a rod, use a rod guide inside your upper receiver.
I have this here because while it is a detail found (or not found) on the upper, if you have a problem, the barrel will be the likely source, thus the correction needs to be taken care of now.
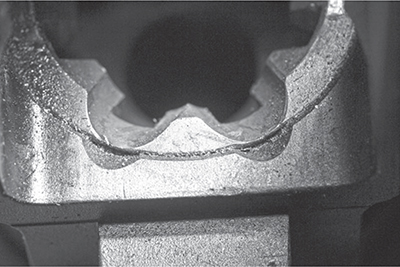
This takes a bit of explanation. The original design of feed ramps were cut in the barrel extension from the magazine to the barrel. The front face of the receiver is simply a flat wall. Each round, as it strips forward out of the magazine, cams up so the tip strikes the feed ramp, and not the receiver wall. In the semi-auto rifle, and in the early M16A1s, there was no problem. Everything worked as designed.
By the late 1980s, however, there was a problem. The government had switched from the M193 to the M885 round. Colt was developing the M4. What Colt found was, when using the M855 round in the M4 on full-auto fire, the feeding became less consistent, and sometimes the tip of a round would strike the receiver wall. That would bring things to a halt, and also stub the bullet back into its case.
Taking the front sight off allows you to install the barrel nut shim intact, making the process easier.
So, Colt made the M4 receiver, so marked on the front, above the gas tube hole. The M4 receiver feed ramps are cut at a steeper angle and, as a result, extend down into the receiver wall. The barrels also had to be modified. This can lead to a rare but odd situation; barrel and receiver mismatch. For the purposes of this chapter, we’ll call the new one the M4, and the old one the AR. We have four combinations here:
The only one that is problematic is the last one, AR barrel with a M4 receiver. AR/AR is the original, and it works. M4/AR has the feed ramps steeper, but they do not overhang the receiver ramps (there aren’t any) and no problem. M4/M4 is clearly correct.
An AR barrel in a M4 receiver, however, has steeper feed ramps cut into the receiver wall, with less-steep ramps cut into the barrel extension. (We’ll overlook for the moment that the front sight is probably also a problem, but that’s a different chapter.) The result is that the ramps in the M4 receiver have an overhang from the barrel extension of the AR barrel. A bullet can catch in there and stop the cycle. No, this is not theoretical. I saw it in a recent class, and we had to correct it.
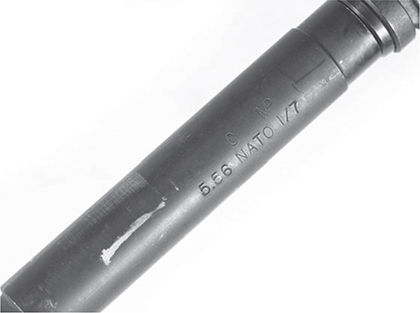
Colt is the gold standard when it comes to proper leade and markings on barrels. The code here means this is a chrome-lined barrel, has been magnetic-particle inspected and has a 5.56 leade with a 1⁄7-inch twist.
Before we proceed, you must be familiar with the front sight height considerations between AR carbine and M4 barrels. If your rifle is correctly zeroed, and the sight is not in the wrong place, then you can correct this problem back at the feed ramps.
If, however, you find you have a non-“F” marked front sight housing, and you can’t easily zero your rifle, the correct solution is to change barrels. Or re-cut the ramps and also replace the front sight assembly.
The process is, use a Dremel or similar tool with a narrow grinding tip or a carbide cutting tool. You can set it up in a mill if you are really, positively OCD and just have to. Or, you can do what every other gunsmith and armorer across the country does — hand-hold the Dremel, grinding the barrel extension to match the receiver ramps. That’s it; you cut the steel to match the aluminum.

Geissele makes the Reaction Rod, and if you are going to install more than one barrel in your life, you need to own one of these.
You can pull the barrel out of the receiver to do this. But the rest of us simply do the cutting or grinding with the barrel in the receiver. Once done, thoroughly hose out the grit with an aerosol cleaner, scrub the chamber, punch the bore with a solvent patch and then a dry patch, just to make sure you got all the grit.
That said, Colt wasn’t entirely correct that it was just a problem with M4s and M855 ammo. The problem did happen in semi-auto rifles and carbines, and not just with M855. I had it happen to one of my Frankenguns, back when Colt was still working on the M4 details. That rifle would occasionally stub in feeding. I looked at it, figuring I’d just buy a new upper receiver if it came to that, and went to work. I had to cut complete ramps of the M4 type, in both the steel and aluminum (which is why I used a carbide cutter) and it worked just fine. It still does.
But, when you order parts for your rifle to replace, rebuild or build from scratch, you want to pay attention to M4 ramps.
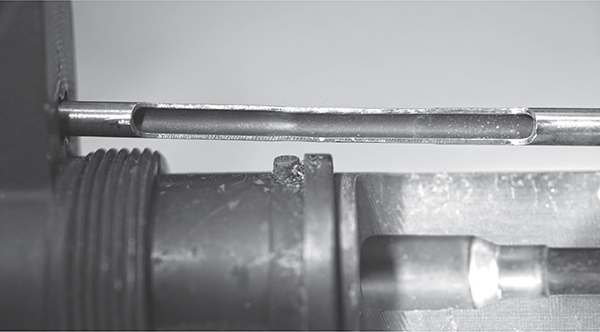
The Reaction Rod uses the locking lugs of the barrel extension to keep the barrel and receiver in place while you tighten the barrel nut.
This barrel nut can be tightened just a bit more to get correct timing. Unless, of course, you are already up to the 80 ft. lbs. of torque, which is the upper limit. Then you have to start over with a barrel nut shim.
When it comes to barrel twist rates, how fast is fast enough? The original Armalite AR-15 had a barrel with a twist of 1⁄14. That is, the rifling took 14 inches to complete one full rotation. While Arctic testing in extreme conditions, the government found that the 1⁄14 rate was marginal. If the air was as dense as it can be on a high-pressure day at 20 below zero, bullets become unstable.
The old canard about bullets tumbling in flight is wrong. I don’t care what someone tells you, or the basis of their experience, or where they were when it supposedly happened. It is wrong. So consider this your first lesson in avoiding bad advice; some people who should know better are wrong.
The government sped the twist rate up to 1⁄12, and there it remained until the A2 came along.
The next change happened when it came time to adopt the M16A2. The testing that had been done prior to adoption had utilized a barrel with a 1⁄7 twist. Not because it was best, but because it was fast enough to stabilize all the bullets the military was going to consider. You see, the longer a bullet is, the faster you have to spin it to generate sufficient gyroscopic stability.
With the adoption of the M16A2, and its 1⁄7 twist rate, things got complicated. Let’s get a few things out of the way first.
Here we have perfection. If you are between 30 and 80 ft. lbs., and your barrel nut looks like this, then you are done. Move on to the next step.
Yes, a 1⁄7 twist rate is too quick for some bullets. If you shoot ammo with the lighter hollowpoints, such as the varmint bullets, they may spin apart on their way to the target. This will likely not be a problem with 52 grain and heavier hollowpoints, and is not an issue at all with 55 FMJ.
The twist, while fast, will not harm accuracy. An accurate bullet will shoot to the level of its accuracy in a 1⁄7-twist barrel.

If you have torqued your barrel nut, and it stops here, you cannot apply more torque to get the nut to align or you will risk breaking things.
Is 1⁄12 too pokey? Yes, for the military standard M855 bullet and anything longer or heavier. A 1⁄12 twist will throw a 62 grain M855 bullet sideways through a target at 25 yards. However, I have shot the Winchester 63-grain softpoint very accurately in 1⁄12-twist rate barrels. How? Simple. The M855 has a steel tip inside the core. This makes it longer than the blunt, round-nose, 63-grain softpoint from Winchester. The Winchester bullet is short enough that it can be stabilized (probably just barely) in a 1⁄12 barrel. I had a 1⁄12 pencil-barrel-equipped upper that shot those bullets into one hole at 100 yards. Well, at least until I wore it out.
So that means you use 55 FMJ and similarly weighted bullets in a 1⁄12 barrel, and anything heavier in a 1⁄7 barrel. That leaves the compromise, the 1.9. What’s up with that?
The slam against the 1⁄9 barrel is that it isn’t mil-spec. But it can be accurate. Mathematically, a 1⁄9 barrel, firing the now standard heavyweight bullet of 75 or 77 grains, has the same stability as a 55 grain FMJ in a 1⁄12 barrel. Most of the shooters who pony up the money for the premium ammo (the 75 & 77 grains loads do not come cheap) would not go slumming with a 1⁄9 barrel. Their loss.
You’ll see barrels listed as 1⁄8. Those are usually premium match barrels, meant for a steady diet of nothing but 75-, 77- and even 80-grain bullets. Match shooters want X-ring accuracy out to 600 yards or more and will pay for a hand-lapped barrel. Those who are hurling even heavier bullets — 90 and 100 grains in the .223/5.56 — will opt for a 1⁄6.5 barrel.
The catch here is case capacity. Heavy bullets like that are so long that if you loaded them so they would fit into the magazine, they would crowd out the powder you need to make velocity. So match shooters load them long — as long as they can, and still have the case neck hold the bullet properly. That requires them to load rounds one at a time, directly into the chamber.
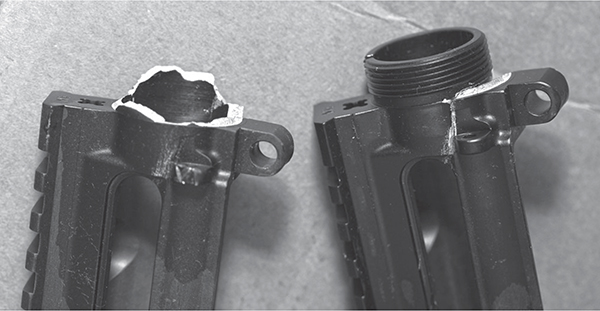
Broken receivers. This is why the Reaction Rod was invented.
This is not a problem, because of the shooting times in matches. You see, while the timed and rapid fire segments of High Power competition call for 10 shots in 60 seconds, the long-range portion calls for a maximum rate of one shot per minute.
For each shot, the target is pulled down, the location marked and the target raised. The shooter notes the location of the hit, the target is pulled down, the hole pasted and then sent back up again. Repeat for the number of shots the scoring string calls for.
Unless you are heading off to shoot in NRA High Power, or off to Camp Perry, your choices are simple: a 1⁄12 for vanilla-plain 55 FMJ blasting, a 1⁄9 if you want to use heavier hunting bullets and a 1⁄7 for the heaviest bullets that will feed from a magazine. Beyond that, consult with the winning shooters in your club for advice on long-range target shooting.