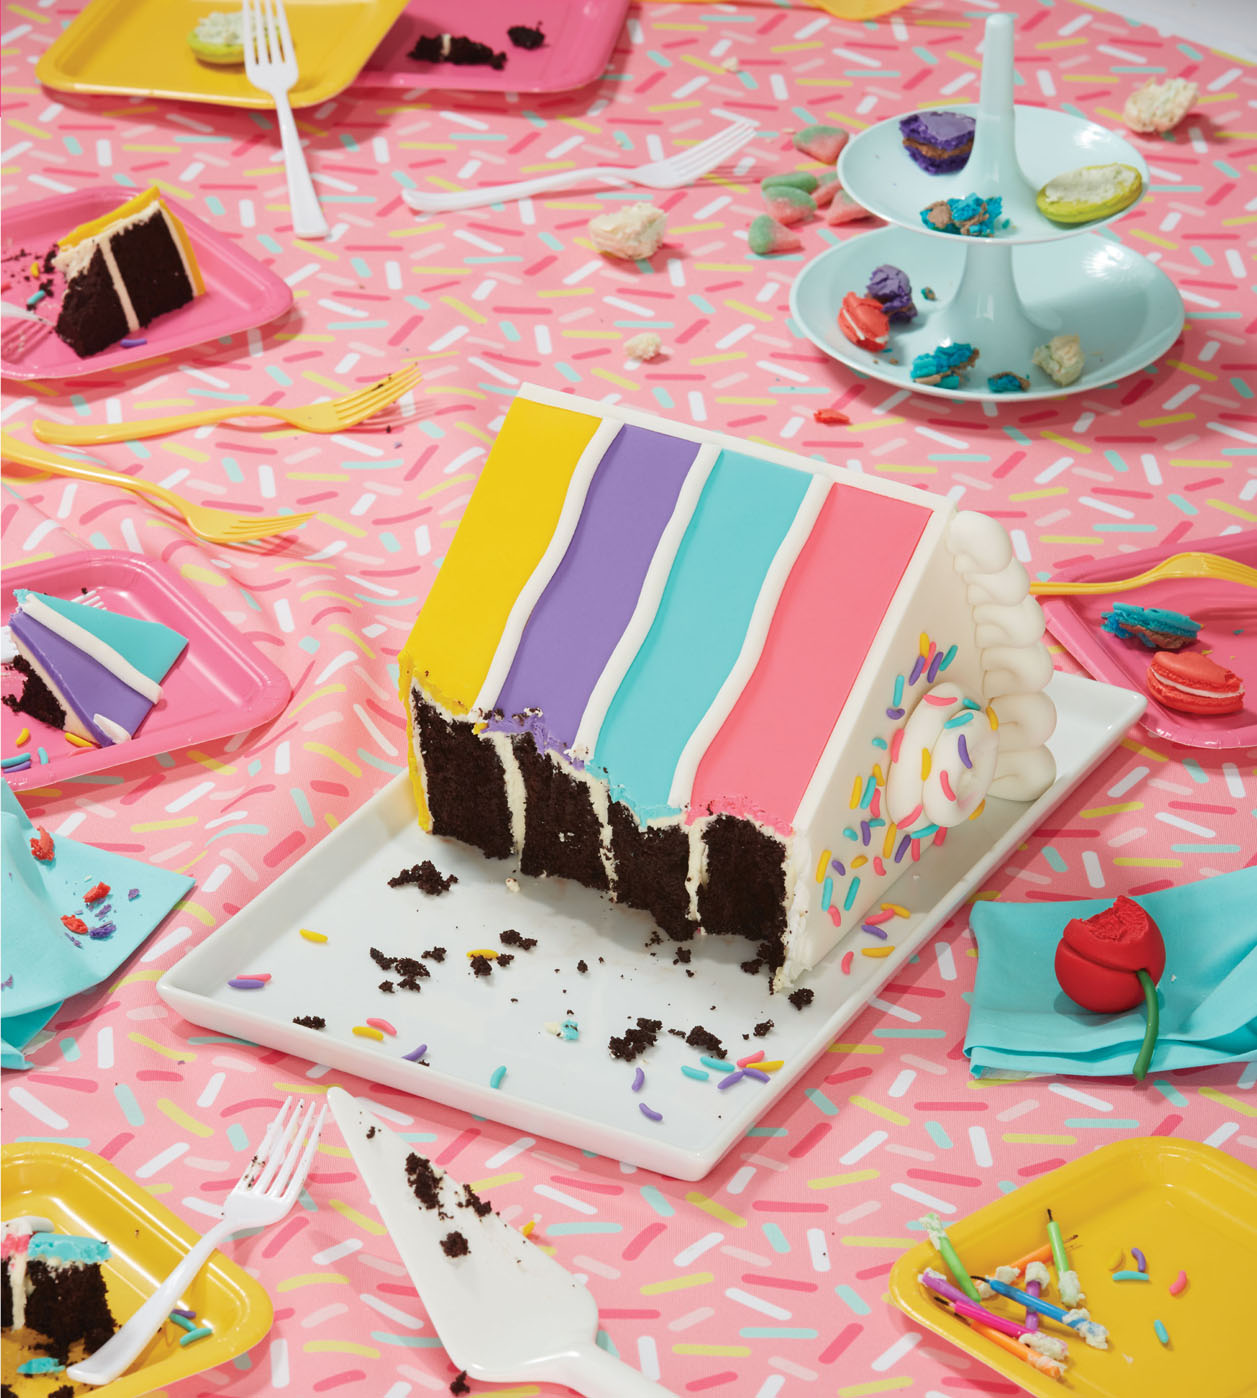
We all know that there are many different kinds of cake slices: the “just a taste” slice, the “it’s my birthday” slice, the “broken-hearted so I’m going to need half the cake” slice, just to name a few. Well, I’d like to call this a Yo-sized cake slice (a.k.a. the whole cake)! And I can pretty much guarantee that if you bring this to a party, you’ll have a slice.
Great for any type of occasion, this cake puts a sweet spin on my “Cake of Cakes” YouTube video, where I created a towering tiered cake of a cake stacked on top of a cake, stacked on top of a cake. And the top tier was, you guessed it, a slice of cake—with a cupcake on top. But this time, we’re going BIG with a giant cake slice that’s perfect for decorators looking to hone their fondant skills. With this cake you’ll also get a crash course in measuring, which really comes in handy for the next level of cakes.
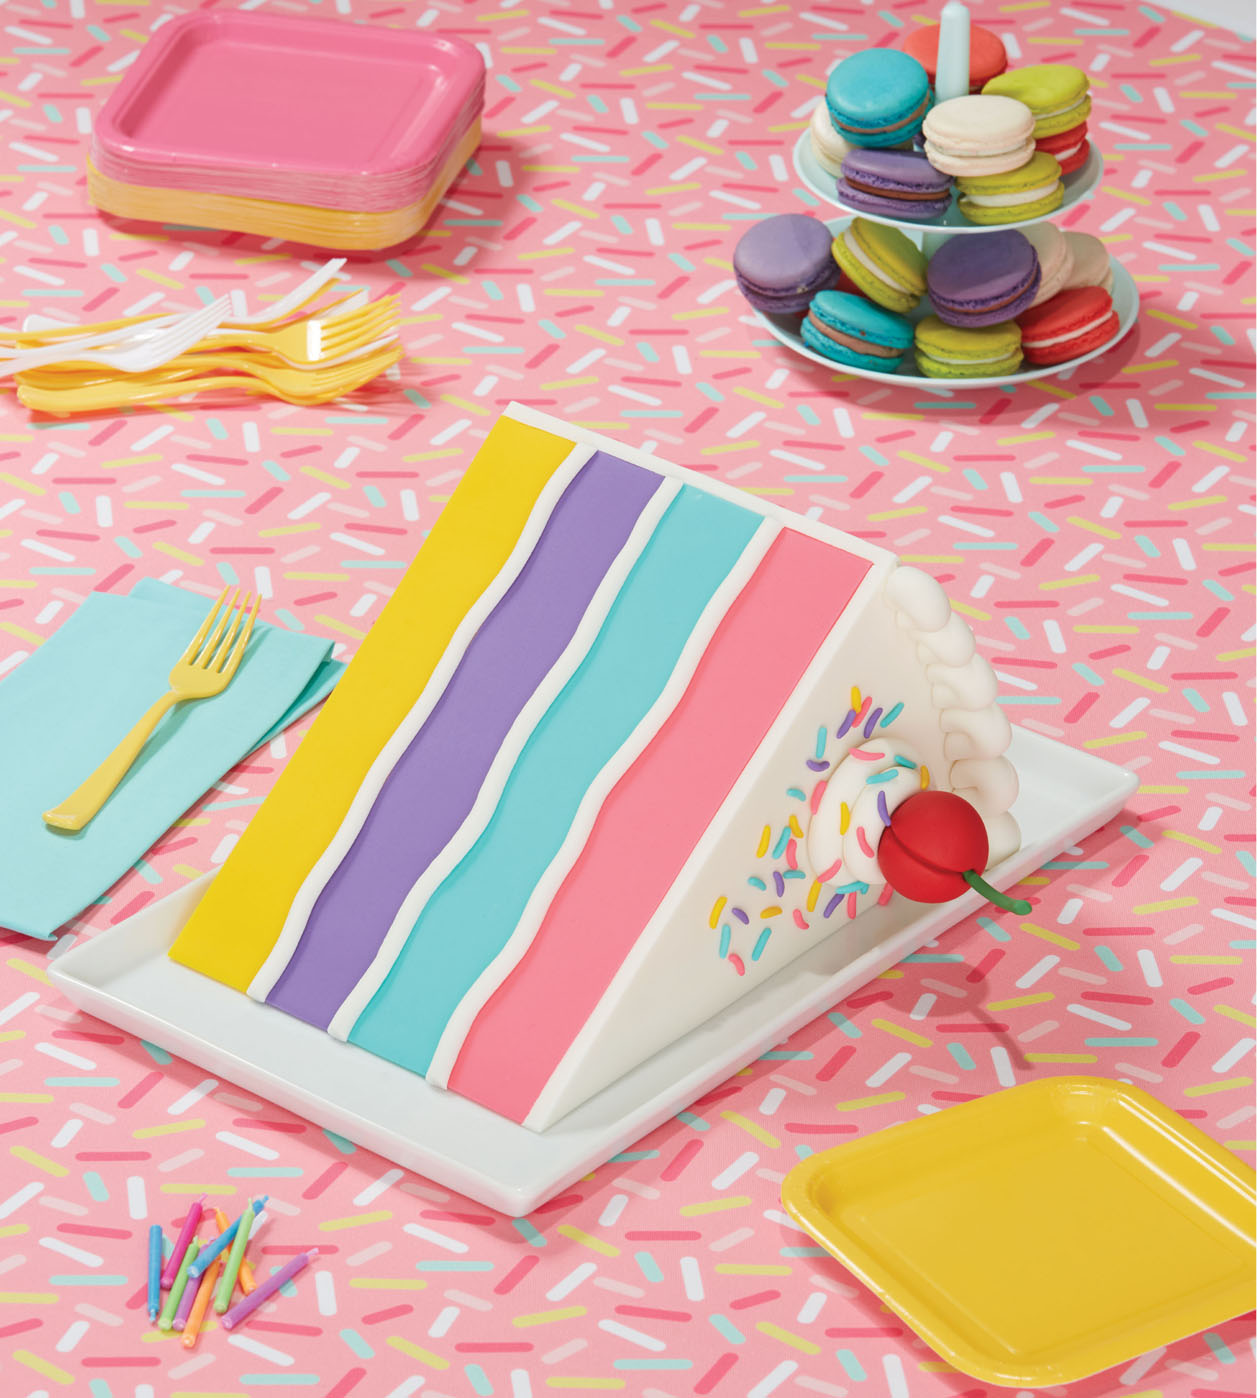
The fun of this cake is definitely in its jumbo size and bright party colors. And the oversized cherry on top is literally the cherry on top!
SERVES 10 TO 12
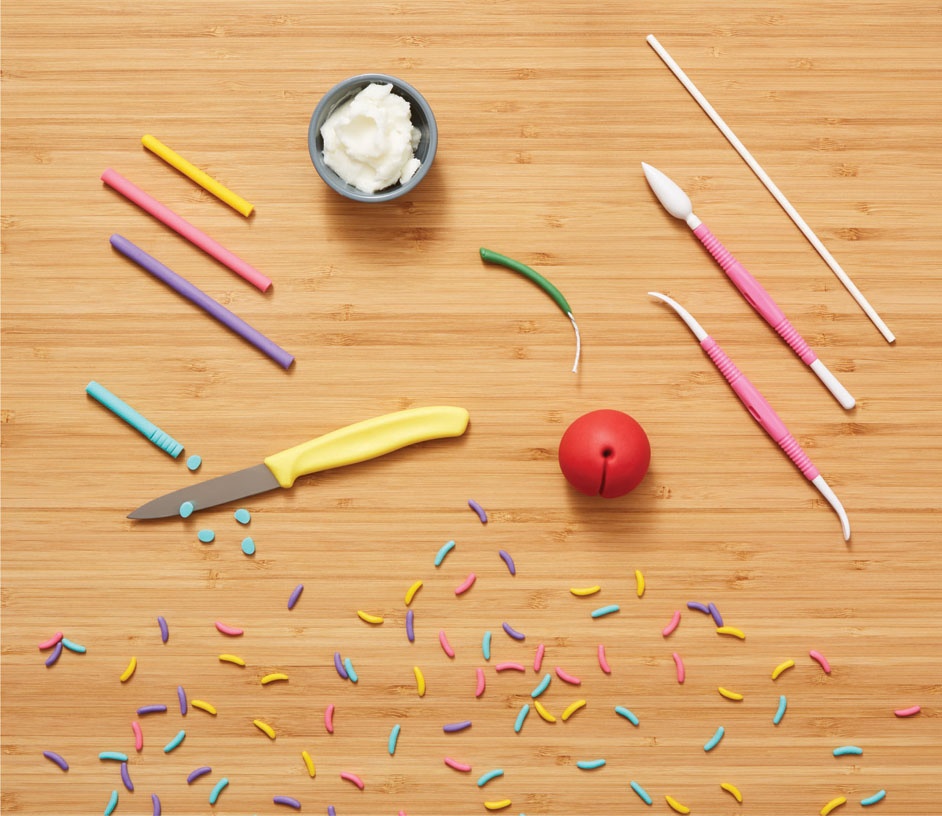
Tools
11 × 15-inch cake pan
Sir Squeeze-A-Lot bottle (see here)
Pointed sculpting tool (cel stick)
Lollipop stick
18-gauge floral wire (for the cherry stem)
Nonstick mat or board
Small nonstick rolling pin
Paintbrush
Serrated knife
Ruler
16-inch square cake drum
Spatulas: small offset and medium straight
Fondant smoother
Clay extruder with half-moon faceplate
Ingredients
1½ recipes Yo’s Ultimate Chocolate Cake batter
1 recipe Yo’s Italian Meringue Buttercream
1 recipe Yo’s Simple Syrup
¾ pound yellow fondant
½ pound pink fondant
¼ pound purple fondant
3 pounds white fondant
Gel food colorings: turquoise, red, and leaf green
2 ounces gum paste
Confectioner’s sugar for rolling fondant
Clear piping gel
Vegetable shortening
Day 1: Prep It
1 Preheat the oven to 350°F. Line the bottom of an 11 × 15-inch cake pan with parchment paper (see “How to Bake a Cake”).
2 Prepare the cake batter according to the recipe. Pour the batter into the prepared pan. Bake for 50 minutes, or until a toothpick inserted in the center comes out clean, rotating the pan halfway through. Transfer to a wire rack and let cool completely in the pan. Cover tightly with plastic wrap and refrigerate overnight.
3 Prepare the buttercream according to the recipe. Cover the bowl tightly with plastic wrap and refrigerate overnight.
4 Prepare the simple syrup according to the recipe. Let cool to room temperature. Pour into your Sir Squeeze-A-Lot bottle and refrigerate.
5 Now it’s time to color the fondant. The yellow and pink fondants come precolored, so no prep there!
To lighten the purple fondant, mix the purple fondant with ¼ pound of the white fondant and knead to combine thoroughly.
To make teal fondant, mix ½ pound of the white fondant with turquoise food coloring and knead until evenly colored.
Wrap each ball of fondant individually in plastic wrap and set aside in a cool, dry place.
6 Make the cherry: Dye 1½ ounces of the gum paste red by adding red food coloring until it’s the color of a cherry. Dye the rest of the gum paste using leaf green food coloring; set the green aside for now.
7 Roll the red gum paste into a ball (like an oversize cherry) and use the back of a knife to mark the indent line in the cherry, from the center of the top to the center of the bottom. Then use a pointed sculpting tool to make an indent where the stem will go. Using a lollipop stick, poke a hole halfway up through the bottom of the cherry. (Later you’ll use the lollipop stick to affix the cherry to the cake.) Set aside to dry overnight.
8 Make the cherry stem: Cut a 3-inch length of floral wire to match the size of your cherry. On a nonstick mat or board, using a nonstick rolling pin, roll out a small piece of the green gum paste into a cord about an inch long and thicker than the wire. Brush a bit of piping gel onto the wire and push the wire up through the gum paste cord, twisting the wire while you insert it into the gum paste. Continue to roll and shape it a little in your hand to look like a stem. Trim away the bottom ½ inch or so of the gum paste to leave some wire exposed to fit into the cherry later on. Set aside to dry overnight.
9 Make the sprinkles: Roll ½ ounce of each of the colored fondants into thin cords. Cut the cords into even lengths with a paring knife, then use your index finger to roll each piece thinner. Let them curve slightly so the sprinkles look more realistic. Set aside to dry overnight.
Day 2: Cake It
1 Remove the buttercream from the fridge and let it come to room temperature. This may take a few hours.
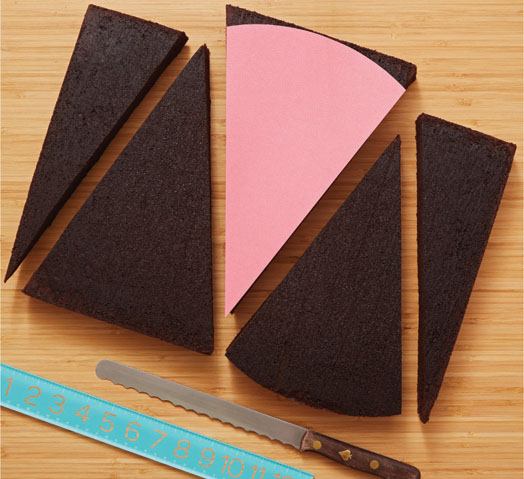
2 Remove the cake from the pan and peel off the parchment. Set the cake right side up, and level it using a serrated knife and ruler (see here).
3 Cut an M shape into the cake (as pictured in the photo) to make three large triangles and two half-triangles. Put together the two half-triangles to make a fourth triangle. Round out the shortest side of each triangle so it looks like it’s been cut from a round cake. You may want to create a simple paper template to make sure all the pieces are the same shape.
4 Lay out the four wedges on a clean work surface and shower them with simple syrup. Let the syrup soak in fully before continuing.
5 Ice the top of three of the wedges with the buttercream. On a 16-inch square cake drum, set each wedge on its long side and sandwich all four wedges together, making sure they align. If the curved ends are uneven, trim them with the serrated knife.
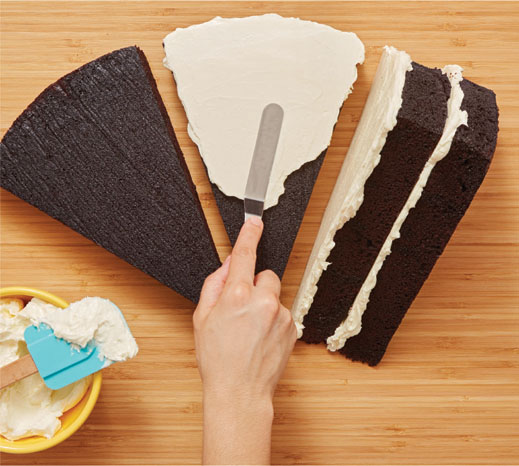
6 Use a small offset spatula to crumb coat the cake with the buttercream (see here). Transfer to the fridge to chill for 20 to 30 minutes, until the crumb coat is firm to the touch.
7 Using a medium straight spatula, apply another layer of buttercream over the crumb coat, trying to get it as smooth as possible. Return it to the fridge for another 20 to 30 minutes, until the buttercream is firm to the touch.
8 Time for fondant! Measure one triangle side of the cake. On a nonstick mat or board, using a nonstick rolling pin and confectioners’ sugar, roll out a piece of fondant the color you want for your bottom layer (I used yellow) that is large enough to cover that area. Cut one side of the rolled fondant into a straight line and press it against the cake with the straight edge flush against the cake drum. Trim away the excess with a sharp paring knife.
9 Create fondant cake layers: Measure the length and width of the top of your cake (the part that’s meant to look like the side of the cake slice). Each band of fondant should be a bit longer than the top of your cake; divide the width of the cake by 4 to determine how wide each band should be. Roll out each of the four fondant colors and trim them to the width you determined.
10 Arrange the bands on the cake surface and smooth them with a fondant smoother. Trim any excess with a paring knife.
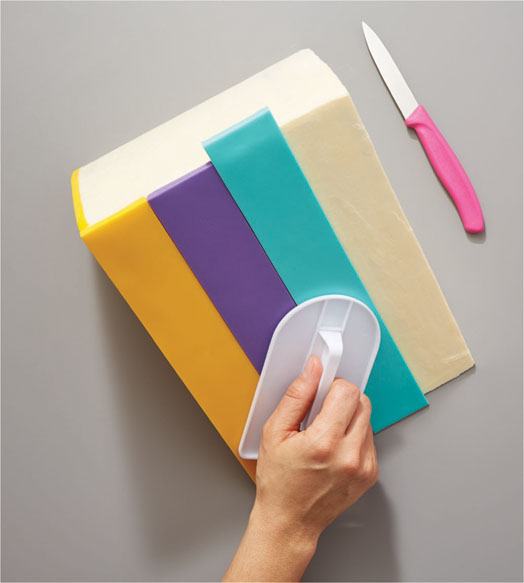
It’s important to measure the bands carefully before you put them on the cake, because peeling them off and resizing them can get messy.
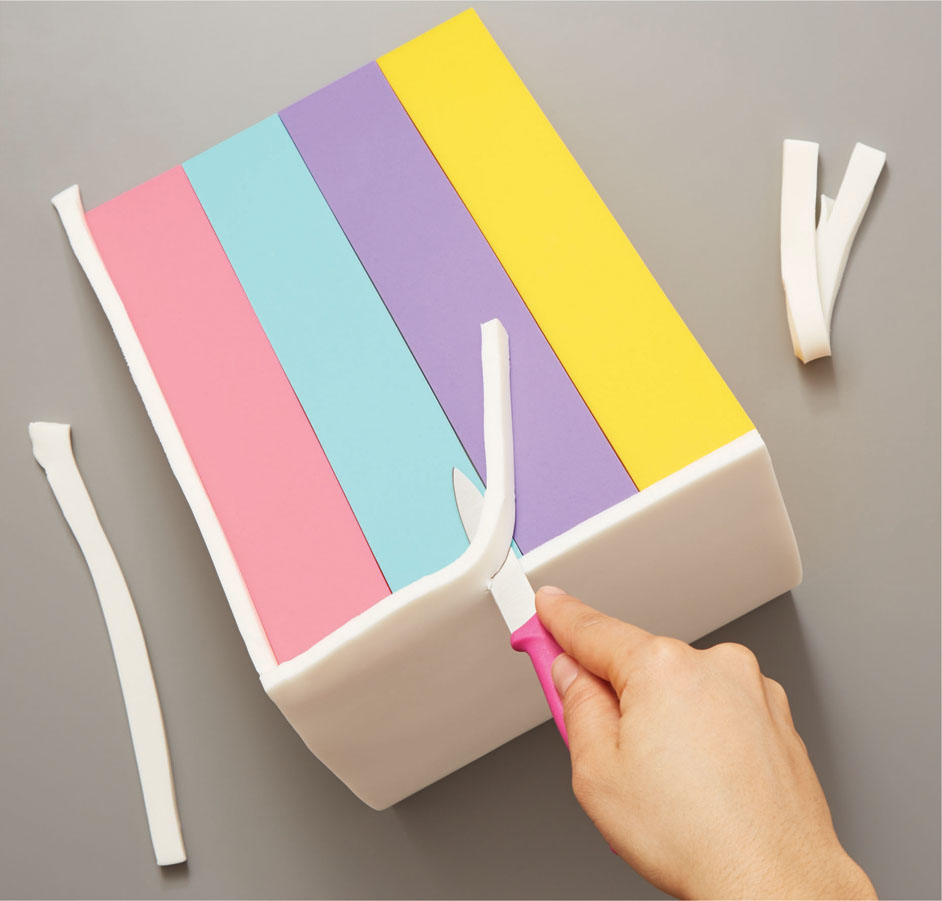
11 Cover the rest of the cake: Roll out white fondant until ¼ inch thick, measure and cut panels slightly larger than needed, apply them to the cake, and trim away any excess. When trimming the sides, make sure the slice is facing away from you as you’re cutting so your hand doesn’t brush against the colored fondant. Hold the blade of the knife flat on the cake and level with the angle of the cake slice.
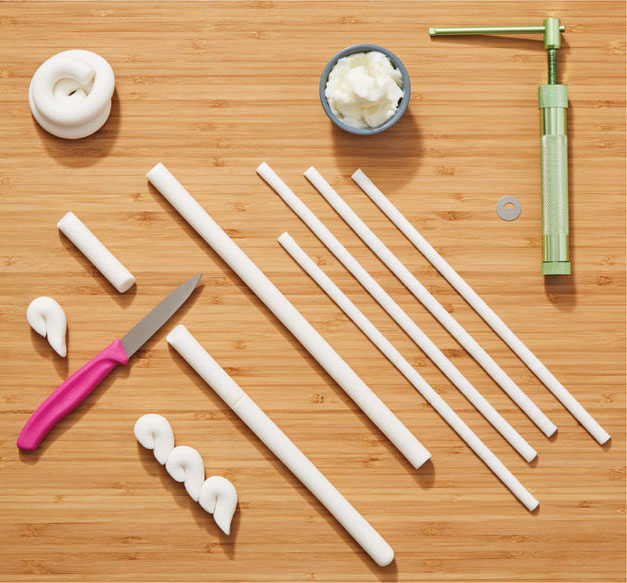
12 Make the “filling”: Mix the white fondant with a little shortening to soften it, then roll some of the fondant into four cords. Push each cord through a clay extruder using the half-moon faceplate. (You will only need three cords, but it’s good to have an extra on hand in case one doesn’t work out quite right.)
13 Brush a little piping gel where the colored fondant bands meet on the side, then attach the cords, creating a slight wave in each one to give them a more realistic look.
14 Make the swirl of “icing”: Roll some of the white fondant into a cord that’s ½ inch thick and 20 inches long, then coil it up on itself. Apply to the cake using piping gel.
15 Make fondant “piping”: Roll out another ½-inch-thick cord of white fondant, then cut it into 2½-inch pieces. Curl one end of each piece under to create a “wave” effect, then shape the trailing end of each wave on a slight angle to allow the next “wave” to sit snugly against it. Apply to the cake using piping gel.
16 Gently push the cherry stem into the gum paste cherry, then attach the whole cherry to the fondant icing swirl using the lollipop stick. Finally, attach sprinkles by dabbing a small amount of piping gel on each. Place sprinkles wherever you like—have fun with it!