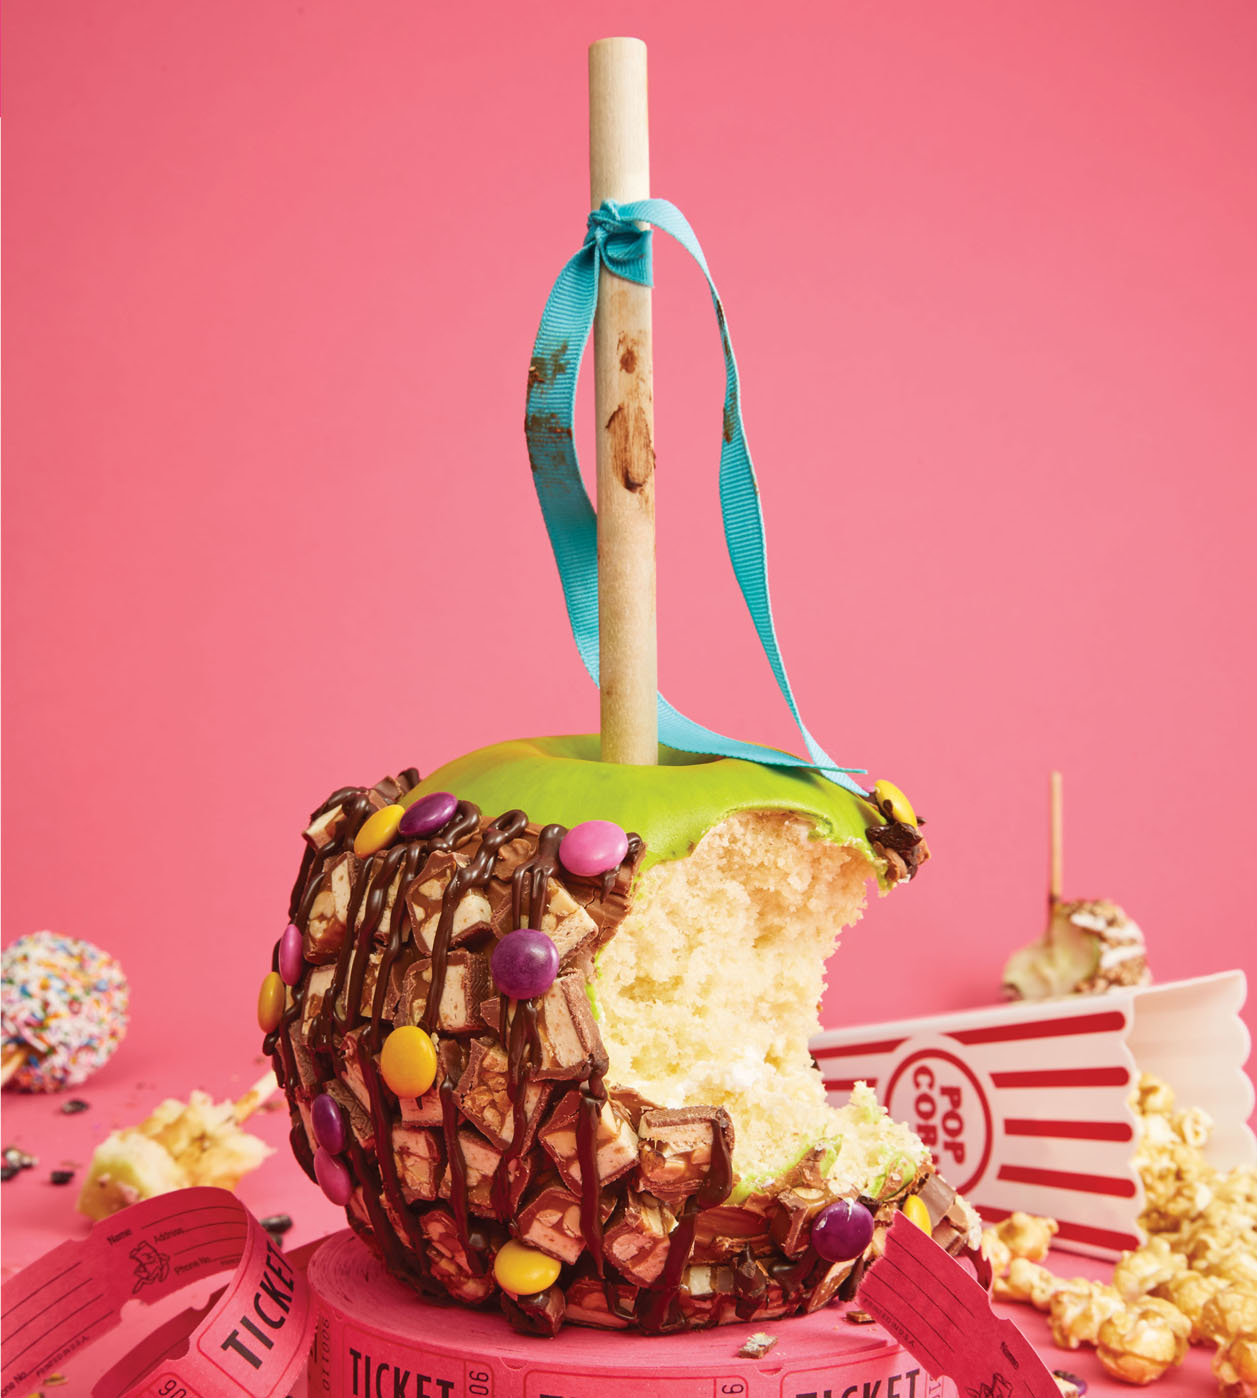

Whenever I walk by a display of candy apples, I always stop to look—there’s just something about the colors and textures that catches my attention. So I thought it would be fun to show you how to cake a jumbo one. What I love most about this cake is that there’s so much room to get creative with it. You can dress it up for a theme or a season by adding a different colored ribbon or bows to the stick, just like real candy apples. Or, if you’re giving it as a gift, you can decorate it with the recipient’s favorite colors and candies.
Most of my novelty cakes are covered in fondant, but I love how with this cake, in addition to fondant that makes it look like a real apple, we use chocolate and candy to enhance the outside to make it look like the real thing—and to add a ton of yummy flavor. And the other thing that makes it the apple of my eye? It’s still a pretty easy design to cake—so it will help you improve your carving skills. In fact, the hardest part about making this cake is trying not to eat all the toppings before you’re done.
SERVES 6 TO 8
Tools
6-inch sphere cake pan (both halves)
Sir Squeeze-A-Lot bottle (see here)
Serrated knives (large and small)
10-inch round cake drum
Small offset spatula
Rolling pins: wooden and French
Straight pin
Small paintbrush
Parchment piping bags
½-inch-wide × 12-inch-long wooden cake dowel, sharpened at one end
Ribbon
Ingredients
1 recipe Yo’s Ultimate Vanilla Cake batter
½ recipe Yo’s Italian Meringue Buttercream
½ recipe Yo’s Simple Syrup
1 pound white fondant
Gel food colorings: avocado, electric green, crimson, white, and yellow
Confectioners’ sugar for rolling fondant
Clear food-grade alcohol
For the toppings
7 candy bars
2 ounces dark cocoa compound chocolate
½ cup candy-coated chocolates (such as M&M’s)
For the “caramel”
4 ounces light milk compound chocolate
4 ounces orange compound chocolate
2 teaspoons vegetable oil
Gel food colorings: yellow and orange
Day 1: Prep It
1 Preheat the oven to 350°F. Line the pans with parchment paper (see “How to Bake a Cake”). Set the pans on baking rings or smaller cake pans set on top of a baking sheet to keep them upright.
2 Prepare the cake batter according to the recipe. Scrape the batter into the prepared pans and spread so that it is smooth in the pans. Bake for 1 hour, or until a toothpick inserted in the center comes out clean, rotating the pans halfway through. Transfer to a wire rack and let cool completely in the pans. Cover tightly with plastic wrap and refrigerate overnight.
3 Prepare the buttercream according to the recipe. Cover the bowl tightly with plastic wrap and refrigerate.
4 Prepare the simple syrup according to the recipe. Let cool to room temperature. Pour into your Sir Squeeze-A-Lot bottle and refrigerate.
5 Dye the fondant a green apple hue: Knead avocado, electric green, and a tiny dot of crimson food coloring into the white fondant (see here) to make a green apple color—you want to use just enough crimson to dull the green slightly but not turn the fondant brown. Wrap the fondant tightly in plastic wrap and set aside in a cool, dry place.
Put the sphere pans on a baking sheet to catch any possible spillover as the cake batter rises in the oven. Candy apple cakes are fun, but cleaning the oven is not!
Food coloring is very bright, so natural colors like that of a green apple can be hard to recreate. Here’s my trick to tone down the brightness: add a touch of coloring that contrasts the main color you’re working with. For example, adding a bit of red tones down green.
Day 2: Cake It
1 Remove the buttercream from the fridge and let it come to room temperature. This may take a few hours.
2 With the cakes still in their pans, use a serrated knife to level them, using the cake pan rim as a guide.
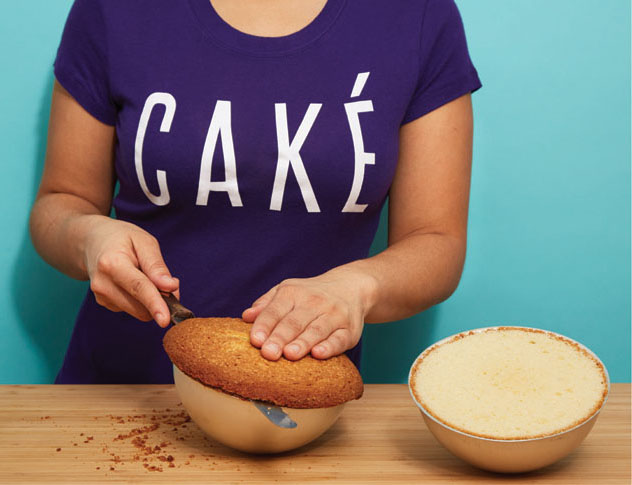
3 Remove the cakes from their pans and peel off the parchment. Cut a thin slice off the domed side of one cake (which will become the bottom of the apple) so that the cake doesn’t wobble. Set it on a 10-inch round cake drum. Top with the other cake to form a sphere, then carve the sphere into an apple shape using a small serrated knife. Be sure to carve away all the caramelization. Use a real apple as a model. Take your time when carving. You can always take a little more off, but you can’t stick it back on.
4 Once you’re happy with the shape, pull the halves apart and shower them on all sides with simple syrup. Let the syrup soak in fully before continuing.
5 Sandwich together the top and bottom of your apple with a layer of buttercream.
6 Carve out a little indentation where the stem would be with a small serrated knife.

7 Use a small offset spatula to crumb coat the cake with some of the buttercream (see here). Transfer the cake to the fridge to chill for 20 to 30 minutes, until the crumb coat is firm to the touch.
8 Apply another layer of buttercream over the crumb coat, trying to get it as smooth as possible. Return it to the fridge for 20 to 30 minutes, until the buttercream is firm to the touch.
9 Smooth out any ridges in the buttercream with small a spatula or slightly wet fingertips.
10 Dust the work surface with confectioners’ sugar and, using a wooden rolling pin, roll out the green fondant until  inch thick and large enough to cover your cake. Set a French rolling pin in the center of the fondant and fold one end up over it. Try not to handle the fondant too much. Pick up the pin, then quickly and carefully drape the fondant over the cake.
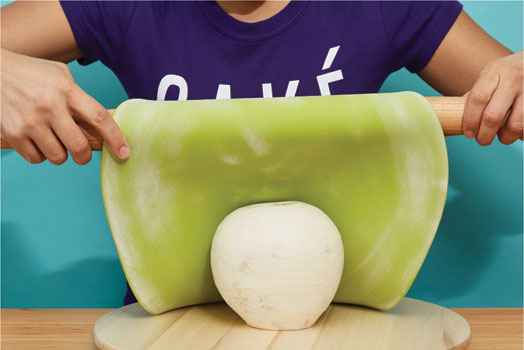
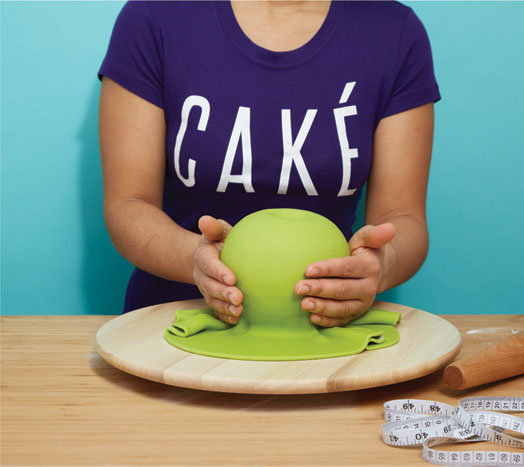
11 Once the fondant is on the cake, smooth it over the curves of the apple with your hands. You’ll notice that some air will get trapped in the top; prick the fondant with a straight pin and gently press out the air. Continue to smooth all the way around, tucking the fondant under the cake and trimming away any excess with a sharp paring knife.
12 In a small bowl, combine a drop each of avocado, white, and yellow food coloring and dilute them with alcohol. If the mixture gets lumpy, strain it through a paper towel or cheesecloth. With a small paintbrush and using downward brush strokes, paint from the top of the apple about halfway down to mimic the look of apple skin—this is a great project for practicing your fondant painting skills.
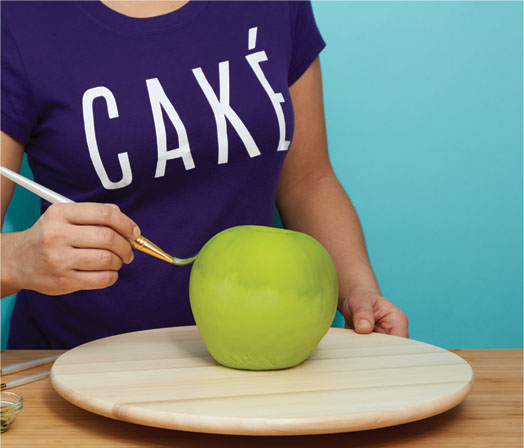
You can test your paint color on any leftover green fondant.
13 Prepare the toppings: Cut the candy bars in half lengthwise and then thinly slice each half crosswise. Make sure your slices are thin, so they won’t fall off the apple.
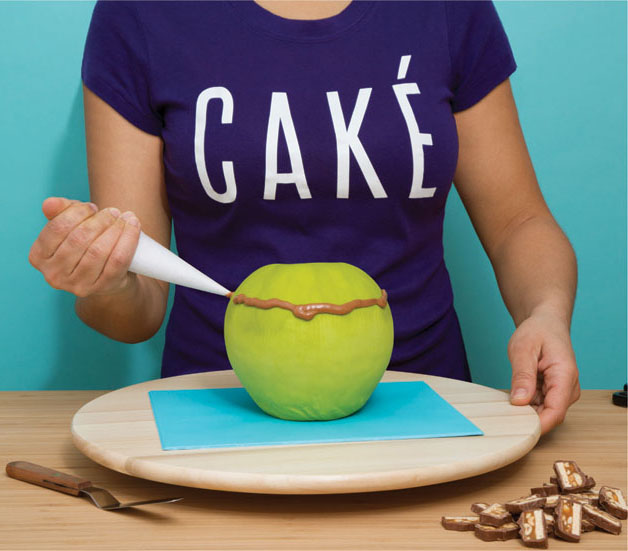
14 Make the “caramel”: In a stainless steel bowl set over a pan of lightly simmering water, melt together the milk and orange compound chocolate, stirring until smooth. Stir in the vegetable oil and yellow and orange food coloring to make a caramel color, then pour into a parchment piping bag.
15 Cut open the tip of the piping bag and pipe a line of the “caramel” around the cake about two-thirds of the way up the side (don’t hide too much of your pretty green!). As you pipe, use a small offset spatula to spread the mixture smoothly down to the bottom of the apple, so it looks like it is covered in caramel.
16 Now it’s time to place the candy-bar pieces on the apple. Working quickly before the mixture hardens, pipe a dot of the “caramel” on each slice of candy bar and stick it to the cake.
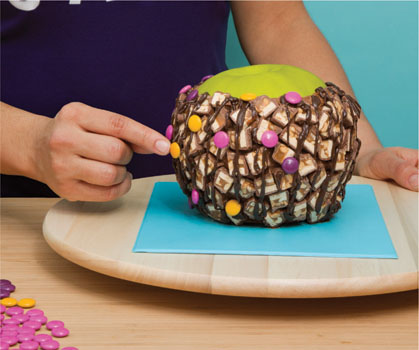
17 In a stainless steel bowl set over a pan of lightly simmering water, melt the dark compound chocolate, stirring until smooth, then pour into a parchment piping bag. Cut open the tip, drizzle the mixture over the cake, and stick on the candy-coated chocolates.
18 Press the sharp end of the dowel into the indentation in the top of the cake. Tie a pretty ribbon on the end as a final touch!