
In my early caking days, I ran a small custom cake business where this cake was a popular choice for birthdays, bat/bar mitzvahs, and other occasions. I love this cake because it’s so versatile and fun to personalize. You can completely customize the wrapper for the person you’re making it for by incorporating their name, preferred colors, and even their age or birthdate as the chocolate’s weight.
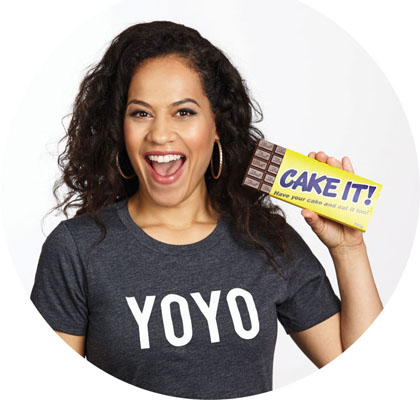
For this cake, we had so much fun creating our own original Cake It bar, and worked with my best friend, Bianca, who is a graphic designer, to design the wrapper. If you want to recreate the wrapper of your favorite candy bar, print out an enlarged version of the logo and use it as a template. The designing doesn’t stop at the wrapper, though—you can customize the imprint on the bar itself, creating lines or patterns or imprinting the bar’s name onto it. Another way to tailor this cake is to replace the wafer cookie layer inside with a favorite chocolate bar. So if you like creating personal touches like I do, and are looking to serve up a real crowd-pleaser at your next celebration, you’ll definitely want to sink your teeth into this one!
SERVES 20 TO 24
Tools
9 × 13-inch cake pan (3 inches deep)
Sir Squeeze-A-Lot bottle (see here)
Nonstick mat or board
Rolling pins: small nonstick, wooden, and French
A few sheets of paper
Serrated knife
Ruler and fabric measuring tape
14 × 19-inch cake drum
Small offset spatula
Fondant smoother
Ball sculpting tool or letter cutters
Veining sculpting tool
Paintbrushes
Paper logo template
X-Acto knife
#9 round piping tip
2½-inch circle cutter (optional)
Ingredients
1½ recipes Yo’s Ultimate Chocolate Cake batter
2 recipes Yo’s Dark Chocolate Ganache
1 recipe Yo’s Chocolate Swiss Meringue Buttercream
1 recipe Yo’s Simple Syrup
8 ounces gum paste
1 pound white fondant
3 ounces black fondant
About 48 sugar wafer cookies (you’ll need about two 14-ounce packs)
Confectioners’ sugar for rolling fondant
1 pound chocolate fondant
Corn starch
Silver luster dust
Clear food-grade alcohol
2 pounds yellow fondant
4 ounces purple fondant
Clear piping gel
Day 1: Prep It
1 Preheat the oven to 350°F. Line the bottom of a 9 × 13-inch cake pan with parchment paper (see “How to Bake a Cake”).
2 Prepare the cake batter according to the recipe. Pour the batter into the prepared pan. Bake for 1 hour 10 minutes, or until a toothpick inserted in the center comes out clean, rotating the pan halfway through. Transfer to a wire rack and let cool completely in the pan. Cover tightly with plastic wrap and refrigerate overnight.
3 Prepare the ganache according to the recipe. Let cool completely at room temperature, then cover and set aside overnight.
4 Prepare the buttercream according to the recipe. Cover the bowl tightly with plastic wrap and refrigerate.
5 Prepare the simple syrup according to the recipe. Let cool to room temperature. Pour into your Sir Squeeze-A-Lot bottle and refrigerate.
6 For the foil wrapper, make 50/50: Knead together the gum paste, 8 ounces white fondant, and ½ ounce black fondant. This mixture, called “50/50,” is stronger than fondant and not as quick to dry out as gum paste. Divide into two pieces.
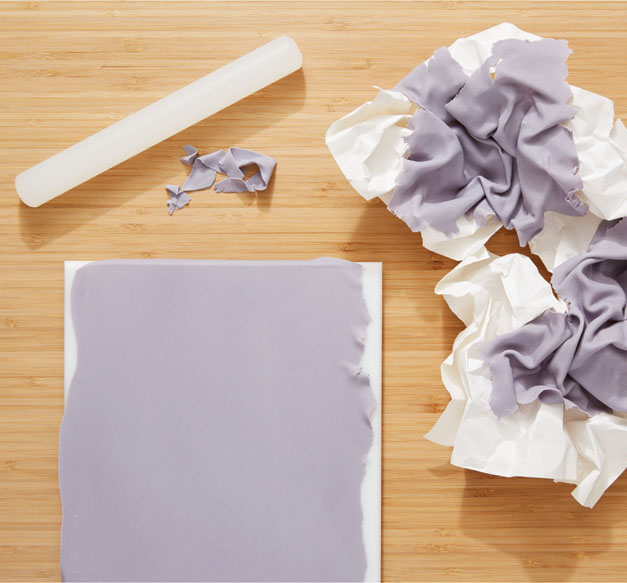
7 Divide one piece of the 50/50 into three to five smaller pieces. On a nonstick mat or board, using a small nonstick rolling pin, roll out no more than half of the 50/50 as thinly as you can—I’m talking paper thin. This will become the foil that is torn away from the chocolate bar. Rip the sides of the rolled-out 50/50; don’t cut it with a knife, but use your hands so the ends look torn. Crumple up a few sheets of paper and drape the ripped pieces of 50/50 over the crumpled paper. Set aside to dry overnight. Tightly wrap the remaining 50/50 in plastic wrap and set aside.
Day 2: Cake It
1 Remove the buttercream from the fridge and let it come to room temperature. This may take a few hours.
2 Remove the cake from the pan and peel off the parchment. Set the cake right side up, and level it using a serrated knife and ruler (see here). Save the hump, because you will use it later.
3 Use the serrated knife to trim 2 inches off one long side of the cake to make a 7 × 13-inch rectangle. Cut that rectangle in half horizontally to make two 7 × 13-inch layers.
4 Level the reserved cake hump to the same height as one of the 7 × 13-inch cake layers. From the leveled hump, cut a 7 × 8-inch rectangle (and snack on the trimmings!). Cut that rectangle in half to make two 7 × 4-inch rectangles. Stack these two rectangles on top of each other and set the stack beside the short end of the 7 × 13-inch layered cake so that you have a 7 × 17-inch slab.
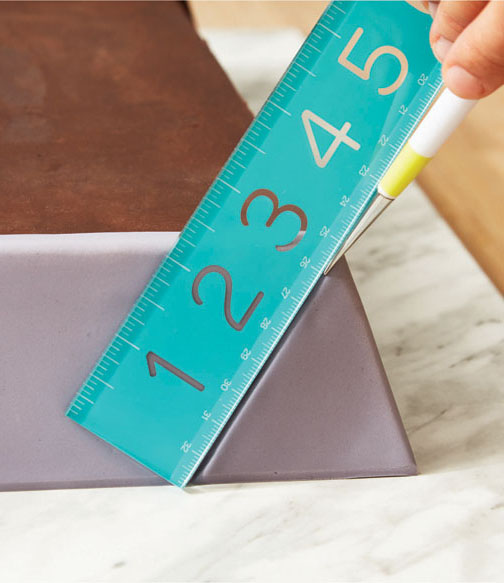
5 Mark ½ inch in from the top edge on all four sides, then cut on a slant from the ½-inch mark down to the bottom outer edge on all four sides to create tapered edges.
6 Lay out all the cake pieces on a clean work surface and shower them with simple syrup. Let the syrup soak in fully before continuing.
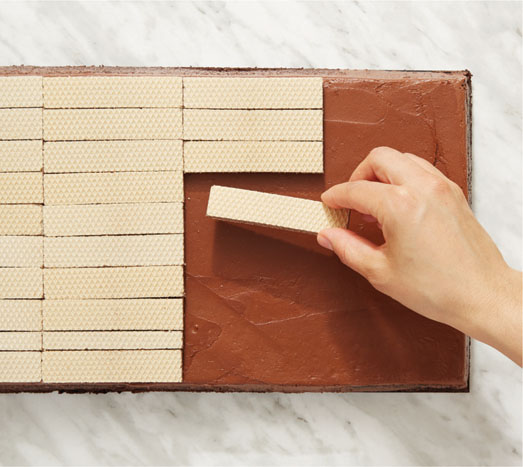
7 Arrange the bottom cake layers (large rectangle plus a small rectangle on the end) on a cake drum. Using a small offset spatula, spread some buttercream on the bottom layer. Cover the entire surface with wafer cookies, lining them up in rows with no space between them and trimming cookies to fit as needed. Spread another layer of buttercream on top of the cookies, then add the top layers of the cake. If needed, trim the angled cuts on the sides of the cake so they line up.
8 Use the offset spatula to crumb coat the cake with some of the ganache (see here). Transfer to the fridge to chill for 20 to 30 minutes, until the ganache is firm to the touch.
9 Using the offset or a straight spatula, apply the remaining ganache over the crumb coat. Return it to the fridge for another 20 to 30 minutes, until the ganache is firm to the touch.
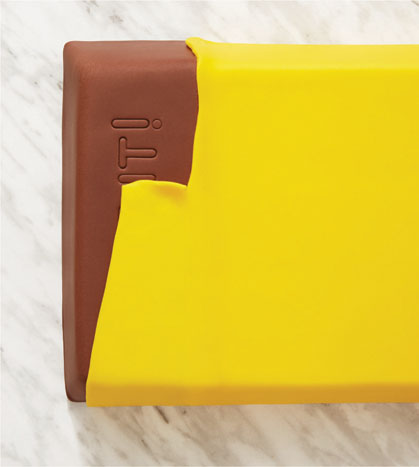
10 Create the end of the chocolate bar: Dust the work surface with confectioners’ sugar and, using a wooden rolling pin, roll out the chocolate fondant until ¼ inch thick and large enough to cover about 3½ inches in from the end of the cake and fully cover the two corners at that end. Set a French rolling pin in the center of the fondant and fold one end up over it. Try not to handle the fondant too much. Pick up the pin, then quickly and carefully drape the fondant over one end of the chocolate bar. Smooth the fondant with a fondant smoother, then trim away any excess fondant from the base with a paring knife. Using a ruler and a knife, cut a clean line in the fondant—this is the edge where the yellow wrapper will meet it later.
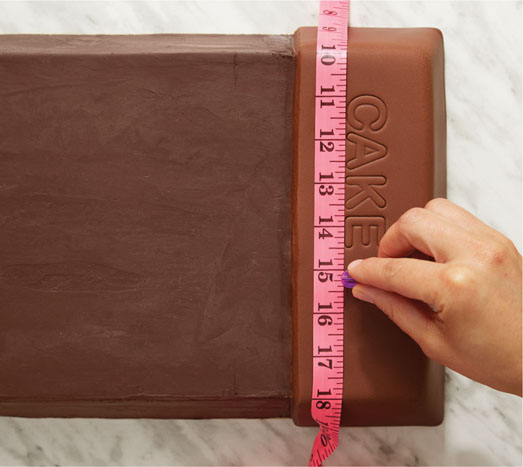
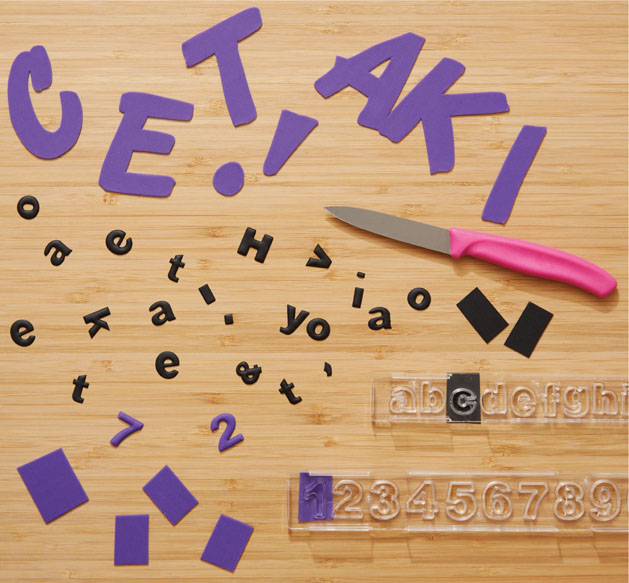
11 Customize the chocolate bar by using letter cutters to imprint the name of the chocolate bar (like I did) or the name of the person you’re making the cake for. Use a measuring tape to help you line up your cutters and make your imprint straight and centered. Dust the letters in corn starch for a clean imprint. You can also create a pattern on your fondant with a sculpting tool or score it with a paring knife.
12 Create the foil end: Roll out the reserved gray 50/50 thinner than ⅛ inch. You’ll be using this to cover ½ inch of the other end of your cake. Drape it over the bare end of the chocolate bar (opposite the chocolate end). Smooth it out with a fondant smoother, then trim away any excess 50/50 with a paring knife. Using the ruler and the paring knife, cut away the gray 50/50 to create a clean line on the top and sides of the cake.
13 To make the folded foil wrapper corners, make a small mark on the bottom edge of the end 2½ inches in from each corner. Using a veining tool and a ruler as a guide, imprint a line diagonally from that mark to the top corner so that it looks like a fold in the foil.
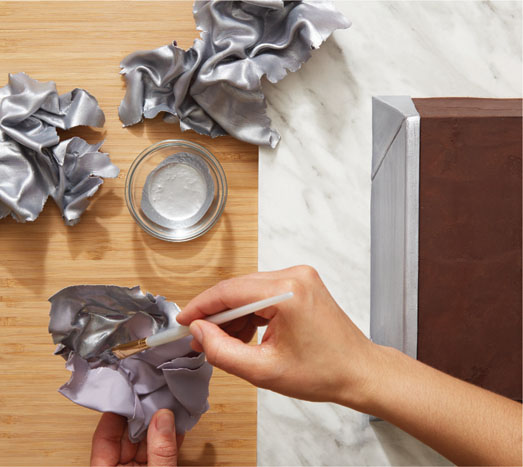
14 In a small bowl, mix silver luster dust with enough clear food-grade alcohol to make a paint-like consistency. Paint the foil on the end of the chocolate bar and all the crumpled pieces of 50/50 with the silver luster paint. When painting the crumpled pieces, be sure to handle them carefully, as they are thin and fragile. If they do happen to break, not to worry: they’ll just look like smaller pieces of the foil wrapper. Set aside to dry.
15 Once the silver paint is fully dry, measure the entire length of the cake (including the foil end and the fondant end) and the width from the base of one side, over the top, and down to the base of the other side. Roll out yellow fondant a little larger than this size and ⅛ inch thick. Cover the cake with it. Trim the two long sides at the base to be flush with the cake drum. Cut a straight line where the yellow fondant meets the foil and remove any excess.
16 Create the torn wrapper: At the chocolate fondant end, cut an uneven edge diagonally across the yellow fondant, being careful not to cut down into the chocolate layer. Slide a piece of paper or a thin piece of cardboard underneath the yellow fondant before you cut so you don’t cut into the chocolate layer, then slip the paper out. Gently fold the yellow fondant back to look like a chocolate bar that’s been unwrapped.
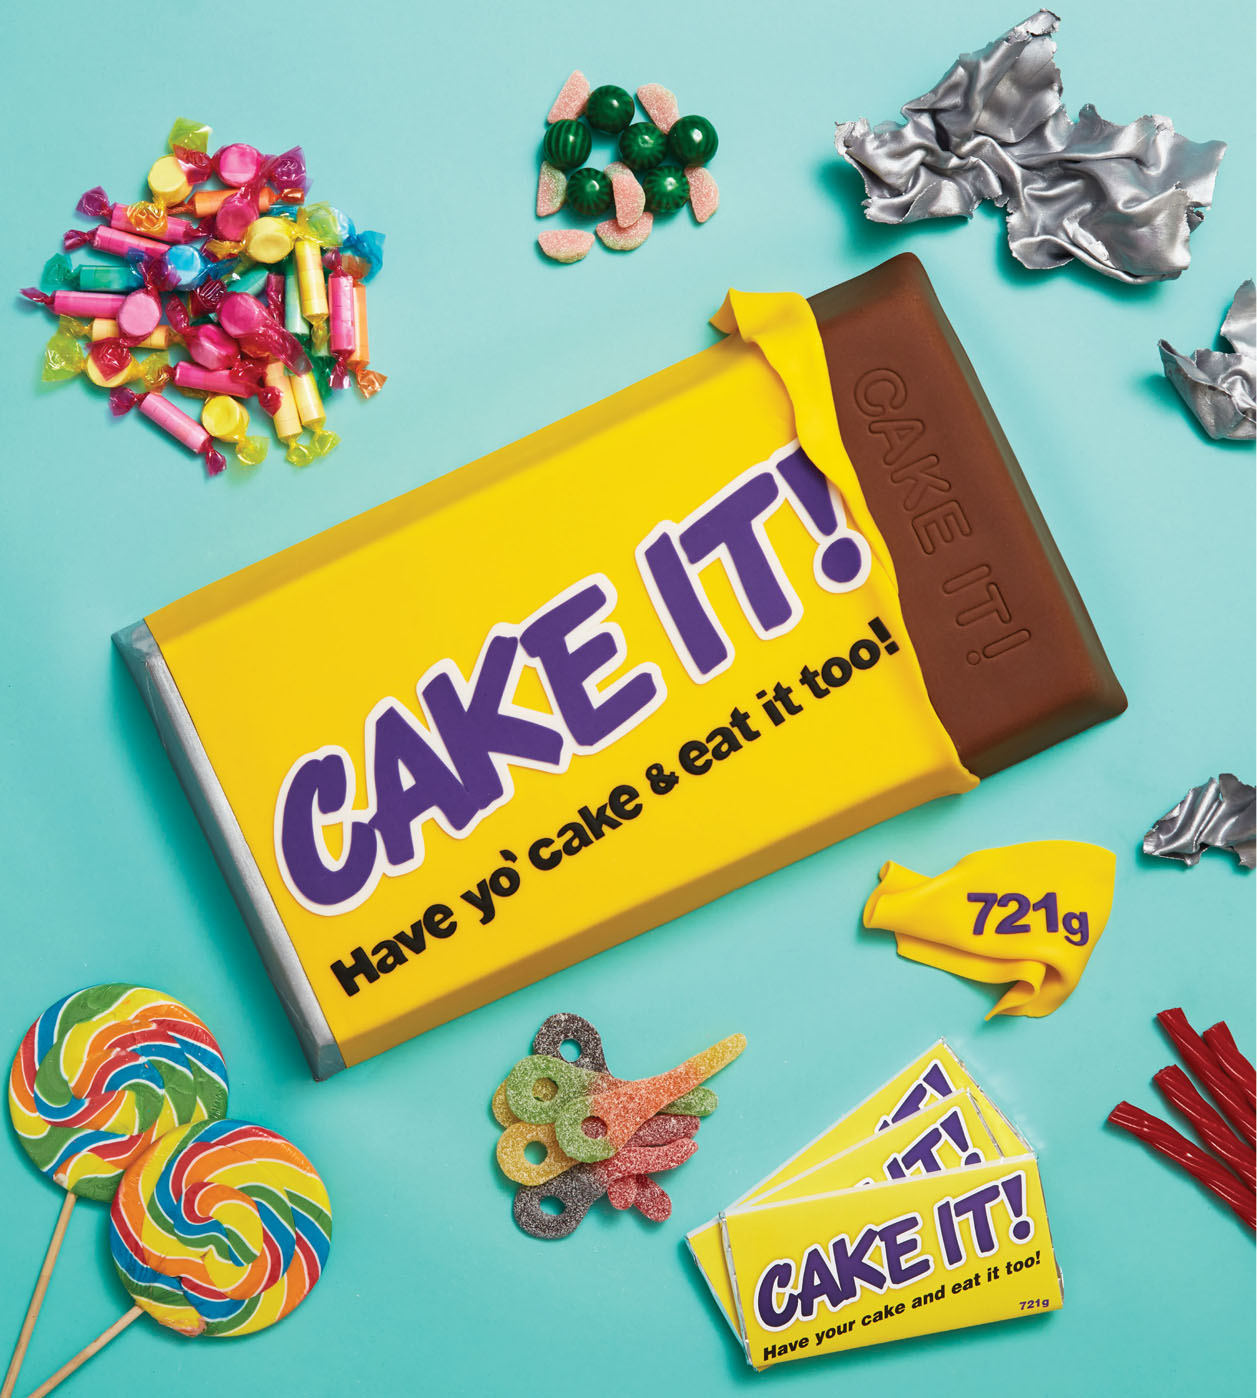
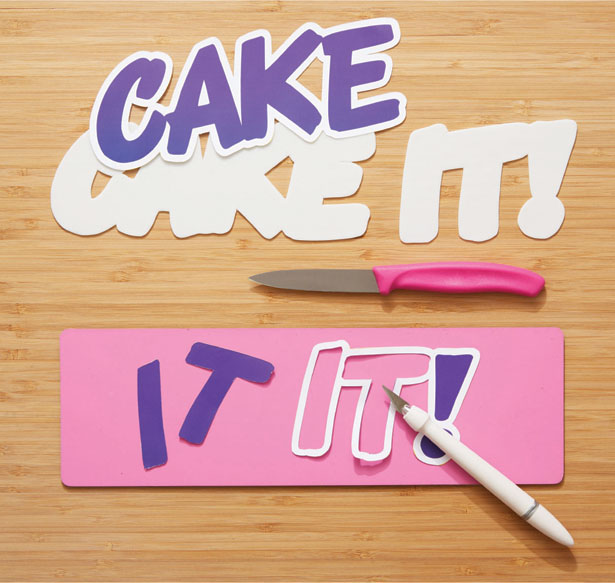
17 Time to have fun with the label! Create a paper template using a font that screams classic candy bar, and use it to cut out letters from purple and white fondant with an X-Acto knife. I recommend doing your lettering in two layers of contrasting colors, one larger than the other, so that the letters will be outlined—this will make the logo really pop.
Now you can have yo’ cake and eat it too!
18 Add black fondant details: I made a slogan that says, “Have yo’ cake & eat it too!” using letter cutters and a #9 round piping tip for the dot on the exclamation point, but you could add “Happy Birthday!” and the chocolate bar “weight” (I sometimes use the person’s age or birth date as the weight if I’m making this as a birthday cake) or whatever personalized message or designs you’d like.
19 Apply all the fondant logo pieces and letters to the cake using piping gel.
20 Style the crumpled foil wrappers around the “torn wrapper” end of the cake for a realistic effect.
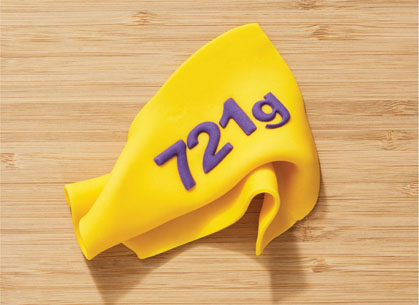
21 Roll out a piece of yellow fondant, and cut a rough triangle that looks like a torn piece of wrapper. Roll out purple fondant very thinly and use letter cutters to cut out the numbers for the candy bar “weight.” (I used my birthday!) Attach them to the torn piece of wrapper with piping gel and artfully crumple the fondant.
You can go one step further and use a circle cutter to create a bite out of the cake to reveal the yummy sugar wafer layer inside.
