Don’t Rely on Friends or Social Networks
Evaluating your results is just as important as planning your shoot. One of the major problems today is that we live in a social world. As a result, we don’t often get objective, professional critiques of our work.
If you shoot a nude image of model and she shows it to her husband or boyfriend, nine out of ten times he will say it’s a great image—even if it’s not. As someone who cares about the model, he’s focused on the subject rather than the photography, lighting, or other technical elements that photographers consider when evaluating the success of an image. It is the same on social networks (those that allow nude photography). When you post an image, people will love it because they love the subject matter, not the lighting or the photography. These reactions don’t provide an accurate assessment of your work or help you grow as an artist.
For objective image assessments, you can’t rely on the model, her significant other, or your own friends. You need professional input.
So where do you find other professional photographers who can look at your work, tell you what you did right, and help you correct what you did wrong?
Photography Boards. One option is the photography boards and networking sites that seem to be growing every day. However, you can encounter a lot of conflicting opinions on these boards. People who shoot glamour feel the image is too dark, while people who shoot landscapes feel the image doesn’t show enough of the environment—and so on and so on.
Professional Photographers. The most successful and useful critiques I have received have come from other professionals who specialize in nude photography. My approach has to been to identify some people whose work I think is really great—I mean the top of the top. Then, I try to find their information and contact them. If you e-mail ten of them, only one or two of them might reply—but just explain that you are looking for help creating better images and would value their feedback. If you keep at it, you will find a person whose work you admire and who is willing to help you.
Portfolio Reviews. Another great resource is Canon Professional Services. At certain events, they offer portfolio reviews that can be very helpful, especially if they have a glamour or nude photographer doing the review. Local camera clubs and photography groups frequently offer similar reviews. Those offer the added potential to meet a fine-art photographer in your area who may be able to review your work.

Evaluate every aspect of your image. Is it what you wanted to create? What could you improve?
Read through the following steps, then try to self-critique some of your images using this approach. You’ll likely find it a valuable exercise—and you’ll probably come up with some ideas for improving the results of your next shoot.
Compare your actual results to the objectives you set out for the shoot. Did you achieve what you had envisioned?
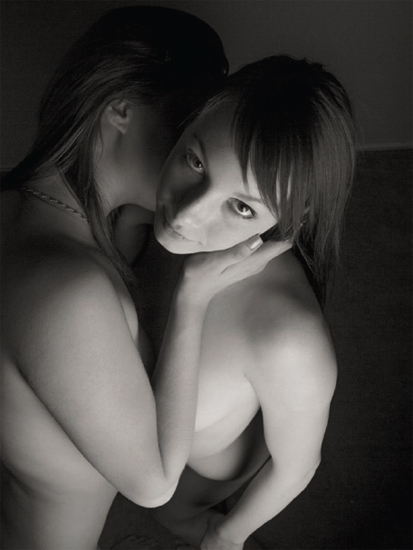
Describe the Objective. If you have done your pre-shooting homework, this part should be is easy. What did you intend to create during this shoot? For example, you might say, “I planned to shoot a nude bodyscape showing the model’s breast and stomach, letting everything else fall into shadow.”
Identify What You See. Looking at a few images from the session, compare them to your pre-shoot ideas. What do you have in front of you? Is the lighting similar to what you envisioned? Does it align with what you discussed with the model? Is the mood correct? Is the pose correct? What feeling do you get from this image—is it too sexy or suggestive? Is it not sexy enough?
Looking at a few images from the session, compare them to your pre-shoot ideas.
Evaluate the Outcome. Now that you have described your objectives and identified what elements of those goals are reflected in your images, it’s time to study your work more subjectively—and look for ways to improve upon it.


When you are looking at your work, ask yourself: What could have made this shot better?
“Interpretation is the revenge of the intellectual upon art.”
—Susan Sontag
Here are some questions to ask yourself as you evaluate your images from a shoot:
Is the lighting what you had in mind?
If not, what could you do to improve it?
Is the posing the way you wanted it?
If not, what would have made it better?
Did you choose the right model?
If not, what features/appearance should you have looked for?
Did the location work as you had hoped?
If not, what would have been a better background choice?
Was the pace of the session comfortable and productive?
If not, how could you fine-tune your approach or adjust your scheduling?
Does the model’s expression reflect the mood you intended?
If not, could you communicate with her better about your objectives?
In addition to the creative aspects of the image, it’s important to consider the technical quality of the shot. Even with the magic of postproduction, technical errors can spell the death of an otherwise good image. When making technical evaluations, it is important to look at the RAW image; once you start editing the image, everything is changed.
In addition to the creative aspects of the image, it’s important to consider the technical quality of the shot.
Focus. Focus is one of the most important things to evaluate when looking at your images. Remember: it is easy to make an image soft in postproduction, but it’s hard to make a soft image tack sharp. If the image simply isn’t in focus, it is difficult (and maybe even pointless) to judge the lighting and other technical aspects. So if you intended for the focus to be on the eyes, check them. Are the eyes tack sharp or is the focus a little off (making the nose or the ears sharp and leaving the eyes a bit soft)?
Exposure. Did you get the correct amount of light on the subject? In Camera Raw, you can adjust the exposure, but you shouldn’t have to adjust it by more than ⅓ to ½ stop. If you regularly need to make significant exposure adjustments in postproduction, you need to look at your metering techniques and work toward minimizing this technical error in your work.
Lighting Control. Did you control the light properly? Check to see if there is any unwanted flare. Check to see that the critical areas of the image are lit properly. For example, if the model’s eyes are important, make sure they have the right light and are not in shadow relative to the rest of the face.
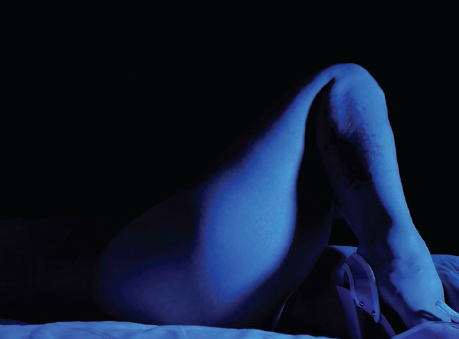
Next, look at the lighting ratio—the relationship between the darkest shadows and brightest highlights. Do these fall within a printable range? Did you lose important highlight or shadow detail? Or is the image too flat (lacking contrast)?
A more subjective thing to consider at this point is the feeling of the light. If the light doesn’t match up with the model, the background, or the intended “feel” of the photograph, this amounts to a technical error in the photograph. We’ve all seen green-screen pictures where the subject and background just don’t look right together—and usually it’s because of a lighting problem. Errors like that happen all the time and are something to watch out for.
Excessive Noise. Excessive noise is becoming less of a problem as digital cameras improve, but it’s important to know where your camera’s sweet spot falls. You may be able to shoot from ISO 200 to ISO 1600 and see no appreciable difference in noise—however your total dynamic range (the range from darkest black to brightest white) might be significantly impacted as you move up the ISO scale. There are sites on the Internet that can help you predict the dynamic range of your gear, but the best way to know what to expect is to do some tests on your own.
Controlling the light is a critical skill to master as a photographer.
Timing vs. Controlling the Shoot
In my mind, there are two approaches to photography: timing-based and control-based. It is important to understand the difference. You will want to shoot accordingly—and evaluate your images differently, based on your objectives.

Does the light have the feeling you wanted? This is something to consider when evaluating your images.
Timing-Based Shots. Sports, photojournalism, wedding, and nature photography are what I consider timing-based photography. For these images, capturing the peak moment of action or emotion is more important than capturing a technically flawless image. I’m not saying that lighting, focus, and exposure aren’t important, but they tend to take a back seat to the emotion and action captured in the frame.
Sports, photojournalism, wedding, and nature photography are what I consider timing-based photography.
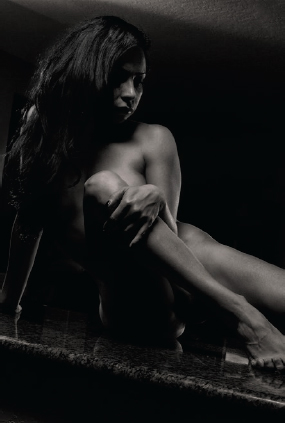
Control-Based Shots. The opposite of timing-based photography is control-based photography, where the photographer determines the lighting, focus, ratio, lens, camera, the look of the model, and the feel of the shoot. This approach is used for most studio shoots, where you have time to keep shooting and controlling the results. You can take as many shoots as you need until every single aspect of the image comes together perfectly in one frame.
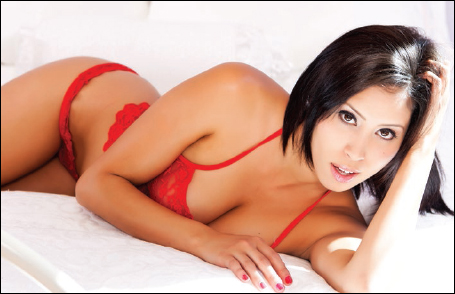
Nude Photography. Nude photography is generally a control-based situation. For example, a few months ago, a client contacted me to shoot background images for a new web site. They needed just two images of a model, so I set the light up, metered, focused, and got everything in control. We then captured over two-thousand frames. These were all very similar, but we needed to get the perfect shot—so we shot a lot, and then we shot more just to be safe. Since everything was controlled, the shoot was a huge success.
With control-based shooting, getting all the elements in place (the background; the lighting; the camera settings; the model’s styling, pose, and expression; any props) is the part that takes a lot of time and effort. Once those are established, you can just shoot until you are totally sure that you have what you want. Unless you are working in a space that’s rented by the hour, the difference between shooting a hundred pictures and a thousand pictures is insubstantial compared to all the other work required to make the shoot happen.
Of course, there are some circumstances where the timing-based approach comes into play in nude photography. For example, imagine you’re photographing a nude model in the rain. The rain isn’t going to last forever, so you have to get the technical stuff as close as possible, then start shooting. Because you don’t have all the time in the world to get everything perfect, you’ll be looking for the action and emotion you capture in the image to give it some impact with the viewer. The same skills can come into play when photographing a model as the sun is dropping quickly at the end of the day, or when photographing nude models in public places.
With control-based photography, you can shoot until you get precisely what you want.
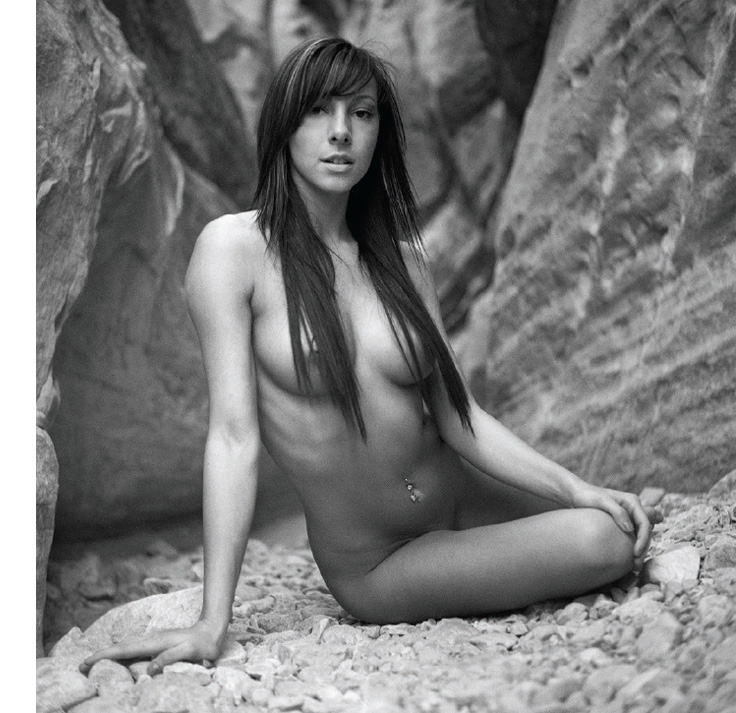
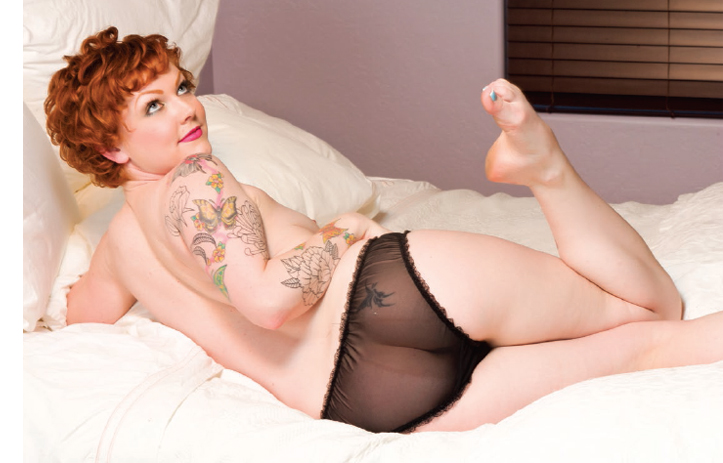
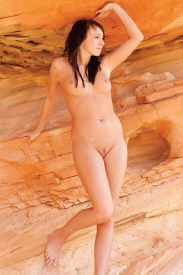
Kayden in the desert. This image was created using only the available natural light—I didn’t even add a reflector. I shot it with a 30-year-old film camera that doesn’t even have a working light meter. If results like this are possible with that camera, imagine what is possible with a modern digital one! 
![]() second, f/4, ISO 400 black & white film, processed in Tmax developer.
second, f/4, ISO 400 black & white film, processed in Tmax developer.