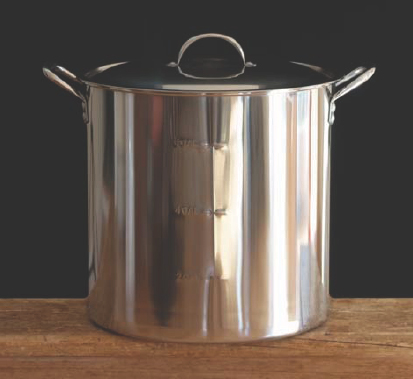
ONE OF THE great things about craft brewing at home is that you can do it on any level and still get very good results. It’s not a pursuit you have to invest hundreds of dollars in, or spend countless hours at in order to achieve satisfaction, unless, of course, you want to. An appropriate pot, a suitable fermenter, and some other inexpensive essentials coupled with a few hours a month and you’ll have your own supply of good, drinkable craft beer at home. Of course, if the brewing bug does bite you, you’ll find the hobby to be all-consuming – that’s a risk you’ll have to take!
If family and friends know you’re interested in craft beer, you might have already received a basic beer-making kit as a gift. There are several such kits on the market today designed especially for someone with no prior experience. These very simple kits, which often require no boiling, include all the ingredients and rudimentary equipment you’ll need. If you follow the directions, the resulting beer will certainly be drinkable. However, if you enjoyed the process, and the result, perhaps you’ll want to try something more challenging.
Brewing beer at home does require various pieces of equipment, and avid home brewers have a tendency to collect quite a lot of it. Most of the equipment is specialized, and you’ll find everything you need at a home-brew shop or online, along with your ingredients. Often the items come packaged as a kit, a step-up from the basic kit discussed above. These kits have just about everything you will need, although a kettle is usually not included.

Invest in a good 3–4 gallon brewpot, or one large enough to accommodate your batch size. Make sure it has a sturdy bottom.
The first essential of a well-equipped home brewery is the brewpot, or kettle. If you are a beginner or intermediate brewer, this item will probably represent your biggest investment. You may have one around the house that will be suitable. If so, make it a dedicated kettle for brewing beer, and don’t use it for cooking other food items, such as tomato sauces and soups.
Ideally, the pot will be sturdy, made of stainless steel, and have a reinforced bottom. The importance of having a thick-bottomed pot will become evident when you’re bringing your first batch of beer to a boil; a thin-bottomed pot will require much more stirring to prevent the malt from sticking and burning. The kettle should be of adequate size: roomy enough to accommodate a good, rolling boil without hot wort spilling down the sides. The size requirements will vary, depending on your brewing style.
As a novice brewer, you may want to begin by using malt extract to make your beer. This style of brewing requires a minimum investment of time and money. Malt extract comes in either liquid or powdered form and is used as the base of the beer, in place of grain. A typical batch size is 5 gallons. Essentially, extract brewers make a concentrate and dilute it with additional water. Consequently, the pot can be smaller than your batch size. The same holds true for some intermediate or partial-mash brewers, who use a combination of grain and malt extract. For a 5-gallon batch of beer, you should use a 3–4 gallon pot.
Advanced or all-grain brewers boil their entire batch; it is not diluted at the end. Some partial-mash – and extract brewers, for that matter – also prefer to brew the entire batch rather than a concentrate. If your goal is all-grain brewing or a full extract batch, you’ll need a kettle that’s big enough to hold the whole brew, plus some head room for the boil. In this case, a minimum pot size of 7 gallons would be required for a 5-gallon batch of beer. One disadvantage to this method is the expense; the bigger the kettle, the more it will cost. Also, if you had planned to brew on your stovetop, you might question the wisdom of using such a large pot. Many all-grain home brewers find that because of the time involved, it’s more practical, and economical, to brew 10-gallon batches or more, rather than just 5 gallons. For a 10-gallon batch, you’ll need at least a 12-gallon kettle. Once you’re working with a kettle that size, you’ll probably be brewing outdoors and not in your kitchen. All-grain brewers generally use one or two reliable, relatively inexpensive, portable burners powered by a propane tank. A warning: this type of burner should never be used indoors.
Larger brewpots can be as simple or as sophisticated as you like. You can buy complete home-brewing systems costing hundreds, even thousands of dollars through a home-brew equipment store or online. You can also make one yourself, if you are a hands-on type of person or know someone who is. Brewpots need a lid, a bottom “port” to safely transfer a large volume of wort, and often have temperature gauges incorporated into them. Smaller brewpots are easy to come by and are also sold at home-brew stores. Suitable pots can also be found at your local department, home goods, or restaurant supply stores. Smaller kettles don’t require any modification, as the volume of wort is small enough to be poured safely.
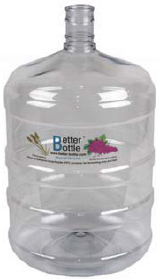
A glass or plastic carboy, when fitted with a rubber stopper and airlock, makes a perfect fermenter.
The fermenter is another piece of vital equipment. For a 5-gallon batch of beer, a 5–6 gallon food-grade white plastic bucket or glass carboy (water jug) is the usual choice. Some brewers use plastic carboys as fermenters, but I find them difficult to clean because they can be easily scratched, creating a place for bacteria to hide. Fermenters must be sealed. The bucket will be equipped with a tight-fitting lid, and the lid will have a grommeted hole that can accommodate a fermentation lock. The mouth of the carboy will be fitted with a drilled rubber stopper into which the fermentation lock will be inserted.
Another vital piece of equipment is a hydrometer or a refractometer. Th ese devices measure the sugar content, or specific gravity of liquid. In addition to measuring the specific gravity of the dense, sugary wort, a hydrometer also measures attenuation (final gravity) of the beer – the conversion of sugar to ethanol (alcohol) by yeast. Taking this reading at various points throughout the brewing, fermentation, and bottling processes is essential. Knowing and recording your wort’s starting or original gravity (OG) in comparison to its ending or final gravity (FG) will allow you to determine the alcohol content of your beer. Equally important, you won’t have to worry about exploding bottles – the result of bottling your beer before active fermentation is complete.
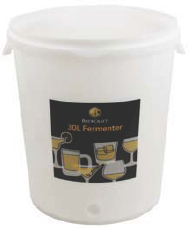
A 5–6-gallon food-grade plastic bucket, when fitted with a lid and a fermentation lock, also makes a suitable fermenter.
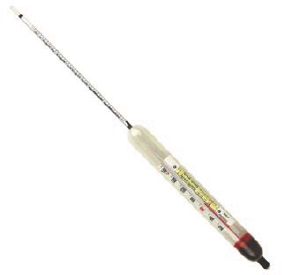
Taking hydrometer readings at various points during the brewing process is critical.
Which instrument you choose is up to you. Many home brewers still use the tried and true hydrometer, which, when dropped into a sample of wort or beer, will float; the reading will be at the level of the liquid. A hydrometer with a temperature correction is preferable. Today’s home brewers have the option of using a refractometer, which has come down in price over the years and is now quite affordable. Th is test method requires just a few drops of your sample placed on a glass plate. The reading is determined by looking through the eyepiece, which has a scale. A hydrometer, however, is the best choice for your final reading.
Although all-grain brewers essentially use the same equipment as extract or partial-mash brewers, there are some items that are specific and necessary to the advanced brewer:
This is a vessel separate from the brew kettle. It must be large enough to accommodate the entire grain bill, which is the total amount of grain in your recipe, along with sufficient water. It will have a false, removable, screenlike bottom to allow the wort to flow through and out, and will have a valve placed just below the false bottom to facilitate its removal. The mash tun will also have a lid and be insulated. In place of expensive stainless steel, many home brewers use an easily modified water cooler.
One or two of these propane-fueled stands will be needed if you plan to use a large kettle to brew your beer outdoors.
A device that uses cold water to efficiently cool boiling wort down to about 70ºF so yeast can be safely added.
Fermentation lock or air lock
Bottling bucket, 5–6 gallon, food-grade plastic
Bottling wand
Bottle capper
Bottle caps
Bottles
Racking cane
Hydrometer
Thermometer
Brushes (bottle and carboy)
Food-grade plastic tubing and clamp or autosiphon
Funnel
Spoon, stainless steel, long-handled
Sanitizer
Bottle rinser
Filter
Grain mill
Keg, 5-gallon Cornelius-type
CO2 tank and regulator
Paddle
Pump
Scale
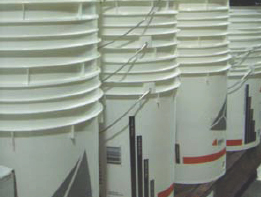
The versatile white bucket is a brewer’s best friend. It’s always a good idea to have several of these inexpensive buckets on hand.
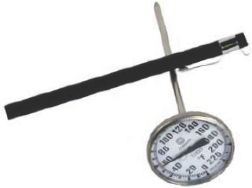
An appropriately scaled, temperature-resistant thermometer will be needed to determine mash and wort temperature.
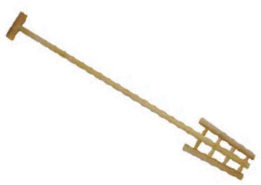
A wooden or stainless steel paddle is used by all-grain brewers to mix and distribute grain during the “mash in.”

This plastic fermentation lock, also called an air lock, allows fermenting beer to “breathe,” while keeping contaminants at bay.
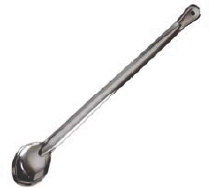
A large, long-handled stainless steel spoon is useful for performing a number of tasks, including stirring and whirlpooling the wort.
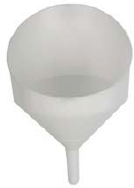
A funnel is a helpful tool to have when transferring liquids to a small-mouthed container, such as a carboy.
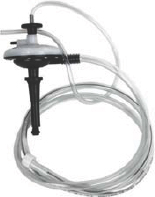
An autosiphon makes the job that much easier.
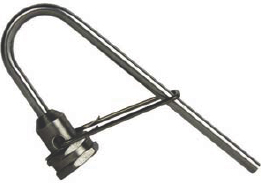
An inexpensive bottle rinser, which attaches to a conventional faucet, is a quick and easy way to rinse bottles prior to filling.
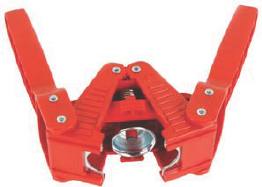
When pressure is applied, a hand-held bottle capper crimps the cap around the neck of the bottle, forming a tight and reliable seal.
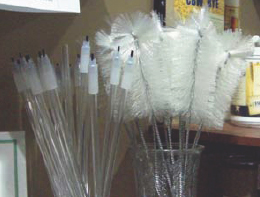
A variety of brushes are needed to keep equipment clean.
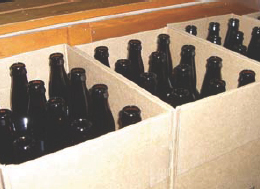
12-ounce or 22-ounce brown bottles, either recycled or purchased new, are the best choice for beer. If previously used, these must be very clean.

Some brewers prefer a bench-style bottle capper.
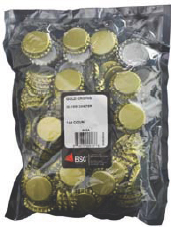
Bottle caps can be purchased at any home-brew shop or online. When applied with a capper, they form a tight seal around the neck of the bottle.
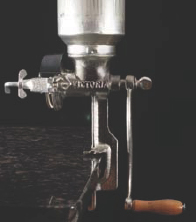
Many brewers prefer to crush or mill their own grains using a manually turned malt mill. Electric versions are also available.
In brewing, the term “sanitization” is used in place of “sterilization.” Proper care of all your equipment is a must: anything and everything that comes in contact with the wort or beer, including your hands, must be clean. Generally a combination of hot water, diligence, and a mild chemical sanitizer will guarantee a good beer. Some home brewers use a no-rinse sanitizer, often iodine-based, or a similar product sold especially for home brewing or commercial brewing purposes. Many prefer an inexpensive alternative: household bleach. When sanitizing with bleach, a very dilute solution should be used and prolonged contact with plastic and metal should be avoided. Rinse well. I repeat, rinse well. Bleach should never be used to sanitize bottle caps because they have an absorbent plastic liner; bottle caps are best sanitized in very hot or boiling water for a few minutes and allowed to cool, or by a quick soak in a no-rinse sanitizer.
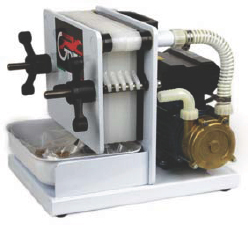
Small plate and frame filters are often used by the advanced brewer to remove yeast and sediments from the finished beer. Cartridge filters are also a popular choice.
Soap should never be used as a sanitizer as the residue will have an adverse affect on both your finished product and your equipment. Some brewers will be diligent in their sanitization practices yet not wash their hands, rinse properly, or forget to sanitize their bottle caps.