Chapter 2: How To Fill-Up Designs
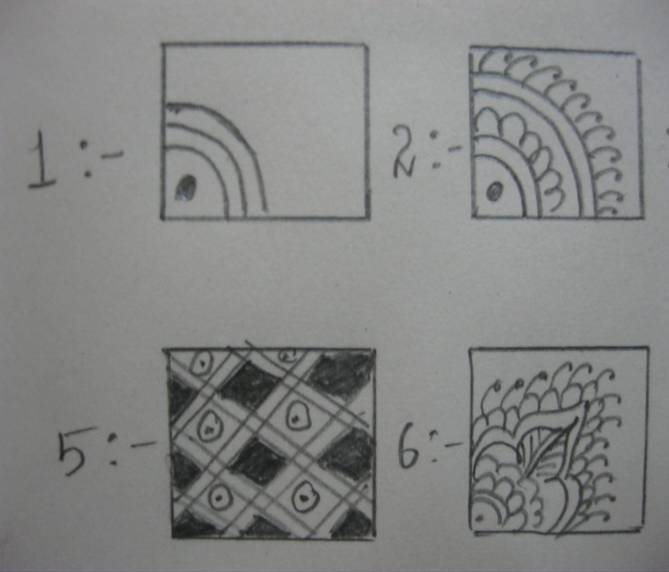
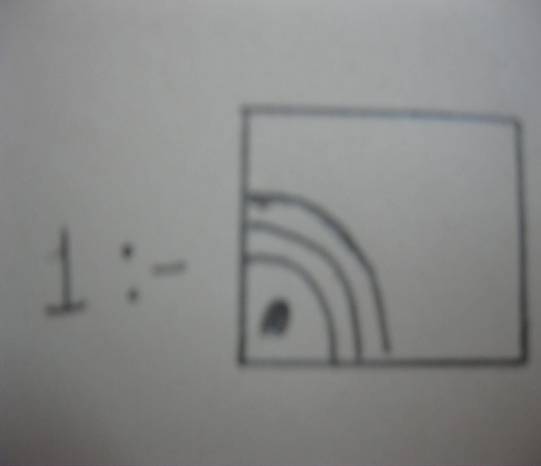
How To Do Fill-Up Design # 1
- Make a dot and draw three consecutive semi-circles around this dot. They don’t necessarily need to be semi-circles.
- Circles must be drawn according to the finish line just like the figure below. Once you have learned this, you are done with the first fill-up design.
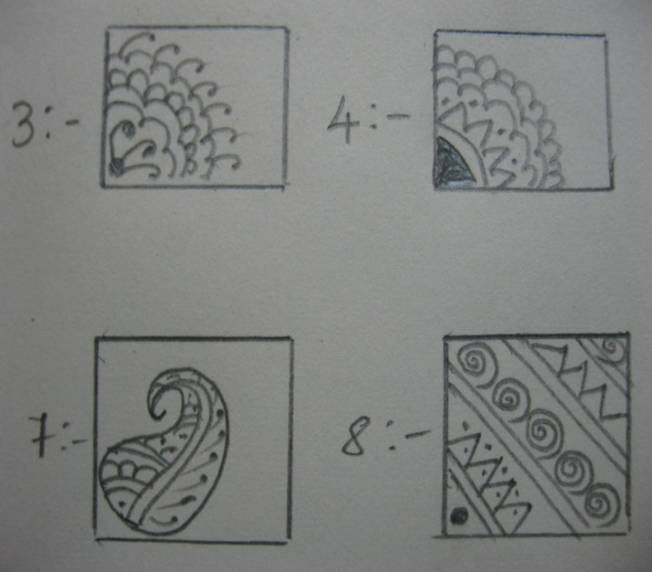
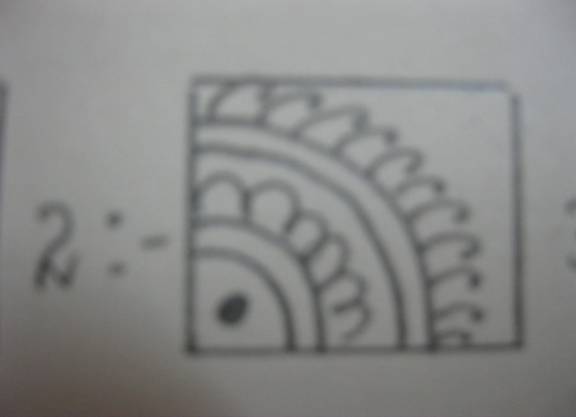
How To Do Fill-Up Design # 2
- Make a dot and draw two consecutive semi-circles.
- Then draw small semi-circles above those.
- Now, draw two more semi-circles around these small semi-circles and draw curved figures with dots above that. This is new for you. Just draw a curve and in the end of the curve, put a thick dot.
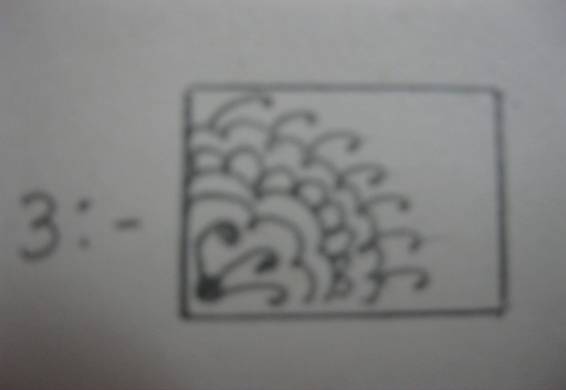
How To Do Fill-Up Design # 3
- As usual, you start with a dot and from that dot;
- Do the last step of figure 2, i.e. curved line with a dot.
- Now, all you have to do is draw double wavy lines. This is something new but not to worry, it is very easy. Just draw elaborate semi-circles.
- Next, draw semi-circles which are called grape design.
- Again, draw one wavy line and then finish the design by putting a curve with dots which is also called peacock design. It is called a peacock design because usually when we draw a peacock, we put this design three times on its head to complete the diagram.
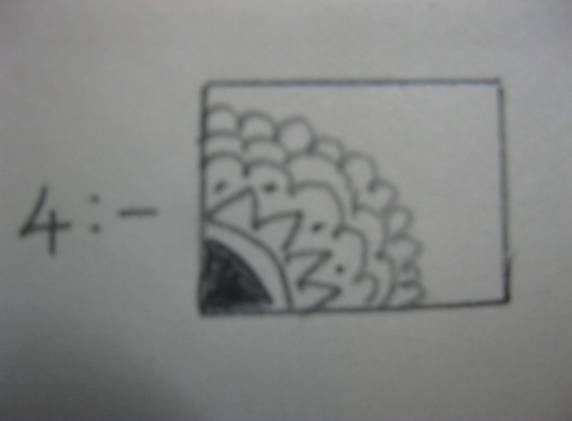
How To Do Fill-Up Design # 4
- Next, we are moving on to something different and interesting. Draw a small triangle and shade it fully.
- Then leave some space and draw a curve and on top of it draw cone shaped figures fully.
- Draw small dots in between the cones. Draw double wavy lines and on top of the outer wavy line
- Draw the grape design and the fourth fill-up design is ready.
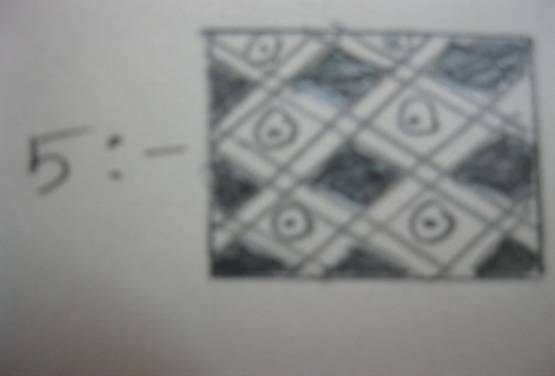
How To Do Fill-Up Design # 5
- This is a block design. You will be using this very often as it is the basis of mehndi. Draw parallel straight lines diagonally from left to right, leaving small gaps.
- After you are done with this, repeat the same but from right to left. Now, you will have bisecting double lines.
- Shade alternative boxes. For example: If one box is shaded, the next box should be white.
- Now, keep a dot and put a circle around the dot in all those boxes which are not shaded. You will get a concentric design once you are done with all the steps.
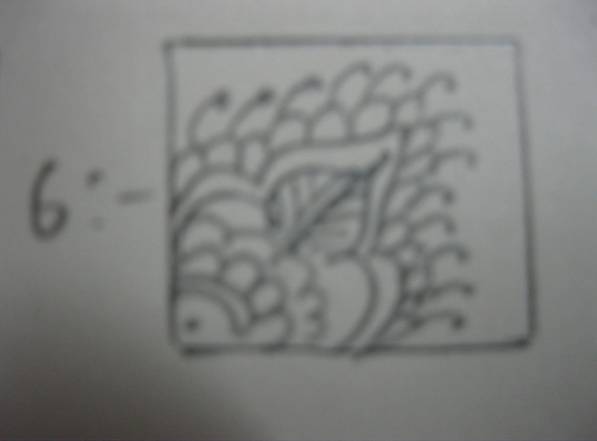
How To Do Fill-Up Design # 6
- Put a big curve and then from the end of this big curve start a small curve.
- After leaving small space or gap, start a big curve exactly parallel to your previous big curve
- From there draw a small curve and join the end of the previous small curve. The tip should be very sharp.
- Repeat the same by doing an outer layer. Layers are very important in mehndi because it gives a highlighted look to your design.
- Now start doing your grape design on top of the outer layer and in the intersections, giving you a peacock design.
- Now, the inside part is blank, we have to fill it up.
- Repeat the second fill-up design inside the blank part.
- Then in the space between the small curved lines draw double straight lines
- And on either side draw diagonal lines to fill-up that portion, with this, your 6th fill-up design is over.
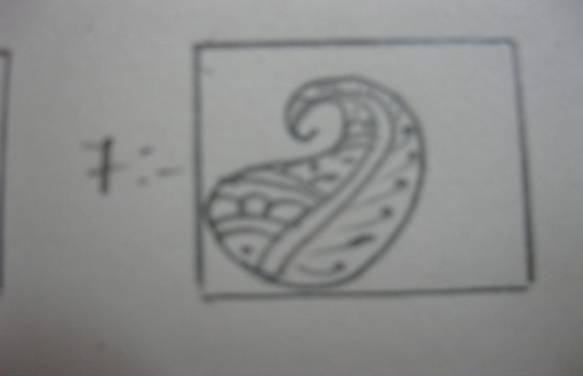
How To Do Fill-Up Design # 7
- This is called Manga design. To do this, draw a C shaped figure first and in the bottom of the figure, draw a slanting figure and a twist in the top so as to finish the figure.
- Next, in the middle of the Manga, draw double lines.
- On the right side of the double line, draw a nicely spaced peacock design
- And on the left side of the Manga, fill-up with one of the “second fill-up designs”.
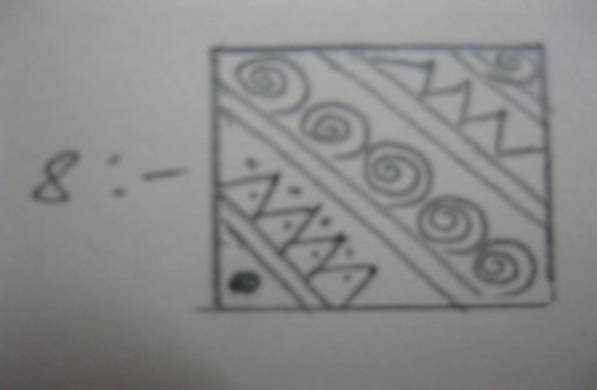
How To Do Fill-Up Design # 8
- This is the last fill-up design in Bombay style mehndi. Draw a large dot and place two straight lines and then put a cone design above it and in between the cones, keep dots.
- Draw two more straight lines and add the coil design. Coil design is done by putting many circles but with only one start and end point.
- Now, repeat the second and first step respectively to finish drawing the design.
Here are the designs which you have learned so far.