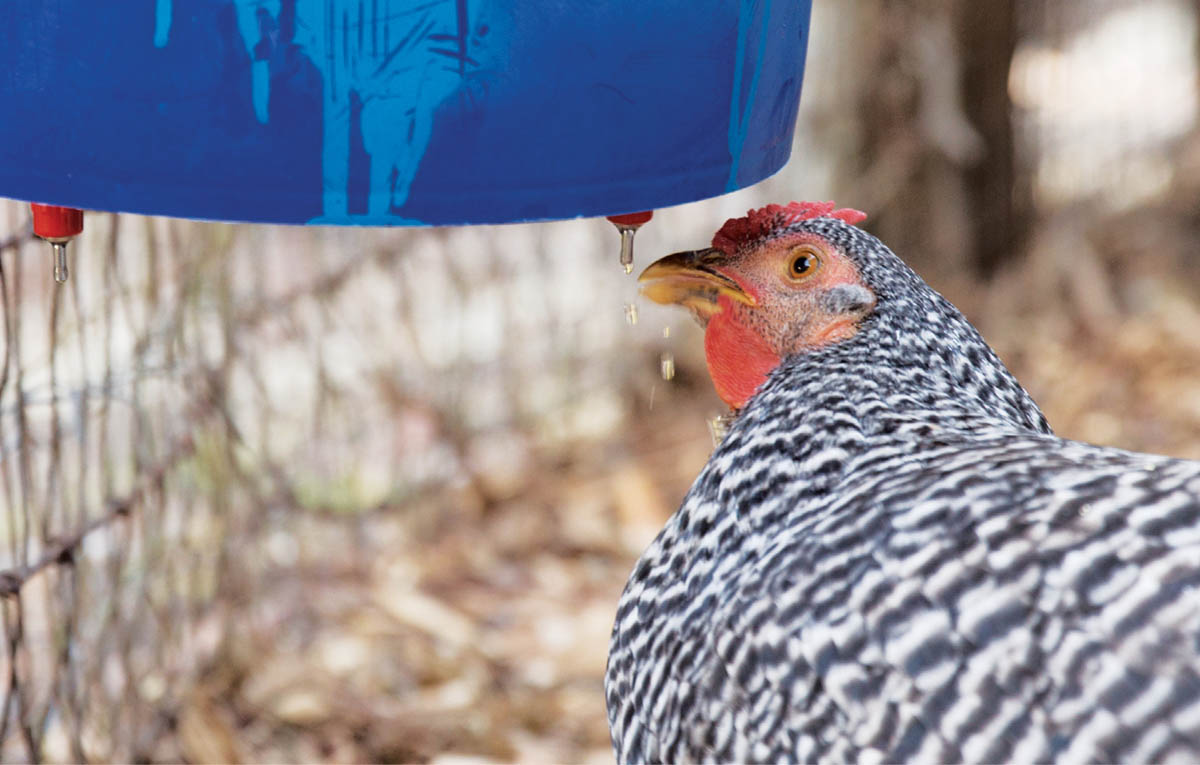
Our Dominique pullet, Domenica, quickly learned to tap the nipples to get fresh water.
Water, water everywhere, but not a drop that’s fit for a hen to drink. If the water is in a saucer, the girls have mucked it up by scratching dirt into it. If it’s in a gravity-fed waterer, they’ve hopped on top and deposited some of their natural fertilizer into it. (Yuck.) And the only thing worse than dirty water is no water at all, when they’ve knocked over the waterer or drained it on a hot day.
There is a better way. We sustain our hens with a simple system that keeps the waterer clean, free of debris, and topped up almost year-round.
Our Dominique pullet, Domenica, quickly learned to tap the nipples to get fresh water.
My design professor at North Carolina State University, Will Hooker, was an early champion of backyard chickens. He captured my attention with his system for using free and plentiful rainwater for his chickens. He screwed a store-bought rain gutter to the eave of his coop’s roof to capture rainwater. The water drops through a downspout into a 35-gallon plastic cistern with a tap. Will uses this rainwater to refill his chickens’ conventional gravity-fed waterers.
My wife and I saw Will’s setup long before we got serious about chickens. I knew even then that we would borrow — I mean, steal — this idea of harvesting rainwater if we had hens.
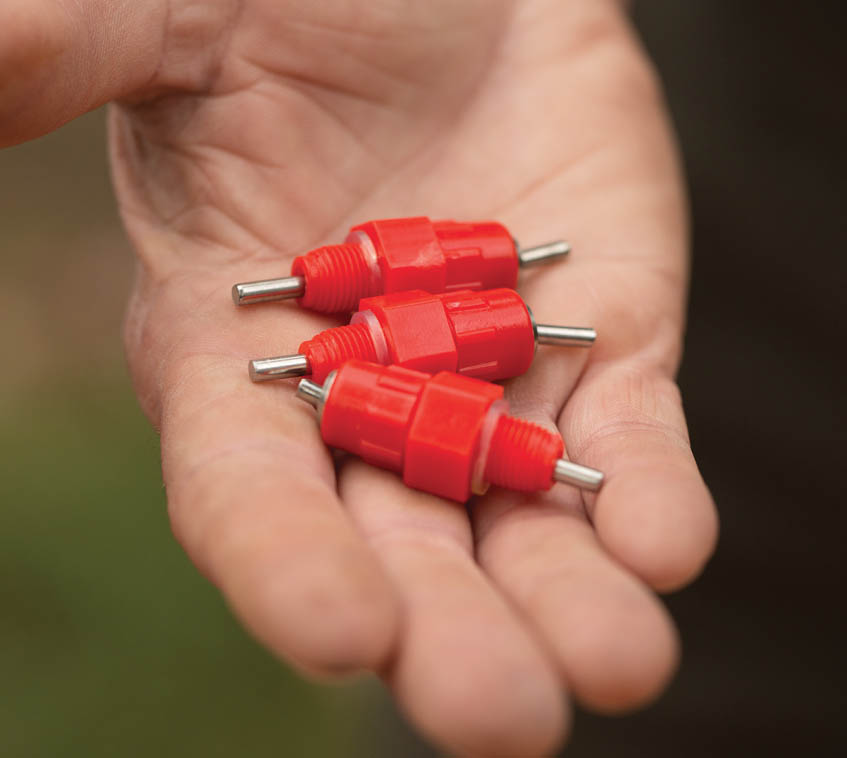
Once we got a little more serious about henkeeping, I found two websites by homesteader Anna Hess: The Walden Effect and Avian Aqua Miser (see References and Resources). She describes how she and her husband make (and sell) hanging poop-free waterers consisting of a 5-gallon bucket with livestock watering nipples protruding from the bottom.
By combining these two techniques, we have a chicken watering system that rarely needs our attention. There’s no saucer to get dirty or tip over. A repurposed metal hanging basket crowns the bucket to keep hens from roosting and pooping on the waterer. (A bucket lid with an opening for the downspout would do the same.)
Since the East Coast averages a good rain every 10 days or so, we rarely have to top up the waterer, nature does it for us. We’ve only refilled it ourselves maybe a dozen times in four years, usually when we wash it out once a season. Obviously, in drier climates the chickens will be thirstier and the rains will be fewer, so use multiple containers or top it up by hand more often.
Some people attach nipples to PVC pipe (fed by a waterer) instead of the bottom of a bucket, and that may work for your pen. But the curved wall of the PVC pipe may make the nipples more likely to leak than the flat bottom of a bucket.
How many nipples will you need? Allot one nipple for every three birds. One bucket can easily sport three nipples. If you have more than nine birds or you find your chickens queued up in long lines waiting their turn to drink, then add another bucket.
Bottom line: Chickens need to drink about a half-pint of water a day, the actual amount depending on their size and how hot it is. A 5-gallon bucket holds enough water — 40 pints — to last our three hens about 27 days without needing refilling or being spoiled by poultry pollution. This setup is one of the biggest contributors to our goal of enjoying fewer chicken chores and more worry-free vacations. So let nature and gravity do the work of keeping your hens watered. You’ve got places to go.
We have a chicken watering system that rarely needs our attention.
Installing a rain gutter and downspout, as in the following project, will cut your ongoing chicken chores dramatically. The gutter and downspout fill the waterer with rainwater from the coop’s roof (or any other nearby roof).
When it rains, the roof edge will act like a waterfall, dropping the water into a 3- to 4-foot-long gutter. From the coop roof you’ll probably need 6 feet, max, of downspout to reach from the end of the rain gutter to the top of the waterer. A 5-gallon bucket will fill up from just a few minutes of steady rain. Make sure the gutter runs slightly downhill toward the downspout so the water flows down and doesn’t sit stagnant.
You can pick up gutter scraps and downspouts pretty cheaply at your local metal scrapyard, or call around to gutter companies and ask them to hold a few short pieces for you. You can also buy gutters and downspouts at a big-box home improvement store, or possibly at an architectural salvage store.
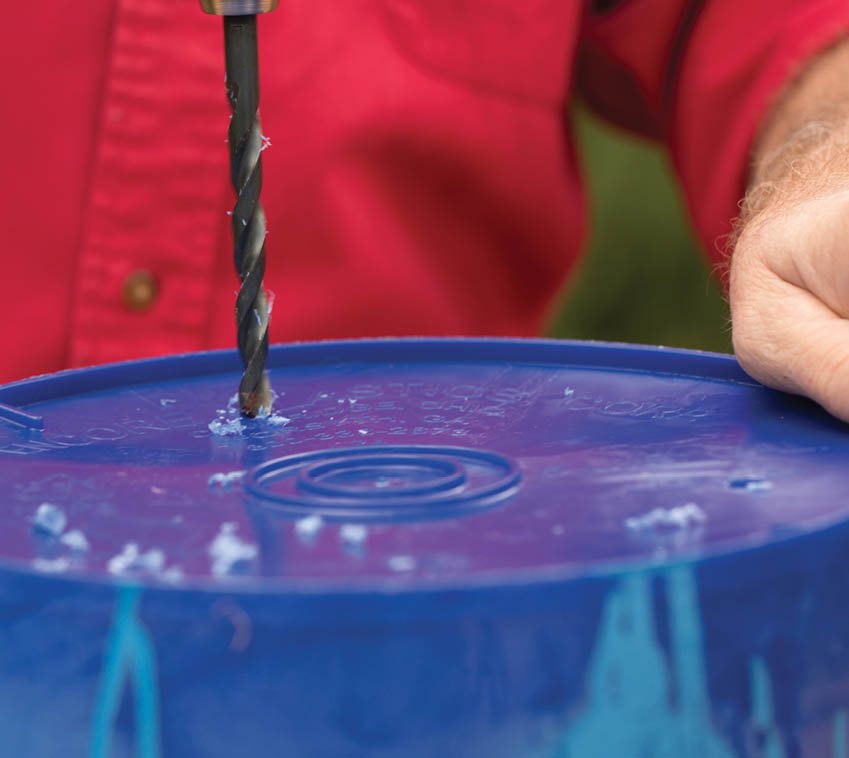
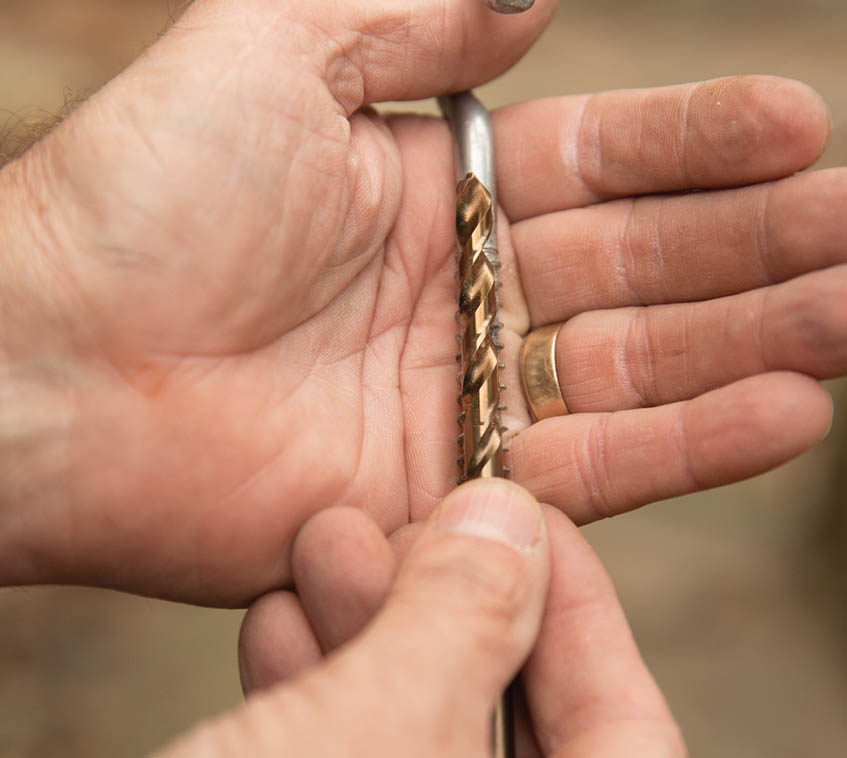
Use self-tapping screws and a matching driver bit from a hardware store so you won’t need to predrill any holes in the gutter or downspout. You’ll also need an 11⁄32" drill bit to make the holes in the bottom of your bucket. That will be just the right diameter for the threads of the nipple to bite into the plastic and create a watertight seal. Spend the extra money for the nipples that have a rubber gasket so that you’ll be sure they won’t leak.
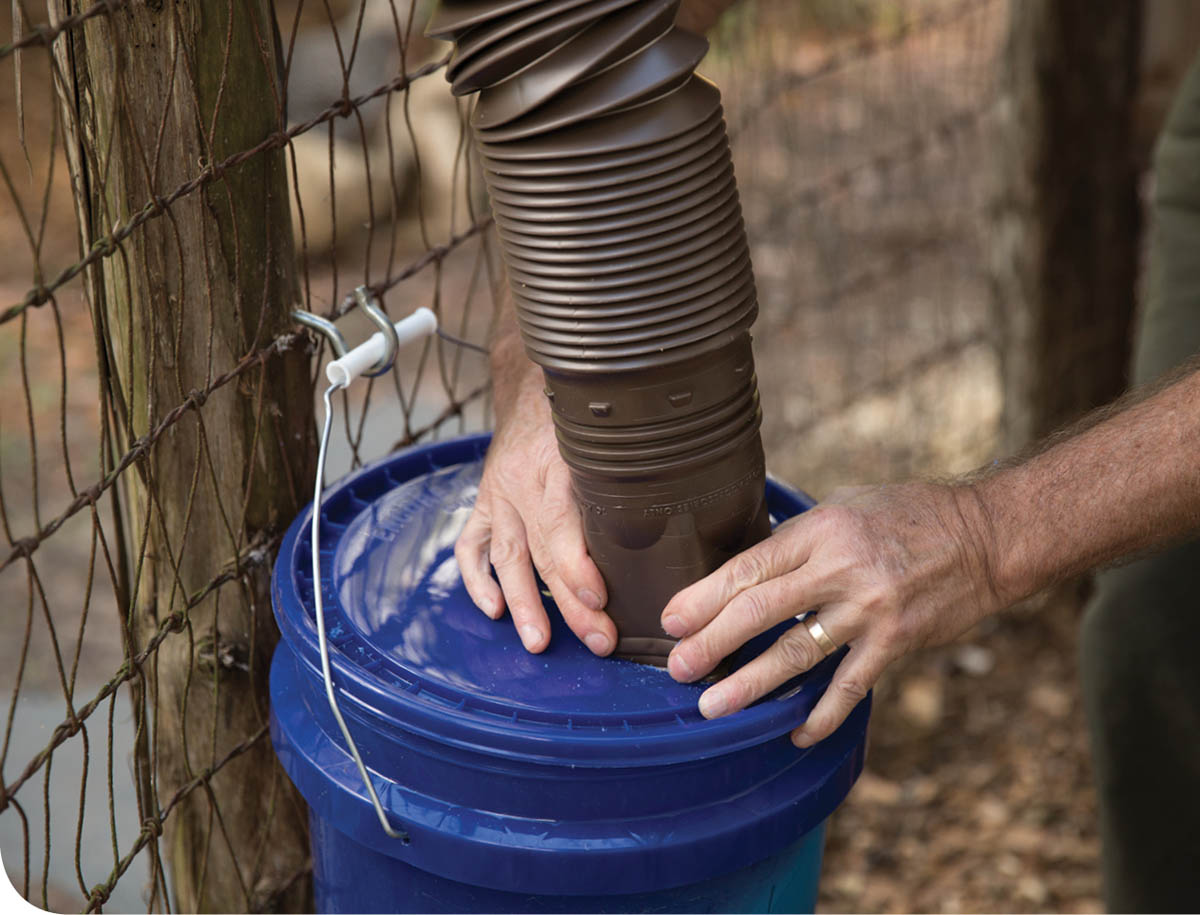
Can’t position your waterer directly under the gutter? A flexible downspout will solve that problem. If you choose to have a lid on your bucket, mark the spots where the corners of the downspout opening meet the lid. Use a drill to make a hole at each corner, use a jigsaw to connect the holes, and pop the downspout in.
How to Make It
What to Do
Prepare gutters.
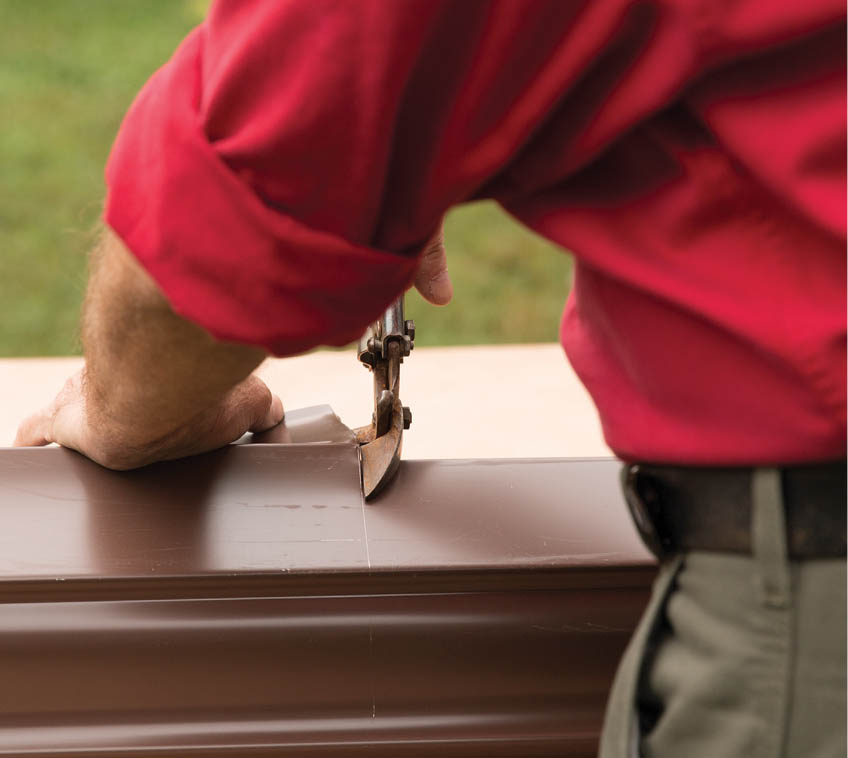
Set up the gutter and downspout.

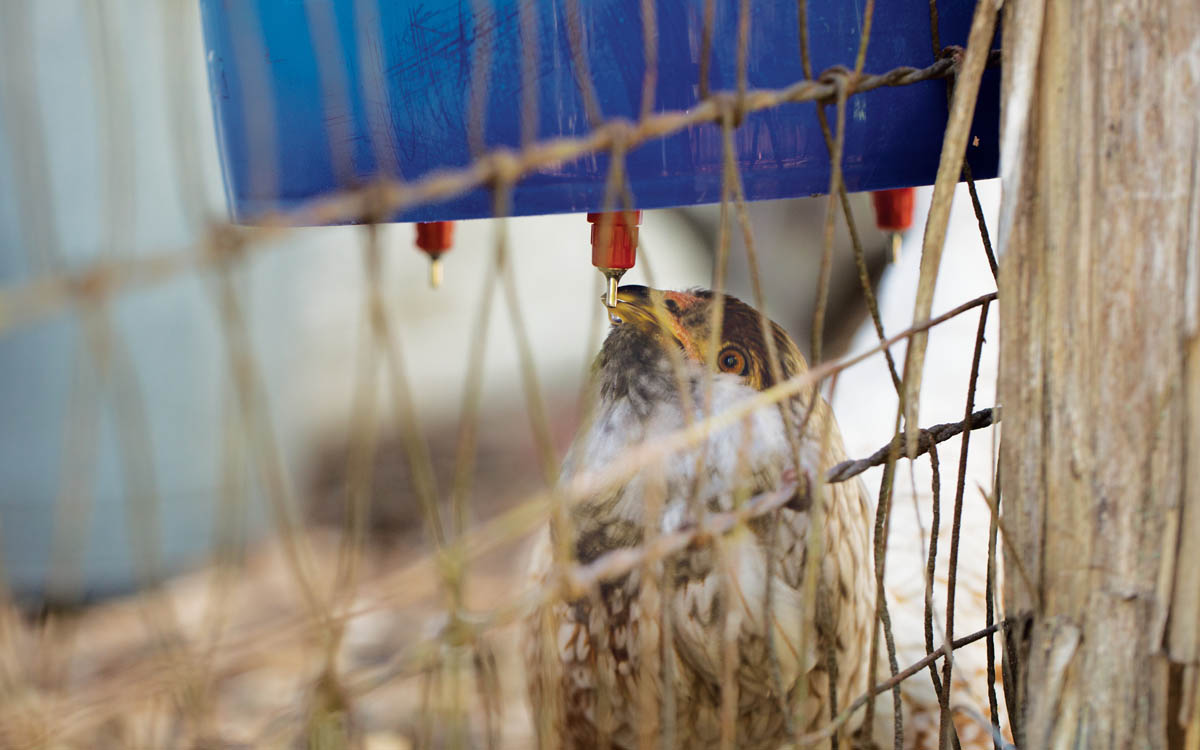
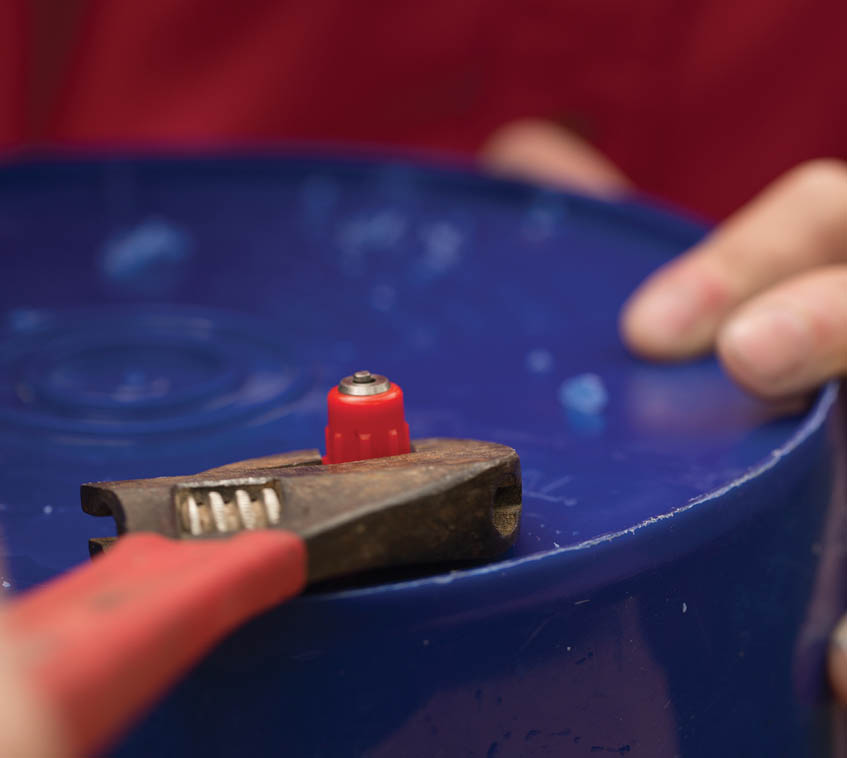
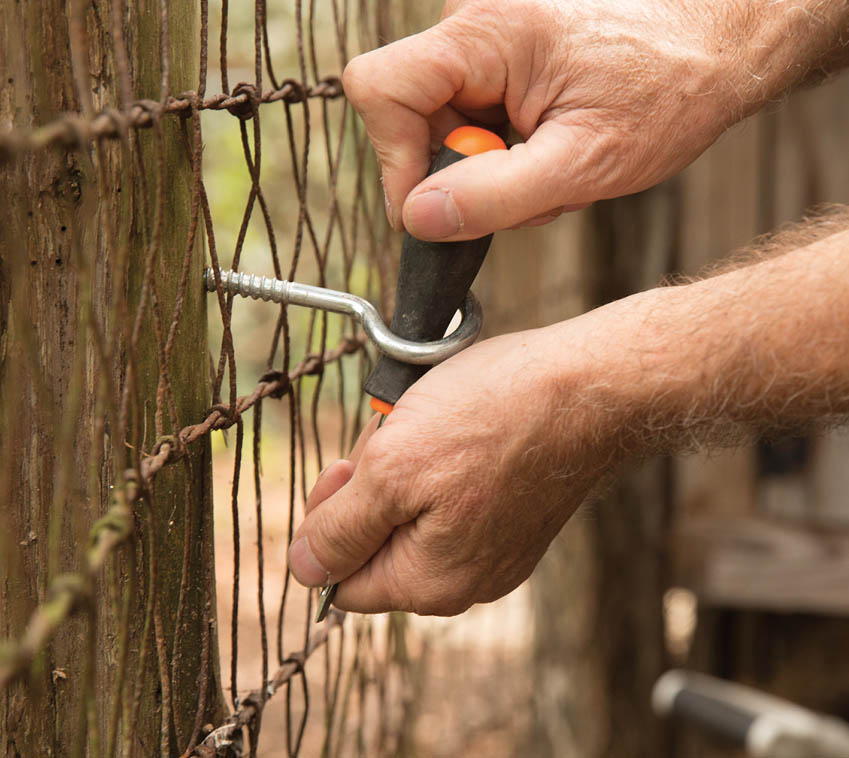
Attach the nipples to the bucket.
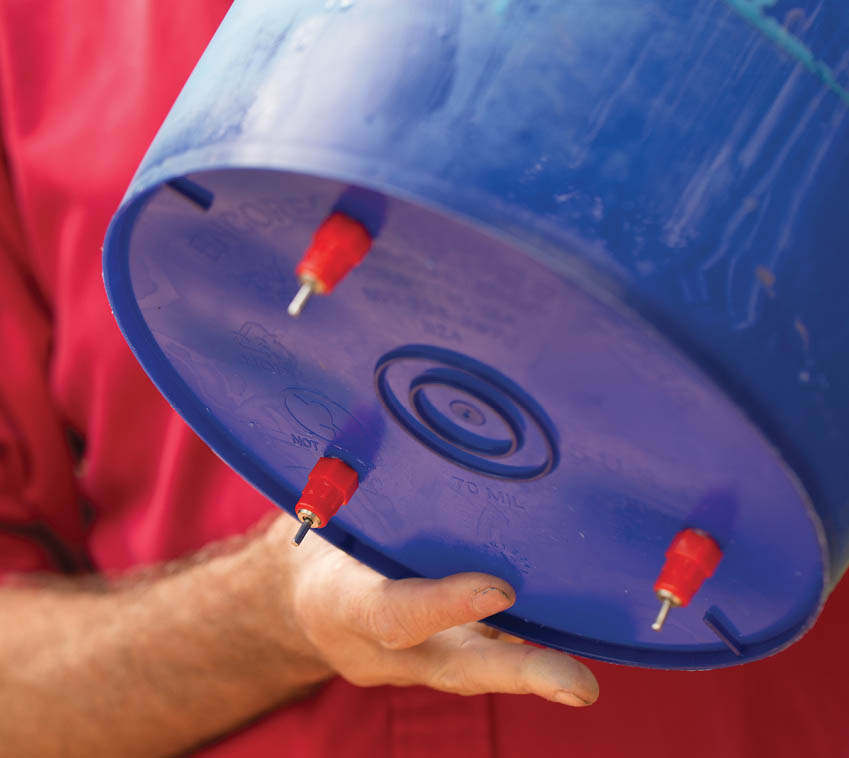
Mount the waterer.
Some henkeepers let the downspout reach into the bucket by cutting a matching hole in the lid. That’s one way to do things. The lid keeps out poop but doesn’t preclude algae, mosquitoes, or leafy debris from entering the waterer; they get in through the downspout. A lid just makes it harder to see into the bucket.
I prefer my waterer without a lid so that I can see the water level and more easily add apple cider vinegar. For that reason, I plopped a repurposed upside-down hanging plant basket over the bucket as a decorative guard to keep hens from roosting there.
You’ll see the light dawn when your bird realizes where her water will come from.
Our downspout stops just short of the bucket, so rainwater drops in just fine. The advantage of going lidless and with a shorter downspout is that it’s very easy to remove the bucket whenever I want to clean it. With or without a lid, you’ll need to clean buckets a couple of times a year to keep the nipples from clogging up due to algae or debris from the roof.
One of the biggest responsibilities of a henkeeper is to keep our birds’ water supply from freezing. It’s bad enough that the chickens have to go without water when icebergs form, but it also means that we (and by “we” I mean Chris) have to head out into the blizzardy weather with a kettle of boiling water or a hammer to break up some ice.
For colder parts of the country, there are many months straight of subfreezing temps and rock-solid ice in the waterers. Fortunately for us in North Carolina, freezing is a problem only a few times a winter; rarely does the waterer get more than a top layer of ice. But even that kind of daily response won’t work if we’re on vacation. I had to find something better.
Some folks recommend wrapping electric heating tape around the base of the waterer. Since the plastic of the bucket is an insulator and not a conductor, however, that is reliable only into the upper teens. Plus, the setup is time-consuming for just a partial solution.
Other henkeepers recommend aquarium heaters. They are not expensive, and they’re made to be in the water. But chatter in the online chicken chat rooms indicates that aquarium heaters wear out quickly. They are designed to push the heat up in a 60°F (20°C) room only to about 78°F (26°C). Outdoors, these heaters are in way lower temperatures, so they work long and hard until they fail. And when they fail, the ones made of glass burst and electrify the water and the metal part of the drippers. The voltage is low, but think of what that does to chicken lips.
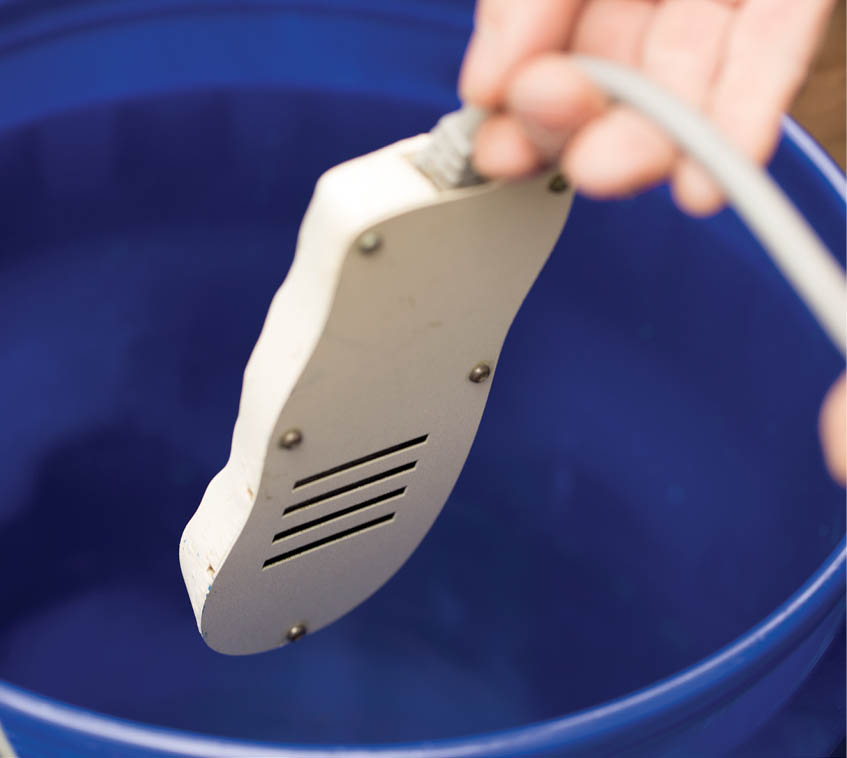
At last, on the Backyard Chickens forum, I found the best option: birdbath heaters. Of course. They’re made to work outdoors, in winter and underwater. It’s a plug-and-play situation. Plug in a birdbath heater, and drop it in the bucket. If you have a lid for your bucket, you can leave it ajar for the season since neither mosquitoes nor algae are active in winter. The girls will be so glad to have warm, liquid water available all winter. Throw in a few tablespoons of apple cider vinegar, and they’ll think they’re having a nice afternoon tea.
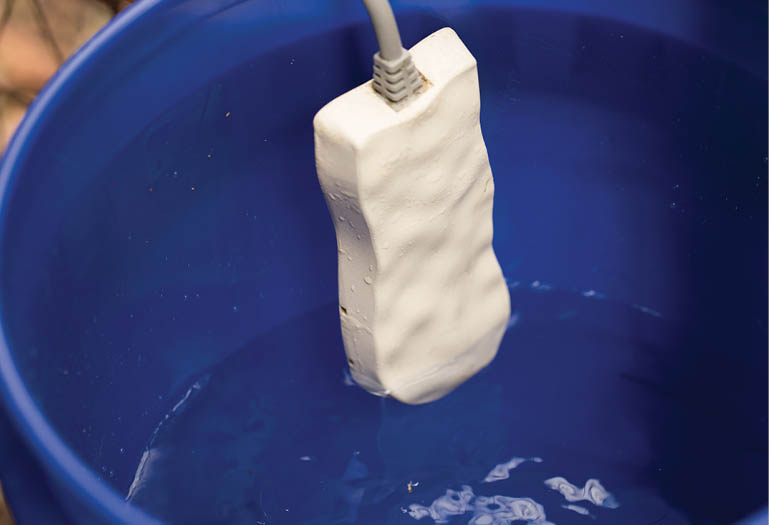
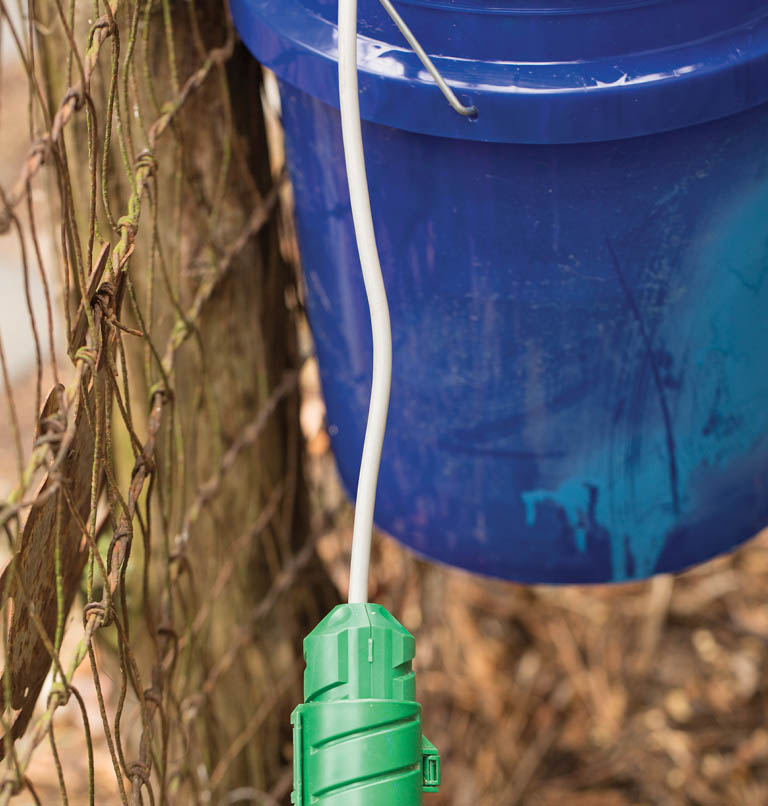
A birdbath de-icer in a chicken waterer is perfect for winter conditions. You may also need an extension cord rated for outdoor use, a watertight cord connecter, a GFCI outlet, and a thermostat.
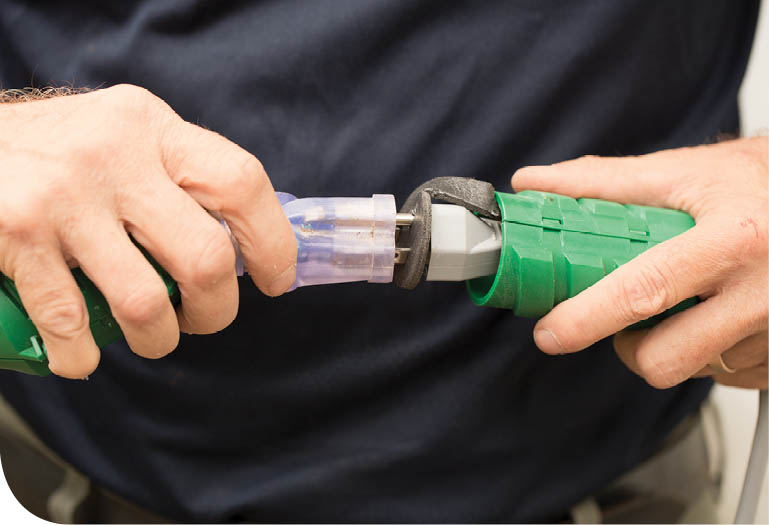
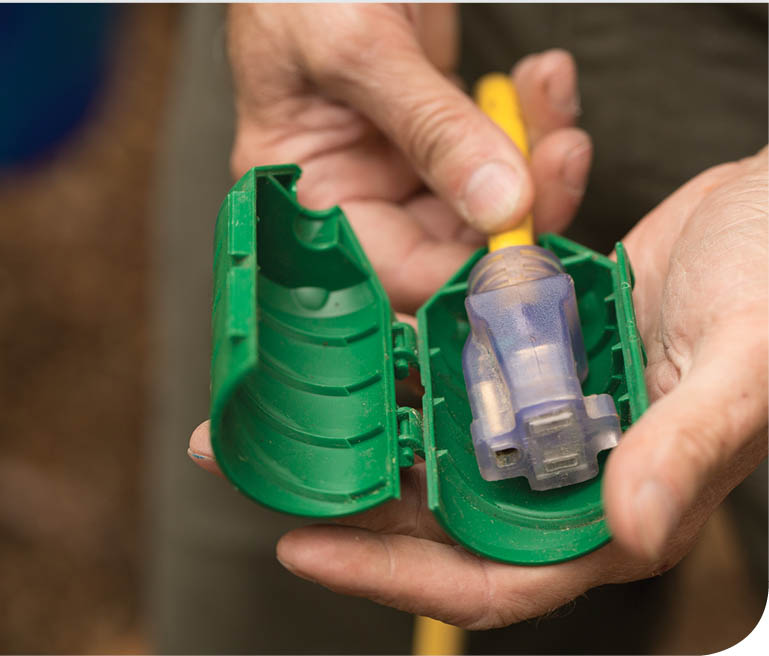
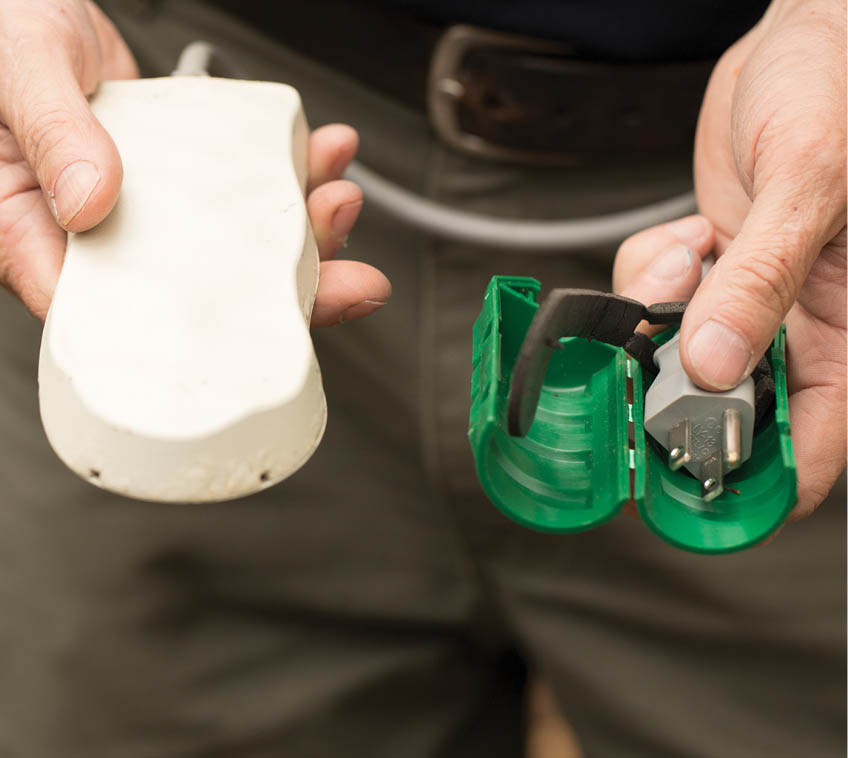
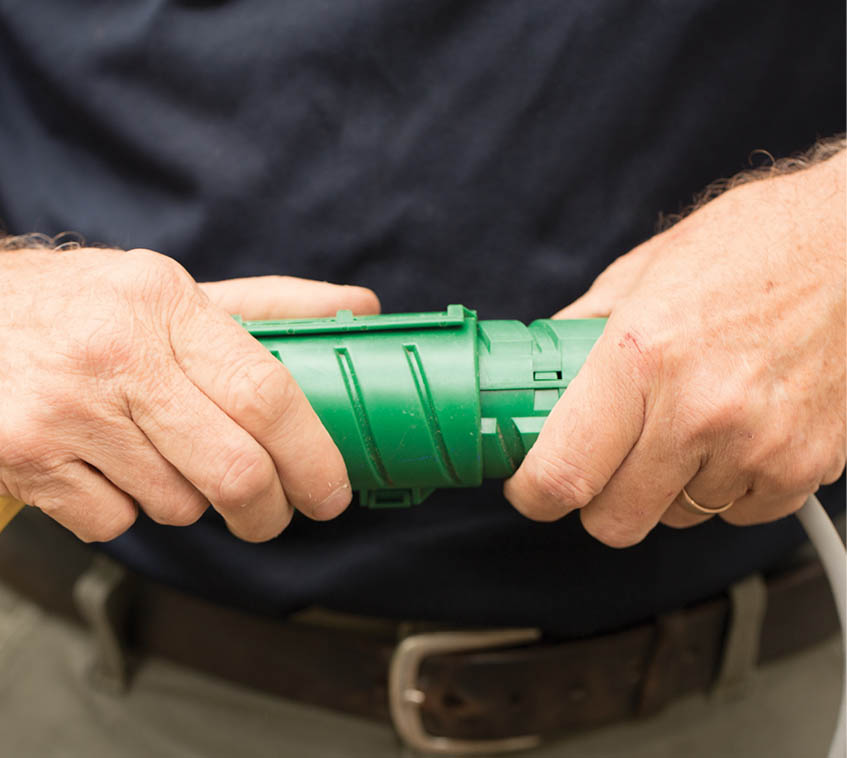
Watertight cord connector
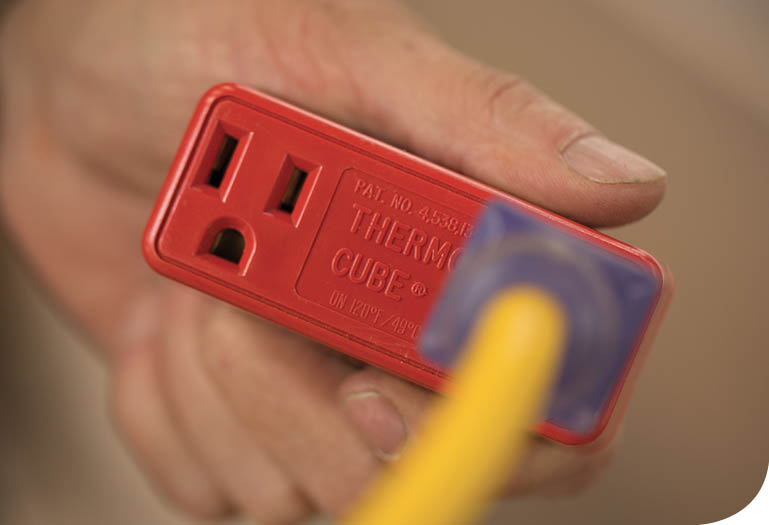
Thermo Cube thermostat
Before you retire to the house for your own teatime, I highly recommend adding a few other devices for safety and comfort:
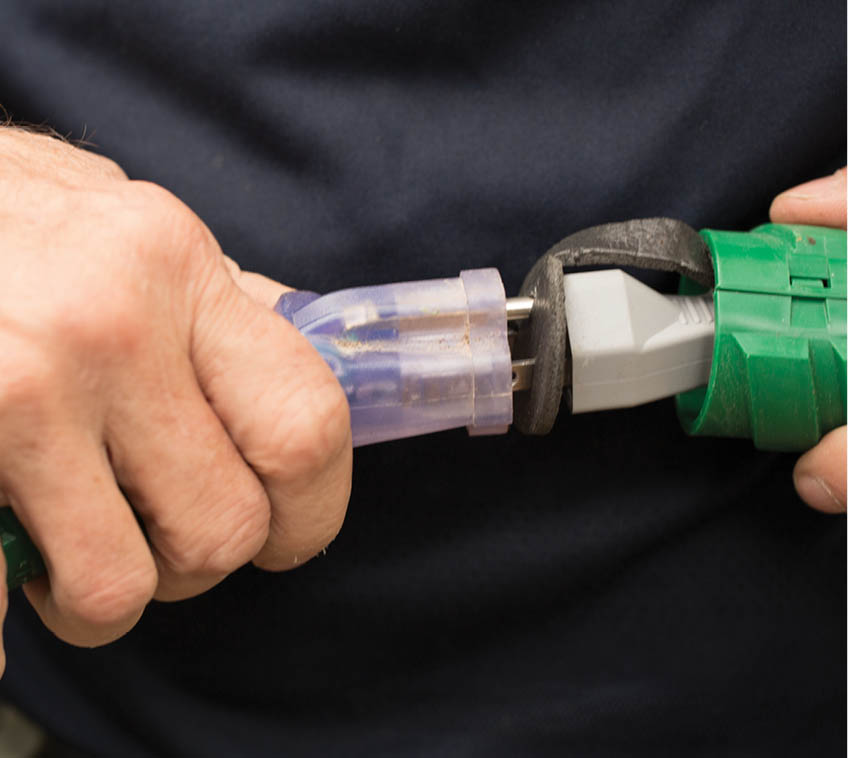
Extension cord and watertight connector. If the cord from your birdbath heater isn’t long enough to reach the outlet, you’ll need an extension cord. Buy one that’s UL rated for outdoor use, and fit a watertight connector over the cord connection to prevent shorts.
GFCI outlet. There is a small chance that the cord or the heater could short out in wet weather. A short could then go past the outlet, heat up some wires, and cause a fire in your house or garage. To prevent this, plug the cord into a ground fault circuit interrupter (GFCI) outlet, which will turn itself off in response to a short and save your house. After you fix the short, pushing a button on the outlet revives it. A licensed electrician can switch any normal outlet to a GFCI one. It’s worth it: you’re dropping a live electrical device into water.
Thermostat. If your birdbath heater doesn’t come with an internal thermostat, you’ll waste a lot of energy if the weather fluctuates. A Thermo Cube TC-3 device has a simple internal thermostat that lets current flow only when the temperature drops below 35°F (2°C) and turns off when the temp rises above 45°F (7°C). In no time, the TC-3 will pay for itself by saving energy and extending the life of the heater.
How to Make It
What You Need
What to Do
Note: If your de-icer lacks a built-in thermostat, plug the extension cord into a Thermo Cube thermostat. Then connect the entire works to a GFCI outlet for safety’s sake.