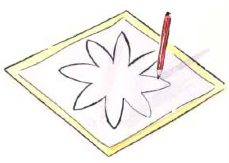
Several of the projects in this book require you to make a template or pattern that you can draw around to cut out a corresponding fabric shape.
1. Tap on a template to make it open in full-screen mode.
2. Take a screenshot by simultaneously clicking the power button (on the top right corner of your iPad) and the centre home button (underneath the screen). You will hear the camera click and see an on-screen flash. The screenshot will be saved in the Photos app on your iPad.
3. There are three ways to print out the saved screenshot:
When printing your screenshot, make sure that you print it at 100% so that you have the template at its original size. If you need to adjust the size of the template, follow the instructions below.
Although books and patterns often give motifs at actual size, it is useful to know how to enlarge them.
First, decide how big you want the motif to be on the finished garment. Let’s say, for example, that you want a particular shape to be 50 cm/20 in. tall.
Then measure the template that you are working from. Let’s imagine that the template is smaller than the size you require – say, 25 cm/10 in. tall.
Take the size that you want the motif to be (50 cm/20 in.) and divide it by the actual size of the template (25 cm/10 in.). Multiply that center by 100 and you get 200 – so you need to enlarge the motif on a photocopier by 200%.
If you want a motif on the finished piece to be smaller than the template, the process is exactly the same. For example, if the template is 25 cm/10 in. tall and you want the motif to be 20 cm/8 in. tall, divide 20 cm/8 in. by the actual size of the template (25 cm/10 in.) and multiply by 100, which gives you a figure of 80. So the figure that you need to key in on the photocopier is 80%.
To make a template for a fabric shape, first enlarge (or reduce) your chosen motif to the size you want.
1. Using a thick black pencil, trace the motif onto tracing paper.

2. Turn the tracing paper over, place it on card, and scribble over your drawn lines to transfer them to the card.

3. Finally, cut out the card shape using scissors or a craft knife on a cutting mat. You can now place the card template on your chosen fabric and draw around it with tailor’s chalk or a fabric marker pencil to transfer the shape to the fabric.
