Newfoundland Rickrack Stripes

The fingers and palms of Newfoundland gloves and mittens frequently have an offset color alternation (Rnd 1: k 1 blue, k1 white; Rnd 2: k 1 white, k 1 blue—Salt & Pepper), but change the color carried ahead in every round, so that the same stitch (say, Stitch No. 1, 3, 5, 7…) is consistently carried ahead.
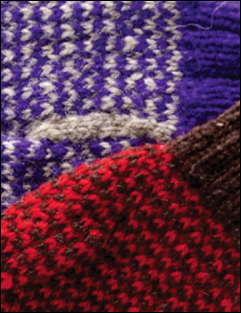
The carried-ahead stitches are then stacked one above another in vertical ridges obvious to eye and touch, thickening and tightening the knit, giving the palms greater durability, warmth, and a better gripping surface.
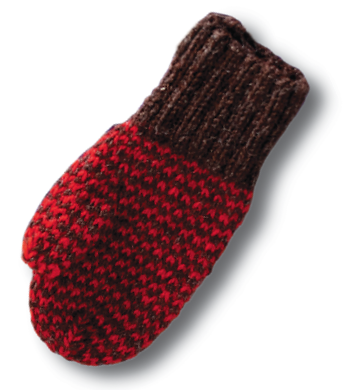
Here is a pattern for mittens entirely made with this technique, which are intriguingly squashy when made with a light worsted weight wool yarn. The pattern is almost the same as Striped Mittens, but has a different cuff and enough other differences that I gave it its own pages, graphics, and measurement box.
I haven’t seen this technique used as a tradition for entire mittens anywhere in my mitten travels, but think it deserves a little push. The constant change of carried-ahead color may drive you crazy at first, but it falls into a rhythm and the product is worth the trouble.
Technical stuff
While the stockinette striped cuff of the other striped mittens can be used for this mitten, a single-colored, ribbed cuff seems better suited to its squashiness and the small, visual action of the rickrack stripes. A smaller size knitting needle is used for the cuff.
The thumb gore increase is taken from the traditional thumb gore for Salt & Pepper—inc 4 sts every 4th rnd.
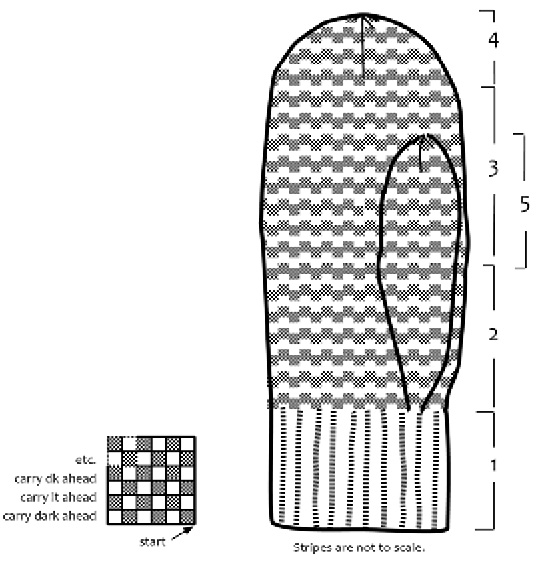
The lengthwise ridged effect and the rickrack-like widthwise stripes are achieved by stacking alternating colored, carried ahead stitches on an uneven number of sts throughout. That is, in a rnd, carry the odd numbered sts (every other st) ahead.
This means changing the color carried ahead at the beg of every rnd, so that, say, the first st (and the 3rd, 5th, and so forth) will be carried ahead but will alternate in color rnd by rnd.
This mitten is knit circularly on 4 needles.
The mittens are identical and can be worn on
either hand.
Note: Terms in italic are explained in Terms and Techniques. Please check out T & T at least once, then refer
to it when moving
into unknown areas.
Abbreviations are explained in the directions.

Directions
Abbreviations. beg, beginning; CC, contrast color; dec, decrease; in, inch(es); inc, increase; k, knit; MC, main color; p, purl; rep, repeat; rnd, round; SSK, slip, slip, knit; st(s), stitches; tog, together.
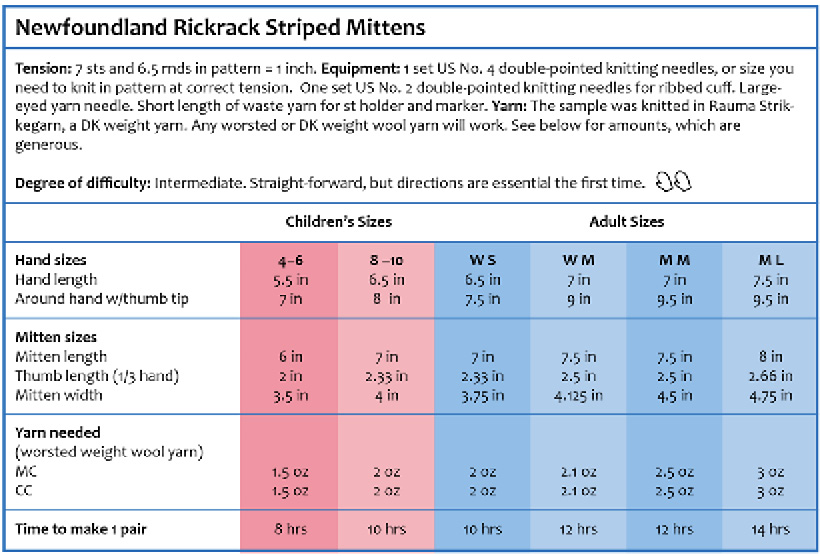
1. Cuff. On smaller needles and using Maine cast on and MC, cast on 45, 45 (48, 54, 57, 60) sts.
Work k2 p1 ribbing in MC until cuff measures at least 2, 2.33 (2.33, 2.5, 2.5, 2.66) inches. 6 sts before the end of last rnd, join CC.
2. Thumb gore and hand.
Set-up rnd. Change to larger needles and Salt & Pepper pattern, starting with MC and carrying ahead MC this rnd.
At beg of this rnd, set up thumbgore: k1, k both colors into 1 st in pattern sequence, k1, k both colors into next st, place marker. The 5 sts between the first st and the marker are the beg of the thumb gore.
Work to middle of Needle 2 (little finger side) and k both colors into 1 st in pattern sequence in 1, 1 (2, 2, 1, 2) successive sts. Complete rnd even. 48, 48 (52, 58, 60, 64) sts.
Work 3 rnds even, always changing the color carried ahead at beg of every rnd. The ridges will always come out even, but the Salt & Pepper won’t, and there will be 2 sts of the same color at the beg/end of the rnd.
Work 3 rnds even, always changing the color carried ahead at the beg of rnd. By the 4th rnd, you should begin to see little ridges forming vertically, and odd-looking jagged stripes starting to form widthwise.
Inc rnd. K 1, k both colors into 1 st, place marker, rep k in pattern to 2 sts before marker, k both colors into 1 st, rep in next st. Complete rnd in pattern.
Inc this way every 4th rnd a total of 2, 3 (3, 4, 4, 4) times until there are 11, 15 (15, 19, 19, 19) sts between the 2 outside MC lines.
56, 60 (64, 74, 76, 80) sts total.
Work even until thumb gore measures 2, 2.33 (2.33, 2.5, 2.5, 2.66) inches.
Take off thumb gore sts. Put on a holder 13, 15 (15, 19, 19, 19) thumb gore sts between (but not including) the 1st and the marker, (but, in Child’s 4–6, include the 1st st and the st after the marker). Remove marker.
Using twisted make 1, cast on 5, 5 (5, 5, 7, 7) sts over the gap, in pattern. 48, 50 (54, 60, 64, 68) sts.
3. Hand. Work even in pattern 3, 3.33 (3.33, 3.75, 3.84) inches, close to the end of the hand. This will seem long, but the dec is quite fast, and the knitting pulls in quickly.

4. Set up dec. Arrange sts on 3 needles so that one needle covers the center back, there are about the same number of sts on each needle, and each needle begins with an MC st.
Dec Rnd 1, and all following rnds. Starting with Needle 2, at end of each needle, SSK in the color of the next-to-last st. At beg of each needle, k 2 tog in the color of the 2nd st. Decs lean toward the “seam.” Work 1 rnd even, then dec this way in every rnd.
When 12 to 14 sts remain, stop.
Compare the length of your mitten with the finished measurement at the beginning of these directions. If you are satisfied with the length, break yarn with a 6-inch tail. Use a yarn needle to draw the remaining sts up on the tail to close the tip.
If you are not happy, measure the length of your dec section, write it down, then rip back to the beginning of the decs and work (or rip) more, so that the length of the dec section and your new work will equal your desired length.
5. Thumb. On 2 needles, pick up 13, 15 (15, 19, 19, 19) thumb gore sts from holder, 5, 5 (5, 5, 7, 7) sts from top of thumb hole. Pick up and twist 1 st from each corner of the thumb hole.
20, 22 (22, 26, 28, 28) sts.
Join both colors by sewing into the inside of the mitten, starting from the right side of the thumb hole. (You can pick this out later and make it beautiful, but this gives you a strong start.) Work even in pattern, matching colors and ridges on all sides to the thumb gore and the upper hand.
Continue in pattern until thumb is 1.37, 1.75 (2, 2.5, 2.5, 3) inches long, or just above the middle of the thumb nail.
Dec as on hand until 12 sts remain. End as on hand.
Finish. Draw all tails inside the mitten. Turn inside out and weave all tails under the floats of the opposite color. Trim tails.
6. Return to Step 1, and make another identical mitten. These can be used on either hand.

