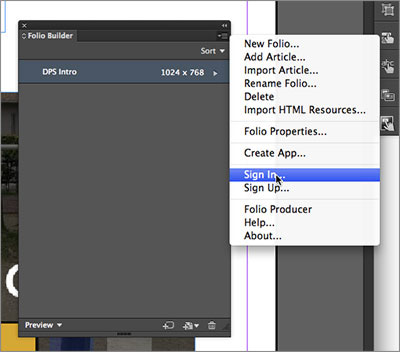
Sign in to the Folio Builder panel.
While you’re building the folio, you may want others to see it so they can give feedback or to share it with team members. From the Folio Builder panel in InDesign, you need to upload the folio to the Folio Producer website in order to share the folio with others. This means that the folio will become an online folio—which means you can’t edit the folio without being connected to the Internet and logged in. The native .indd files are not uploaded and stay local, so you could still make changes to them regardless of whether or not you have an internet connection. After uploading, you can send users an email that contains a link to the folio. Users who receive the link can then download the folio in Content Viewer on their device to see it, or click a link to see a less than stellar preview on the Folio Producer website.
In order to share the folio, you will need to login to the Folio Producer website. That means that you need a free Adobe ID. If you don’t have one, choose Sign Up from the Folio Builder panel menu (or go here: https://digitalpublishing.acrobat.com/CreateAccount.html). Sharing a folio does not require you to pay for any of the paid editions.
Next, you will share the folio with someone else.
1. In the Folio Builder panel, choose Sign In from the panel menu.

Sign in to the Folio Builder panel.
2. Sign in and click OK.
Notice in the Folio Builder panel that an icon is added to the right of the folio names. The little computer icon ![]() means that the folio is offline (local), and any folios that you’ve shared before will appear.
means that the folio is offline (local), and any folios that you’ve shared before will appear.
Before you upload for sharing, it’s important to set the publication name by editing the folio properties. This name appears in the Adobe Content Viewer and is how users can distinguish between the different folios. That’s what you’ll do next.
3. Make sure that you see the list of folios in the panel. Select the DPS Intro folio and choose Folio Properties from the panel menu.
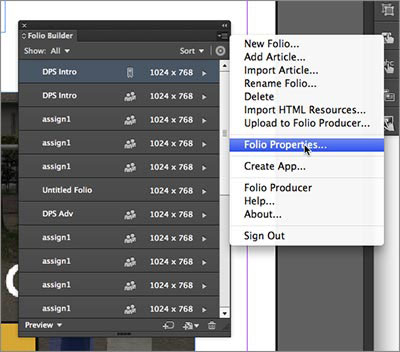
Choose the folio properties. from the panel menu
4. Change only the following settings in the Folio Properties dialog box:
• Publication Name: DPS Intro.
• Cover Preview Vertical: Click the folder icon to the right of Vertical and navigate to DPSIntro > Main_Article > Links > folio_cover_v.jpg for InDesign CC users (or DPSIntro > Main_Article > Links > folio_cover_v.jpg for InDesign CS5/CS5.5/CS6 users). The thumbnail I created is the same landscape dimensions as the folio (768 x 1024 pixels) and either JPEG or PNG. Click Open.
• Cover Preview Horizontal: Click the folder icon to the right of Horiztonal and navigate to DPSIntro > Main_Article > Links > folio_cover_h.jpg for InDesign CC users (or DPSIntro > Main_Article > Links > folio_cover_h.jpg for InDesign CS5/CS5.5/CS6 users). The thumbnails I created are the same pixel horizontal dimensions as the folio (1024 x 768) and either JPEG or PNG. Click Open.
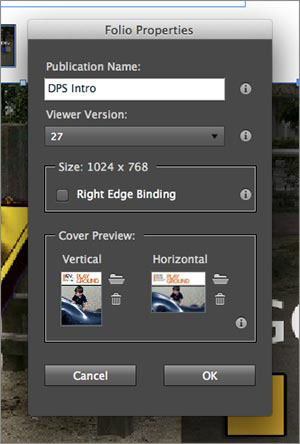
Edit the folio properties.
5. Click OK to edit the folio properties.
6. With the DPS Intro folio selected in the list in the Folio Builder panel, choose Upload to Folio Producer from the Folio Builder panel menu. The folio will be checked to ensure that there aren’t any issues before it uploads it. If there’s a lot of article content, uploading may take a while.
NOTE: From here on out, you will need to be logged in with your Adobe ID to be able to see the DPS Intro folio. It is now considered on online folio. You can also view it on the Folio Producer website by choosing Folio Producer from the Folio Builder panel menu when the folios or articles are showing in the panel.
7. When an Upload Complete message appears, click OK in the Uploading Local Folio dialog box. The offline icon (looks like a hard-drive) has disappeared from the right of the folio name in the Folio Builder panel.
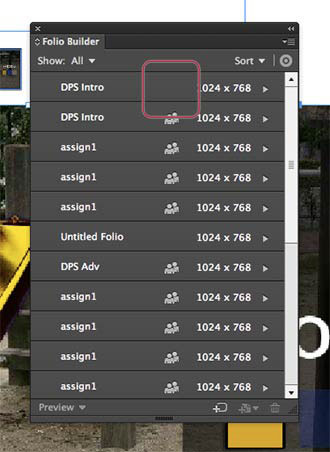
The offline icon is gone.
8. With the DPS Intro folio selected in the Folio Builder panel, choose Share from the Folio Builder panel menu.
In order to send an email to someone, the email address must be an Adobe ID. If your desired recipient doesn’t have an Adobe ID, they need to create one.
9. In the Share dialog box, enter the emails address(es). You can press Return between each email address or paste a list of addresses in. Edit the subject and add a message if you like. If you want to share it with me, go for it—my email address is brian@brianwoodtraining.com. Click OK.
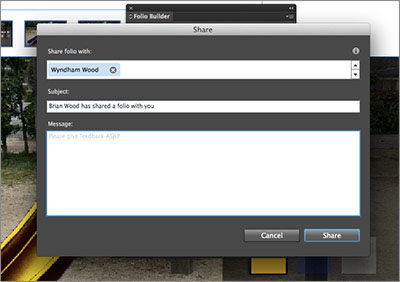
Share the folio.
NOTE: You can unshare a folio if you like. Simply select the folio in the Folio Builder panel list, and choose Unshare from the panel menu. Select the user(s) and click OK.
When the user gets the email, they can click the link to see the folio on the Folio Producer Service (the Folio Producer website).
After logging in with their Adobe ID on the Folio Producer website, they will be able to explore the folio. Currently, if you create a PDF based folio with PDF based articles, the thumbnails that normally show, won’t show in the Folio Producer (as seen in the next figure)
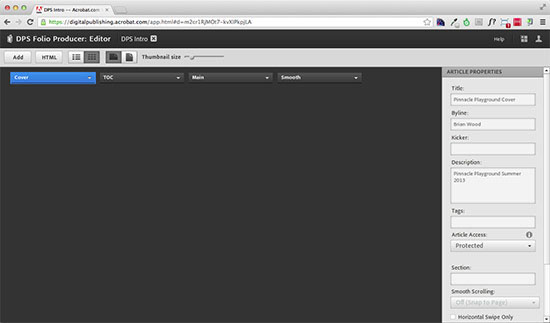
What users will see when they log in with their Adobe ID.
They can also head straight to their supported device (such as an iPad) and download the Adobe Content Viewer from the app store on the device (such as the Apple App Store). Once they install the app, they can sign in with their Adobe ID.
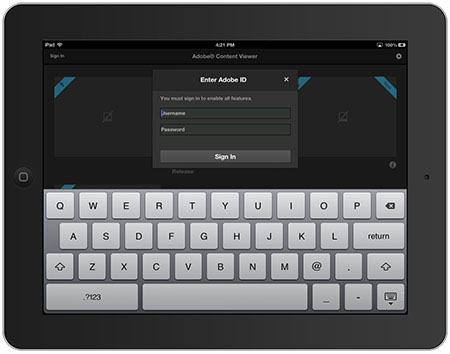
Sign in to Adobe Content Viewer on their device.
After signing in, the folio should then appear in their list. They can then tap to download it and take a look.
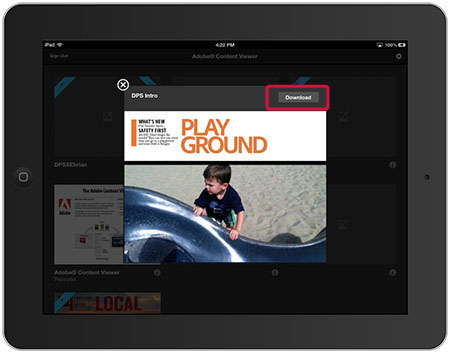
Tap to download, then open the folio.
If you share your folio, there will be a change in your workflow when you make changes to the folio article content. Now that the folio lives on the Folio Producer Service in the cloud, you will need to upload the articles again after you make changes to them to update the folio.
1. Close all open pages in InDesign.
2. In the Folio Builder panel, double-click the DPS Intro folio in the list to show the cover article. Double-click the cover article to see both orientations. Double-click the Landscape Layout to open the InDesign file (you can also open it by choosing File > Open). Make a text change and choose File > Save, and then choose File > Close.
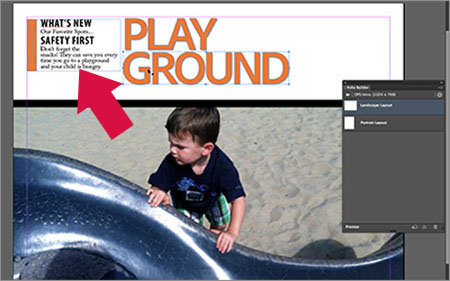
Make a text change.
NOTE: From this point on, when you make updates to your InDesign files, make sure that you change both orientations. I’ve made the mistake of changing the layout for one orientation and not the other many times before.
3. After editing the article, click the Back to Article arrow in the upper-left corner of the panel to show the articles again. Make sure that the Cover article is selected.
4. Choose Update from the Folio Builder panel menu.
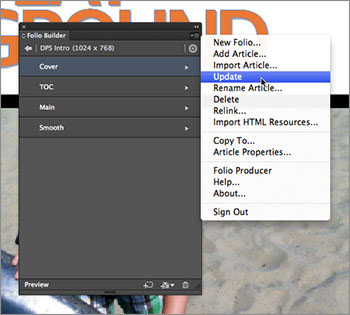
Update the article content.
After the article has uploaded to the Folio Producer Service again, any users that you’ve shared the folio with will be notified that there is an update available for the folio in Adobe Content Viewer on their device. They can choose to download the update and take a look.
NOTE: If you are a Single Edition subscriber, you only have to test on one device—the iPad. But in a perfect world, you would test on a non-Retina version (iPad 1, iPad 2, or iPad mini) and a Retina one (iPad 3). If you are a Professional or Enterprise subscriber, you can create for multiple devices and stores and will most likely create renditions for your articles. To learn more about renditions, visit: http://helpx.adobe.com/digital-publishing-suite/help/create-folio-renditions.html.