Chapter 3
Building the Foundation and Floor
It’s time to dig in the dirt, set down a foundation, and build a floor. To start, you’ll need your nine essential tools, plus a shovel and these materials listed below. Among the choices, I recommend the first item that is locally available or most affordable.
Foundation and Flooring Materials
Foundation
- 4 pier blocks, concrete blocks, or large, flat stones; or
- 24 bricks
Foundation stakes
- 4 1×2 or 2×2 scraps, about 2 feet long
Foundation sills
- 2 4×4s, 8 feet long, pressure-treated
Floor joists
Floorboards
- 14 1×6 car siding or pine boards, 8 feet long; or
- 11⁄2 4 × 8-foot sheets 5⁄8"- or 3⁄4"-thick plywood; or
- 11⁄2 4 × 8-foot sheets 3⁄4"-thick tongue-and-groove OSB (Sturd-I-Floor)
Nails
- 1 pound of each 6d coated sinkers; 8d coated sinkers; 6d or 8d galvanized box nails (optional; for nailing down floorboards)
Project
Building the Foundation
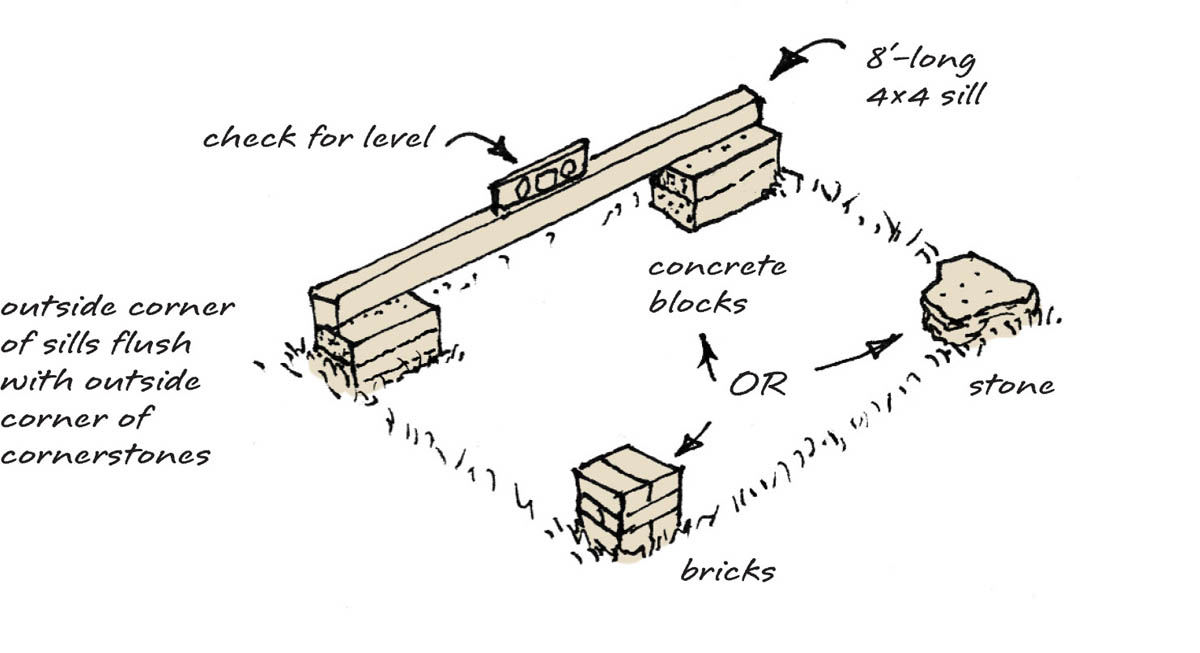
The Classic Clubhouse is 6 feet wide and 8 feet long. To build its foundation, you’ll need to set cornerstones of concrete blocks, bricks, or flat stones at each corner. If you have to buy your cornerstones, pier blocks or concrete blocks work best.
Look at your building site and decide where you want the corners of your clubhouse to be. If the site is cluttered with weeds or junk, clear it out before building. A clean site is a safe site. Start out by finding the foundation corners and pounding in stakes.
Set the Stakes
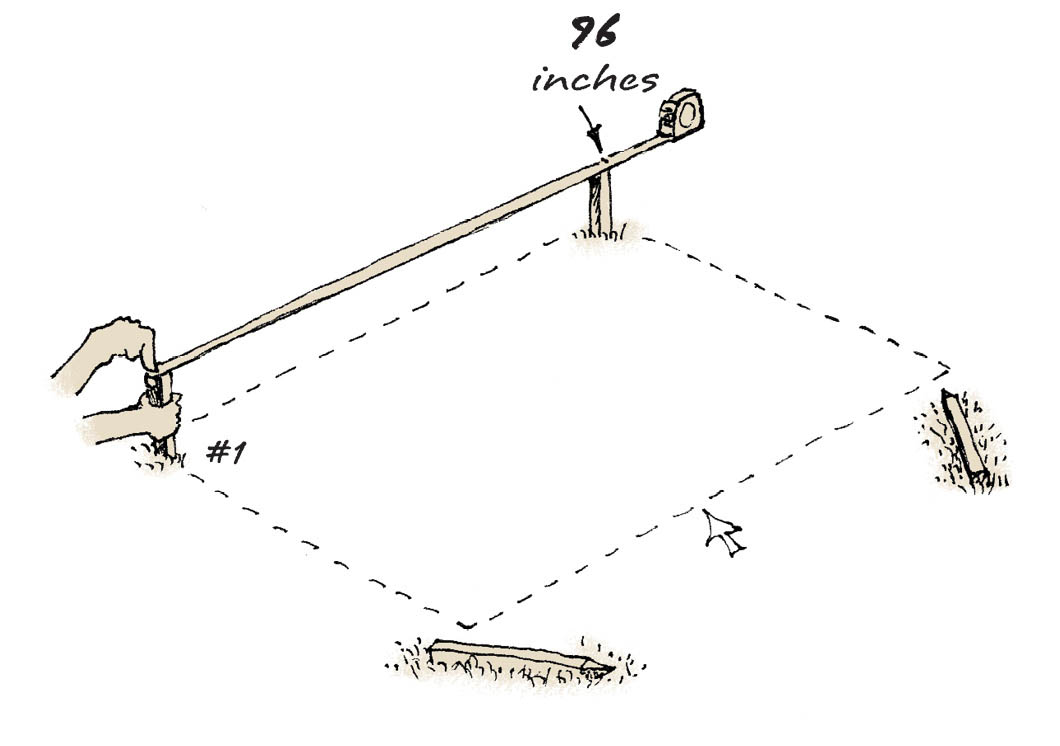
- Step 1. For your first corner, pound in a stake, which we’ll call Stake #1.
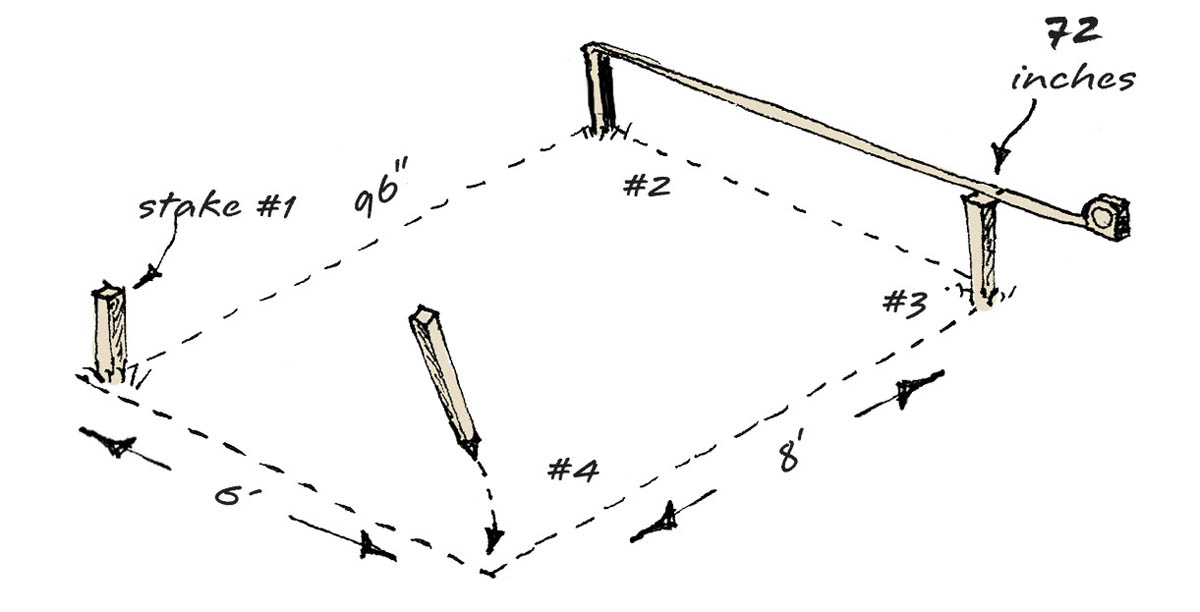
- Step 2. Hook your tape measure on the stake (or have your friend hold it there) and pull it to the 8-foot (96-inch) mark to find the location of Stake #2, and pound that one in.
- Step 3. Now turn and measure 6 feet (72 inches) from Stake #2 to set Stake #3.
- Step 4. Now measure from both Stake #3 and Stake #1 to set Stake #4.
Square the Foundation
Once the stakes are in, check them to make sure your foundation is square. “Square” means that all four corners form a 90° angle.
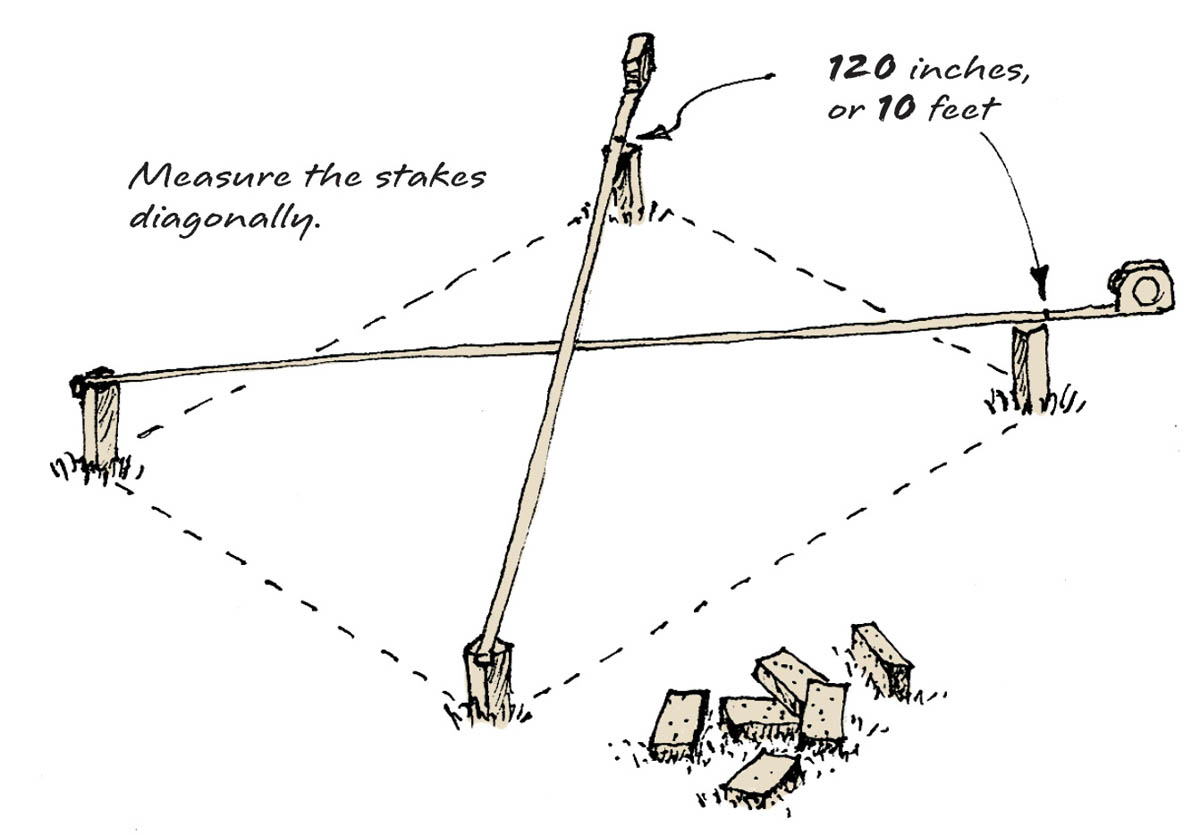
- Step 1. Get a friend to help you measure diagonally across your stakes (see the drawing at right). For a 6-foot by 8-foot foundation, the diagonal measurement will be exactly 10 feet.
- Step 2. Pull up and reset the stakes until you get this measurement in both directions. This method works best on fairly flat ground, and don’t worry if the diagonal measurements are off by up to an inch . . . you’ll test this again when building the floor frame.
Set and Level the Cornerstones
The stakes now tell you exactly where the outer corners of your foundation stones are to be set.
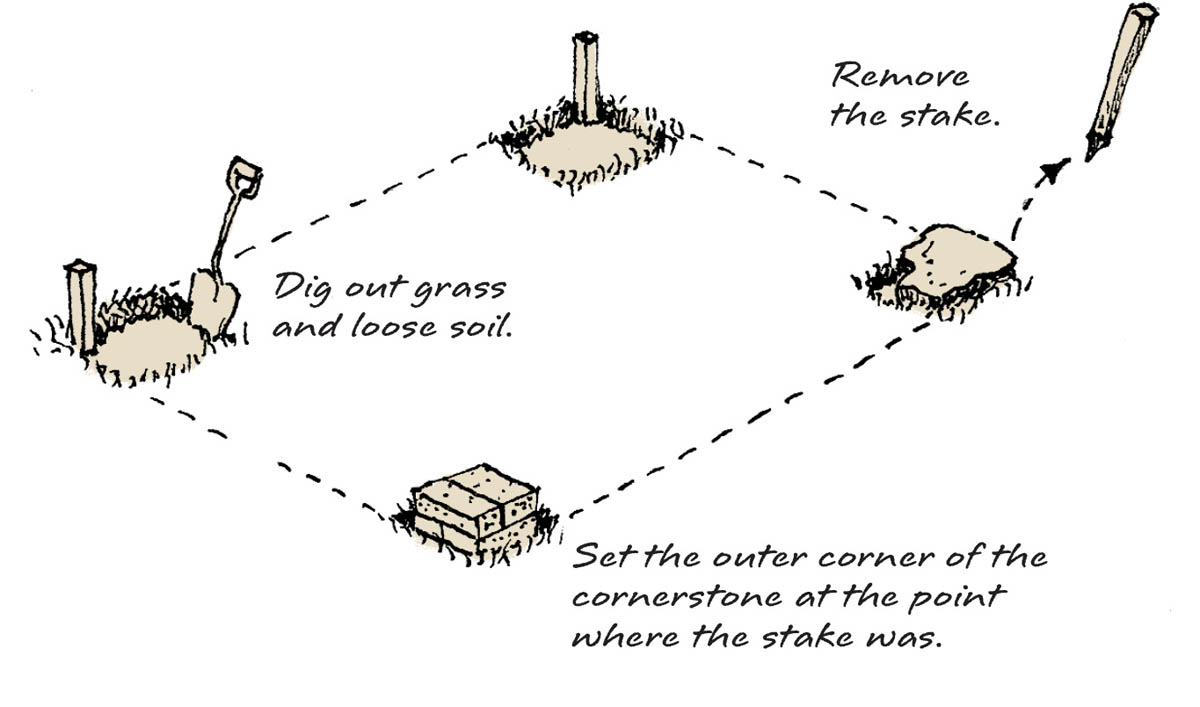
- Step 1. In each corner, dig out any loose dirt and grass for the cornerstone.
- Step 2. When you’re ready to set the cornerstone in place, take out the stake. Set the stone, adjusting it as necessary to make sure it’s stable.
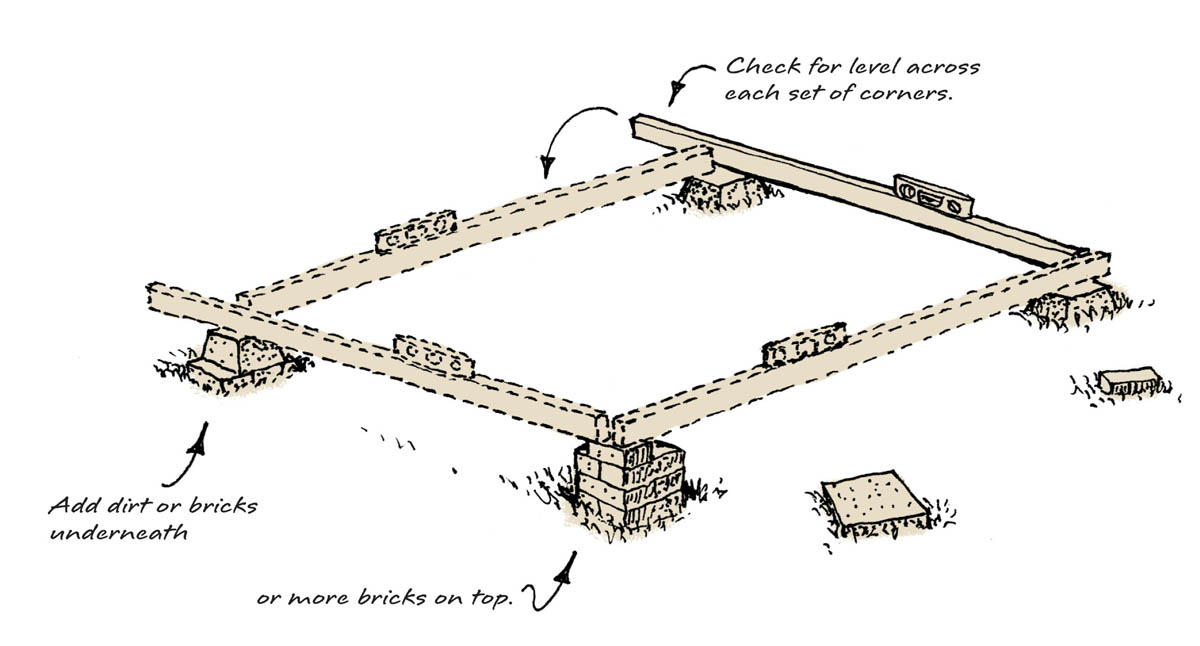
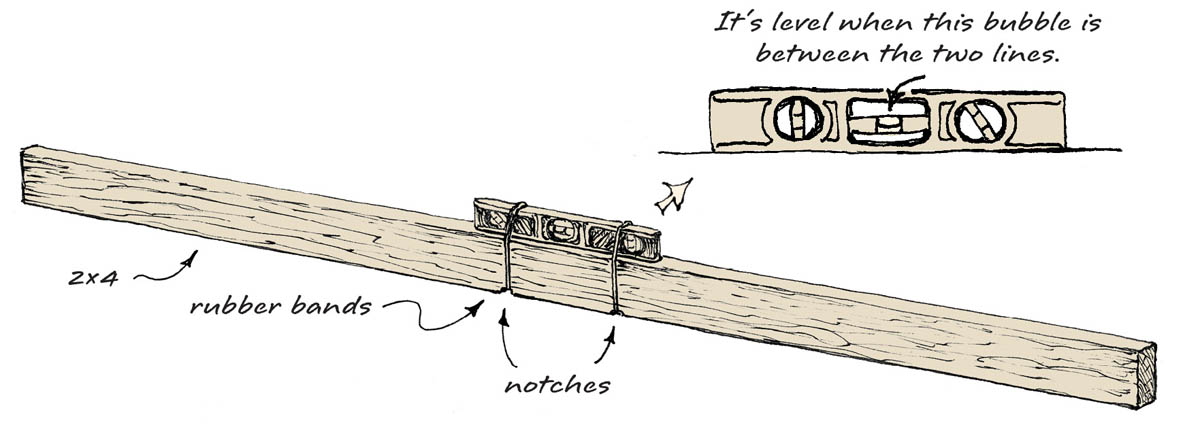
- Step 3. Level the cornerstones to ensure that the floor of the clubhouse will be level. You can check for level by laying a long, straight 2×4 across the top of each pair of cornerstones and setting your level on top of it, as shown in the drawing below. If the cornerstones aren’t level, you may have to dig out more dirt from beneath one or more, or add bricks or stones. Then check for level again. Be patient; sometimes this takes a while, but starting with a level foundation is key to a successful clubhouse.
Project
The Floor Frame
Now you’ll build a floor, beginning with 4×4 sills, which will support the 2×4 joists, which will support the floorboards. Yes, the 4×4s are big and heavy, but if you have a sharp handsaw, you’ll be able to saw through them. Remember this: Before power saws and nail guns were invented, whole houses were once built with handsaws and hammers.
Cut the Sills
- Step 1. Set the 4×4 sills on your sawhorses, then get out your tape measure, pencil, and square. Measure to exactly 8 feet (96") along the top of each 4×4, and mark that spot. If the sills are already 8 feet long, or within 1⁄4" of 8 feet, you lucked out. If not, use your square and draw a line across each 4×4 at that mark and also down the sides.
- Step 2. Begin sawing the first sill. Your saw is nice and sharp, right? Take your time as you saw steadily through the 4×4. If it wiggles, have a helper hold it down. Use the line you drew as a guide, keeping the saw on the line. Make sure the piece you are cutting off is beyond the end of your sawhorses (not between them) so it will fall free.
- Step 3. Do the same thing for the other sill. There! You just sawed through the thickest pieces of wood in your entire clubhouse.
Mark the Sills for the Joists
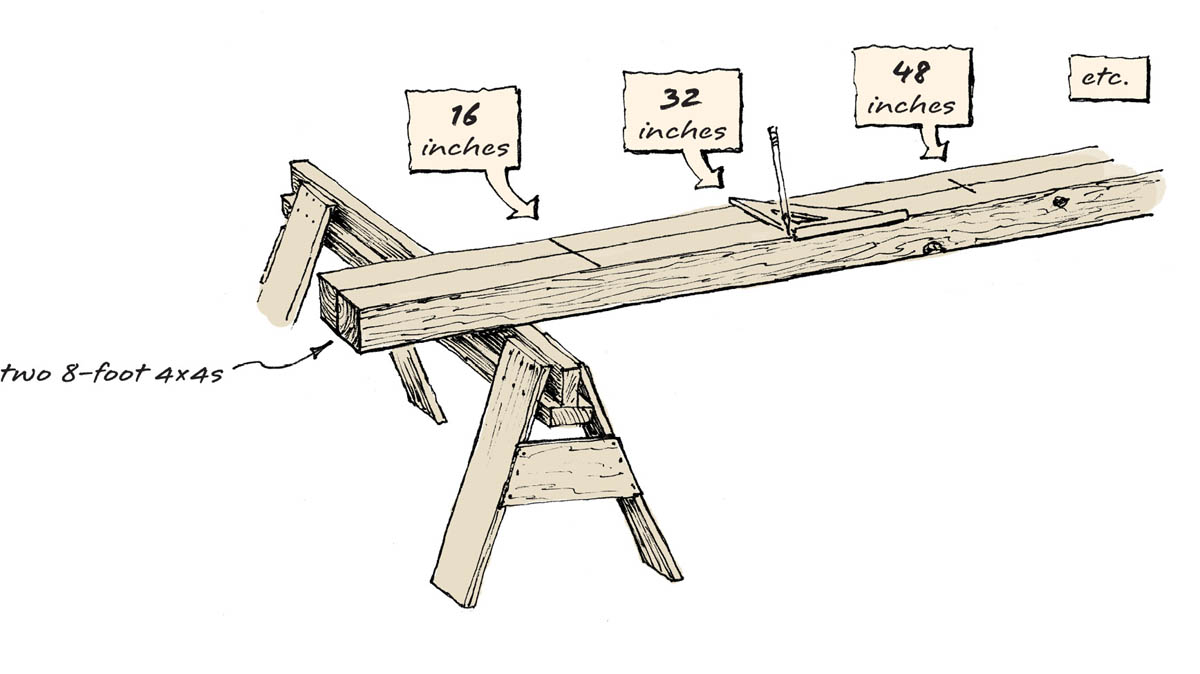
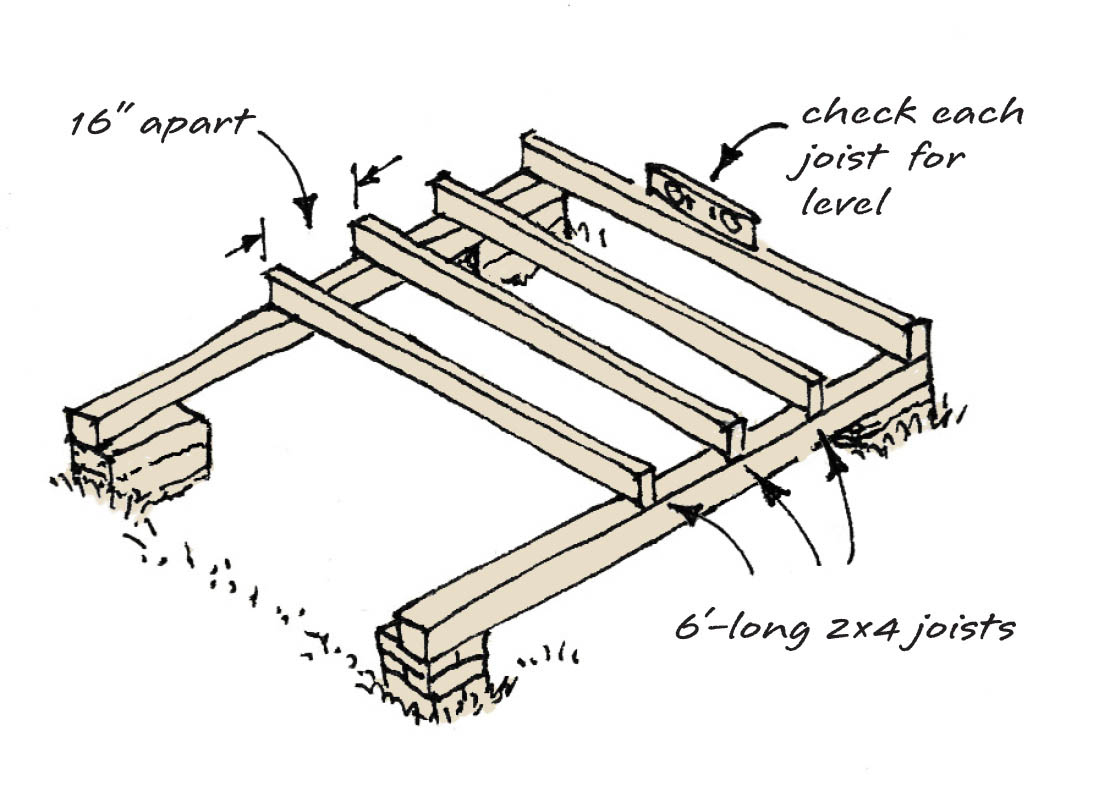
- Step 1. Lay both sills side by side on your sawhorses. Hook your tape measure to one end of one of the sills, and with your pencil, make a mark every 16" to the other end.
- Step 2. Using your square, draw lines over the marks across both sills. These will be the centerlines for your 2×4 floor joists (the boards that hold up the floorboards). This means that the joists will be centered over the lines. Tape measures usually have a little arrow at 16", 32", 48", 64", and every 16" thereafter because this is the standard spacing of joists, studs, and rafters in house building.
- Step 3. Once you’ve drawn all the centerlines, set the sills on the cornerstones. Set your level on each one to check for level, just to be certain.
Install the Joists
- Step 1. For your floor joists, get seven 2×4s and place them on your sawhorses. Measure and mark each 2×4 at 6 feet long, then draw a cut line using your square. Saw them all to length (unless you lucked out again), sawing slowly and watching your cut lines. Then take a break; that was a lot of sawing.
- Step 2. Set your joists on the sills so they are centered on the centerline marks, then put your level on them for one more test. You might have to add a shingle or thin piece of wood under one or more of the sill ends to finally get the whole thing level. Keep at it!
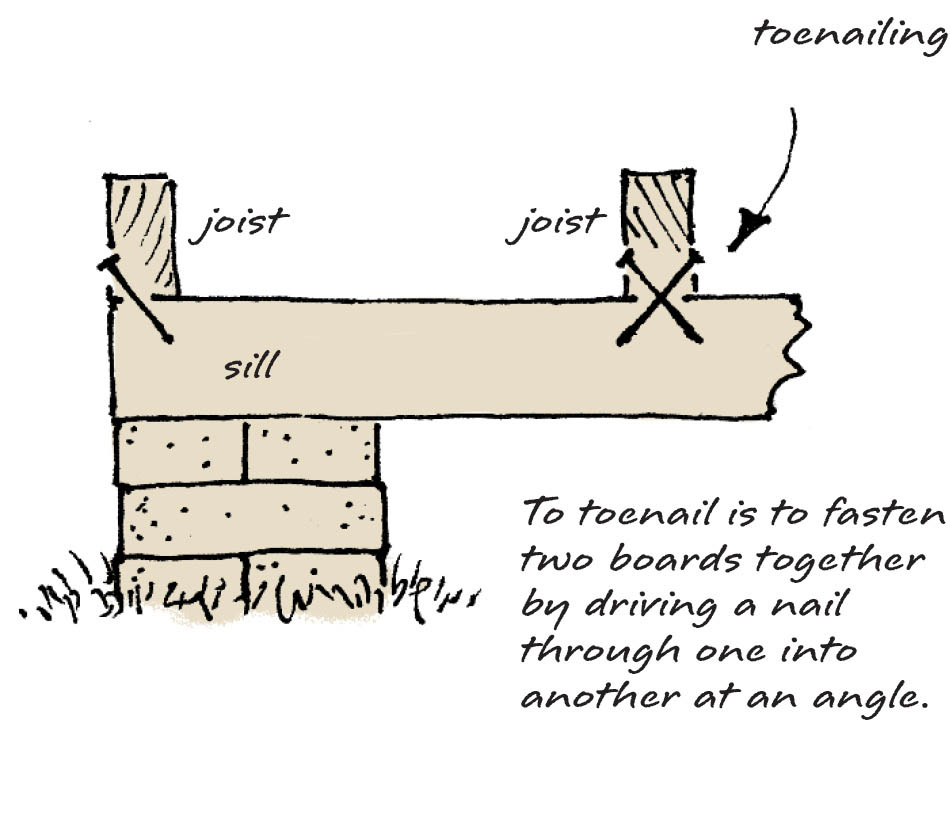
- Step 3. Once the joists are level, nail them to the sills with 6d nails. You’ll have to toenail them — that is, drive a nail at an angle through one and into the other. The best way is to hold the joist in place with your knee, tap the nail into the side or end of the joist, near the bottom, and then drive the nail at an angle until it “bites” into the sill. (See the drawing below.) This can be tricky at first, but toenailing will get easier after some practice.
- Step 4. If your floor is crooked, meaning not square and level, it will be a lot harder to build the rest of your clubhouse, so test your floor frame for squareness again by measuring the diagonals. Hook your tape to one corner of your floor, pull it diagonally to the far corner, and see if you get 10 feet, or 120". If it’s longer, have a friend hold down or sit on the far corner of the floor frame while you push the opposite (diagonal corner) toward him or her to lessen the long measurement. Continue until the diagonals are both the same.
- Step 5. Test the frame for level one more time because all the nailing and nudging might have moved things.
Once you’ve gotten this far, take a break. Go swimming, eat lunch, or do something else because you just did a lot of building!
Project
Putting Down the Floorboards
Ready to continue? Let’s put down the floorboards. Any boards, plywood, or OSB panels will work fine, even in combination, so long as all the boards are the same thickness. Car siding, nailed with the grooves facing down, makes a nice, tight floor.
How to Install Floorboards
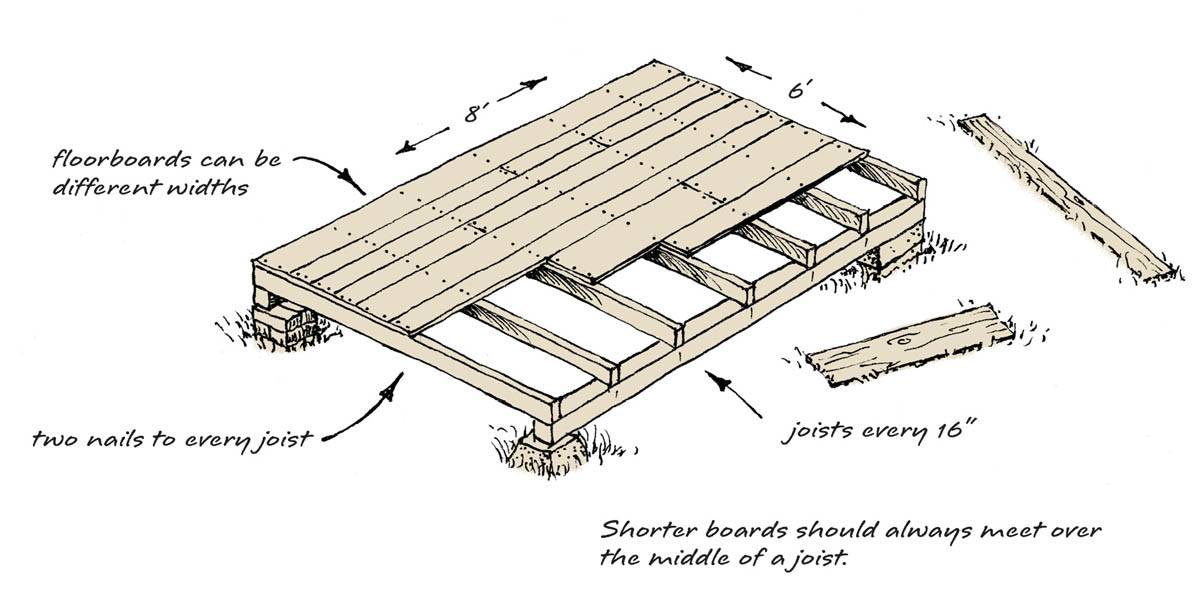
- Step 1. Set some floorboards on your sawhorses. Measure and cut the boards so they either go across all your joists (8 feet long) or will end over the center of a joist. Since your joists are all 16" apart, the floorboards will be 16", 32", 46", 64", 80", or 96" long. The longer the better, and every board must end over the middle of a joist.
- Step 2. Nail the boards to every joist with 8d nails.
How to Install Plywood or OSB Panels
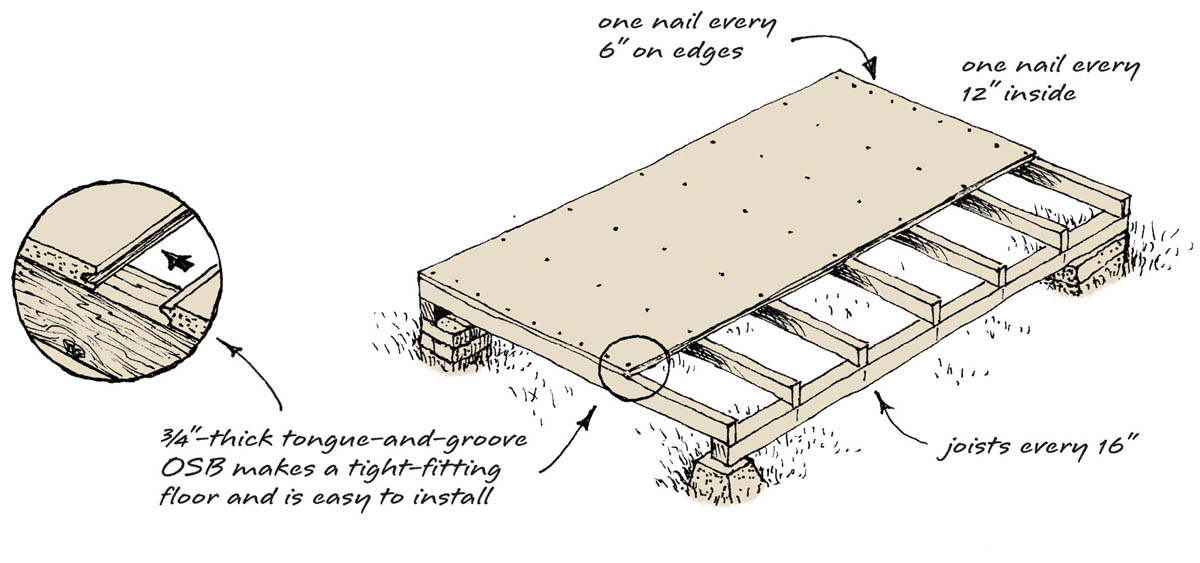
- Step 1. If you’re using sheets of plywood or OSB, first cut them to size, then set them over the joists. Remember to use 5⁄8"- or 3⁄4"-thick plywood or OSB. If your floor frame is square, a 4-foot by 8-foot sheet should fit nicely on your joists, without any cutting.
- Step 2. Start a nail in each corner of a sheet or panel to set it in place, then pound in a nail every 6" along the outside edges and every 12" on the inside joists. Use 8d nails.
Okay, now you have a floor that will last for years. Time for a snack!
