Seeds cost only pennies a plant when you buy them by the pack, and if you know how to harvest and save them, you may never have to buy more again. Making mature plants into dozens more doesn’t cost a thing—all you need is a gardening friend who is willing to give you a piece. I’ve never met a gardener who wasn’t generous, if not downright pushy, about passing a little bit of his or her botanical fortune along.
Any herb that makes flowers will eventually yield seeds. But as a general rule, unless you intend to grow a thyme lawn or you just really, really, really love sage, only annuals and biennials are worth growing from seeds. They germinate quickly and grow to a size that is ready for harvest within months, sometimes weeks.
Perennials, on the other hand, can take ages, sometimes even years to grow into mature plants that are ready to harvest. It makes more sense to spend a few extra bucks on a transplant you can start to harvest almost immediately, but if you’ve got the patience to grow from seeds, be my guest.
The first things to know before growing plants from seeds are where they will grow best and when to start them. The back of a seed packet or Section Two of this book will help you with the when part.
Where depends on your climate and the life cycle of each plant. Those of us in the frosty north start tender and tropical plants such as basil and marigolds indoors around late winter or early spring in order to get a jump on the growing season. Starting seeds by this method is a bit of a production, but it’s also exciting, bringing a little greenery into your life when the world is still frozen and white outside.
Regardless of whether you are sowing into used coffee cups or objects made of wood, plastic, or any variety of materials found in the recycling bin, always—and I can’t stress this enough—make lots of holes in the bottom of your container before adding soil and sowing into them. Seedlings are even more vulnerable to rot than mature plants. Proper drainage is an absolute must.
I typically poke three holes into the bottom of a coffee cup using a pencil or pen. Adjust the number of holes according to the size of the pot or tray used.
Prewash used containers with warm, soapy water. Add a splash of hydrogen peroxide to the water to help sterilize the pots.
The soil you use to start seeds should drain exceptionally well, yet hold moisture like a sponge. A store-bought soil-less mix marked “specially prepared for seed starting” on the package is your safest bet and worth the slight cost markup. It’s light and airy and has been sterilized as a preventive measure against diseases that could harm sensitive seedlings.
Grow These Herbs from Seed
Herbs marked with an asterisk (*) do not transplant well. Direct-sow when you can.
• Anise hyssop
• Basil
• Catnip
• Chervil
• Chives
• Coriander
• Dill*
• Fennel
• Mustard greens
• Nasturtium
Soak nasturtium, runner bean, or other seeds with a hard shell in water for no more than 24 hours to encourage the shell to crack open. Rub parsley, bay, and coriander seeds along a piece of fine sandpaper to cut into the hard shell slightly.
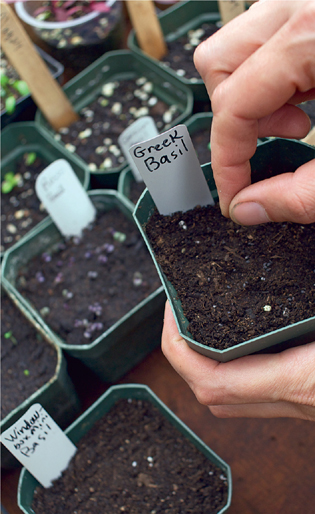
I like to do my seed starting assembly-line style by preparing the pots and filling them with soil ahead of time. That way I can wash and dry my hands before the precision work of sowing tiny seeds. Keep a scrap towel on hand to wipe soiled hands. This is fun, messy work.
1. Prepare each pot ahead of time by poking drainage holes into the bottom.
2. Fill each container with moistened seed-starting soil to within about ½" or so of the top.
3. At most, sow two mid- to large-sized seeds into a typical 4" pot. Sprinkle several small seeds onto the surface of a shallow tray or a recycled lettuce container from the greengrocer’s.
4. Sow seeds thinly or deeply in direct proportion to their size. Plant big seeds into a hole and sprinkle superfine seeds evenly along the soil surface like you’re seasoning a meal. Consult the seeds packet for detailed instructions.
5. Lightly cover the seeds with a layer of fine grit, perlite, or vermiculite to keep seeds from tossing around or sitting in a puddle when you water.
6. Place the pots on a tray and water the soil well until it is wet right through to the bottom of the pot. Toss any extra water that is left in the tray after a half hour.
7. From the moment you sow your seeds until they germinate, keep the soil cozy, warm, and evenly moist, like a damp sponge that has been squeezed out slightly.
8. As soon as the seeds poke their heads above the soil, set the pot in the sunniest window you’ve got and turn it daily so that all sides receive light.

It’s best to direct-sow plants that do not like to be transplanted or that need a bit of cold weather to germinate. Plant the seeds straight into the ground or into large pots that are already outside. Drainage is still key; however, you do not need to buy special soil or affix a grow light. You’ll find that the process is a lot easier because you are not fighting low light levels, dry indoor air, and the fake environment indoors.
DIY Lighting
A grow-light set-up is ideal for seed starting if you’ve got one. Make your own using a fluorescent shop light equipped with one cool white bulb and one warm white bulb. Place your plants within inches of the lights and keep it running for 12–16 hours per day.

Scrap paper sheets, cut into squares (4 min)
Scissors
Set aside a portion of the seeds that you harvest for growing next year’s garden.
• Clean them and lay them on a piece of newsprint or paper towel for a few days until they are thoroughly dry. You do not need to wash seeds that come from a dry seedpod (e.g., coriander, dill, basil).
• Store them in an envelope or glass jar that is marked with the variety name and date.
• Only save seeds that are mature when you pick them. They should be practically falling off the plant.

The fact that we can make baby replicas from the bits and pieces of older plants is kind of freaky and miraculous when you think about it. It’s also the only way to reproduce some unusual varieties and stay true to form.
Propagate healthy, strong plants, because chances are good that any diseases they may have will eventually pass along to their plant progeny.
Dividing the root ball into smaller plants is good for the health of older perennials that have grown cramped and squished into a tight spot. Creating smaller clumps brings back the vitality of lackluster herbs and prevents root rot.
TRY THIS WITH: Perennials such as mint, marjoram, oregano, lemon balm, hyssop, catnip, French tarragon, and clumping herbs including chives and lemongrass.
1. Dig around the root mass in early spring as soon as the soil is thawed, or in the fall once they’ve stopped actively growing.
2. Gently pull apart or cut through the root ball with a knife to divide it up into smaller sections. Each piece must have roots and shoots to be viable as a new plant. Pull out or cut off any dead or rotted growth.
3. Immediately replant the healthiest new pieces into separate pots or back where you found them. Take this opportunity to add in fresh compost or soil amenders that will revitalize the plant and help its roots get established in a new location. A thorough drink of water or Homegrown Liquid Feed will also help.

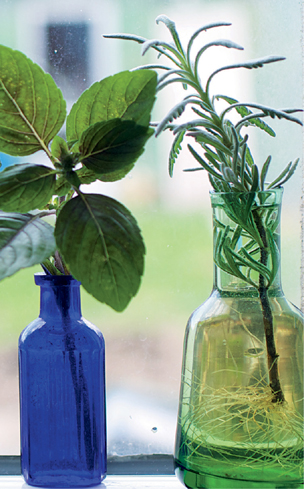
Many soft-stemmed plants will grow roots when you place the stems in water. This is an incredibly easy way to double your basil or mint crop in just a few weeks.
TRY THIS WITH: Nasturtiums, basil, oregano, mint, Cuban oregano.
1. Simply follow the directions for rooting in soil, but place the cut end into a cup of water instead.
2. Top up or change the water every few days.

Many herbs with woody stems will produce roots quickly and effortlessly by this method. It’s practically criminal how easily you can multiply your stock from one small plant.
TRY THIS WITH: Basil, mint, thyme, scented geraniums, rosemary, lavender, lemon balm, catnip, sage, bee balm, bay, myrtle, hops, anise hyssop, tarragon, Cuban oregano, lemon verbena, savory, stevia.
1. Snip a 4–6" stem on an angle just below the spot where the leaves are attached.
2. Remove all flowers and buds and pluck off a few sets of leaves until 1–2 inches of bare stem remain at the bottom. Set aside scented geraniums overnight to let the cuts scab over slightly.
3. Push the cut end of the stem into a plastic pot or tray filled with well-draining soil, coir, or a mix of 1 part vermiculite and 1 part perlite.
4. Keep the soil evenly moist for 2 weeks to a month, or until the cuttings have formed a healthy root system.
NOTE: This method will not work with parsley, dill, and other umbelliferous herbs.


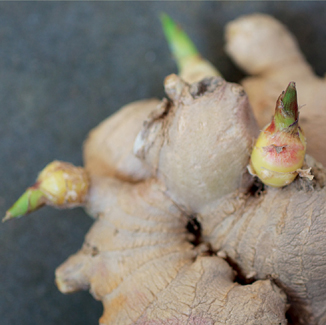
TIP: Ginger leaves have an invigorating scent and flavor that is a lot like the rhizome, but milder and green. Freshly dug roots are tender, pale, delicate, and incomparable to those mummified things that lose their vigor on the hard-traveled road to the produce bin.
TIP: Chopped ginger root and leaves along with a dollop of honey and a slice of lemon make a deliciously warming winter tea.


TIP: In its natural habitat, lemongrass is adapted to very wet summers and dry, warm winters. To mimic this anywhere, locate your plant somewhere that is always warm and bright or move it around as conditions change. Keep the soil damp like a wet sponge through the growing season and decrease watering during the winter.