5
GEOMETRIC TOOLS: DIAGONALS, SQUARES, AND CUBES
DIAGONALS
In addition to their use in constructing perspective grids, diagonals serve several useful functions in the drawing of perspective views.
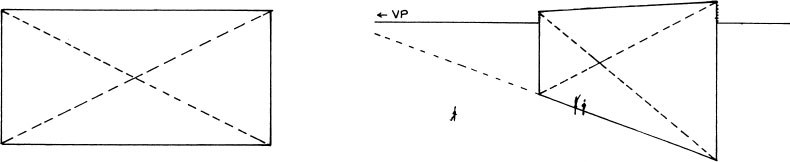
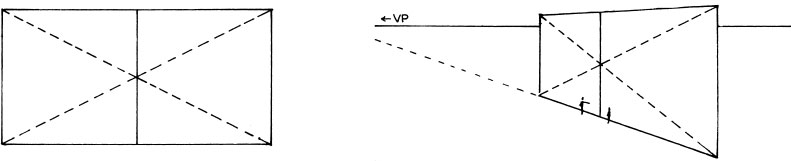
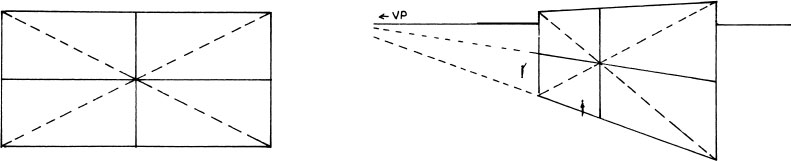
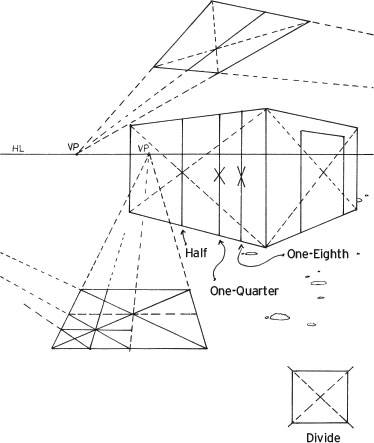
One basic rule is that diagonals of any rectangle will cross at the center of that rectangle; this is also true of rectangles viewed in perspective.
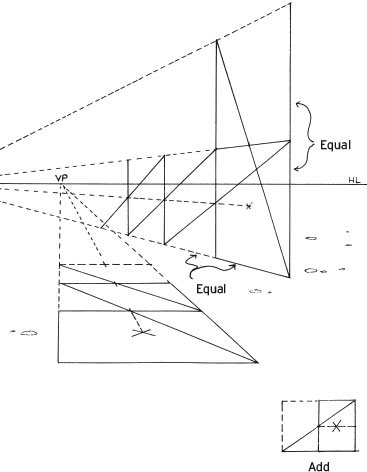
Finding the center automatically means that rectangles can be subdivided and multiplied geometrically in the perspective system, as detailed in the following two exercises.

Dividing a Rectangle with Diagonals
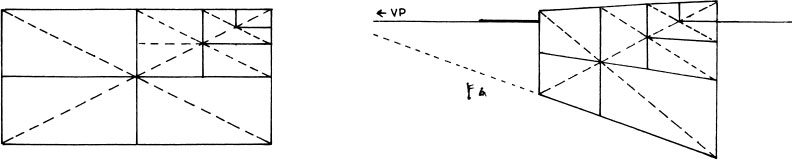
Adding Rectangles with Diagonals


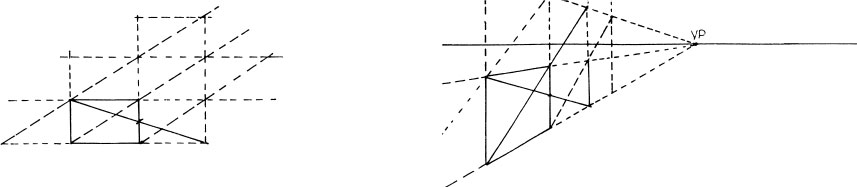
Dividing Rectangles
Adding Rectangles
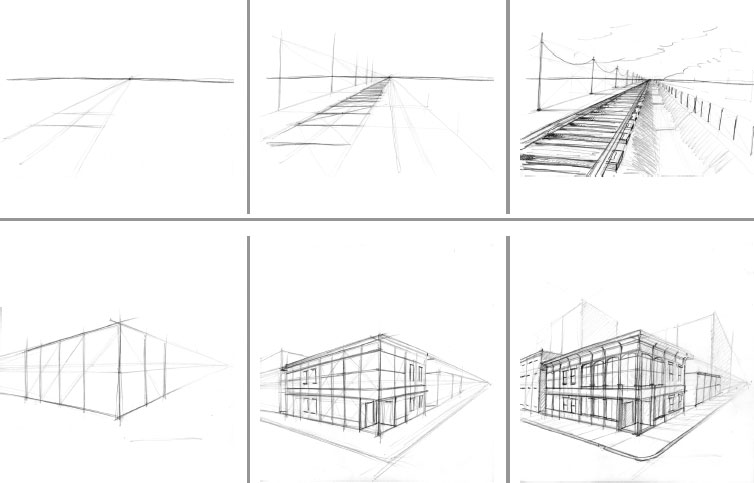
Sketching with Diagonals
SQUARES
Squares are the simplest, most convenient device for building scaled drawings. They are also valuable as conceptual tools for imagining and creating perspective structures, and for estimating and deriving perspective images from observed objects and spaces. A working familiarity with square characteristics is therefore essential.
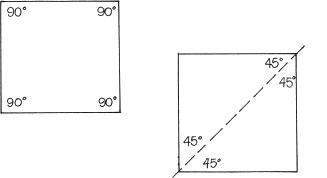
Characteristics of Squares
- All four sides of a square are equal.
- All sides of a square are at right angles to one another.
- The diagonals of squares are always at 45 degrees.
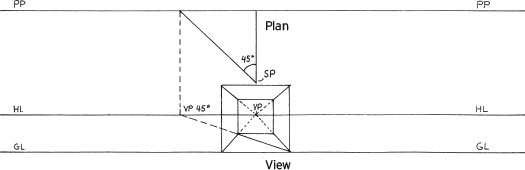
A square can be drawn in any perspective setup if the right-angle vanishing points are known and the 45-degree vanishing point is known.

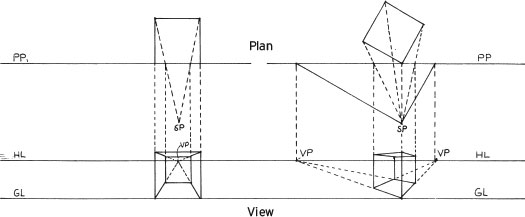
Drawing Squares in Perspective
There are numerous ways to draw squares in perspective views. The following are four of the most basic and common.
Draw the square or combination of squares in the plan and bring the dimensions down into the view. (See Chapter 4, “Constructing Perspective Views” and “Drawing a One-Point Perspective from a Plan.”)
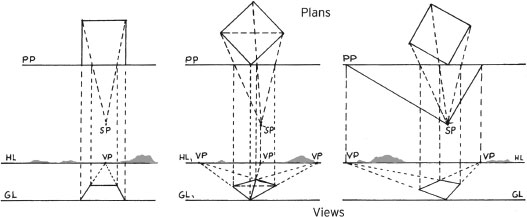
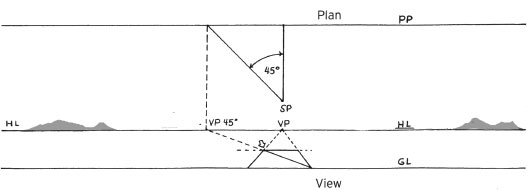
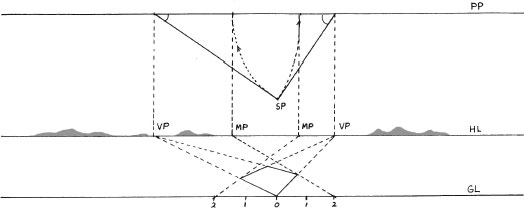
In a one-point-perspective setup, find the 45-degree vanishing point or estimate its position, and then mark off the receding plane at the point where the diagonal crosses.
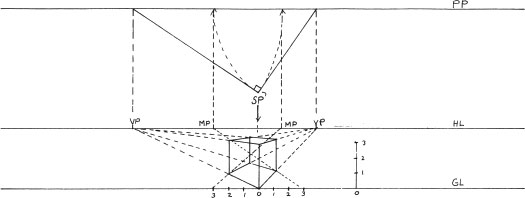
For two-point-perspective setups, find the measuring points and connect them to equal lengths on the ground line (the bottom of a scaled picture plane).
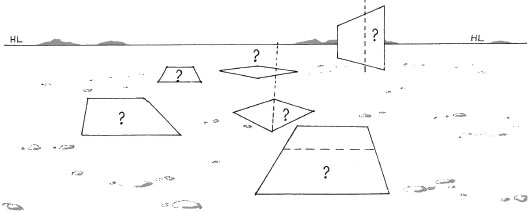
With practice and experience, you will develop a sensitivity to the shapes and proportions of drawn perspective squares, so that you can recognize or correct them.
Sketching with Diagonals and Squares
CUBES
Cubes are a combination of six squares. The methods of constructing them in perspective views, then, are essentially the same as the methods used for squares.
Characteristics of Cubes
- All six sides of a cube are equal square planes.
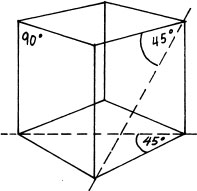
- All six side planes are joined at right angles.
- The diagonals of the sides (squares) are always at 45 degrees.
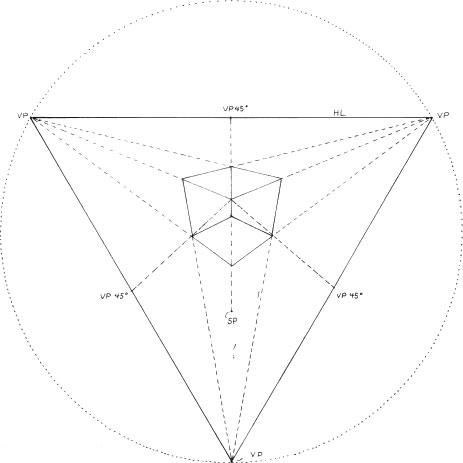
As with squares, a cube can be drawn in any perspective setup if the right-angle vanishing points are known and the 45-degree vanishing point is known.

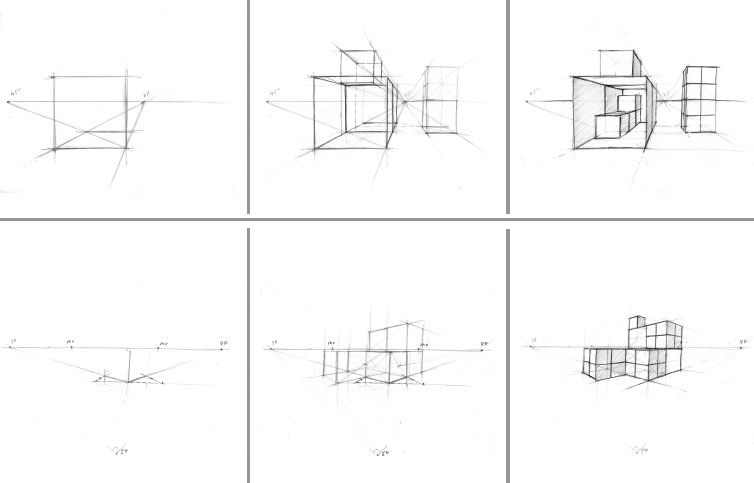
Drawing Cubes in Perspective
The basic methods for drawing cubes in perspective are virtually the same as those for squares, except for the addition of an elevation.
Draw the cube in plan and elevation. After the plan has been brought down into the view, as described earlier (see Chapter 4, “Constructing Perspective Views” and “Drawing a One-Point Perspective from a Plan”), set the whole elevation over the view to coincide with the ground plane (for a one-point perspective) or set the corner elevation at the corner of the view (for a two-point perspective).
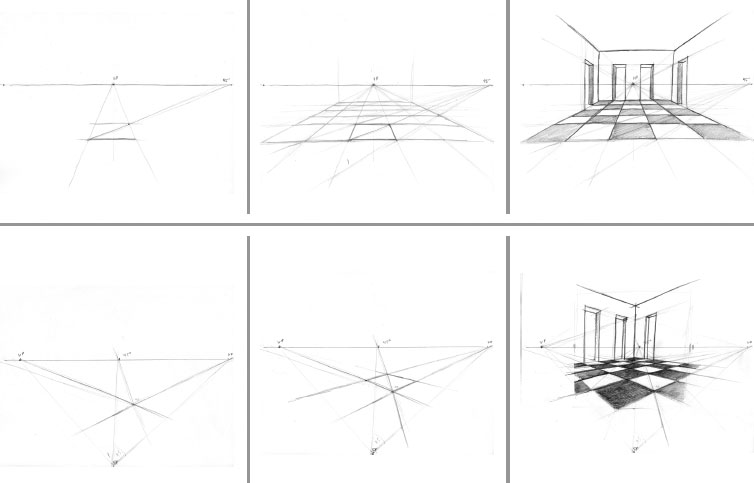
For a one-point-perspective setup, draw a base square, add the elevation, and complete the cube, as illustrated.
To establish the base square for a two-point-perspective cube, find the measuring points and connect them to the scaled ground line. Where a corner of the cube touches the ground line, draw a vertical measuring line and mark it off at the height of the elevation.
As with squares, try to develop the ability to recognize and estimate the proportions and angles of perspective cubes. Try adding and subtracting from various planes until the shape seems correct.
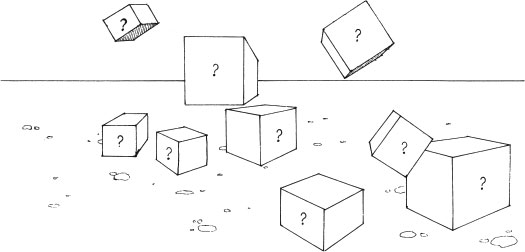
In three-point perspective, none of the planes of the cube are parallel to the picture plane. Therefore, even the elevation of the cube will diminish toward a vanishing point.
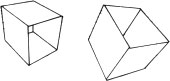
Movement of the object toward any one of the vanishing points will tend to turn the view into a one-point perspective, while movement of the object toward any of the horizons will have the effect of turning the view into a two-point perspective.
Dividing, Adding, and Multiplying Cubes
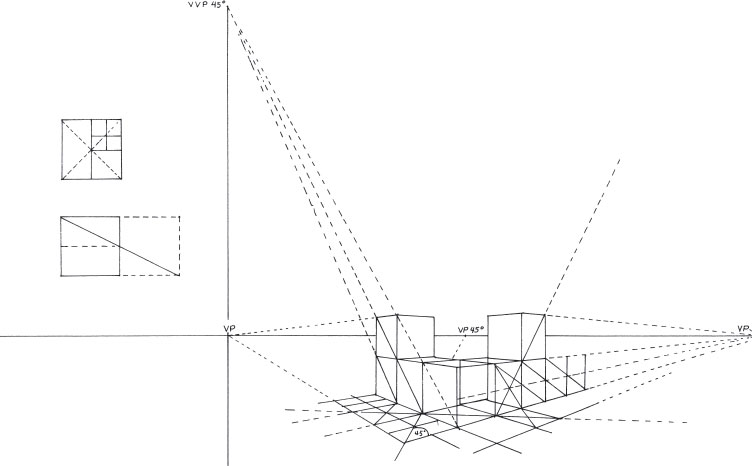
To divide, add, and multiply cubes, use the techniques illustrated above and see Chapter 4, “Constructing a Two-Point-Perspective Grid.” If large numbers of cubes are to be manipulated in this way, it is best to find the 45-degree vanishing point and the 45-degree vertical vanishing piont (VVP). Vertical vanishing points are discussed in Chapter 6.
Sketching with Squares and Cubes