BULLDOG
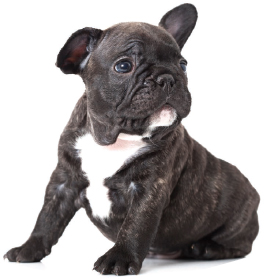
The gentle, affectionate nature of today’s Bulldog belies its violent past. They were once bred to fight bulls in a recreational activity known as bull baiting. Popular during the Middle Ages—first in England, and then throughout Europe—breeders selected for the following traits: a sawed-off, squat body type to keep the dog close to the ground and out of the reach of a bull’s sharp horns; a large head to permit the development of powerful jaws; and a pronounced underbite that allowed the dog to maintain its vice-like grip even as the bull tried to free itself from its powerful jaws.
Bull baiting was banned in 1835. Since then, breeders have selected for more family-friendly qualities. In 2014, the Bulldog was ranked by the American Kennel Club as the fourth most popular breed, so clearly they have succeeded. Known for their gentle, docile temperaments, Bulldogs make terrific pets for families with children. They have even been known to put themselves at risk to save a family member from harm.
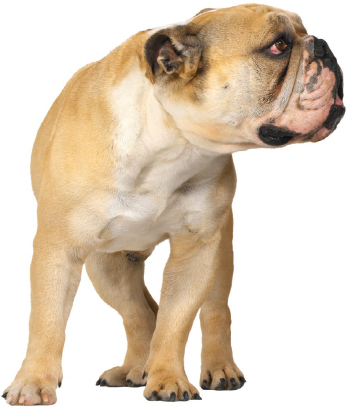
An area where breeders have unfortunately fallen short is in going too far to create the preferred Bulldog “look.” A Bulldog’s short head and pushed-in snout have led to upper-airway issues that can become life-threatening, especially when the dog is overheated. Coats are short and glossy, and come in a variety of colors and combinations.
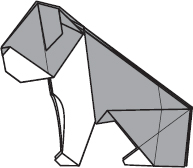
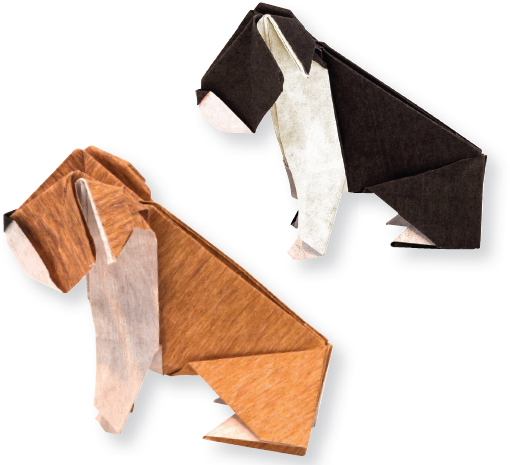
Both Bulldogs follow the same set of instructions. To fold the second Bulldog, orient the paper as shown on left, and proceed to step 1 on the following page.
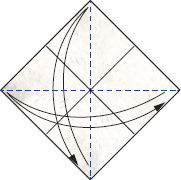
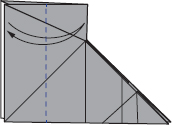
1. Orient the paper as shown. Valley fold in half in both directions, and unfold. Turn over.

2. Valley fold in half in both directions, and unfold.
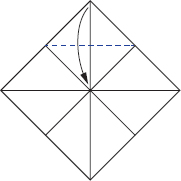
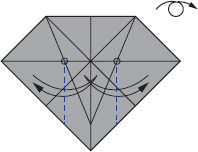
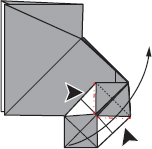
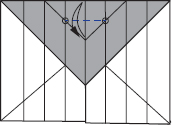
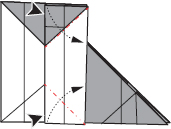
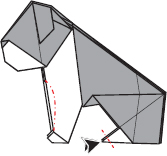
3. Valley fold, aligning tip with center.
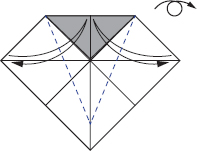
4. Valley fold, aligning edges, creasing only as indicated, and unfold. Turn over.
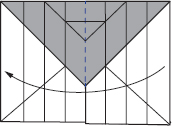
5. Establish vertical creases, creasing only as indicated, and unfold. Turn over.
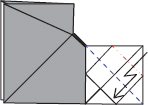
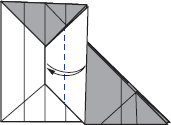
6. Valley fold, aligning creases from previous step to center, and unfold.
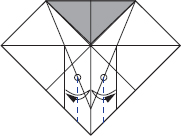
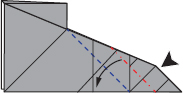
7. Valley fold between reference points, creasing only as indicated, and unfold.
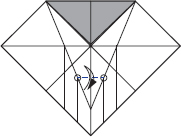
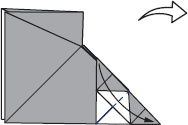
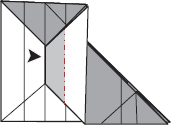
8. Valley fold between ends of existing creases.
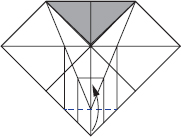
9. Valley fold along edges, creasing only as indicated, and unfold.
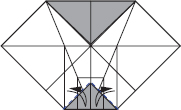
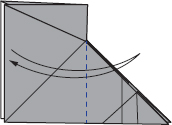
10. Valley fold triangular section in half through both layers, creasing only as indicated, and unfold.

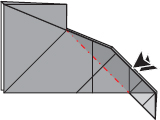
11. Unfold triangular flap.
12. Valley fold, aligning with intersecting creases, and unfold.
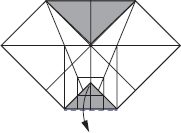
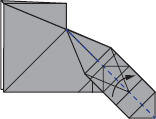
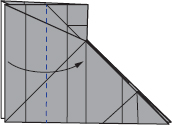
13. Valley fold in half. Rotate.
14. Crimp fold using existing creases.

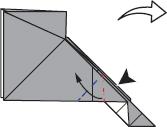
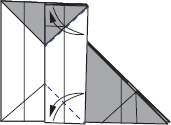
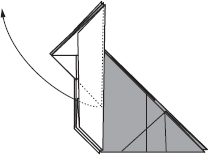
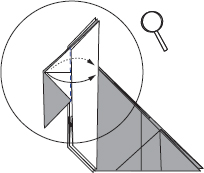
15. Open from below, push where indicated, and spread squash fold.
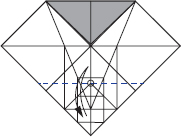
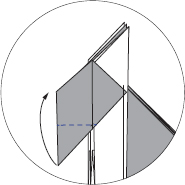
16. Valley fold flap in half, making the model symmetrical.
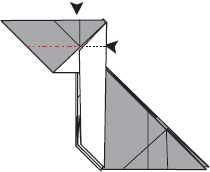
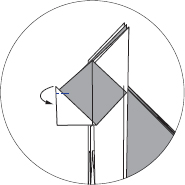
17. Close-sink fold the indicated section on both sides.
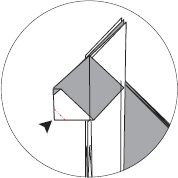
18. Lift flap along existing valley crease, distribute layers evenly, and push where indicated to squash fold.
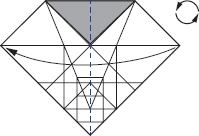
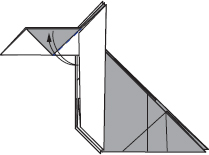
19. Lift top layer on both sides of the flap, raise the lower corner, and flatten.
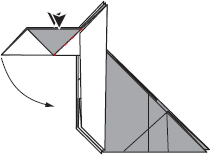
20. Pleat fold using existing creases.
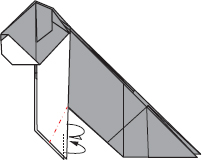
21.Valley fold, closing the flap.
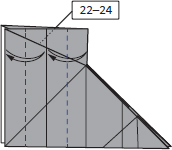
22. Valley fold perpendicular to the bottom edge, and unfold.
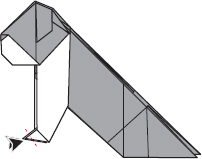
23. Valley fold, aligning edges, and unfold.
24. Valley fold, aligning edges to existing creases, and unfold. Repeat steps 22–24 on opposite side.
25.Open the flaps slightly to reverse fold, aligning top edge to crease from step 23, tucking between layers, and unfold.
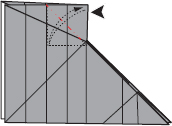
26.Valley fold, opening the flap.
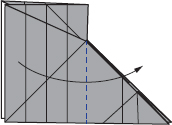
27.Valley fold between reference points, creasing firmly and only as indicated, and unfold.
28.Valley fold, closing the flap.
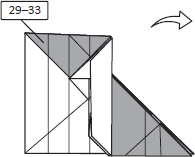
29.Valley fold along existing crease.
30.Valley fold, aligning edges, and unfold.
31.Reverse fold using creases from previous step.
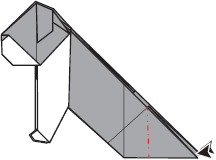
32.Valley fold flap in half, creasing firmly, and unfold.
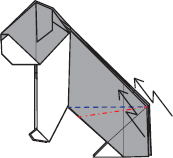
33. Open the flap partially and sink fold the indicated section. Sink all layers except the exterior layer on the top half.
34. Repeat steps 29–33 on opposite side.
35. Lift the central layer as far as the paper allows.
36. Open the head partially, push downward on the crease created in step 27, and sink fold the entire head.
37. Valley fold, creasing firmly, and unfold.
38. Open the head partially and reverse fold both indicated edges, lowering the corner.
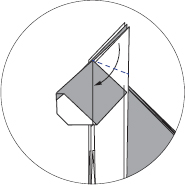
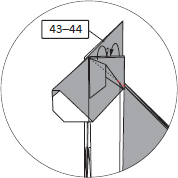
39. Valley fold flaps on both sides.
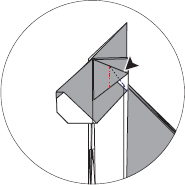
40.Open the head partially, and outside reverse fold, wrapping paper onto itself. Tip should extend slightly beyond upper corner.
41.Open the head partially and valley fold, wrapping paper onto itself once more.
42.Reverse fold, shaping the mouth.
43.Valley fold, aligning edges.
44.Reverse fold asymmetrically, tucking excess paper between layers.
45.Repeat steps 43–44 on opposite side. Mountain fold central protruding flaps inside the model.
46.Mountain fold layers inside in the model. A small reverse fold will be required near the front legs.
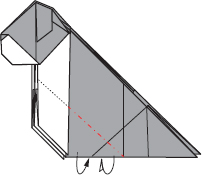
47.Mountain fold, giving shape to the front paws.
48.Reverse fold the tip of the feet.
49. Reverse fold both sides. The distribution of layers within will not be even.
50. Crimp fold, aligning the base of the front and hind legs.
51. Reverse fold the tip of the hind legs. Shape the chest.
The completed Bulldog