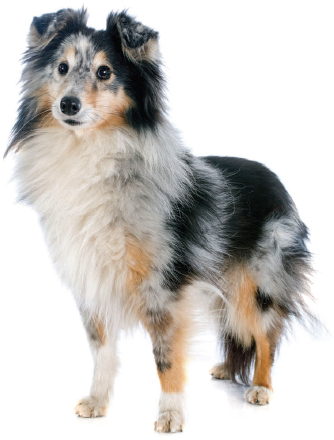
SHETLAND SHEEPDOG

Though this little “Lassie” dog is often mistaken for a miniature Rough Collie, the Shetland Sheepdog is its own breed. Of mysterious lineage, experts believe that it is a mix of a number of pedigrees including the Scandinavian Spitz, the Border Collie, the Pomeranian, and perhaps the Cavalier King Charles Spaniel. Also known as the “Sheltie,” the breed was first recognized by the American Kennel Club in 1911.
Its roots spring from the Shetland Islands, where the dogs were first bred to herd and protect the miniature livestock that are indigenous to the region. Energetic, agile, and chock-full of stamina, these active little dogs were more than up to the task. Their dual-layered coats, made of a thick layer of fur beneath a water-resistant top coat, kept them warm and dry as they worked.
Today, though Shetland Sheepdogs are no longer used for herding, they are highly prized as family pets. Capable of learning commands in fewer than five repetitions, Shetland Sheepdogs continually surprise their owners with their superior intelligence. Their athletic, fun-loving nature makes them the perfect companions for anyone who enjoys a game of Frisbee. Like most herding dogs, Shelties are very territorial and are known to bark at anything that moves. Although they make excellent watch dogs, they are not recommended for apartment living. Shelties come in a variety of colors and patterns, including merle—a coat with mottled patches of color.

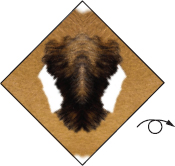
Both Shetland Sheepdogs follow the same set of instructions. To fold the second Shetland Sheepdog, orient the paper as shown on right, and proceed to step 1 on the following page.
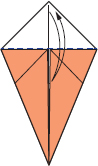
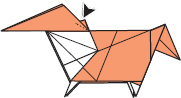
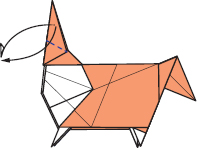
1.Orient the paper as shown. Turn over.
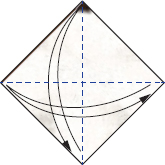
2. Valley fold in half in each direction, and unfold.
3.Valley fold, aligning lower edges to center.

4.Valley fold, wrapping over the edge, and unfold.
5.Unfold entirely.

6.Mirror steps 3–5 from opposite direction. Turn over.

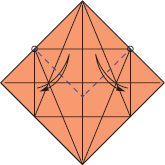
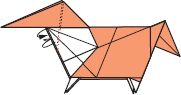
7.Valley fold between sets of reference points, and unfold.

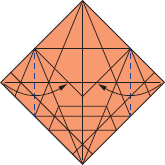
8.Valley fold perpendicular to upper edges, creasing only as indicated, and unfold.
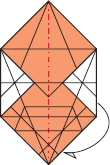
9.Valley fold between reference points, creasing only as indicated, and unfold.

10.Valley fold, aligning reference points, and unfold.

11.Valley fold, aligning edges to existing creases, and unfold. Turn over.

12.Valley fold between sets of reference points, creasing only as indicated, and unfold.

13.Valley fold between sets of intersecting creases, parallel to paper’s edge, and unfold. Turn over.

14.Valley fold along existing creases.
15.Mountain fold in half.
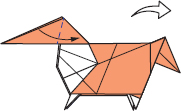
16.Open and squash fold. Rotate.

17.Reverse fold asymmetrically using existing creases, drawing long diagonal edges underneath toward the center.

18.Valley fold along existing crease.
19.Unfold the triangular flaps from behind.
20.Valley fold triangular flap, incorporate existing mountain crease, release trapped paper, and squash fold bottom section to flatten.

21.Reverse fold using existing creases.

22.Valley fold flap to opposite side.
23.Open the flap partially, and carefully wrap the layers around.

24.Repeat steps 20–23 on opposite side.

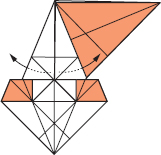
25.Rabbit-ear fold. The upper corners will need to be lifted and squash folded to flatten.
26.Valley fold, aligning crease to edge underneath.
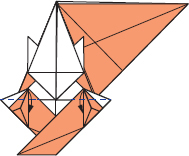
27.Valley fold, aligning edges to center.
28.Valley fold in half, making the model symmetrical. Rotate.

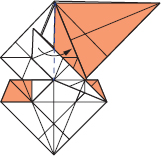
29.Valley fold, aligning upper edge with existing crease, and unfold.

30.Inside reverse fold.

31.Valley fold perpendicular to point where creases meet, and unfold.
32.Outside reverse fold, incorporating indicated crease, and squash fold.

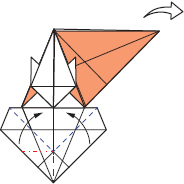
33.Valley fold, aligning edge to existing crease, and unfold.

34.Outside reverse fold using creases from previous step.

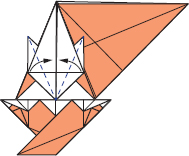
35.Reverse fold near both sides of the neck by swivel folding near the bottom, tucking the excess paper under the layers of the head.
36.Reverse fold the protruding corners.
37.Mountain fold corners on both sides inside the model.
38.Valley fold, aligning edges. If unable to do so, top of folds in previous step must be made closer to the top of the head.
39.Open from above, distribute layers evenly, and squash fold.

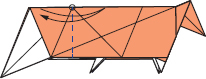
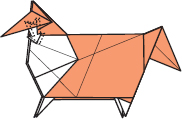
40.Mountain fold section in half.
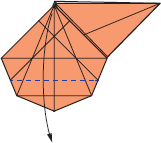
41.Outside reverse fold, adjusting angle as required.
42.Release trapped paper on both sides and flatten.
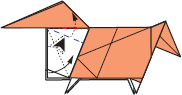
43.Crimp fold. Pre-crease as necessary.

44.Open the head partially, and valley fold by wrapping paper onto itself. Mountain fold both sides of the jaw inside the model.

45.Gently pull the tail, pivoting downward, creating a crimp fold at the top to flatten.

46.Reverse fold, tucking the excess paper between layers.

47.Close-sink fold the back of the tail, pre-creasing as necessary. Reverse fold the back, as well as the tip of the tail. Round the chest and belly.
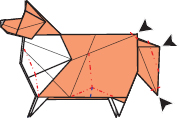
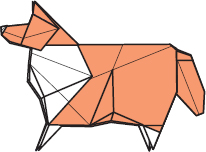
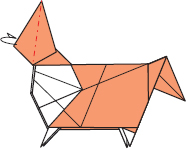
The completed Shetland Sheepdog