BEAGLE
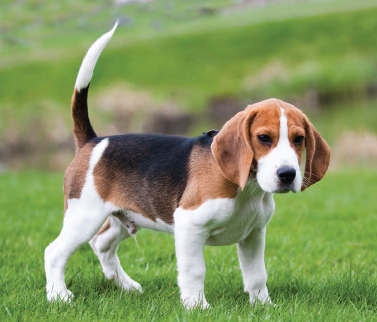
Beagles are known for their affectionate, fun-loving disposition—the trait that undoubtedly landed this breed the star role of Snoopy in the ever-popular Peanuts franchise. Like Basset Hounds, the Beagle’s low-slung body, droopy ears, and impressive nose make it an excellent tracker. Bred to hunt rabbits and other small game, a Beagle is equipped with an additional tool in its hunting arsenal—its voice. The word beagle is thought to come from a French word begueule, meaning “open throat.” Its unique vocal chords allow it to produce three distinct sounds: a standard bark; a yodel-like bay that alerts its owners and other dogs that it has caught a scent; and a soul-piercing howl that lets you know there’s a Beagle nearby loving the sound of its own voice!
Unfortunately, unlike the Basset Hound, Beagles are not a great choice for apartment living. They are much too noisy. On top of that, these dogs are bundles of energy and need a lot of exercise. It’s advised to provide them with a yard to run around in—one that is surrounded by a very secure fence. Their curiosity cannot be contained; they like nothing better than to follow their nose, chasing down an inviting scent. Like Bassets, these hounds come in combinations of three basic colors: black, chestnut, and white, and their gentle nature makes them a wonderful breed for families with small children.


Both Beagles follow the same set of instructions. To fold the second Beagle, orient the paper as shown above, and proceed to step 1 on the following page.
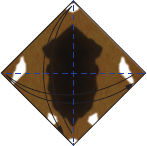
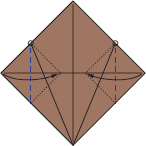
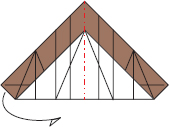
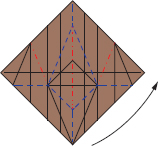
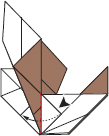
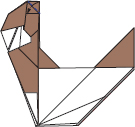
1.Orient the paper as shown.
Valley fold in half in both directions, and unfold.
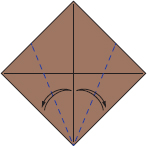
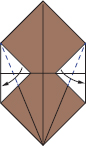
2.Valley fold, aligning edges to center, and unfold.
3.Valley fold, aligning creases with ends of creases from previous step.
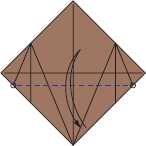
4.Valley fold at angle bisectors.
5.Unfold everything.
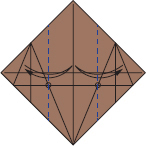
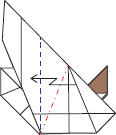
6.Valley fold between reference points, and unfold.
7.Valley fold vertically, aligning creases to intersecting sets of creases, and unfold.
8.Valley fold vertically, aligning creases from previous step to center, and unfold.
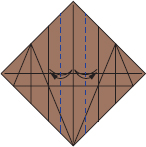
9.Valley fold along existing crease.
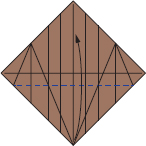
10.Valley fold through both layers along existing creases, and unfold.
11.Mountain fold in half.
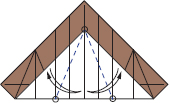
12.Valley fold through all layers, aligning lower edge to existing crease, and unfold.
13.Unfold everything.
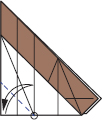
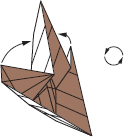
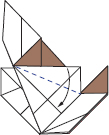
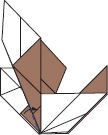
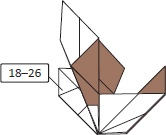
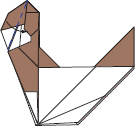
14.Collapse using indicated creases, reversing the necessary creases before trying the collapse.
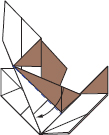
15.Collapse in progress. Rotate to achieve next step’s position.
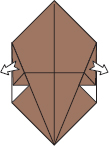
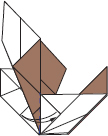
16.Open from the top, valley fold, and evenly spread layers to squash fold.
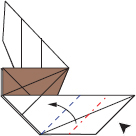
17.Valley fold flap in half, making the model symmetrical.
18.Valley fold, opening the flap.
19.Pleat fold, reversing both existing creases.
20.Valley fold along existing crease.
21.Valley fold once again along existing crease.
22.Valley fold triangular flap along its hinge, and unfold.
23.Inside reverse fold using creases from previous step.
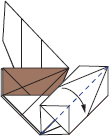
24.Valley fold top layer, wrapping over the edge.
25.Valley fold triangular flap, creasing firmly, and unfold.
26.Inside reverse fold using creases from previous step.
27.Repeat steps 18–26 on opposite side.
28.Sink fold the indicated section.
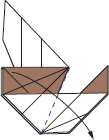
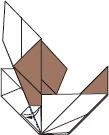
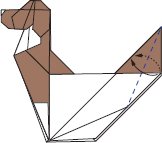
29.Valley fold as indicated, and unfold.
30.Valley fold as indicated, and unfold.

31.Valley fold, aligning creases from previous two steps, and unfold.

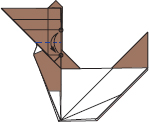
32.Valley fold, aligning existing crease to right edge, and unfold.
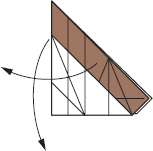
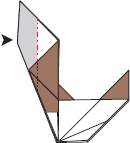
33.Open model carefully. View from above.
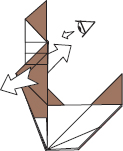
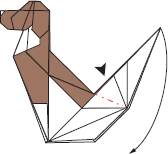
34.Collapse using indicated creases. The top corner will pivot downward.

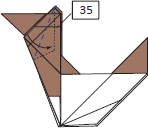
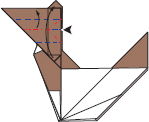
35.Pivot from the top, and crease when the diagonal edge becomes vertical. Repeat on opposite side.
36.Valley fold flap downward along its hinge.
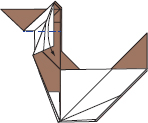
37.Valley fold, aligning edge to existing crease, and unfold.
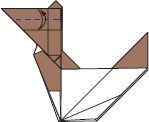
38.Valley fold, aligning reference points, and unfold.
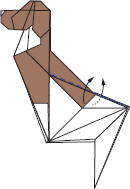
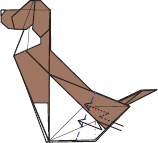
39.Push where indicated, creating new mountain creases to sink fold indicated section. This action will allow the rest of the head to collapse.
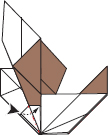
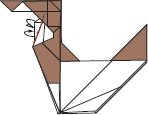
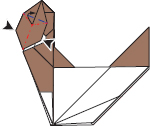
40.Valley fold flap downward along its hinge.
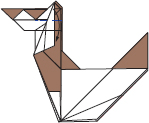
41.Repeat steps 36–40 on opposite side.
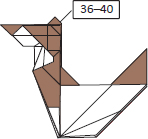
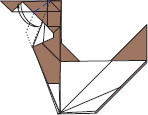
42.Fold flaps on both sides inside the model.
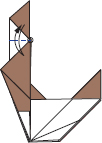
43.Valley fold, creasing firmly, and unfold.
44.Open the top carefully and reverse fold the three edges, pivoting the head downward.
45.Reverse fold on both sides, tucking excess paper behind the ears.
46.Valley fold, tucking corner between layers.
47.Valley fold flap along its hinge, making the model symmetrical.
48.Push from both sides, establishing new creases, and pivot section carefully to the left to collapse.
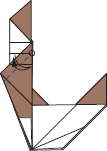
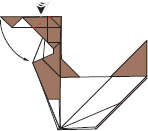
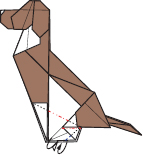
49.Valley fold flap along its hinge, making the model symmetrical.
50.Open the head partially, and valley fold by wrapping paper onto itself.
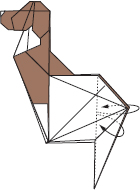
51.Mountain fold a very small section.
52.Mountain fold both sides inside the model.
53.Mountain fold three flaps at the top of the head inside the model.
54.Valley fold along existing creases on both sides.
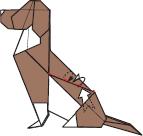
55.Swivel fold on both sides by establishing long, diagonal valley creases and releasing trapped paper on the right side.

56.Inside reverse fold, lowering the tail.
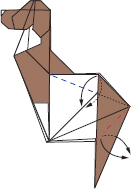
57.Valley fold flaps upward on both sides.
58.With great care, partially open the back, and reverse the interior creases to change the color of the paper.
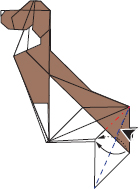
59.Swivel fold on both sides using existing creases.
60.Valley fold along existing creases on both sides, tucking excess paper between layers.
61.Crimp fold, lifting the tail.
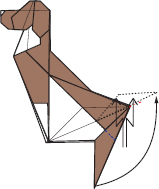
62.Valley fold both sides, narrowing the tail.
63.Crimp fold. Pre-crease as necessary to simplify fold.
64.Mountain fold both sides inside the model. A small swivel fold will be required near the rear legs.
65.Mountain fold, aligning base of paws with rear legs. Mountain fold, rounding the rear legs.

66.Release trapped paper, and fold excess between the layers of the back.
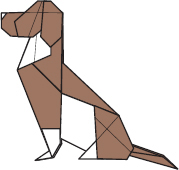
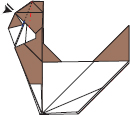
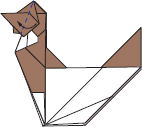
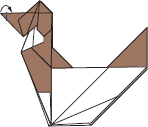
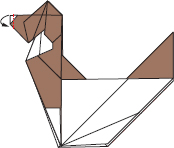
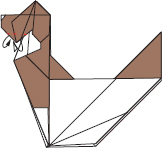
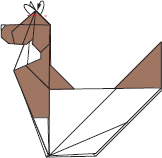
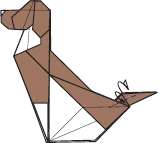
The completed Beagle