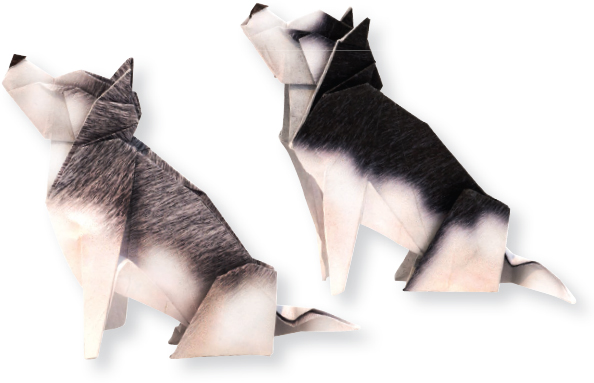
SIBERIAN HUSKY
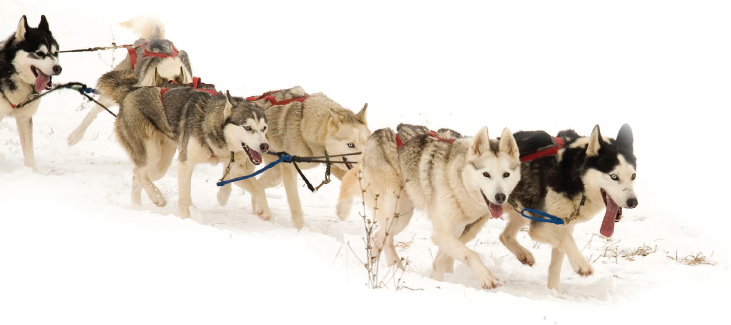
Ancestors of the Siberian Husky lived thousands of years ago among the nomadic Chukchi, a people who relied on dogs to haul their sleds across the frigid northernmost reaches of Siberia. First brought to Alaska in 1908 by Russian fur traders, the modern-day Siberian Husky retains the same traits that made it so indispensable to the Chukchi. Fur-lined paws coupled with a densely-layered waterproof coat allows it to withstand temperatures as low as 60 degrees below zero. The breed’s uncanny ability to slow its metabolism, allowing it to maintain its stamina on very little food, contributes to its amazing endurance.
In 1925, relay teams of sleds pulled by Siberian Huskies proved to the world what they were made of. Racing across 674 miles of frozen tundra, they delivered life-saving serum to the residents of Nome, Alaska, in time to save them from a full-blown diphtheria epidemic. A statue of Balto, one of the lead dogs, stands in New York City’s Central Park to commemorate this heroic event.
Siberian Huskies are loyal and affectionate pets who love children. But because they are so friendly and rarely bark, they do not make stellar watch dogs. These dogs need hours of intense exercise each day, and do best with families who provide them with a spacious fenced-in yard. Known for their striking good looks, Siberian Huskies come in a wide variety of colors and patterns. Their eyes range from blue, green, brown, amber, or mixed, with each eye sometimes being a different color.
Both Siberian Huskies follow the same set of instructions. To fold the second Siberian Husky, orient the paper as shown on left, and proceed to step 1 on the following page.
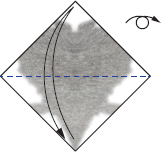
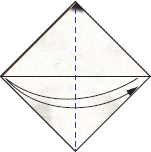
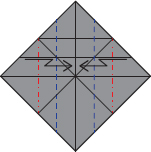
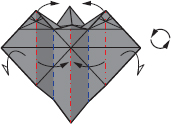
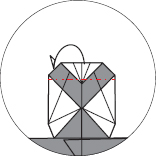
1.Orient the paper as shown. Valley fold in half, and unfold. Turn over.
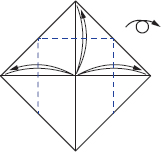
2.Valley fold in half, and unfold.
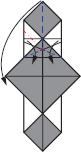
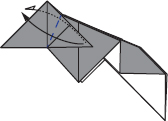
3.Valley fold, aligning three tips to center, and unfold. Turn over.
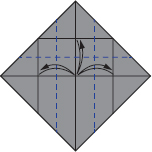
4.Valley fold, aligning creases from previous step to center creases, and unfold.
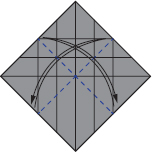
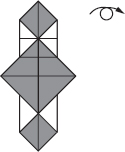
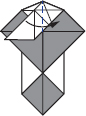
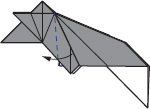
5.Valley fold in half in each direction, and unfold.
6.Pleat fold using existing creases.
7.Turn over.
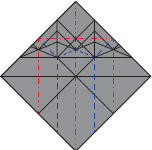
8.Valley fold, aligning corners, and unfold. Turn over.
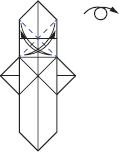
9.Valley fold, aligning creases from previous step to horizontal crease, and unfold.
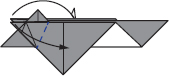
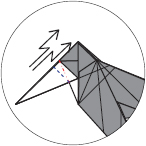
10.Rabbit-ear fold using existing creases.
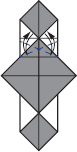
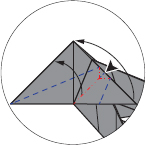
11.Valley fold flap to opposite side, creasing firmly.
12.Unfold everything.
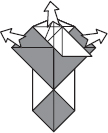
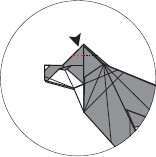
13.Reinforce existing creases, preparing for collapse …
14.…and collapse the paper. Rotate.
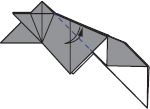
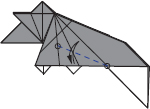
15.Valley fold flaps on both sides.
16.Valley fold, aligning edges, creasing firmly, and unfold.
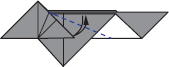
17.Open the model and reverse fold the three top edges using creases from the previous step.
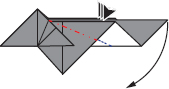
18.Valley fold flaps on both sides.
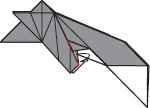
19.Valley fold flap along its hinge.
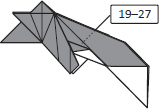
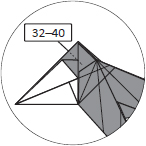
Note: It may be easier to complete Steps 19–27 on both sides at the same time.
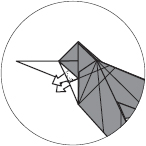
20.Reverse fold using creases from previous step.
21.Valley fold flap along its hinge.

22.Reverse fold using creases from previous step.
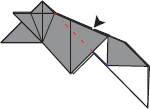
23.Valley fold flap along its hinge.
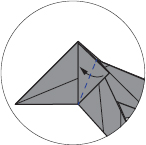
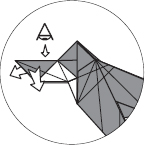
24.Valley fold, aligning edge to existing crease, and unfold.
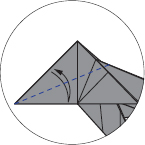
25.Valley fold between reference points, and then rabbit-ear fold using existing creases.
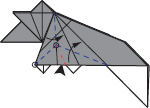
26.Valley fold, aligning edges.
27.Mountain fold along edge, tucking excess paper between layers.
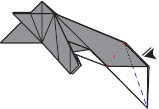
28.Repeat steps 19–27 on opposite side, if not already completed.
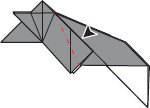
29.Valley fold, aligning edges on both sides, and unfold.
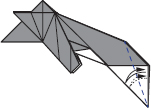
30.Reverse fold on both sides using existing creases, tucking excess paper between layers.
31.Valley fold flaps on both sides.

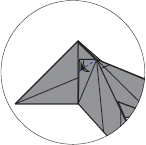
32.Valley fold through all layers, aligning edges, creasing firmly, and unfold.
33.Valley fold flap to opposite side.
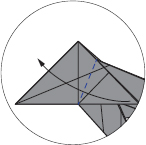
34.Pleat fold using existing creases.
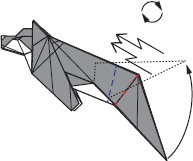
35.Separate the pleated layers so they are no longer locked together and can be moved independently.
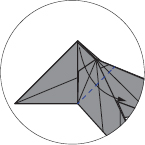
36.Valley fold, aligning edges.
37.Valley fold, aligning edge to existing crease, and unfold.
38.Reverse fold using creases from previous step.
39.Valley fold flap to opposite side.
40.Starting from the left tip, valley fold along long diagonal crease, and push where indicated to collapse and flatten the model, swinging the ear back upright.
41.Repeat steps 32–40 on opposite side.
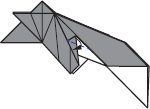
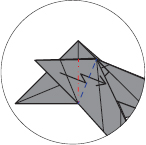
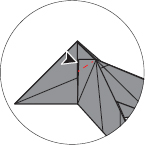
42.Valley fold perpendicular to flap’s bottom edge, and unfold.
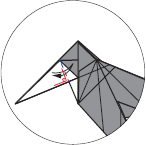
43.Valley fold perpendicular to flap’s top edge, pivoting from bottom of existing crease, and unfold.
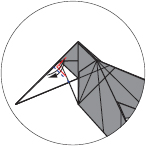
44.Crimp fold using creases from two previous steps.
45.Release trapped paper and flatten.
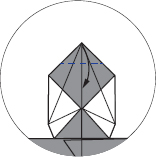
46.Flatten the nose. View from above.
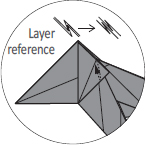
47.Valley fold by wrapping paper onto itself.
48.Mountain fold slightly below corners on both sides. Then close the nose.
49.Mountain fold both sides inside the model, giving shape to the jaw.

50.Valley fold small sections on both sides, giving shape to the eyes.

51.Reverse fold, shaping the top of the head.
52.Crimp fold, allowing the outer layers to shift. Rotate.
53.Mountain fold both sides inside the model, incorporating a small reverse fold near the rear legs.
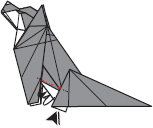
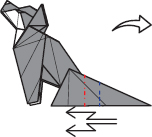
54.Mountain fold three edges inside the model, giving shape to the back.
55.Valley fold twice, roughly parallel to each other, and unfold.
56.Crimp fold using creases from previous step.
57.Mountain fold, narrowing the tail.
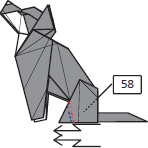
58.Crimp fold the rear leg. Repeat on opposite side.
59.Pleat fold the ears on both sides, shape the front legs along existing creases, and curl the tail.
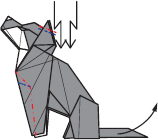
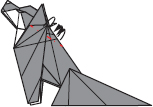
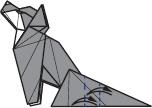
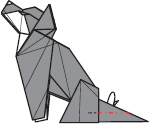
The completed Siberian Husky