
A childhood favorite takes on grown-up glitz thanks to arresting color combinations and luxurious embroidery floss and other threads (some with metallic accents). Start each of the following patterns by anchoring the strings with tape or a straight pin.
Supplies
Each string represents a stripe in the bracelet; arrange and tie them in the order in which you want them to appear.
For wider stripes, place same-color strings next to each other (you can also go monochromatic). Start with much longer pieces than you think you’ll need—all the knotting significantly shortens each strand, and it’s easier to trim to fit than to start over.
For a diagonal pattern, cut a little more than 35 inches and knot one end to start (or cut 70 inches, then fold in half and tie a loop). For a chevron, start with 70 inches, fold in half, and tie a loop.
Loop string 1 around string 2 as shown below, pulling tight toward top. Repeat. Use string 1 to make 2 knots each on strings 3, 4, 5, and 6. String 2 will be on the end. Repeat process with all 5 remaining strings.
Loop strings and arrange them so colors mirror one another. Starting from left side, follow instructions for diagonal pattern, left, for half of the strings. Repeat from right side. Double-knot the two strings in the middle. Repeat for next row.

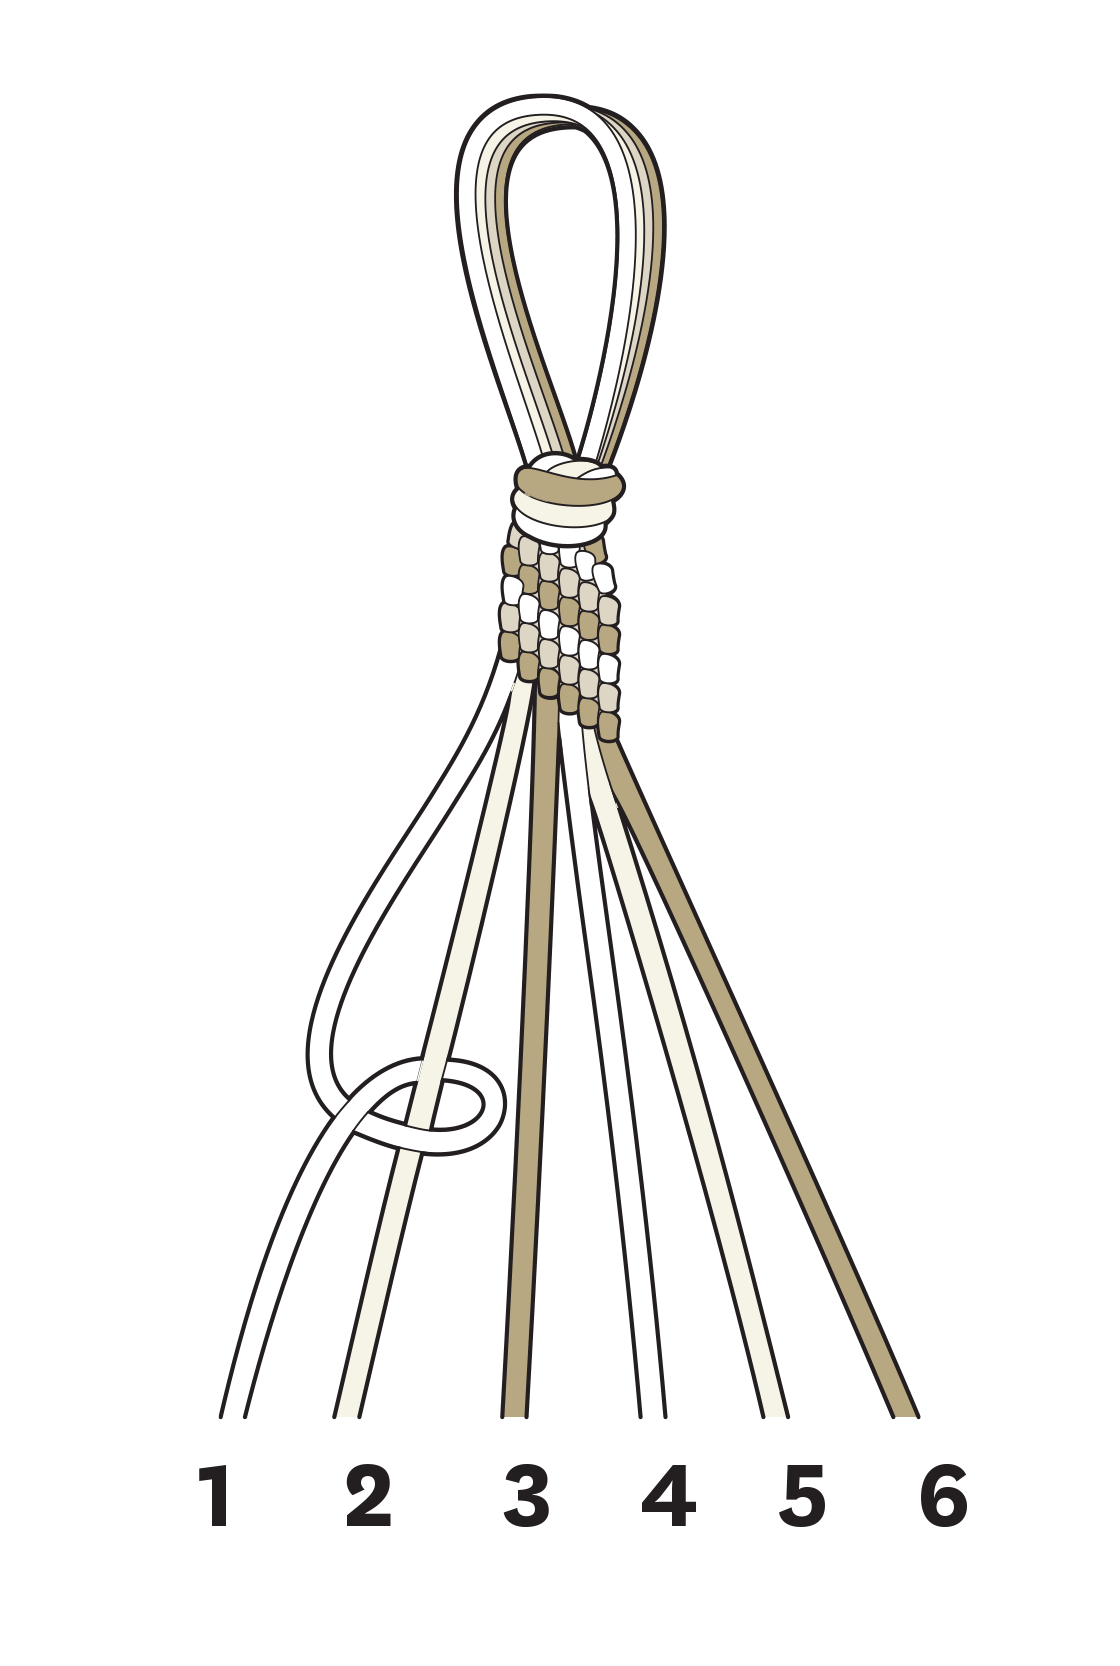
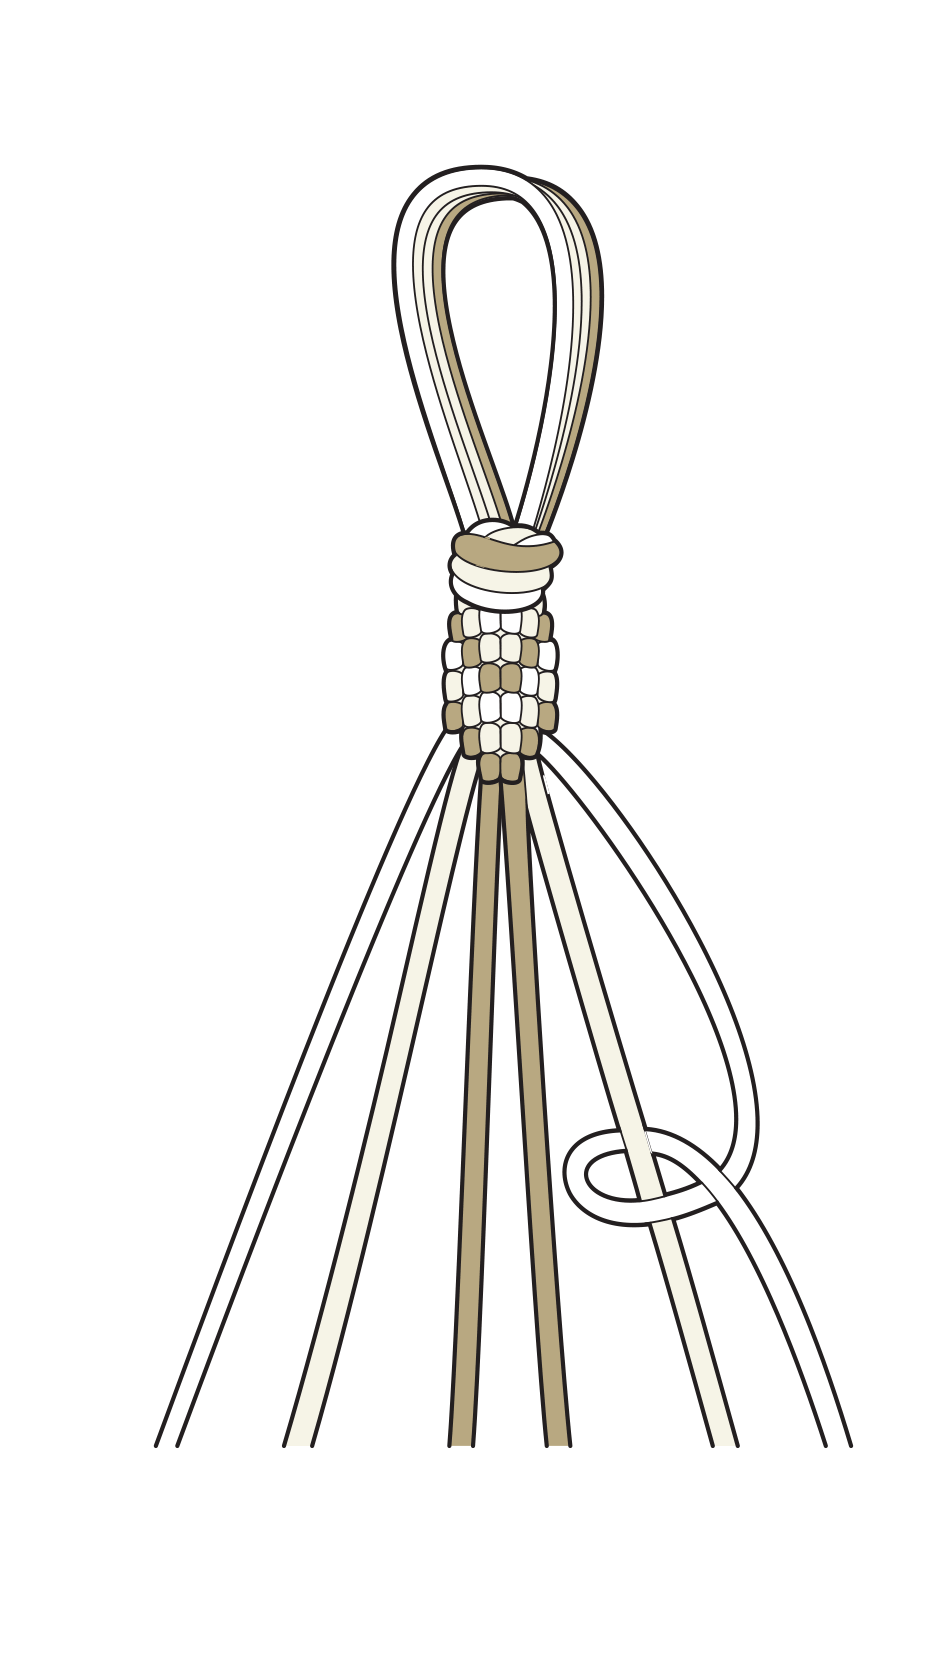
For this pattern, one string needs to be much longer than the others. Loop the longer string around all others, as shown below, running end up through the loop you made. Pull knot taut, up toward the top. Repeat to create the spiral pattern.