MILK CAN TABLE LAMP

I love anytime I can add a little bit of farmhouse style without going overboard, and using a vintage milk can to make a lamp brings just the perfect amount of character and interest to our home. I added mine to a nightstand in our guest room, but it could move to almost any room. Don’t be intimidated at the possibility of making a lamp; the lamp kit makes it really simple, and the only tools this project needs are a drill and maybe a pair of pliers.
MATERIALS
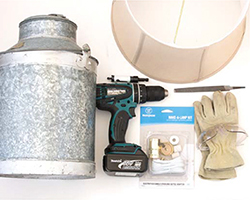
- Pliers (optional)
- Milk can
- Eye protection
- Drill with hole saw attachment sized to the neck of the lamp kit
- Work gloves
- Metal file
- Lamp kit
- Lampshade sized in proportion to your milk can (the one I used is 10" high with a top diameter of 12")
- Harp (optional)
- If necessary, use a pair of pliers to remove the top handle from the cap of the milk can.
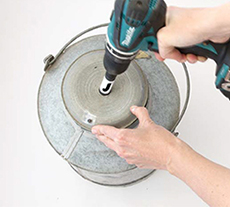
- Put on your eye protection and use your drill with a hole saw attachment to drill a hole in the center of the cap of your milk can equal to the diameter of the neck of the lamp kit.
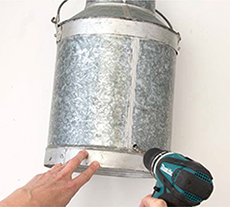
- Use a regular drill bit (large enough to accommodate your cord) to drill a hole on the back of the milk can about 1⁄2" up from the bottom of the can. Wearing your work gloves, file the opening until smooth.
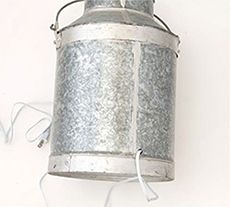
- Thread the cord through the back of the milk can and up and out of the hole in the top.
- Assemble the lamp kit’s electrical components according to the directions.
- Add your lampshade. Depending on your lamp kit and the style of your shade, you may need to add a harp before adding your electrical components. Note: A harp is made up of the metal pieces that attach to the shade and hold it in place. To attach, simply slide it on the stem that is holding the electrical components in place. Some shades do not use a harp; they clip onto your light bulb. Only use a harp if your shade does not clip onto the light bulb.
TIPS & RECOMMENDATIONS
Customize your lamp even further by adding trim or stenciling your lampshade. Also, if you can’t find a vintage milk can, reproductions can easily be found.