METAL GIFT TAGS/ORNAMENTS

Over the years I have found galvanized tags and ornaments in stores, but they were never quite right. I either didn’t like that they were painted or they weren’t the shape that I wanted. Finally I learned how to cut galvanized sheet metal into shapes, which is actually a lot less difficult than I expected. Once I got over that hurdle, it just became about figuring out how to get the shape that I wanted, which turned out to be the easiest idea of all: a cookie cutter.
MATERIALS
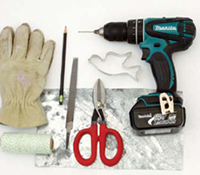
- Cookie cutter in your shape of choice (I recommend not using a shape with too many small angles and details)
- Section of galvanized sheet metal
- Pencil
- Metal snips
- Work gloves
- Metal file
- Drill
- 8" of twine per tag
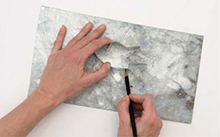
- Place your cookie cutter on your sheet metal and trace the shape with a pencil.
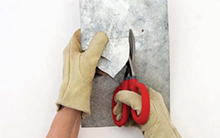
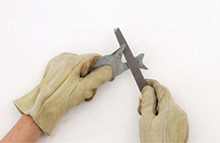
- Use your metal snips to cut out your shape. Be sure to wear work gloves while working with the sheet metal as the edges will be sharp.
- Use your metal file to smooth all of your edges. Take your time with this step to make sure all the edges are smooth.
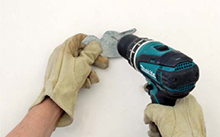
- Use your drill to drill a small hole at the top of your tag.
- Thread a piece of twine through the hole and tie a knot. Hang it on a gift or use it as an ornament.
