One of the most innovative fermentation systems I have ever heard of included the use of a large, 10-foot-deep swimming pool. Tucson, Arizona, is not known for its coolness. In the summer daytime temperatures regularly exceed 100 degrees F (38 C), and during the winter one can count on daytime heat in excess of 80 degrees F (27 C). Going underground is not an option. The geological formations of underlying hardpan rock prevent basements from being a standard home inclusion. Nonetheless, there are many homebrewers in Arizona. Cold beer goes down quite easy among the cactus, mountains and good company.
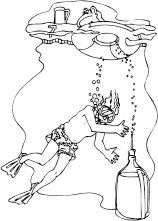
Air conditioning is quite common, but for some it cannot satisfy the requirements of homebrewing. The logical conclusion for one homebrewer was to don a bathing suit and immerse the fermenting beer in the swimming pool. Carboy, fermentation lock and beer were gently placed under 10 feet (3 m.) of cool water. The brewer reported that checking the fermentation was a pleasure and the rising bubbles were very comforting. A natural Jacuzzi?
Yeast needs oxygen prior to fermentation. An adequate amount of dissolved oxygen is usually introduced into cooled wort as it enters the fermenter, with agitated shaking of the wort (in closed fermenters) or with the addition of cold tap water. However, some circumstances, such as high-gravity brewing, may warrant mechanical introduction of additional oxygen to help assure adequate levels of dissolved oxygen. Pumping ambient air into the cooled wort and allowing it to bubble through is a versatile and economic means of introducing oxygen into wort.
An aquarium (fish tank) aerator-bubbler is a simple and readily available piece of equipment that may be employed for this purpose. The air pumped through this system can be purified by utilizing sterilized cotton as an air filtration medium. Insert a wad of sterile cotton into the tubing through which air flows from the air pump. Commercial filters can also be bought and attached to the system. The sterile cotton may be purchased wherever basic home medical supplies are sold.
To help disperse air into the wort, an aquarium aeration stone can be attached to the hose outlet. Employing tubes and hoses is a convenient way of extending the system into the wort. Whatever method you use, it is absolutely essential that all pieces of equipment be sanitized before being immersed into the cooled wort. For porous material and fixtures with joints, disassembly and heat sanitation with boiling water is the best method to help minimize contamination.
Thirty to 60 minutes of aeration will be adequate to introduce the required oxygen into solution. Never introduce air once fermentation has begun.
Brewers use wood, plastic, glass and stainless steel vessels to ferment beer.
Wood. The use of wood has a long tradition in brewing, though it is rarely used today. Older breweries, offering unique products, are usually the exception. For homebrewers, wood should be considered only in the most desperate of situations, such as being stranded on an island in the South Pacific with a supply of water and a pallet of homebrew kits. No one would begrudge you fermenting in wooden barrels. Traditionally speaking, when beer is fermented in wood it does not usually come in direct contact with the surface of the wood. Brewer’s pitch, a tasteless resin, is applied to the inner surface of fermenters, and with a great deal of care, is maintained every few months or as necessary. Fermenting beer in uncoated barrels should only be considered for some of the wilder Belgian styles of beer. Homebrewers have been known to brew excellent Flanders-style sour brown ales and masterfully made lambic-style beers in old sherry casks.8
Plastic. Food-grade plastic fermenters are economical and offer the homebrewer ease in handling and cleaning. But their disadvantages eventually leave the homebrewer seeking a replacement after a fair amount of usage. Plastic stains and scratches easily and is more prone to abuse such as being used as a storage container for homebrewery equipment. Scratches, whether visible or invisible to the naked eye, will harbor bacteria and other undesirable microorganisms partly responsible for beer spoilage. However, if plastic is well sanitized (scratches and all) and a good healthy dose of yeast is added under optimal fermentation conditions, the cultured yeast will vastly out-number any small bacterial populations hanging out in the cracks and crevices in the fermenter. Therefore, one should suspect less-than-ideal procedures when confronted with a spoiled beer that was fermented in plastic.
Open fermentation should never be considered for the homebrewer. The home environment is much more contaminated with spoilage organisms than a clean brewery. In a word: don’t. Plastic fermenters should be sealed with an airtight snap-fitting lid. Never, ever use a piece of plastic or towel as a cover. It is a 100 percent guarantee of contaminating the beer. Fermentation locks should be placed in a prebored hole in the lid. The lid should be sanitized, and nothing should come in contact with the fermentation except the hose or racking tube you will use to transfer the beer into its prebottling vessel. Drafty rooms, dusty environments, careless breathing and mucking about, must be avoided whenever the fermentation is exposed to the outside air for transferring or bottling purposes.
When using plastic, single-stage fermentation is recommended to minimize handling. Bottle when visually evident activity has stopped or after assessing the activity with a hydrometer. Because of the risk of oxidation, the beer should not be kept in plastic for more than a few days after fermentation is completed.
In summary, plastic requires more attention, care and timing during the fermentation process, but can give consistently adequate results for homebrewers who prefer this alternative for one reason or another.
Glass. Glass is one of the most preferred fermenter materials. One-gallon jugs and 2-, 3-, 5- and 6½-gallon (7.5-, 11.4-, 19- and 25-l.) glass carboys offer a number of advantages to the homebrewer. The inner surface is not susceptible to scratching, is chemically resistant to most substances and can be cleaned relatively easily. Perhaps one of the nicest advantages of glass is that you can watch the beer’s fermentation activity. Glass is unsafe if handled improperly. Always lift with dry hands. Breakage can cause severe injury. Procedures to avoid pressure buildup in a glass carboy must be taken into consideration. Glass will break if subjected to drastic changes in temperature. Boiling wort should never be added to an empty, cool carboy.
Cleaning a glass carboy is a simple process of filling with cold water and 2 ounces (60 ml.) of household bleach and allowing it to soak overnight. A light brushing with a bottle brush will then remove all fermentation residues. A bottle washer of the type that screws onto your faucet and directs a stream of water upwards is a useful gadget for rinsing glass fermenters.
With experience you will be able to determine when to bottle your beer by simply observing the fermentation activity through the clear glass. As a rule, when fermentation does not produce any surface bubbles and the beer begins to clear and appear darker, it is ready to bottle. The procedure for measuring specific gravity to assure completion of fermentation becomes unnecessary.
Whenever a blow-off fermentation system is employed, it is essential that all particulate material be strained out of the wort before it enters the fermenter. Large-diameter hoses (approximately 11/8-inch [2.86-cm.] outside diameter) can be affixed to the opening of the glass fermenter in order to minimize the risk of clogging, pressure buildup and bursting. A simple option to consider when using glass fermenters is to completely eliminate the risk of pressure buildup in a carboy due to a clogged blow-off tube by only filling the fermenter to three-fourths of its capacity. This is essential if fermenting fruit beers in carboys. You may choose to top up to the full volume after fermentation is complete, but do so only with deaerated and sanitized water (boiled and then cooled).
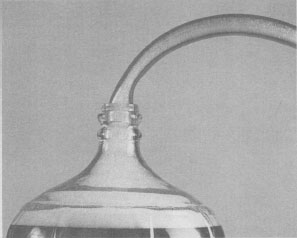
Shove it in. Large-diameter hoses can be affixed to the opening of glass fermenters in order to expel kraeuseing fermentation and minimize the risk of clogging, pressure buildup and bursting more probable with smaller diameter hoses.
Small glass carboys and one-gallon glass jugs offer convenience when brewing small batches or experimental brews. Be especially aware that fermentation activity and possible beer character can be significantly affected by the size and shape of the fermenter. Large commercial operations must consider these variables when scaling recipes and procedures up or down. Perhaps two of the most significant considerations for the homebrewer are the effects of convectionlike circulation currents during fermentation and the effects of heat retention and dispersal during fermentation.
Heat is generated by yeast activity and is dispersed from the fermentation through the walls of the fermenter. Heat transfers to and from the brew in the fermentation room. The efficiency and speed of heat transfer are a function of the ratio of volume to fermenter surface area. What this means is that for smaller one-gallon fermenters, heat will travel in or out of the brew much more quickly. Detrimental temperature fluctuations are more likely to affect smaller brews, a factor particularly worth considering in homebrewing areas that are prone to temperature changes.
Stronger circulatory currents are set up in larger containers by the action of carbon dioxide production. These actions can affect flocculation, suspension and other activities of the yeast, thus affecting the character of the beer.
The best course of action here is to relax and have a homebrew. Remember—you are a homebrewer, and your beer much more often than not comes out great. Don’t worry. Appreciate the many factors that can have an effect on the character of your fermentation and the flavor of your beer. Enjoy this diversity and the challenge of considering all this stuff while enjoying the results of your latest efforts. A homebrew in hand is quite helpful in keeping a perspective on your brewing endeavors.
The 200-Year-Old Burton Union “Blow-off” System
World-class top-fermented pale ale has been brewed in the Burton-on-Trent area of England for centuries. A combination of water quality, brewing technique and yeast handling has helped one ale in particular achieve international recognition. Bass Ale, considered by many beer enthusiasts as a world classic, has been brewed with the same yeast for over 200 years. What makes this brew even more distinctive is the method employed for propagating the yeast, known as the “Burton Union System.” Not all Bass Ale these days is produced using this method, but modern upgrades to the brewery employ this system in some of its production.
Simply put, the Burton Union System directs the yeast kraeusen-head produced during the initial stages of primary fermentation from the fermenters through a blow-off system into collecting troughs. The very flocculent top-fermenting ale yeast is collected from these troughs and repitched batch after batch, year after year. As the fermenting head is blown off and collected in the system, there are three “phases” of brew that separate in the system. Some of the fermenting wort is allowed to flow back into the fermenters, while the settled yeast is collected by selective channeling of the liquid. The foamy head maintains itself in the “open” system and serves as a barrier between the ambient air (full of contaminants) and the pure yeast below.
The brewers at Bass have determined that yeast harvested from the Union System is not only the purest but also the most healthy and viable. Yeast sedimented out of the fermenters is discarded or processed into other food products.
The Burton Union System is unique and is particularly well suited to the particular strain of yeast that makes Bass Ale.
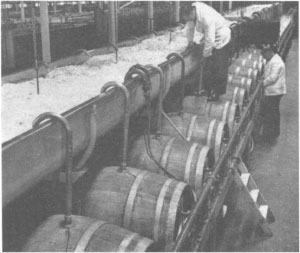
Not your typical homebrew setup. The same yeast and the same system are still used in some of Bass Ale’s breweries, though wooden fermenters are no longer used and modern upgrades to equipment are employed. The Burton Union system is unique and crucial to the survival and purity of the original yeast.
Commercial brewers often have to consider the effect of pressure on the behavior of yeast and fermentation when fermenting in tall two- to four-story-high fermenters. The effect of pressure in small-scale brewing is virtually none.
Stainless Steel. Used by commercial brewers the world over, stainless steel is the preferred material for fermenters. On a homebrewing scale the only serious disadvantage is cost—stainless can be expensive. Stainless vessels do require adaptation before they can be used in the household brewery. Also, care needs to be taken when sanitizing with solutions of household bleach and water as any solutions can cause corrosion.
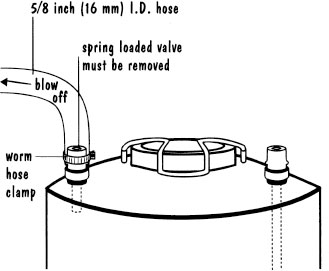
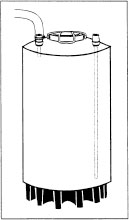
Practically speaking, the only reasonable means for employing stainless steel as a homebrewing fermenter is to adapt 2-, 3- and 5- gallon (7.5-, 11.4-, and 19-l.) stainless steel soda canisters for the job. The opening is large enough to allow easy cleaning. There are two fittings on the tops of these canisters. Usually marked “in” and “out,” they normally dispense “out” soda (or beer) and take “in” carbon dioxide pressure to push the soda (or beer) out. (Using these canisters as homebrew kegs is discussed in the kegging section.) In order to use these canisters as fermenters, the “in” fitting is adapted to serve as the “blow-off” stream for primary fermentation. To accomplish this, examine the removed “in” fixture and notice the spring-loaded valve seated inside. Remove this valve so that there is a clear way through the fixture. Reattach the fixture to the canister and slip onto the end a 4-foot (1.3-m.) length of 5/8-inch (16-mm.) inside-diameter plastic hose and secure with a hose clamp. The hose should be inserted into a bucket of sanitized water during fermentation to catch the overflow and serve as a fermentation lock.
CAUTION: Fermentation should never be done in a sealed, closed container. Use all necessary precautions to assure that all particulate matter having a potential to clog the system has been strained out of the wort.
The versatility of these canisters as fermenters goes beyond primary fermentation. After fermentation is complete, the spring-loaded valve can be replaced, the fixture screwed back onto the canister, and the unit used as it was originally intended—to dispense liquid. Carbon dioxide is used to gently push the fermented beer out of the canister, but rather than dispensing the beer via a tap, the end of the “out” hose is fixed onto the “out” fixture of a secondary canister fermenter. In this manner the beer is pushed from one tank into another, leaving behind most of the sediment. One tip worth considering is to purge the air from the receiving fermenter and minimize oxygenating the beer during transfer by injecting about 10 seconds worth of carbon dioxide. (Carbon dioxide is heavier than air/oxygen.)
In fashioning this transfer system, you may have to shorten the long “out” tube by cutting with a hacksaw. The principles are simple, but there are additional considerations that the brewer must deal with to get the system to work properly. A tank of carbon dioxide with regulators and hoses is necessary, along with extra hose to connect fixtures. Sanitation of all fixtures, tubes, hoses and anything whatsoever that comes into contact with the beer is essential.
If all this weren’t enough, you can take the whole system one step further by transferring once again into a final “keg” of beer (more on that later).
CONTROLLING FERMENTATION AND LAGERING TEMPERATURE
Don’t immediately assume this discussion is only about maintaining cool lagering temperatures. Some homebrewers need to keep their fermenters from getting too cold.
Whether your goal is to keep your fermentation warm or cold, the essence of dependable, carefree temperature control is a thermostatic device that senses temperature and reacts by switching electricity on or off. These thermostats, complete with sensing probe and switches, are readily available. Devices adequate for homebrewers will generally run from $25 to $50.
For homebrewers brewing in Alaska or through a cruel New England or Midwest winter, maintaining warmer ale fermentation temperatures or keeping your lager from freezing can best be accomplished by storing your fermenter in an enclosed insulated area. The heat source can be as simple as a 100-watt light bulb for small areas or an electric heater for a closet space. Shield your fermentation from direct light. Connect your light bulb or heater to a thermostatically controlled device that switches on whenever the temperature drops below a certain point. A spare closet or a large cardboard box lined with sheets of insulating Styrofoam will work quite well, while an unplugged refrigerator can also serve the same purpose while doubling as a cold lagering box in the warmer months.
Recall that fermentation produces heat. To a certain degree a very well-insulated and sealed compartment can hold heat created by vigorous primary fermentation to help maintain ale-fermenting temperatures in extremely cold environments.
Heat tapes used to help prevent pipes from freezing can be wrapped around carboys. Electric blankets or heating pads can also be employed, but be very aware that a more sensitve thermostatic device should be interfaced with the tapes, pads or blankets to regulate when they turn on and off. Fermenters should not be placed on top of pads or blankets for safety reasons. Rather these heat sources should be draped around the area of the fermenters in a manner that easily allows the heat to escape from the pad or blanket.
The temperature of the air is not always indicative of the temperature of the brew. Once you have your system established, take temperatures of the fermentation and the air. Note the difference and adjust your thermostatic controls accordingly.
For homebrewers living in more temperate climates, an extra refrigerator will serve perfectly to lager or ferment your homebrew at controlled temperatures. A thermostatic device is simply plugged into the wall. The refrigerator is plugged into its switching device, and the temperature-sensing probe is placed inside the refrigerator. The device can be set for any temperature. Some more sophisticated thermostats can be programmed for a variety of temperatures over extended periods.
Another way to cool your fermentation is to employ the principles of evaporative cooling. This works well in particularly dry climates. When water passes from the liquid stage to an evaporated gas stage, it literally takes a lot of heat energy with it. (That’s why when water vapor gas turns to liquid [rain] in a storm, there is a lot of heat energy reversibly released. That in part is what makes a storm.) Homebrewers can employ this principle by wrapping a wet towel (or heavy cotton T-shirt) around a fermenter and letting water evaporate from it. Keep the towel wet and your beer will be no fewer than 10 degrees F cooler than the air temperature. The effect can be exaggerated by blowing air on the wet-toweled fermenters with a small fan.
Wetness can be maintained by fashioning a means of dripping water on the towels or by placing the fermenter and towel in a shallow pan of water. The towel will wick water up as it evaporates.
SUCK-BACK AND FERMENTATION LOCKS
When a fermenter is moved to a lagering environment, temperatures are often drastically reduced. If there is any signficant amount of air space in the fermenter, a vacuum effect will be created as the air in the fermenter is cooled and reduced in volume. If there is not sufficient fermentation gas still being produced by the yeast, then outside air can be sucked into the fermenter. This can create problems if contaminated air is brought into the fermenter or if contaminated water from the fermentation lock is sucked into the brew.
To minimize the risk of contamination by fermentation lock liquid, the liquid can be reduced to a level that cannot be sucked into the brew by the reverse action of the vacuum. The liquid can be replaced with neutral sterile spirits such as vodka just in case there’s suck-back. Sterile dry cotton can be stuffed into the fermentation lock passages to act as a filter barrier. If this method is used, it is imperative that the cotton not become wet, otherwise the barrier will become a wet bullet sucked into the brew. For this reason the fermentation lock should be dry for 24 hours. As equilibrium is reached, pour liquid back into the lock.
With a good lager yeast and proper timing, lagering will continue to produce some carbon dioxide. This will purge any air from the vessel that was introduced through suck-back.
TRANSFERRING BEER FROM HERE TO THERE
There are many reasons to move beer from one place to another. The most important and most obvious transfer is the one from your glass to your lips. But that’s the end of the journey. There are several transfers made during the fermenting, aging and bottling (or kegging) process to help assure that the beer’s final character is the best.
Usually beer is transferred from one vessel to another to remove it from sedimented yeast and other matter or to move it to a special environmentally controlled container such as a lagering tank. In some breweries and perhaps sophisticated homebrew systems a “unitank” system is employed whereby, rather than moving the beer off of sediment, the sediment is removed from the temperature-controlled tank. The bottoms of these tanks are usually conically shaped so that yeast removal is easier. The tanks themselves are jacketed with refrigerant.
Most homebrewers will find themselves transferring beer from one vessel to another. There are three important factors to consider with any transfer system you employ: (1) Avoid the introduction of oxygen during transfer, (2) maintain sanitary conditions throughout the process and (3) avoid sudden and drastic temperature changes in the environment.
Small electric pumps can be used by homebrewers, but as with any equipment, they must be maintained in sanitary condition at all times. The pump should be of the type that will not aerate or introduce air into the stream.
Using a hose siphon is the easiest and cheapest means to transfer liquid from one container to another (see Transferring Extract and Wort). It is powered by gravity and requires little maintenance other than sanitizing the hose or occasionally replacing it with a new one. There are as many ways to start a siphon as there are homebrewers. Before any method is used, the number one step that must be taken is to thoroughly wash and rinse your hands before handling the siphon hose. Soap and water and a good rinse will be adequate for homebrewers’ purposes.
The outflow from the transferring hose should be directed to the very bottom of the receiving fermenter so that splashing is minimized. The effects of splashing can be virtually eliminated by adding a layer of carbon dioxide to the receiving fermenter. Homebrewers with a carbon dioxide dispensing system can easily add about a 15-second stream of regulated carbon dioxide gas into the fermenter. Carbon dioxide is heavier than air and will layer itself on the bottom of the receiving fermenter. Any splashing will only aerate the brew with harmless carbon dioxide. This method can also be used when transferring beer into kegs. Hey—relax and don’t worry if you can’t add a layer of carbon dioxide to your receiving fermenters and kegs. Have a homebrew—there are plenty of more important things you can attend to that will make more of a difference.