The most obvious advantage that kegging has over bottling beer is that there aren’t any bottles to wash. An additional, not quite as obvious, advantage is that properly kegged beer is less prone to oxidation. The air-space-to-beer-volume ratio is much smaller, reducing the effects of oxidation. Kegged beer—if stored properly—will keep its fresh character for a longer period.
Kegged beer and draft systems are a real treat for those with the resources of space and money to assemble all the necessary equipment to make it happen.
A few disadvantages are worth considering. It is far easier to take a few bottles of assorted homebrew to your friend’s party or dinner event. Giving bottled beer as a gift is easier to cope with than giving kegs! Then there’s the cost of setting the system up, but if that is not an obstacle, there are several convenient and pleasurable options available to homebrewers. The most common systems (brewery kegs, soda canisters and plastic “beer balls”) are reviewed in The New Complete Joy of Home Brewing.
SOME SAFETY AND QUALITY-ASSURANCE CONSIDERATIONS
Before disassembing any beer keg for cleaning, always take great care to release all pressure from within the keg. If you are sure you’ve already done this, check and do it once again. The explosive force of flying keg parts as they are loosened can be lethal. If there is any beer or sediment left over along with pressure, you could also be a prime target for a full-body beer soaking, never mind having to repaint the walls.
The majority of stainless beer kegs and soda canisters used by homebrewers are secondhand. Valves, seals and gaskets wear out and fail. To help assure yourself of a perfectly conditioned keg of beer, check all seals, valves and gaskets by adding 5 pounds of carbon dioxide pressure to the just-primed and kegged beer. Work up a good lather of soap and water and smear this lather over all seals and joints. As if you were looking for a leak in a bicycle inner tube, look for air bubbles. The smallest pinhole will result in flat, uncarbonated beer. If you do discover a leak, release all the pressure and attempt to reseat the fixture or seal. Reapply pressure and check again. Keep spare parts on hand to replace worn-out fixtures.
There are times when sediment-free draft beer is an option of choice, particularly when you will be traveling into the wilderness for days with only draft homebrew to sustain the spirits.
Sediment-free draft beer can be achieved in two ways, one of which was explained in the section dealing with artificial carbonation. A more natural method is not only very simple but inexpensive. A naturally conditioned sedimented keg of beer can be chilled (the closer to freezing, the better) and transferred from one keg to another by means of attaching the outflow fixture to the outflow fixture of an empty keg. Before the transfer, the empty keg is sanitized and purged of air by running carbon dioxide gas into the “out” valve. The tube inside will direct the gas flow to the bottom of the keg. As you release pressure from the “in” valve, air is evacuated and replaced with carbon dioxide. Similarly beer is pushed out of the full keg with carbon dioxide and into the “out” valve to the bottom of the awaiting keg. Releasing pressure from the “in” valve or safety release will allow the flow of sediment-free beer into your new keg. All that is required is an extra short hose and one extra valve fixture.
Having to walk to where your keg of beer is located is good exercise. It’ll help keep you in shape. Now, why would I mention something like that? If you really get swept away with this hobby of homebrewing, things are likely to get a bit out of hand. It wouldn’t surprise me if there is someone, somewhere out there, who has all his or her cold beer stashed in the basement with beer hoses running from a draft system to a bedroom headboard, a bathtub or shower stall, the kitchen, the living room, dining room and patio. It’s all quite possible, and whenever homebrewers and possibilities intermingle, well…Need I say more?
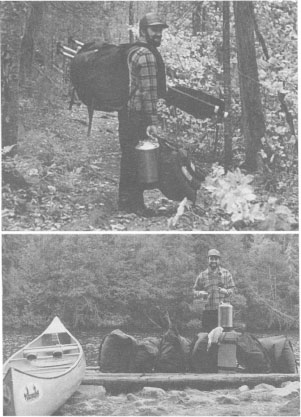
Canoe Brew? Sediment-free three-gallon stainless steel kegs are perfect for wilderness canoeing and those long portages. Using a hand pump to dispense the beer, I found that Canoe Brew made evenings perfect even when the fish weren’t biting. Pack it in and pack it out—they’re ecologically smart, watertight, and float when empty!
Yes, much is possible, but when your beer lines are long, you’ll need to be a bit more scientific and understand how keg pressure can be compromised with flow resistance, gains or losses in elevation, temperature changes and a lot more. If you keep your beer lines short and dispense your beer within 3 feet (l m.) of the source, then the dynamics of pressure, flow and resistance need not be seriously considered. But here are a few tidbits of information to prime your thoughts if you ever consider putting together an elaborate draft system that runs throughout your castle, or if you want to appreciate the problems a tavern or bar has to deal with when installing a draft system.
- The hose through which beer flows will create varying resistance to flow depending on the inside diameter, hose material and length. Increased resistance requires more pressure to push the beer from the keg through the hose and into your glass.
- An increase in elevation from the keg to the tap will create resistance to flow and require additional pressure to push the beer through the lines.
- When the pressure required to push the beer through the beer lines is more than the ambient pressure within the keg, then additional carbon dioxide is forced into the beer. The beer gains carbonation. Beer can lose carbonation if the reverse is true.
- The ambient pressure inside the keg is affected by how cold the beer is (refer to the Carbon Dioxide Volumes table in Carbonation, Conditioning and other Gaseous Matters).
- If the beer lines are long and not insulated, beer can be warmed on its journey to the tap. Warmer beer releases carbon dioxide much more quickly and becomes overcarbonated or foamy.
- Unfortunately relaxing and drinking lots of homebrew will not help you figure out how to put together a sophisticated system, but referring to other sources of information and doing a little scientific homework will. Here are several references that go into greater detail: “Setting Up Your Home Draft System,” by Dave Miller, Just Brew It!, Brewers Publications, Boulder, Colorado, 1992; “Principles and Characteristics of Beer Dispensing,” by Elton Gould, The New Brewer, volume 5, number 4.
The simplest of home draft systems requires a spare refrigerator, a carbon dioxide system (tank and regulator), a gas line with a fixture to attach to the keg, and a beer hose with a tap on one end and a fixture to attach to the keg. Holes can be drilled through the walls of the refrigerator to accommodate hoses carrying pressurized carbon dioxide in and beer hoses out to a tap.
A less sophisticated method requires no adaptation of the refrigerator. Carbon dioxide can be applied only as needed to dispense a desired amount of beer. Simply open the refrigerator door, connect the tap line to the keg and serve yourself. Add carbon dioxide if necessary. When you are using this method and are finished pouring for the day, top off your keg with about 10 pounds of pressure so that carbon dioxide is not lost from the beer when it attempts to equalize pressure in the air space in the keg.
If you have several kegs of homebrew on tap, a carbon dioxide manifold is a handy device to employ. It allows you to split the gas lines and direct carbon dioxide from one tank to several kegs of beer at one time.
Serving cold beer from a warm keg can be done by means of a “jockey box.” It allows you to chill only the beer that is actually being poured, saving energy or allowing for a quick and immediate chill. From a room-temperature keg, beer is pushed with carbon dioxide through a hose leading into an insulated box or chest. (Picnic-type coolers work well.) Inside the chest the hose is connected to a length of coiled copper or stainless steel from which the beer flows into a beer tap emerging from the side. Beer is chilled by means of ice and water inside the chest and surrounding the coils. Instant cold beer. Replace ice as needed.
Whenever using carbon dioxide gas for dispensing, always use a properly functioning regulator. Unregulated pressure can blow a keg and cause fatal injury. As a safety precaution always turn the gas source off when it is not in use. Leaks can create their own hazards; carbon dioxide is heavier than air and can snuff pilot flames in water heaters and cause asphyxiation.
How long will a keg of beer last? If you dispense with carbon dioxide and have brewed a clean beer, homebrewed beer can last for several months and even a year, but only if you don’t consume it in a hurry. The carbon dioxide does not hasten the deterioration of the beer, though with time the beer will naturally age and flavor character will change. For some styles of beer this may be desirable, while for others it may not.
If a carbon dioxide system is not practical or available, draft beer can still be enjoyed by pushing the beer out of the keg with a hand pump. Air is forced into the keg, and beer forced out. This method of dispensing beer is completely adequate as long as the beer is properly chilled and you plan on finishing the keg within the day. Beer will not maintain proper carbonation or its freshness when air is introduced. Air contains spoilage organisms that will eventually turn the beer sour over a matter of a few warm days. But prior to spoilage, much of the carbonation will be lost. Why? Even though you are putting a lot of air pressure into the keg to push the beer out, the beer does not “see” much carbon dioxide gas in the air. There is no carbon dioxide pressure being forced onto the beer and forcing the carbonation to stay in the beer. Even though there is pressure to force beer out, the beer’s carbonation “instincts” see no pressure, so it equalizes the dissolved carbon dioxide pressure with the gas carbon dioxide pressure and slowly loses carbonation as the air space gets larger and you and your friends drink more homebrew. Hand-pumped homebrew is best served at colder temperatures.
When dispensing beer from a home tapping system, pull the “throttle” out full, even if your beer tends to be overcarbonated. Opening the tap partway only serves to agitate and spray the beer out, and much carbonation is lost. Pouring flat beer from an overcarbonated keg seems contrary, but it happens if you choke the throttle. You’re better off pouring a full pitcher at full throttle and letting the foam subside. If you encounter an overcarbonated keg, you can reduce the carbonation by releasing carbon dioxide gas pressure from the safety release (on some kegs) or from the “gas in” valve. Release pressure every few hours or once a day until you can dispense beer with a reasonable amount of carbonation.
Five to 15 pounds per square inch of pressure is a normal range of regulated carbon dioxide pressure with which to dispense beer. Applying more than that may create overcarbonation or too vigorous a flow from the tap.
Your beer hoses and taps should be cleaned regularly. Run hot water and sanitizing solution through them. A perfectly good keg of beer can pick up moldy and sour flavors from its quick trip through dirty beer lines.
WHAT ABOUT THAT CREAMY GUINNESS HEAD?
It’s the gas! For those of you who have ever had the pleasure of draft Guinness Stout, you can appreciate what a thick, creamy head really can be. Almost whipped cream or meringuelike, the head on draft Guinness Stout is created by injecting a mixture of nitrogen (N2) and carbon dioxide gas into the dispensing system. Nitrogen gas, when mixed with beer and agitated, creates very tiny bubbles. Because of the laws of physics, molecular behavior and surface tensions, these bubbles of nitrogen and carbon dioxide break down very slowly, hence the long-lasting, dense head on draft Guinness.
Homebrewers can duplicate the Guinness effect to some degree by using the simplest of methods. You will need a tank of nitrogen gas and a special regulator for high-pressure gas. (These are not cheap.) Prime your stout (or other beer) at a rate of ¼ cup (60 ml.) of dextrose per 5 gallons (19 l.). Apply 20 to 25 pounds pressure of nitrogen to the keg. Note that nitrogen does not dissolve very readily into beer, but it doesn’t take very much to create a dense, creamy head. Because nitrogen does not dissolve into beer in great amounts, it is still necessary to carbonate with carbon dioxide.
When the beer is conditioned and chilled, serve as you normally would, but use mostly nitrogen to dispense the beer. Add some carbon dioxide to help maintain carbonation levels. The beer will be dispensed quite forcibly at 20 to 25 pounds pressure, but if served cold, once the foam has settled, you will get the head you’ve been looking for and the typically mild carbonation of a proper draft Guinness.
Another option is to simply purchase a Guinness tap. It comes designed with a flow restrictor for dispensing stout just like your favorite source of draft Guinness.
Sure—you can try this with any type of beer.
WHAT ABOUT THE LONG-LASTING, DENSE HEAD OF GERMAN DRAFT PILSENER?
If you ever go to Germany and intend to have more than one glass of Pils, order your second beer as soon as you get your first. You’ll wait perhaps 5 to 10 minutes for the first round.
Classic German draft Pilsener is a slow pour. It takes time for the dense, rich head of foam to subside and the barkeep to top off your glass with a fair serving of beer.
Very cold fermentation, hopping with quality “noble”-type aroma/flavor hops, and decoction mashing help build the character of German draft Pilsener. The tapping system and regulation of pressure also have much to do with the quality of the head and carbonation. Pilsener is fully carbonated and dispensed with more than the usual amount of pressure. This practice creates a lot of foam in the glass. The foam is allowed to settle for a few minutes, then the glass is topped off with more beer. It is allowed to settle and then topped off again and again until the portion is correct. Draft Pils is not excessively carbonated, but it has a pleasingly stubborn head that forms patterns of lace on the sides of your glass as you seek the bottom.
And while we’re on the subject of head retention…as indicated above, cold fermentation enhances the ability of beer to maintain a head of foam. Warmer fermentations are more likely to create fusel oils (alcohols), which can have a negative impact on head retention.