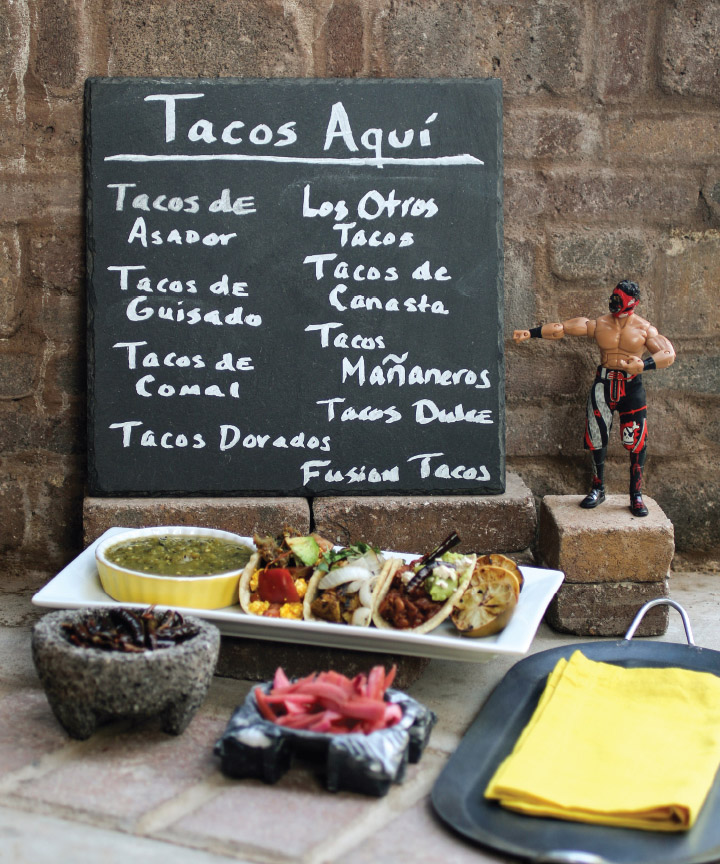
Tortillas, Masa, Nixtamal, and You
“All about tortillas and how to make your own.”
The tortilla is a simple food. At its heart, it’s just corn, water, and sometimes salt. It has a rustic elegance that keeps drawing me back to the griddle to make more. When I am craving something late at night, I am prone to head out to my patio kitchen, heat up my griddle, cook some fresh tortillas, spread some beans on top, and dip them in salsa. Not only do they have a sensual taste, they make me feel invigorated and comfortable at the same time.
The tortilla is also loaded with nutrition. While low in the essential amino acids lysine and isoleucine, they have a notable amount of the other essential amino acids. They have a moderate amount of fiber, are 10 percent protein, and are low in fat. A taco-sized tortilla is about 60 calories. When coupled with beans, their amino acid profile becomes very high in all 20 essential amino acids. This combination of ingredients is filling, nutritious, and easy to make. No wonder corn and beans were a staple of the Central American diet.
The tortilla makes the perfect vessel for holding a variety of ingredients. It’s thick enough to hold even saucy ingredients without falling apart; it’s pliable enough to wrap around those ingredients; and it’s perfectly sized to fit in the hand. Plus, they taste great on their own, melding with the flavors of the filling to create bites of soulful perfection. I should note that the standard tortilla size for a taco is 5 ½ inches in diameter. I’ll tell you a secret, though. I usually make mine a little bigger. I like to eat!
Tortillas are the foundation of any taco. They carry the flavors of the rest of the taco. They are the vessel that holds the filling, condiments, and sauces, and they are the first thing you taste when you bite into a taco. While the tortilla is often the component of a taco that gets ignored in most kitchens, for me, it is the most important element. Without a good foundation, the entire taco is diminished. This is why I spend the extra few minutes to make my own tortillas when I make tacos, instead of resorting to packaged tortillas. The fresh tortilla is a star!
With that said, however, while I next show you how to make your own excellent corn tortillas from scratch, you can make most of the tacos in this book with storebought corn tortillas.
Making Corn Tortillas from Masa Dough
Let me be candid with you. I purchase my masa more frequently than I make it from scratch. I am fortunate enough to have Mexican markets within a few minutes away, so I just head to the store and get my masa for the next couple of days. Not everyone has that luxury, though. Then again, there are times when I just want the feel of the dough mashing together in my hands, or I want a flavored masa, which requires making it myself. Those are the moments where it’s time to bust out the masa harina flour, get some warm water, and make my own masa dough.
Buying Ready-Made Tortillas

If you don’t want to make your own tortillas from scratch, take the easy way. Here’s how to find fresh tortillas and what to look for when buying them pre-packaged from a store.
Finding Fresh Tortillas
Making your own tortillas isn’t for everyone, and that’s O.K. If you have a local tortilla maker, you can usually purchase tortillas from them. They are not always easy to find, though. Ask a non-chain Mexican restaurant where they purchase theirs. Often, they will point you in the right direction. You should also be able to get freshly made tortillas from most markets that serve the Mexican community. I found quite a few by doing a quick search for Mexican bakeries in my area.
Buying Packaged Tortillas
If you don’t have a local source for fresh tortillas, that’s O.K., too. Dried, packaged tortillas can be found anywhere. My preference is to get a thick tortilla, because it won’t fall apart as quickly as the thin dried ones that are commonly sold, especially if you are using them for tacos de cazuela. Trader Joe’s makes an excellent thick, handmade tortilla. If you don’t have a Trader Joe’s near you, check out your local market. They will sometimes have the thicker tortillas. If it comes down to it, the thin yellow or white ones will do.
Make Your Own Masa Dough from Corn Flour
Masa harina is a type of ground corn flour specially made for tortillas and tamales. It’s made from corn that has gone through the nixtamalization process, which makes the corn more nutritionally sound and enables it to be turned into a dough. Do not try substituting corn meal, polenta, grits, or corn flour. Masa harina is your one-and-only friend here. At most stores in the U.S., masa harina will be found near the wheat flour or in the Mexican section of the grocery market. Bob’s Red Mill (see Resources) makes a great organic masa harina, though Maseca is the most well-known brand. To make your own masa dough for tortillas from masa harina flour, all you need are:
2 cups masa harina flour
1 ½ cups warm water
1. Place the masa in a mixing bowl.
2. Heat the water until it is just starting to steam. Pour the water into the bowl. Mix it together with the masa harina so it’s evenly distributed. Hang out and wait for 5 minutes.
3. The masa harina needs time to absorb the warm water before it can be turned into dough. Once that time has passed, work the wet masa with your hands until you have a thick, smooth dough.
Make Your Own Masa Dough from Nixtamal
If you are lucky enough to have a Mexican market near you, chances are you can find fresh nixtamal (usually located next to the bags of prepared masa) and can make masa from nixtamal instead of dry masa harina flour. Tortillas made from nixtamal freshly ground into masa have a depth of flavor unmatched by even tortillas made from premade masa. Nixtamal is corn that has been treated with a highly alkaline solution to remove the outer chaff, break down cellular walls, and make the niacin in the corn more available. Some markets will cook nixtamal to the point where it is fully cooked and ready to grind into masa right away, basically making hominy. They’ve done all the work for you. You just need to grind. To make masa from fresh nixtamal, you will need a bowl and a molino (grinder).
4 cups nixtamal
Add the nixtamal to your grinder in two batches and grind it to a smooth dough. Yes, that is all there is to it. Masa made from fresh nixtamal will start to spoil within a couple days, so just make what you need and no more. If you end up with leftover nixtamal, you can freeze it.
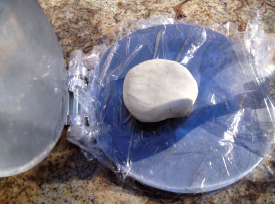
Storing Masa
To store your masa dough, place it in a plastic bag and press out as much of the air as possible. Keep this in the refrigerator. When you want to use it again, let it warm up to room temperature before working it into tortillas. If you try to press the dough cold, the tortilla will be prone to falling apart. Ideally, you should use your masa within a day of making it. It will generally last four or five days before it starts to turn (it sours, though not in a good way). It loses some of its plasticity after a day, making the tortillas less light and fluffy. Despite that, I hate wasting food, and I still use my masa after a day of being in the refrigerator. If the tortillas don’t puff up quite as much, so be it.
Working with Older Masa
If your masa is more than a day old, chances are it has dried out just slightly. It’s enough to make the tortilla a little dry, but there is a work-around for it. Before grabbing a chunk of masa, dip your hands in a bowl of water. The residual amount of water on your hands will get into the masa as you form it into a ball, and this will be just enough water to bring your masa back to the right consistency.
Masa Dough from Masa Harina vs. Nixtamal

Important: These recipes assume that you are making masa from masa harina. If you are making them from fully cooked nixtamal or your own homemade nixtamal, omit the water in the recipes. Add in about ¼ cup of masa harina to the mix to make sure it binds with the additional liquid introduced by the flavoring ingredients.
Want to Make Your Own Nixtamal?

What’s that, you say? You want to make your own nixtamal, too? I approve of your dedication.
Important: When using homemade nixtamal, it will take practice to get the tortillas to come out right, so don’t get frustrated if they don’t turn out perfectly the first time. Nixtamal is finicky and nuanced. Each batch comes out slightly different, so practice until you get a feel for it. It will also help to rub oil onto your metal comal or griddle to give you some leeway with your technique. Alternatively, use a clay comal, which is by nature more forgiving on homemade nixtamal.
To make your own nixtamal, you will need a bowl, colander, non-reactive enamel or stainless steel pot, a molina (grinder), and patience.
4 cups organic dried corn
2 ½ tablespoons cal (see below)
2 quarts water
Rinse the corn in a colander for about two minutes, moving the corn around with your hand as you rinse to remove the chaff. In a non-reactive pot, combine the cal and water and bring to a boil. Add the corn and boil for 5 minutes, turn the heat off, and let the corn rest in the water for at least 8 hours. Pour the corn into a colander and rinse for 3 to 4 minutes, while rubbing the corn with your hands. Get your hands in there and vigorously rub the whole batch of corn. This will remove the pericarp of the corn, which is not very digestible. Don’t worry about getting this perfect. The pericarp comes off easily and rinsing it will wash away the bits. Now it’s time to grind your corn.
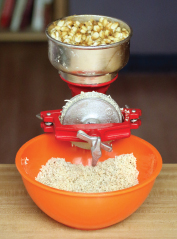
Nixtamal being ground into masa with a molino.
Transfer the corn to a molina (grinder) and grind away. Once you have the loose dough in the bowl beneath the grinder, knead the dough until thick and smooth. Then, congratulate yourself because you just made fresh masa from nixtamal you made yourself, and that makes you the king or queen of the vegan Mexican kitchen! Now that you have your masa, it’s time to make tortillas.
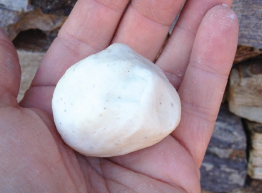
You Can’t Make Nixtamal Without Cal
“Cal,” short for calcium hydroxide (aka pickling lime or slaked lime), is essential for making nixtamal. It is highly alkaline and dissolves the hemicelluloses of the corn, breaking down the cellular walls and separating the hull from the kernels. Without that breakdown, the corn would not stick together and form into dough. The process also makes the niacin in the corn bioavailable. I usually purchase cal at my local Mexican market, although it is available in specialty stores and online. It’s fairly cheap, so I get enough for several batches of nixtamal. The leftover liquid from nixtamalization, called nejayote, requires careful disposal since it is environmentally disruptive.
I accidentally spoiled myself. When I made my first fresh tortilla, I thought I was making something that would be a step up from using the storebought versions I had used my whole life. What I didn’t expect was that the fresh tortillas would be so much better than the storebought variety that the fresh ones would make the other ones taste like corn-flavored cardboard forevermore.
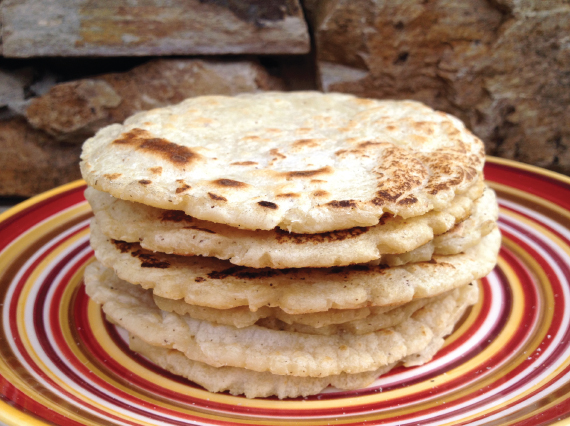
Fresh tortillas feel like home to me. They are warm and inviting, and nothing beats holding a tortilla that just came off the griddle, filling it with beans or grilled veggies and salsa and chomping down. They also have a complex flavor, slightly sweet, a little bit toasty brown, and full-bodied. They absorb flavors from the ingredients placed on them, but they don’t become soggy messes. Instead, the tortilla incorporates those other flavors, which accent the rich flavor of the tortilla instead of dominating it. It’s such a simple food, but it has such a beautiful impact. Have I convinced you yet to make your own tortillas?
To make your own corn tortillas, you will need:
• a tortilla press
• plastic sheets or wax paper
• a hot griddle (whenever I call for a griddle, you can use a comal or iron skillet.)
• a wide spatula
• a towel
• practice
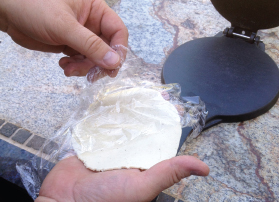
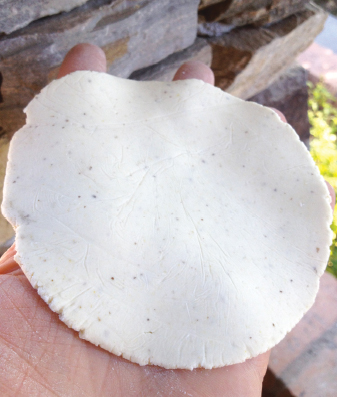
Before you start working the masa, heat your griddle to just above medium heat. That way, as soon as you are done pressing your masa into proto-tortillas, you can put them on the griddle right away. Have a towel near the griddle so you can place your tortillas on it as they come off the griddle. Take a chunk of masa and roll it in your hands into a ball about 1 ¼ to 1 ½ inches in diameter. If you need to take or remove masa from the ball, do so and then just reroll it. Next, flatten this out into a disk between your hands. Lay a sheet of plastic wrap or wax paper on the bottom part of your tortilla press. (See step-by-step photos opposite.) Place the disk on the plastic slightly off center towards the hinges. This is important, because when you close the press, the masa will be pressed away from the hinges. By placing it slightly toward the hinges, the tortilla will be centered when you are done pressing it. Lay another sheet of plastic or wax paper on top of the masa, making sure the plastic covers the entirety of the tortilla press, bottom plate, as well. Press the tortilla press closed, flattening the masa. The harder you press, the thinner your tortilla will be. If you want very thin tortillas, you will need a heavy press, like a cast-iron press. Peel away the top sheet from the flattened masa. Gently lift the plastic and flattened masa off the press and flip the flattened masa into your palm. The raw flattened masa should now be in your palm, and what was the bottom sheet of plastic should still be stuck to it, though now on top of the masa. Peel this away. One word of caution before you peel away your masa and put it on the griddle. If you are using masa made from stone ground nixtamal, lime, and water and nothing else (you can tell because bits of rough nixtamal will still be in the masa), you need to be careful when handling it or it will break. The flavor of this pure masa is amazing, but the texture requires extra practice and skill to get it to work properly.
The balls of masa that get pressed into tortillas are called testales. (My wife thinks an angry Mexican housewife named them.)
A Forgiving Art
Tortilla-making is an art, but it’s a fairly forgiving art. Don’t worry if your tortilla doesn’t puff up. You’ll still end up with a nice tortilla. If you want them a little extra toasty, you can increase the time you cook them. They won’t be quite as pliable, but they will develop a more robust flavor.
Step 1: Place the testale and cover with plastic.
Step 2: Press the testale and peel off the plastic.
Step 3: Place on the griddle or comal to cook.
Step 4: Flip to cook on both sides.
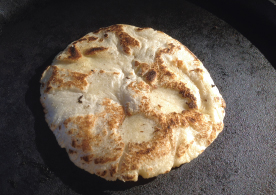
Step 5: A finished tortilla ready to enjoy.
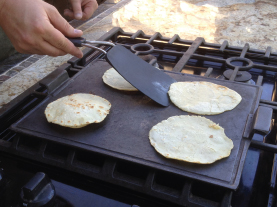
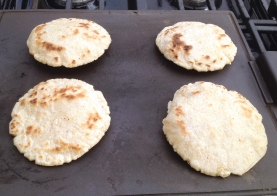
Gently lay the tortilla onto your hot griddle. After about 30 seconds, you will see the edges turn color. Tease your spatula gently underneath the tortilla and flip it over. Let it toast for about a minute or so, then flip it over again. This time, you will toast the tortilla for another 30 seconds. If you’ve done everything right, your tortilla will puff up. If you like your tortillas a little extra toasty, you can go 2 to 2 ½ minutes per side to get a little char on them, though they will lose some pliability. Transfer the tortilla to the towel and then fold the towel over it to keep it warm and pliable while you make the other tortillas.
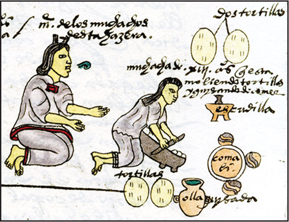
An Aztec woman teaches her daughter how to make corn tortillas. You can see the Aztec glyph used for corn tortillas. (from the Mendoza Codex)
If you have a griddle big enough to cook several tortillas at once, press out all the masa into ready-to-be-made tortillas that you plan to cook before laying any of them onto the griddle. That means that if your griddle can handle cooking four tortillas at once, press out all four before placing them on the griddle. Now work quickly. Lay them on the griddle. By the time you lay the last one down, it’s probably time to flip the first one. This is why you should get the masa pressed out before you start cooking it because the tortillas cook fast. It takes a little practice, but you will find a rhythm and the tortillas will come together effortlessly. It took me about four times before I could get my tortillas to puff and another four or five times before I developed a good tortilla-making rhythm.
Once you have made your tortillas, keep them wrapped in a moist, warm towel to keep them pliable. You can easily keep them this way for an hour. After that, you should warm them using one of the techniques below.
Warming Corn Tortillas (storebought and fresh)
Fresh tortillas should ideally be eaten right away, and if not right away, kept in a moist warm towel. If you have time constraints that dictate you have to serve them later, all is not lost.
There are three ways to warm your tortillas. First, bring a dry pan to a medium heat. Place the tortilla in the pan for about 5 seconds per side. You can also do this on a grill. Your tortilla will be pliable at this point and can be filled with delicious taco fillings. Another option is to gently steam the tortillas. They only need to steam for about 30 seconds. Once you steam them, place them in a tortilla warmer and they will stay pliable for about 10 minutes. If you have a thin, dry tortilla, you will only need to steam them for about 15 seconds. If you steam longer than that, you risk them falling apart. The final technique is to lay your tortilla over a hot pot of taco fillings that are moist, but not wet. The residual heat and moisture will warm and steam the tortilla. You’ll need about 30 seconds on one side with this method. My preferred method is warming them in a dry pan, while I prefer steaming them if I am serving lots of tortillas.
Taco Heresy: How to Make Wheat-Flour Tortillas
The corn tortilla has always been, and still is, the preferred tortilla for tacos. Taco aficionados will spurn any taco served with wheat and declare it unpalatable. However, the northern states of Mexico and the American Southwest still show a heavy influence from the agricultural legacy of the Spanish, who preferred wheat. That’s why quite a few tacos served in the north of Mexico are served with wheat flour tortillas. Baja, Mexico also features a number of wheat flour tacos, though these are more due to a California influence.
Unlike corn tortillas, you will have a hard time simply pressing wheat dough into a tortilla shape. Instead, you will need a rolling pin and a little extra flour on your work surface. You will also need a bowl, a hot griddle or comal, a wide spatula, and a towel.
1 ¼ cups all-purpose flour (I actually prefer whole wheat, but your tortilla will be a bit chewier)
½ teaspoon salt
¼ teaspoon baking powder
2 tablespoons vegan shortening (you can omit this, but the tortillas will be
a little tougher)
1 cup hot water
In the bowl, combine the flour, salt, and baking powder. Incorporate the shortening and use your hands to work it into the flour. The dough should be crumbly at this point. Slowly pour hot water into the flour, ¼-cup at a time. After each addition, work the water into the dough with your hands. After doing this, you should have a smooth dough. Knead until the dough no longer sticks to the kneading surface and your hands. Divide the dough into 10 balls. Cover them with a damp cloth and let them rest for 45 minutes. This is very important. This is the time where a gluten web in the dough forms. If you don’t do this, the dough becomes very hard to roll into disks.
Tortilla-Making by Hand

Tortillas used to be formed by hand, patting them back and forth between the palms to create a perfectly round, flattened masa cake. The tortilla press, which requires little practice, has made this a vanishing art.
Preheat the griddle to a medium heat. Very lightly flour your working surface. Flatten a dough ball into a small disk. Roll this out into a tortilla about 5 to 6 inches in diameter. To do this, roll the rolling pin forward, then back, and then adjust the angle slightly and repeat. Continue this until you have your flattened tortilla disk. You need to be firm, but not forceful, with the rolling pin. If you push too hard, it smashes the dough too much and makes the tortilla tough. If you push too lightly, it will take forever to roll into a disk. It takes a bit of practice, so don’t worry if they don’t look perfect the first time.
Place the tortilla on the hot griddle. These cook very quickly. After 30 to 45 seconds, flip the tortilla. After a minute, flip it again. If you got everything right, the tortilla should puff up. As soon as it puffs after the second flip, take it off the heat. Cover it in a towel while you make the rest of the tortillas, repeating this process.

“(Tortillas are) extremely wholesome, and when fresh (are) made of a good taste, (but) become disagreeable when stale.” - Father Francesco Saverio Clavigero, from his 1710 treatise The History of Mexico
Hard Shell Tacos
The hard taco shell was made famous by Glen Bell, the founder of Taco Bell. After eating at the local Mexican restaurant in California, he figured out how to bring the taco dorado to market. Though far removed from authentic Mexican tacos, here’s how to make your own. You will need:
• A deep fryer or heavy large pot like a Dutch oven
• Enough corn oil for 5 inches in your pot
• Tortillas
• A taco form (or a can, see variation)
• Plate and paper towel
• Courage
1. There are frying baskets specially designed for frying tacos,
which is the taco form. This is by far the best implement to use because it is sized properly and has a handle designed to keep your hands away from the hot oil.
2. Pour 5 inches of oil into your pot and bring the oil to 350°F. Make sure your tortillas are pliable enough to lay over the taco form and not break. If they are not, warm your tortillas using the dry pan method described earlier. Do not use the steaming method since this introduces water back into the tortillas. Lower the tortillas into the pot and fry them for 2 minutes. Remove them and gently slide them off onto a paper towel or rack. Repeat until you are tired of frying tortillas, or you run out of them!
Variation: You can also use an empty can as a taco form, but you will need something to safely dip it into and out of the pot, like tongs. Just grab the edges of the can with the tongs to lower and lift the can. Make sure you remove both ends of the can using a can opener that makes a clean cut, not a jagged one.
Baked No-Fat Hard Taco Shells
If you’re really in the mood for a crunchy taco, but don’t want to use any oil, baking will do. To make baked, no-fat hard taco shells, you will need:
• Oven mitts
• Storebought packaged tortillas
• A plate
• A really strong desire to eat baked, hard tortillas
1. Place the oven rack you want to use away from the heating element. Usually that’s on the bottom of the oven, so you’ll be placing your rack towards the top. Turn the oven to 375°F. Make the tortillas pliable. My preferred method is to warm them in a dry pan, but you can get away with a quick 10-second steam. If you steam them longer, the excess moisture will make them stick to your oven rack.
2. Drape a tortilla over two of the bars of the oven rack. This will ensure the tortilla is concave enough to hold lots of filling. Repeat this until you are out of tortillas or oven room. Bake them for 10 minutes. Bake these to the point where the tortillas are hard enough to crack. Otherwise, they will come out tough and leathery.
Warming Crispy Tortillas (handmade and storebought)
Be aware that even though packaged corn tortilla shells have been sealed, they have been sitting on the store shelf long enough for the oil in the tortilla to start to turn. That’s also true with your homemade ones, if you are keeping them around for weeks on end, but chances are, if you have been making fresh crispy corn tortillas, that’s not the case. Regardless, as soon as the shells come to room temperature, they need to be rewarmed to get the most flavor out of them.
To do so, bring your oven to 325°F and place the rack away from the heating element. Gently drape the hard tortilla over one of the bars on the rack and warm it for 2 to 3 minutes. It’s just enough time to bring out the toasted corn flavor.
Flavored Tortillas
Now that you’ve got some experience making fresh masa and tortillas, you can start to make different flavors of tortilla. The key to making flavored tortillas is keeping the amount of liquid used the same as if you were making unflavored tortillas. Also, keep in mind that masa harina and nixtamal are flavor dampeners. They will significantly cut the flavor of whatever you mix into them, so if you want to create your own flavored tortillas, go heavy on the flavoring ingredients.
Remember, with all of these recipes, you need to let the masa rest for five minutes once you add the wet mixture to the dry masa harina, so the masa harina can fully absorb the liquid. After that, you can work it into dough.
Chile-Flavored Tortillas
Taco Pairing: These tortillas go well with just about any taco, but they are particularly delicious when used with Tacos de Asador. There are three ways you can make these, each with its own flavors and intensity.
Method 1: Chile Powder
You can add plenty of chile flavor to a tortilla by mixing chile powder directly into your masa harina. For every 1 cup of masa harina, use 2 tablespoons of your favorite chile powder. I like using my own ground mild chiles such as ancho or guajillo. If I want to spike the chile powder with some heat, I first grind ground chiles de árbol or ground chipotles and mix it into the chile powder before measuring my 2 tablespoons. A little of this heat goes a long way in the tortilla, so use sparingly. If you don’t want to grind your own chiles, you can instead use your favorite storebought chile powder. Because you’re adding the chile powder to the masa harina dry mix, you will need to add an additional teaspoon of water when you make the dough. Use the same proportions of masa harina to water you would use if making your own masa. Just remember to add 1 teaspoon of water for every 2 tablespoons of chile powder.
Method 2: Chile Water
When making chile water, you want as much chile flavor to seep into the water as possible. This happens when you simmer it. This will give you a light, very smooth chile flavor accent, rather than a dominant flavor. All you have to do is rehydrate the chiles in water and then use the rehydrating water in place of the water in the regular recipe. For every 2 cups of water you need for making masa, you will want to add 3 to 4 large dried chiles, like the ancho or guajillo.
If you want some heat, you can add a dried chipotle, habanero, or a couple of chiles de árbol to the pot. Use more water than you want to end up with at the end because it will evaporate as you simmer the chiles. For example, if you want to end up with 2 cups of water, add 3 cups of water to the pot and 3 to 4 chiles. You’ll have a little excess liquid left over, but it’s better to have too much than too little. Simmer the chiles over a medium heat for about 10 minutes. Place a bowl underneath a strainer and pour the water through the strainer. This ensures that you catch all the seeds and chile bits so they don’t get in the masa. Use this chile water for making your masa dough.
Method 3: Chile Puree
4 ancho or guajillo chiles, stems removed, seeds taken out
Water for rehydration and mixing
¾ teaspoon salt
1 ½ cups masa harina
1. When making chile puree, you want as much flavor to seep into the pulp of the chiles as possible, which is why a gentler rehydration method is used. This method will give you a much more intense chile flavor since you are using the pulp of the chile to flavor the tortilla. It’s a little more finicky, because there isn’t a straight one-to-one water substitution.
2. Toast the chiles over a medium heat in a dry pan for about 30 seconds per side. Cover the chiles with enough very hot water and rehydrate them by letting them sit for 20 minutes. Drain, reserving the liquid. In a blender or food processor combine the chiles with 1 cup of the water used to rehydrate the chiles. Puree until smooth. Press the chile puree through a sieve and collect it in a bowl below the sieve.
3. In a separate bowl, combine the salt with the masa harina and mix well. Combine the masa harina mixture with the chile puree and mix well. Because the size of the chiles vary, you will need to practice to find the optimum consistency of the masa.
Guajillo Garlic Tortillas
Taco Pairing: These tortillas go well with just about any taco, but they shine with Tacos de Asador and Tacos de Canasta. Suggested tacos are My Family Tacos (here), “Cecina” Tacos (here), Charred Chayote Tacos (here), Mushroom Tacos (here), and any of the Tacos de Canasta (here).
This works best with Method 3. Start by removing the stem and seeds and toasting the chiles. Rehydrate them using Method 3. When you puree the chiles, add 8 cloves of raw garlic to the blender. Combine 1 teaspoon of salt with 1 ½ cups of masa harina and then add the chile garlic mix to the masa. Work the masa with your hands until you have a tight, smooth dough. Try making this with pan-roasted garlic, too!
Taco Pairing: These tortillas have a heavier flavor and texture, but they go well with most tacos. I would not use them with tacos that utilize beans already or with tacos that have a lighter, brighter flavor profile. Suggested tacos are Bricklayer Tacos (here), Tacos with Sweet Potato and Chard (here), Michoacán-Style Carnitas (here), and Tacos with Hominy and Seitan Tacos in Roasted Garlic Cascabel Sauce (here).
I love black beans. I love the texture, the flavor, and the health benefits they possess. They happen to make a great flavoring agent for tortillas, too. You will need ½ cup of cooked black beans. If you are using canned, save the liquid. If you are using beans you cooked yourself, save the liquid. Save the liquid! You will need a total of 1 ½ cups of liquid. Use your bean liquid and make up the rest of the amount with water. Puree the beans, liquid, and ¾ teaspoon of salt into a bean sauce. If you want to get really fancy, you can use a smoked salt. Mix this with the masa harina. Let it sit and form your dough.
Beer Tortillas
Taco Pairings for Dark Beer: Tacos with Pintos Borrachos (here), Tacos with Yucatecan Barbecue (here), Mole Tacos (here)
Taco Pairings for Light Beer: Tacos Veracruz (here), Basket Tacos with Potatoes and Chorizo (here), Cactus Tacos (here), and Tacos with Purple Potatoes and Roasted Poblanos (here)
Beer-flavored tortillas are very easy to make. As a rule of thumb, dark beers go best with tacos that have a deep, heavy flavor, while light beers work best with tacos that have fillings that taste light, themselves. Use your beer of choice with this recipe, but my favorite beer for these tortillas is a nut-brown ale (not really a beer, but close enough for this recipe) by Samuel Smith. It’s vegan, and it tastes great. I also like Black Toad and Minerva Imperial Stout. For light beers, I usually go with India Pale Ale. If you want to go truly Mexican, both Tecate and Negra Modelo are both vegan. Use the beer as a one-to-one replacement for water in any of the tortilla recipes.
Taco Pairing: These have a very bright, acidic flavor that pops as soon as you bite into the tortilla and they should be paired with tacos that have fresh, crisp flavors. Some of my favorite pairings include Tempura Tacos (here), Charred Chayote Tacos (here), and Hominy and Seitan Tacos in Roasted Garlic Cascabel Sauce (here).
When you fill these tortillas, fill them on the unsalted side. That way when you bite into the taco, the first taste you get is the salted side of the tortilla. Cooking them this way may seem tedious, but if you mix the large salt crystals directly into the masa, they can cause the tortilla to break when you press out the dough. Plus, you don’t get quite the same effect when you bite into the taco.
½ cup fresh lime juice
1 cup warm water
1 ¼ teaspoons coarse salt
1. The ½ cup of fresh lime juice replaces ½ cup of water used in the original recipe, meaning you will need ½ cup of fresh lime juice combined with 1 cup of warm water to make a total of 1 ½ cups of liquid. You will also need 1 ¼ teaspoons of coarse salt. Don’t use regular fine ground salt. Use one that has a large crystal, such as kosher salt. Combine the lime water with the masa and make your dough.
2. Before you start making your tortillas, sprinkle ¼ teaspoon of salt onto a clean countertop and spread it out. You are going to be pressing about four tortillas into each sprinkle of salt. Make sure the salt is near your griddle.
3. Cook the tortillas, but not all the way. Cook the first side for 30 seconds, then the second side for 1 minute. Take the tortilla off the griddle and flip it so the first, less-cooked side is face down towards your countertop. Gently press it into the salt.
4. Return the tortilla to the hot griddle, salted side down, and cook it for another 30 seconds to 1 minute (or more if you want them toasty).
“For me, making masa and tortillas is a meditative process. I get lost in the feel of the dough and the rustic aroma of toasting corn.”