Segment drawing is my favorite way to teach a student how to draw. It is a simple technique for seeing things in a smaller, more isolated way. It helps you gain valuable practice without becoming overwhelmed by creating an entire project.
By using a small viewfinder, you can break a reference down into an abstract perspective. It helps you to concentrate on shapes and gives you a small area to practice the five elements of shading.
.5mm mechanical pencil with 2B lead
kneaded eraser
ruler
smooth bristol paper
tortillion

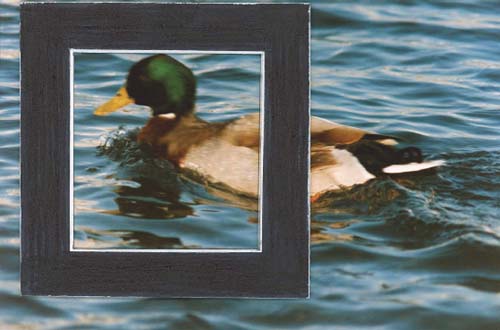
Cut an opening into a black piece of paper using a ruler and a craft knife. Make the opening two inches (51mm) square.

Place the viewfinder over your photo so just a portion is revealed. This changes the photo into a collection of smaller shapes. This small segment will be what you draw.

Draw the same two-inch (51mm) box on your drawing paper. Lightly and carefully draw the shapes you see within your viewfinder photo. If you need to, divide the square into four boxes and use the grid method.

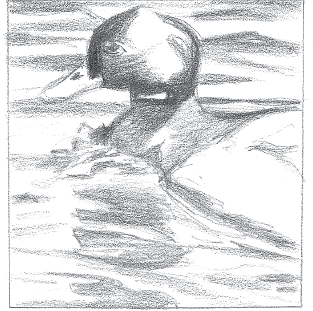
Always let the dark create the light. Fill in the darkest areas of the drawing first. In this photo, the darkest areas are in the head of the duck and the reflections in the water.

Deepen the dark areas with more pressure on your pencil so it fills in. Look carefully at the photograph to see the patterns. Remember to see them as puzzle piece shapes.

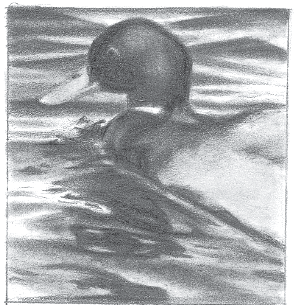
To finish the drawing, use a tortillion to blend the tones smooth. The blending will create the gray tones on the back of the duck and on the gray areas in the water. Reapply the dark areas for more contrast, and then use a kneaded eraser to lift the light. This makes the highlights on the water look more reflective.
Observing the shapes within the viewfinder as puzzle pieces will help you achieve accuracy. Always start with the dark areas first and allow the darks to create the light.