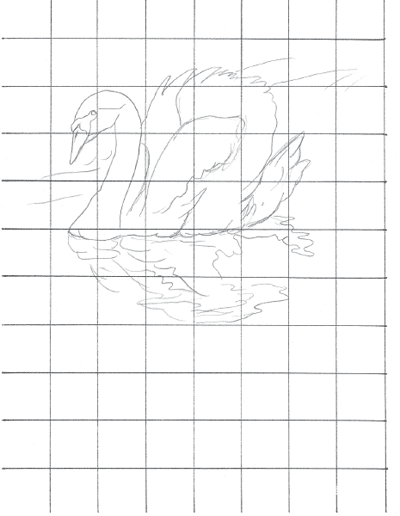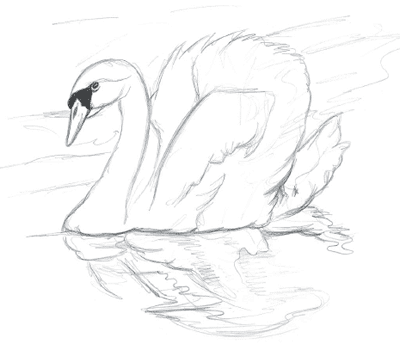
Use the grid method to draw this swan.
.5mm mechanical pencil with 2B lead
kneaded eraser
ruler
smooth bristol paper
tortillion

Use the grid to capture the shapes of the swan and its reflection. Lightly draw a grid on your drawing paper, and draw in the shapes one box at a time. View the shapes as puzzle pieces.

When you are sure your shapes are accurate, carefully remove the grid lines from your paper using a kneaded eraser.

Draw in the tones as shown. Notice the direction the lines are going. In the background and in the water they are going horizontally. On the bird they follow the contours.

Blend the entire drawing out with a tortillion, making the tones look smooth. Make the water area a bit darker than the background above.
Use a kneaded eraser to lift the light areas out of the swan. This is what creates the illusion of feathers. It is also used in the background to create the texture and illusion of a rocky ledge.
Study the contours of the swan and remember the five elements of shading as you go. Look for cast shadows. You can see them to the right of the neck and on the tail feathers.
When lifting the light out of the water area, use horizontal swipes with the kneaded eraser. This helps create the movement of the water.