Menu Position MENU -->  6 --> Face Registration
What it Does Allows you to register up to 8 different faces it can prioritize focusing on a preferred person in a group shot
Recommended Setting n/a

Figure 7-23: Register the face of the bride and groom to make sure the camera always prioritizes them in a group shot.
You already know that your camera (with Face Detection enabled) is able to recognize faces and therefore will use those as the subject on which to focus and expose for. (In fact, this is one of my favorite features of this camera, especially when shooting kids!) Sony has pushed this concept even further by allowing you to register up to eight different faces with the camera. When faced with a group of many faces from which to choose, the camera will consult with these previously-stored faces and look for a match – if a match is found, the camera will give focus priority to the registered faces. What if two registered faces are detected? Then you can tell the camera which one takes priority.
Wedding photographers say they love this feature, since the bride and groom will always be in focus in a group shot (although in my opinion, it's the wedding photographer's job to ensure ALL faces in a group shot are in focus!!) This feature could also be ideal when shooting sports like soccer games and you only want the camera to pay attention to your child (although regretfully when shooting from the sidelines the faces won’t really appear large enough for the face recognition to work.)
Here’s how to use it anyway:
- Invoke MENU -->
 6 --> Face Registration --> New Registration.
- The camera presents you with a small square. Fill that square with the face of your choice and take the picture. (Figure 7-23.) You can even take a picture of a picture - you don’t need the person actually there. Hit OK each time you’re prompted.
- Now make sure MENU -->
 6 --> Smile / Face Detect. is set to ON (REGIST. FACES).
That’s it! From now on, when you start composing your shot, any recognized face will get focusing priority.
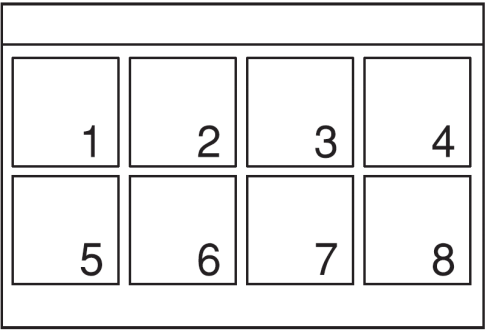
Figure 7-24: You can re-shuffle the registered faces to tell the camera which face has priority. |
|
You can register up to 8 different people. And if no registered faces are recognized, then the camera will revert to just focusing on any old face it sees. This feature won’t work on pets, and for maximum effectiveness you should use good light when taking your classic head shot. (In other words, the more detail the camera has, the better job it will do recognizing a person.)
Want to take it a step further? You can program the camera to favor the bride rather than the groom in case it recognizes both in the same picture but can only focus on one. (Trust me, this is the preferable arrangement.) Just register both faces in the camera and then use the MENU --> 6 --> Face Registration --> Order Exchanging function to tell the camera which face to favor (Figure 7-24). Call it up, select a face, and then choose which priority level you want.
7.30 AF Micro Adj. (A-mount Lenses Only)
Menu Position MENU --> 6 --> AF Micro Adjust
What it Does Invokes a feature which can correct for focusing problems when using A-mount lenses
Recommended Setting On
Constraints Only needed for an A-mount lens with an LA-EA2 or LA-EA4 adapter.
One of the things that has been plaguing Autofocus Cameras (from all manufacturers) for over a decade has been a phenomenon commonly called “Backfocus” – it refers to a scenario where a lens-body combination will autofocus inaccurately – typically a centimeter or two behind (or in front of) where the camera ought to be focused. If you’re doing critical work on your camera a Backfocus (BF) or Frontfocus (FF) issue can really ruin a shot for you.
What causes this is a little difficult to explain – it’s not just the body and it’s not just the lens, but the two of them each might be just enough out of tolerance to produce a consistent focusing error when used together. If you wanted to fix this in the olden days you’d have to send both the camera and lens back to the manufacturer so they could be calibrated together. While that may have worked, it was time consuming and expensive and often the problem would be fixed with the lens you sent in but then it would start to happen on other, previously accurately-focusing lenses.
This problem is eliminated completely in mirrorless cameras, where the image sensor = the focusing sensor. It’s a closed loop system, with no possibility of bad manufacturing tolerances giving way to inaccurate AF. However, when attaching an A-mount lens with either the LA-EA2 (APS-C) or LA-EA4 (full-frame) adapter, the old fashioned phase-detect array is built in to the adapter and therefore the possibility of this kind of focusing error returns. Hence this feature which allows you to calibrate your lenses and dial in a correction if backfocus is evident. Whenever you put that lens back on, the camera recalls the AF correction amount you dialed in for that lens. The camera can remember correction values for up to 30 different lenses.
In a futile attempt to keep this book from being too large (HA!), a short primer on the best way to test your lens and make the adjustment has been put into a separate .pdf file which you can download here: http://bit.ly/1MY8p2K .
Menu Position MENU --> 6 --> Lens Comp.: [3 variables]
What it Does Allows your camera to digitally correct 3 types of common lens ailments for lenses that it knows about (most apply to .jpgs only)
Recommended Setting AUTO on all three variables
Constraints Only works for lenses it knows about. For some reason it doesn’t work with the 16-50 OSS PZ lens.
There are two ways to get exceptional image quality: 1) start with the highest-quality, most-expensive lenses available, or 2) start with slightly cheaper lenses and use computers to compensate for their known deficiencies.
In the past this was the work of high-end photo workflow software, but now it’s baked into your camera which makes things considerably easier for you. These features can perform these computerized lens correction algorithms for three of the most common types of lens deficiencies: Vignetting in the corners (“Shading”), Chromatic Aberration (“Chro. Aber.”), and either Pincushion or Barrel distortion (“Distortion”).
As of this writing the camera knows about all native E-mount and FE lenses, and Sony will add data for future lenses via future firmware updates. The effects are applied to .jpgs only (with the sole exception of the “Shading” variable, which interestingly gets applied to RAW files too!)
Normally I’d recommend keeping all three of these variable set to ON all the time. Because they are computationally expensive, in the past I've recommended turning these OFF if you're shooting at very high frame rates (which this camera can't do).
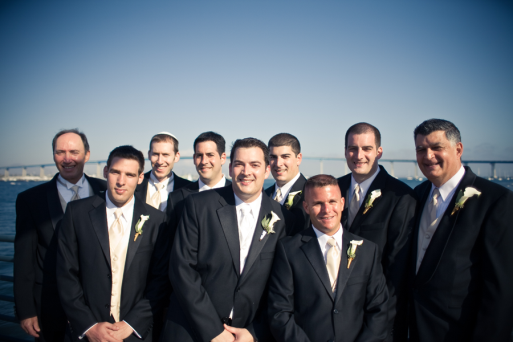
Figure 7-25: An extreme case of Vignetting (Shading) in the corners. (And no, I didn’t take this picture…) |
|
The first setting is the easiest to see: A darkening in the corners, and almost all lenses have it to some degree. (Worse, sometimes you’ll have more of it as you zoom in or out, making it difficult to correct for as a batch program on your computer). The rest of the world calls this “Vignetting”; however Sony didn’t want to scare you off so they called it “Shading” instead. You can see an extreme example of Vignetting in Figure 7-25. If you want to get rid of it programmatically, just set this function to AUTO.
TIP: ‘Shading’ is the ONLY special effect that applies to RAW files as well as .jpg. (And if you’re a purist like me, you’d be saying “It shouldn't be applied to RAW at all!" C'est la vie.) |