15.8 RAW Processing using Capture One Express
If you're just getting started with RAW, I can tell you the two greatest benefits to shooting with it are the slightly greater dynamic range (as compared to .jpg), and better control over noise reduction. (Many people don't like the "watercolor effect" that the camera can apply to .jpgs using the High ISO Noise Reduction feature. For this reason Sony has provided a "low" noise reduction option which isn't so aggressive. All of the .jpg examples you see in this chapter were taken with that setting.)

|
Figure 15-12: While I would never recommend shooting at ISO 51,200, this very dark setting practically demanded it. And this out-of-camera .jpg taken at that speed looks remarkably good. Can we process the RAW file to make it even better, by reducing the noise while keeping the detail? |
For the past few years I've been using Lightroom and Adobe Camera RAW for their noise reduction abilities. But I've also been playing with the new Capture One Express software ("COE" from now on) that Sony has provided for FREE with the purchase of this camera. I'll show you the basics of de-noisifying a RAW file with both tools.
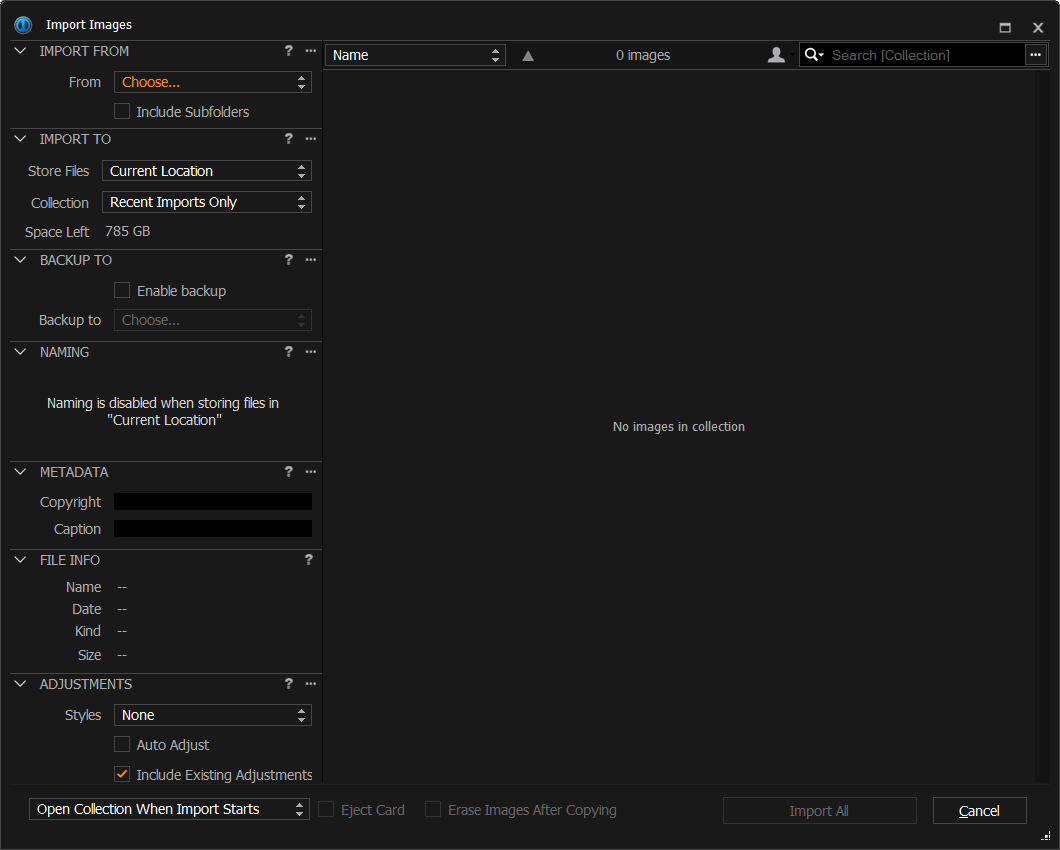
COE uses an image database just like Lightroom, and so when you open the program you have to do a "File --> Import Images" in the program. You'll see the screen in Figure 15-13. To specify a directory to import files from, click on the orange "Choose…" in the upper-left-hand corner (and then click on the secondary "Choose" pop-up that appears after that. Strange UI.) Then a conventional "Open" dialog box appears. You choose your directory and then click OK. (Ignore the fact that you're not seeing thumbnails yet. You're just choosing a directory now.)

|
Figure 15-13: Capture One's File Import screen. After you browse for files and double-click on a thumbnail in the bottom center window, thumbnails will appear for choosing. |
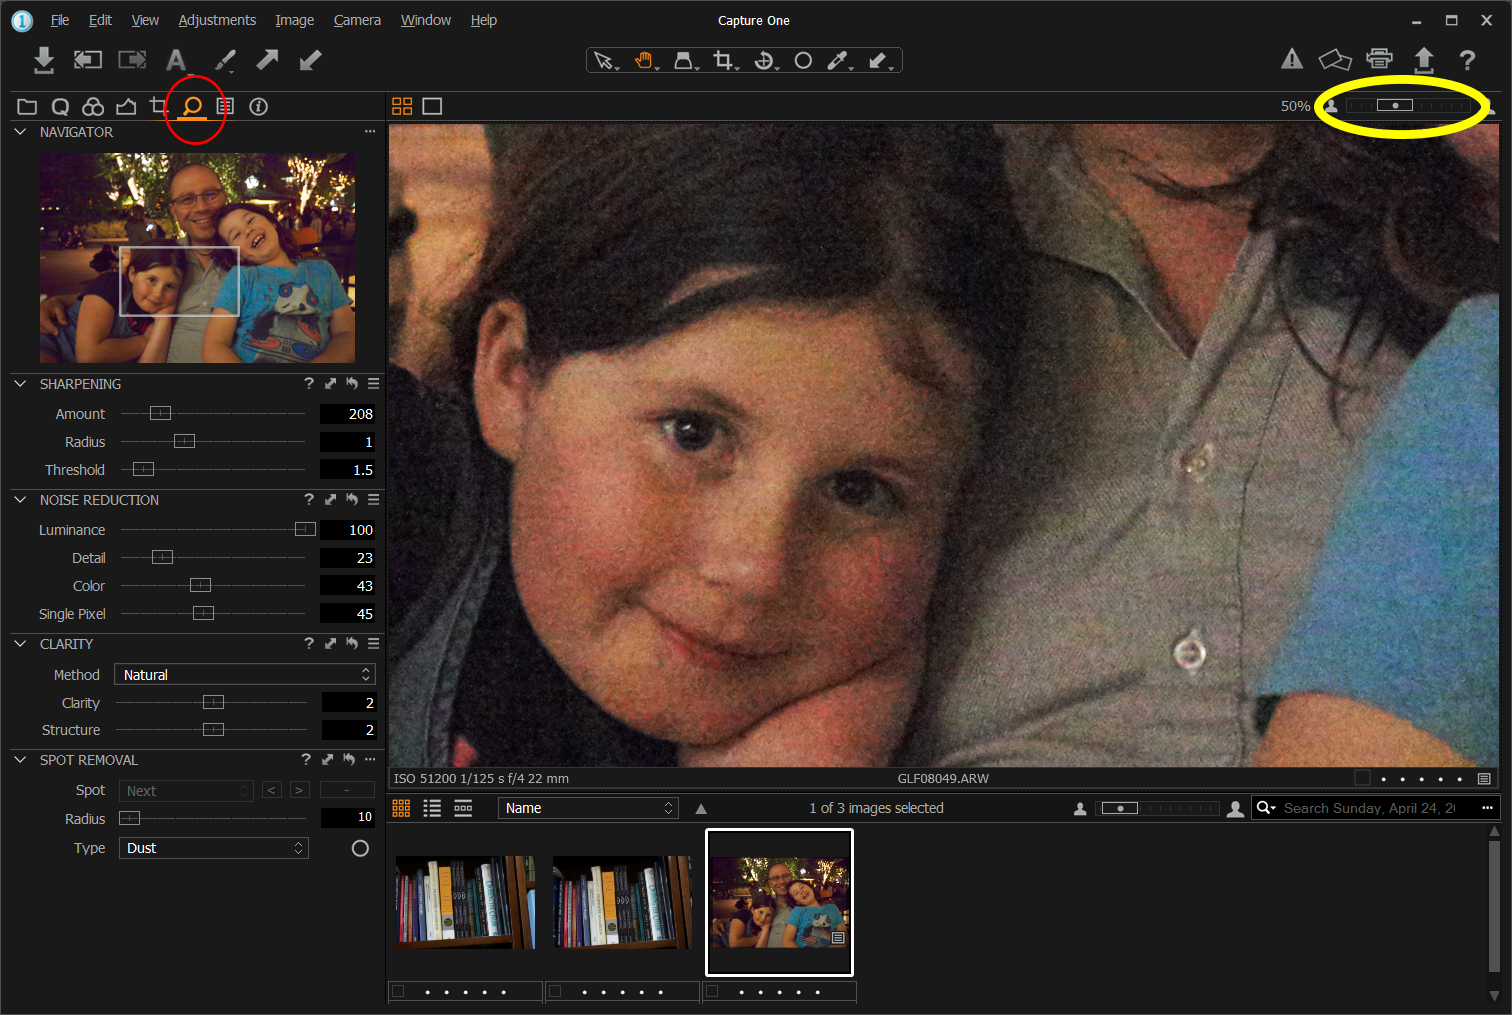
Once you hit OK, thumbnails appear. Click on "Import All" at the bottom of the screen and the program will do so. Figure 15-14 shows a thumbnail selected along the bottom, and a larger version appears on top, ready for editing.

|
Figure 15-14: A "filmstrip" appears across the bottom. Click on one of those and a larger image appears above, ready for tweaking. |
Now here you have a lot of choices. Near the upper-left-hand corner you'll see a series of icons. Click on the "magnifying glass" icon in the 2nd row; it will take you directly to the Sharpening and Noise Reduction controls. (Click on the other icons as well to access other editing tools. You can learn a lot about this program simply by clicking and exploring.) I'll talk just about de-noising the image here.
You must zoom in for a closer look by moving the slider bar (yellow circle in the upper-right-hand-corner) to 50% or greater in order to see the effect the sliders are having on your image. Then go to work de-noisifying the image – the sliders you see in the lower-left-hand corner can be a good starting point.
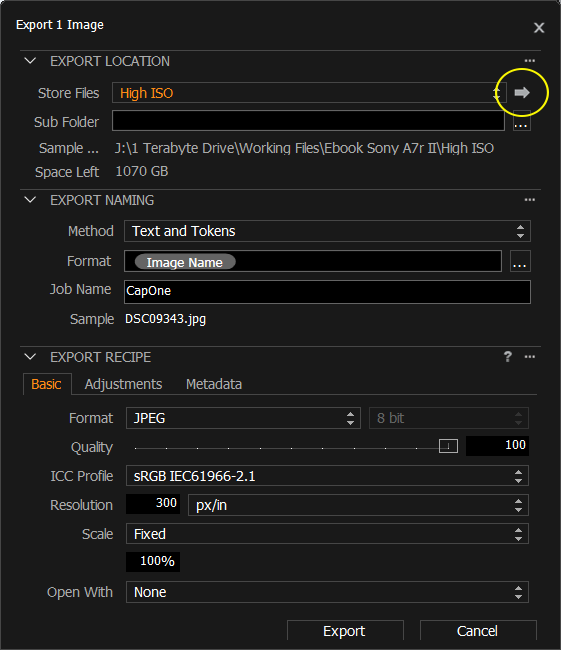
After this and any other desired adjustments are made, do a File --> Export Images --> Variants… The intimidating screen of Figure 15-15 appears. Strangely, COE export directory doesn't default to the same directory from which you imported; you have to tell it specifically where you want your exported images to be. Hitting the right arrow in the yellow circle brings you to another conventional dialog box where you can specify where you want the images stored.

|
Figure 15-15: File --> Export --> Varients… brings up this export screen. Clicking on the arrow in the yellow circle allows you to specify a directory. |

|
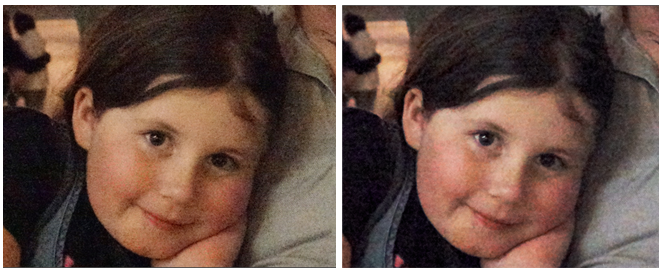
Figure 15-16: Here's a close-up of the out-of-camera .jpg and the cleaned-up (and color-tweaked) RAW (right). On earlier cameras, the improvement in the processed RAW file would have been significant. Now the straight-out-of-camera .jpgs are so good that it's tough to improve upon them! |

