Follow these steps to validate the registration:
- We do our service implementations in Services/Core folder. Our service implementation is as follows:
Go to https://goo.gl/Xxv3kj to access the code.
using RestBuy.Application.ViewModels;
using RestBuy.Application.Repos;
using RestBuy.Application.Services.Queries;
using System.ComponentModel.DataAnnotations;
using System.Threading;
using System.Threading.Tasks;
using RestBuy.Application.Services;
namespace Restbuy.Application.Services.Core
{
  public class RestBuyRegistrationService : IRegistrationService
  {
    readonly IUserRepo userRepo;
    readonly IUoW uow;
...
...
  }
}
At the constructor, our Unit of Work is injected. Then we fulfil our interface contract. By using validation context, we validate our view model once more. Although we will validate the view model in the controller, the application is not (and should not be) aware.
As a security practice, inner layers should not trust upper layers when it comes to data validation.
- Since we are throwing a validation exception from our application layer, our controller should handle and show a validation message with respect to that. We revise our register method as follows:
Go to https://goo.gl/KWuyPd to access the code.
[HttpPost]
public async Task<IActionResult> Register(NewUserViewModel newUserViewModel, CancellationToken cancellationToken)
{
  if (ModelState.IsValid)
  {
...
...
  }
  return View(nameof(RegistrationForm));
}
Don't forget to add using System.ComponentModel.DataAnnotations; at the beginning of the file.
In case a validation error occurs, we will show it in the registration page.
- Then, we invoke our user exists query and get the users with the same name. If a username already exists, our userList will have a count greater than 0 (it will be actually 1 since we know our query makes use of Take = 1). In that case, we need to reject the registration. Otherwise we register the user by getting UserRepo from the UoW, add it to the user repo, and commit the changes by calling SaveChangesAsync.
Our current code doesn't check these parallel requests and doesn't have to. For these kind of requests, we should put a unique constraint in the database. Database constraints are your last line of defense. Because the odds are tiny for such a thing to happen (except for the malicious user case), your unique constraint will fail and you will show an error page telling the user a problem occurred and they should retry the operation. So our next step will be to add our unique index to the Username property.
- Add the unique index to the UserName property by modifying the ConfigureUser method of the RestBuyContext, as follows:
Go to https://goo.gl/Ncc42w to access the code.
void ConfigureUser(EntityTypeBuilder<User> builder)
{
  builder.ToTable(userTable);
  builder.HasKey(ci => ci.Id);
  builder.Property(ci => ci.UserName)
    .IsRequired()
    .HasMaxLength(50);
  builder.HasIndex(c => c.UserName).IsUnique();
  builder.Property(ci => ci.Password)
    .IsRequired();
}
Note that we have added the HasIndex method.
- Now, we need to upgrade our migrations and database by executing the following commands in the package manager console:
Add-Migration AddUsernameIndex
Update-Database
Make sure you select RestBuy.Infrastructure before running the commands from the default project combobox.
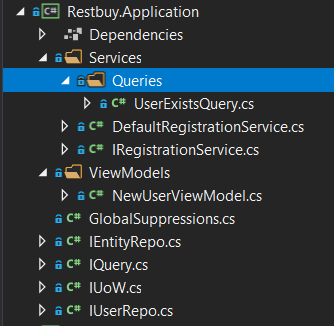
Our application project now looks as follows:
- Lastly, we need to create our service registrations. Since we have used interfaces and their implementations, we will associate these interfaces with their implementations with the built-in dependency injection mechanism. In the web project, we will update the ConfigureServices method in Startup.cs, as follows:
Go to https://goo.gl/NJ2zvC to access the code.
public void ConfigureServices(IServiceCollection services)
{
  services.AddEntityFrameworkSqlServer()
  .AddDbContext<RestBuyContext>(options =>
  options.UseSqlServer(Configuration.
  GetConnectionString("DefaultConnection")));
  services.AddScoped<IRegistrationService,
  RestBuyRegistrationService>();
  services.AddScoped<IUoW, RestBuyUoW>();
  services.AddScoped<IUserRepo, UserRepo>();
  services.AddMvc();
}
So, we make three registrations: IRegistrationService to DefaultRegistrationService, IUoW to RestBuyUoW, and IUserRepo to UserRepo. We used the scope approach so that only one instance of these services is created per request. And they will be disposed of at the end of each request.
- Next let's set up our connection string. We edit appsettings.json in the Web project:
Go to https://goo.gl/zTgTcc to access the code.
{
  "ConnectionStrings":
  {
    "DefaultConnection": "Server=(localdb)\\
    mssqllocaldb;Database=RestBuy;Trusted_
    Connection=True;MultipleActiveResultSets=true"
  },
  "Logging":
  {
    "IncludeScopes": false,
    "LogLevel":
    {
      "Default": "Warning"
    }
  }
}
Now we can run our application. We should visit the /Accounts page to see the registration form:

After the registration is successful, we are redirected to the Registration Successful page:

And if we check our database, we can see our user has been inserted, as shown here:
