We have created the business entity—the Employee class. Now, we can proceed with the migration. Migration is a two-step process: in the first step, we create the migration files. We have seen how to create migrations from the Package Manager Console. There is also one other way to create migrations from command-line tools. To do it, first we need to edit the MVCEF.csproj project file and add tools to the end of the file. So your project file's ending should look like this:
...
  <ItemGroup>
    <DotNetCliToolReference Include="Microsoft.VisualStudio.Web.CodeGeneration.Tools"
    Version="2.0.0-preview2-final" />
    <DotNetCliToolReference Include="Microsoft.EntityFrameworkCore.Tools.DotNet"
    Version="2.0.0-preview2-final" />
  </ItemGroup>
</Project>
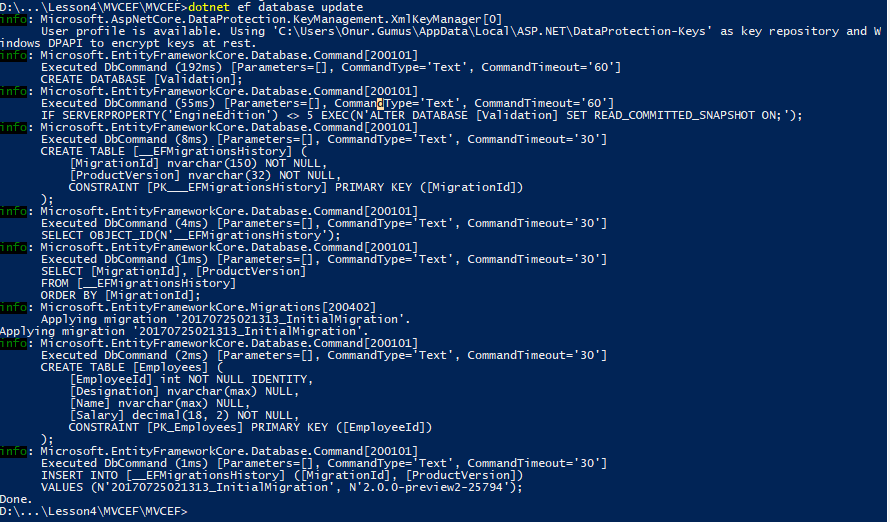
Next, we will execute the command-line tools. This can be done by executing the following command from the Command Prompt from the context of the project:
dotnet ef migrations add InitialMigration
InitialMigration is just a name. You can give it any name you like.
Finally, this command will create the migration files in your project, as shown in the following screenshot:

You will also see a model snapshot is created. This allows EF to get a new diff from your existing model so that as your model evolves, it can generate migrations for you.
The snapshot file has to be kept in sync with the migrations that create it, so you can't remove a migration just by deleting the file named _.cs. If you delete that file, the remaining migrations will be out of sync with the database snapshot file. To delete the last migration that you added, use the dotnet ef migrations remove command.
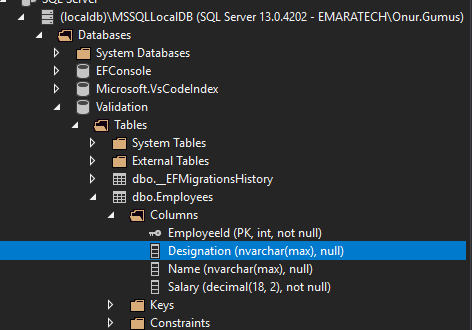
Then execute the following command to create the database:

This command will read the migration files created in the previous step and create the database along with the associated tables:
The following screenshot shows you the database created:
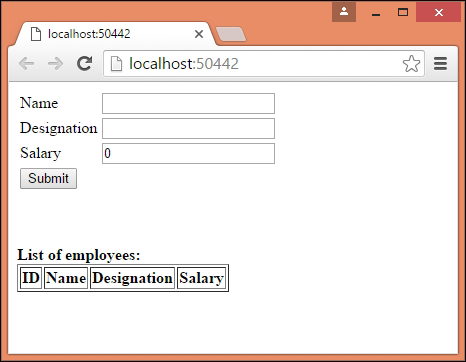
Run the application. You will get the following screen, where the user can enter the employee information in the form. As we are using the strongly typed model in our view, it takes the default values for all the properties. Name and Designation are properties of the string type and the default values are empty string for these fields, Salary is of the decimal type and the default value for decimal is 0, hence 0 is shown in the form when it is loaded for the Salary field.
As there are no records, we are showing 0 records in the List of employees table:
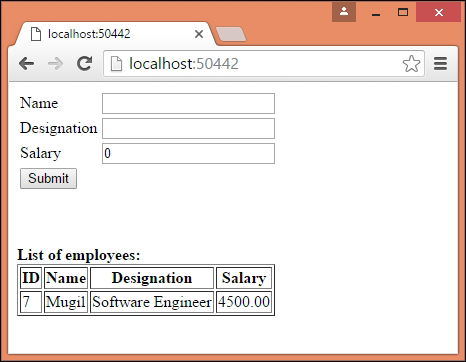
When you enter the information in the form and submit it, the information gets saved in the database and all the database records in the Employees table will be presented as follows:
Adding an Age Property to the Employee Class and a New Migration
The Employee class will resemble this:
Go to https://goo.gl/2i6iRj to access the code.
public class Employee
{
  public int EmployeeId { get; set; }
  public string Name { get; set; }
  public decimal Salary { get; set; }
  public string Designation { get; set; }
  public int Age { get; set; }
}
Then from the Package Manager Console, we run the Add-Migration EmployeeAge command.