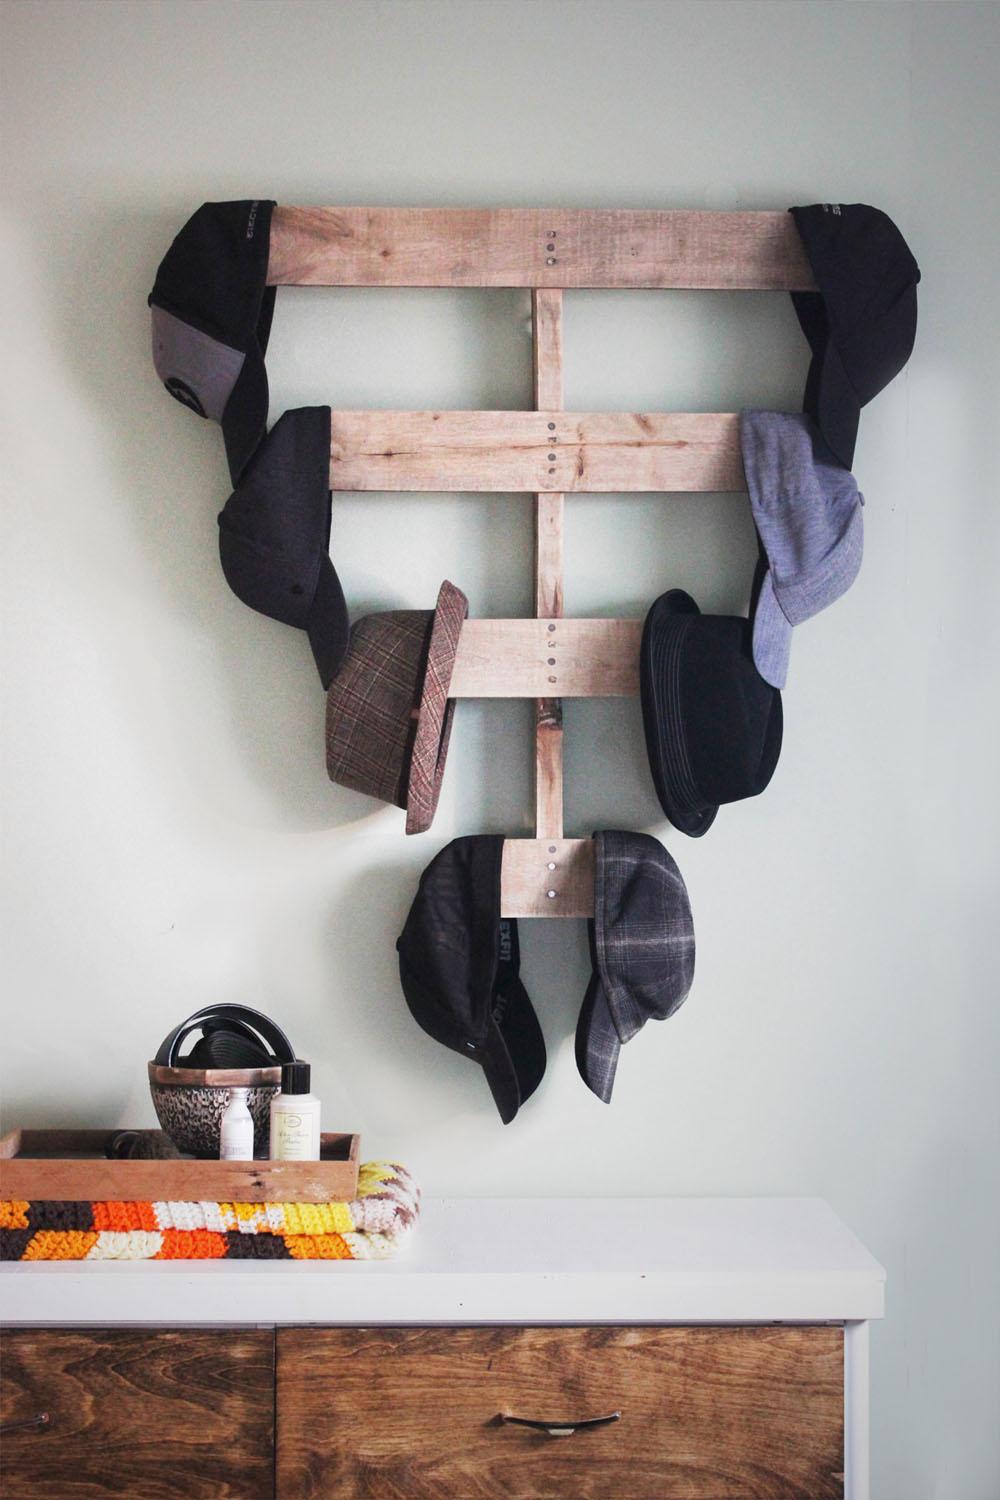
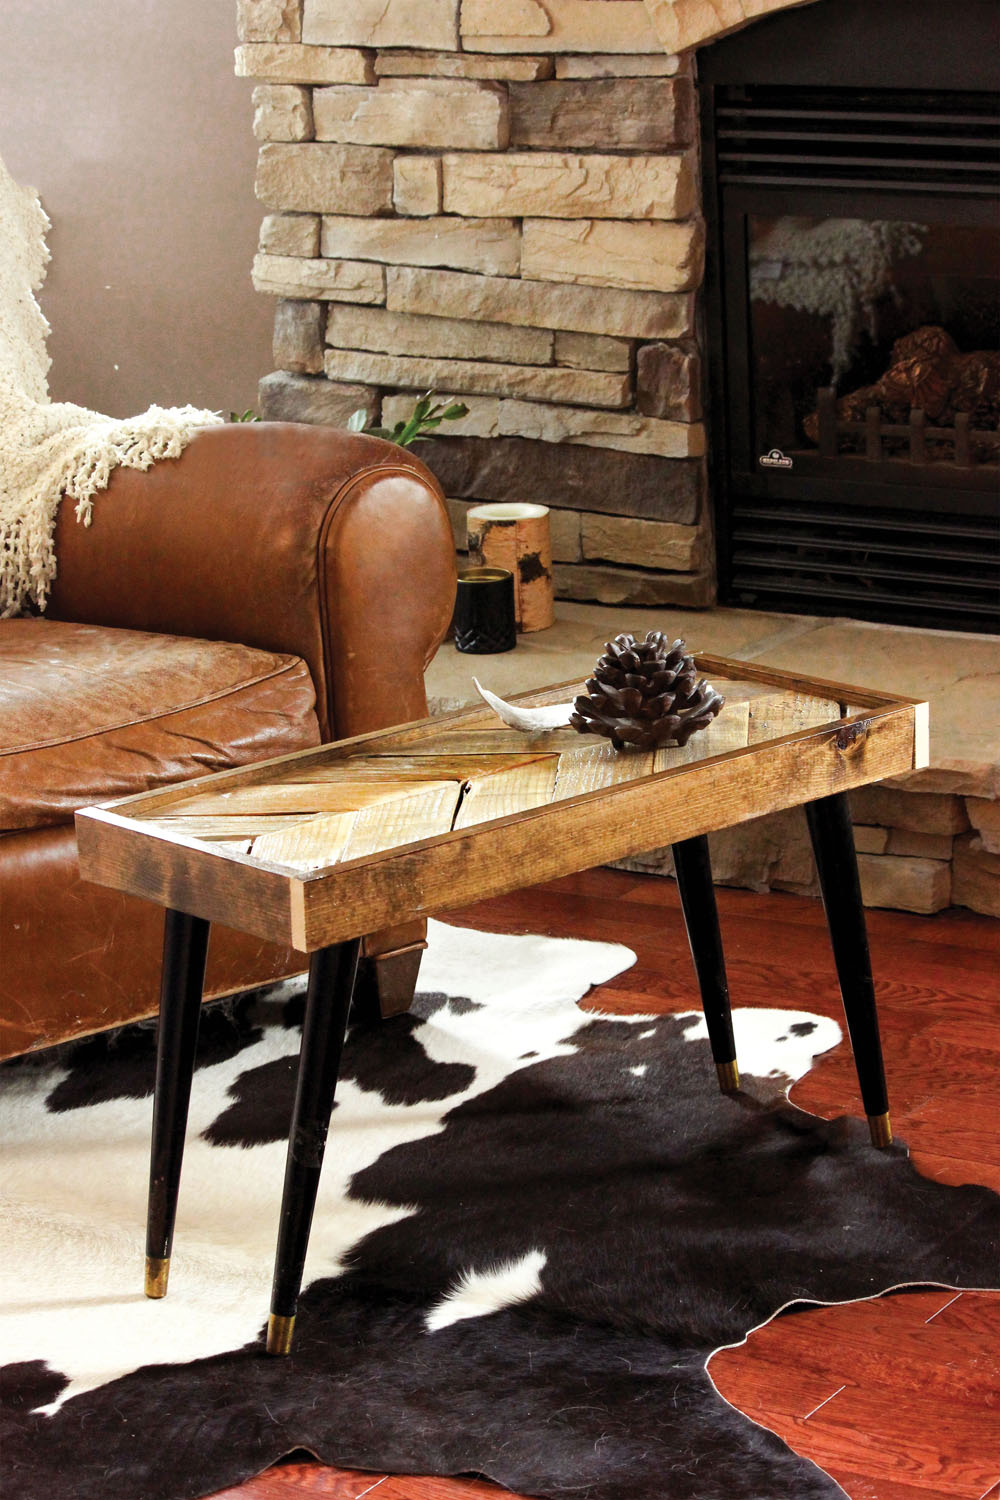
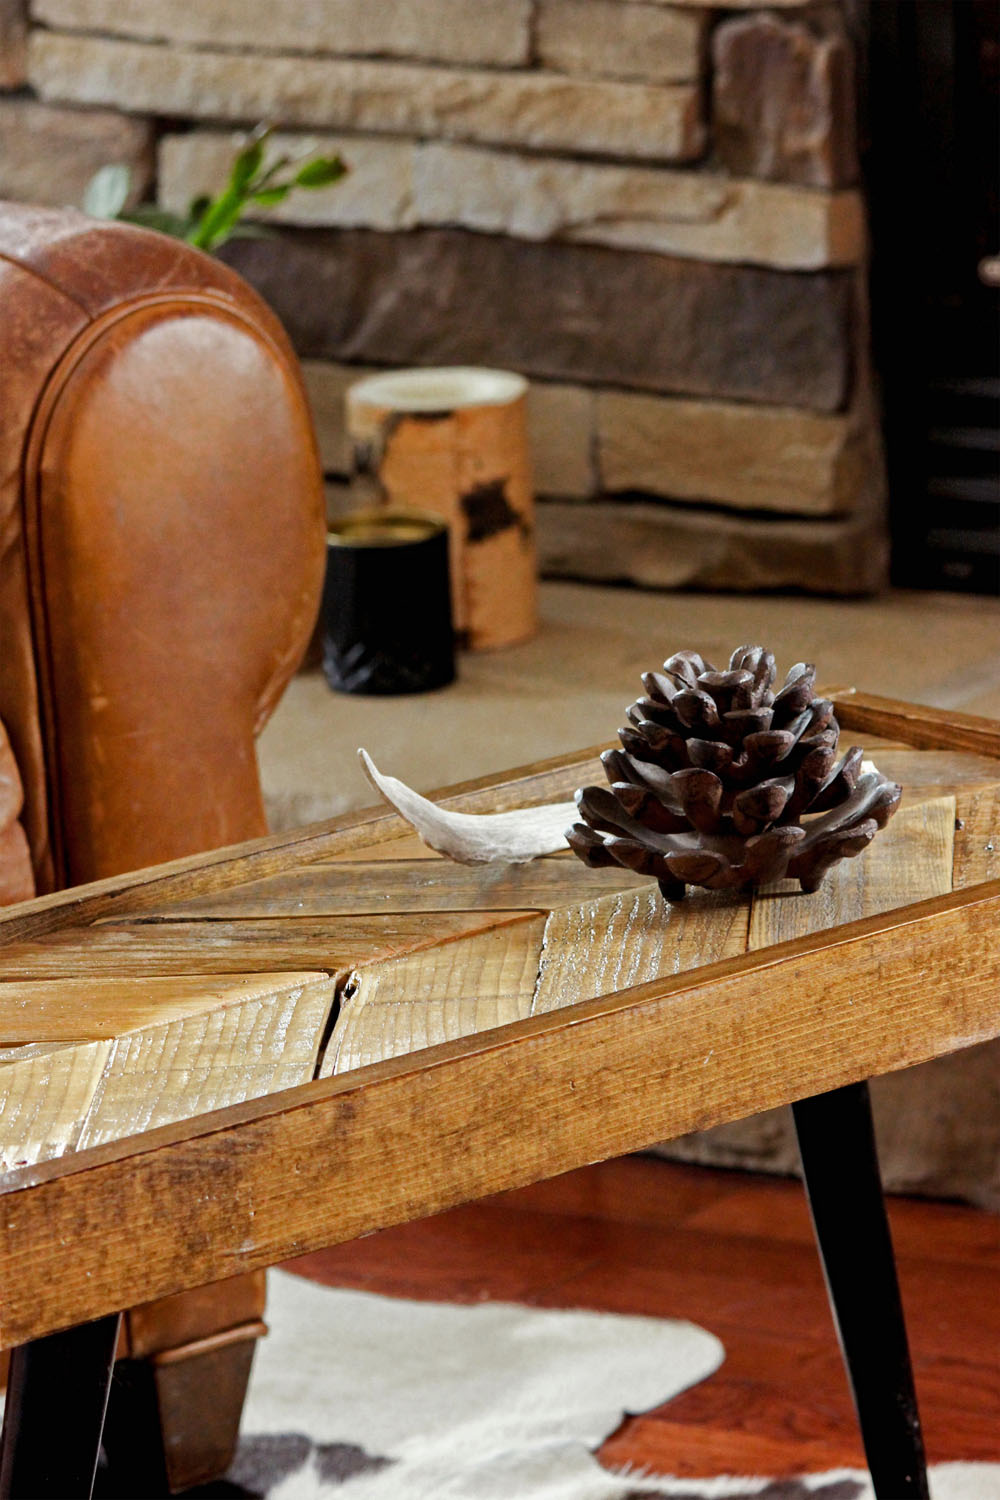
Chevron Coffee Table
MAKE YOUR HOUSE A HOME
|
Chevron Coffee Table |
|
If there’s one project that you decide to leave with a natural finish, make it the Chevron Coffee Table. If you choose a pallet that varies in color and texture, you can create a really beautiful table simply through the weathering and history of the wood. The pallet I found had been sitting outside for a long time and the wood was old and brittle, but once I cleaned it up and put those final few coats of lacquer on the table, it easily turned into one of my favorite pieces in the book.
Tools • Nail gun or hammer • 1" nails • 1½" nails • Miter saw • Wood glue • Sandpaper • Table saw • Circular saw • Ruler or square |
Materials • Pallet pieces • One 28¾" × 11⅛" piece of ⅝" plywood • Four table legs |
Instructions
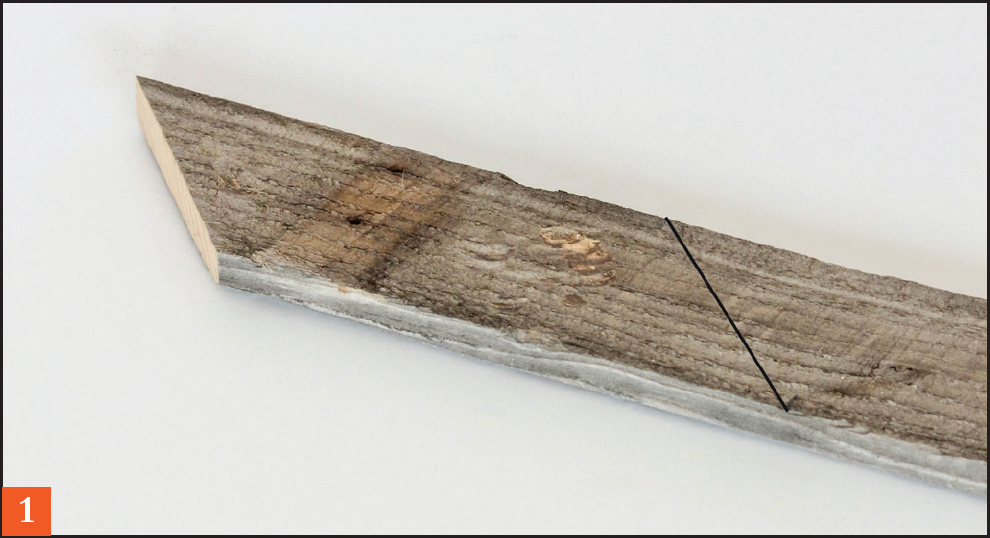
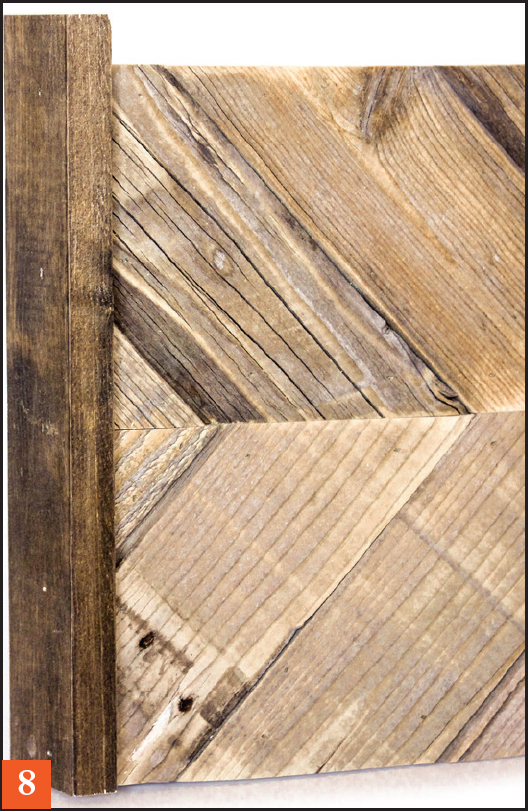
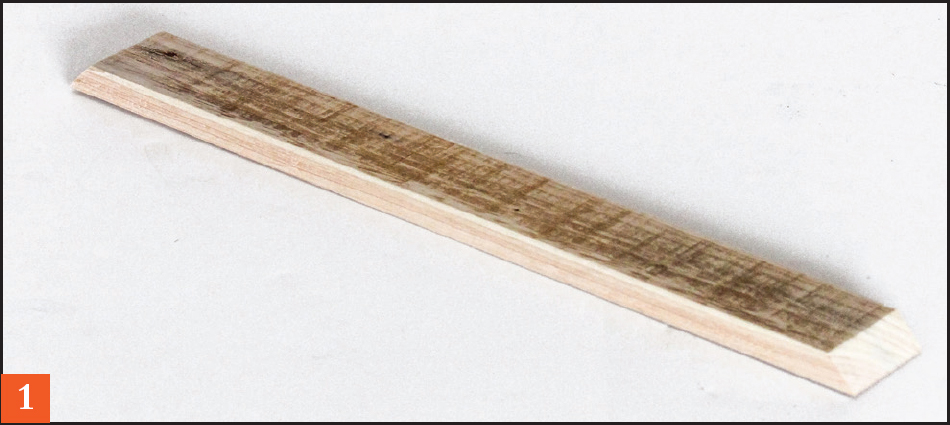
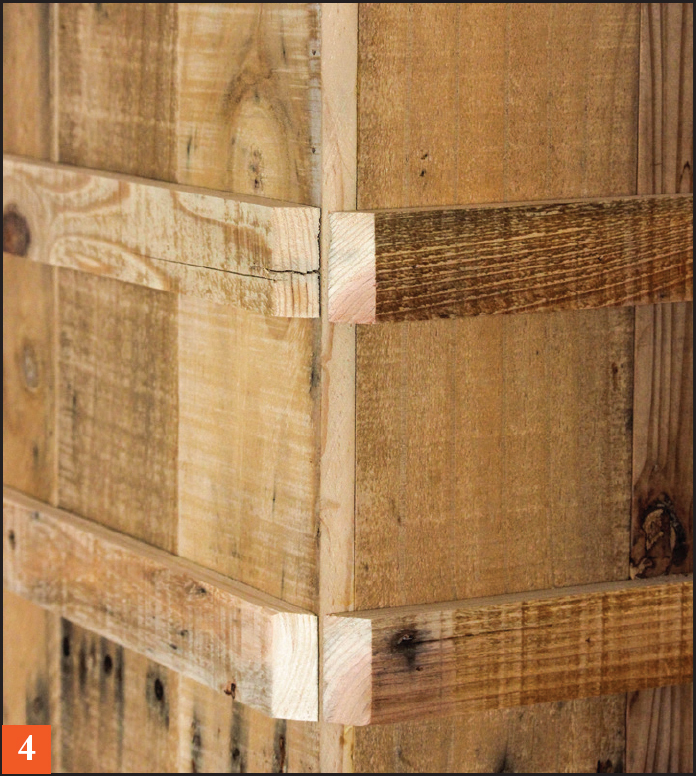
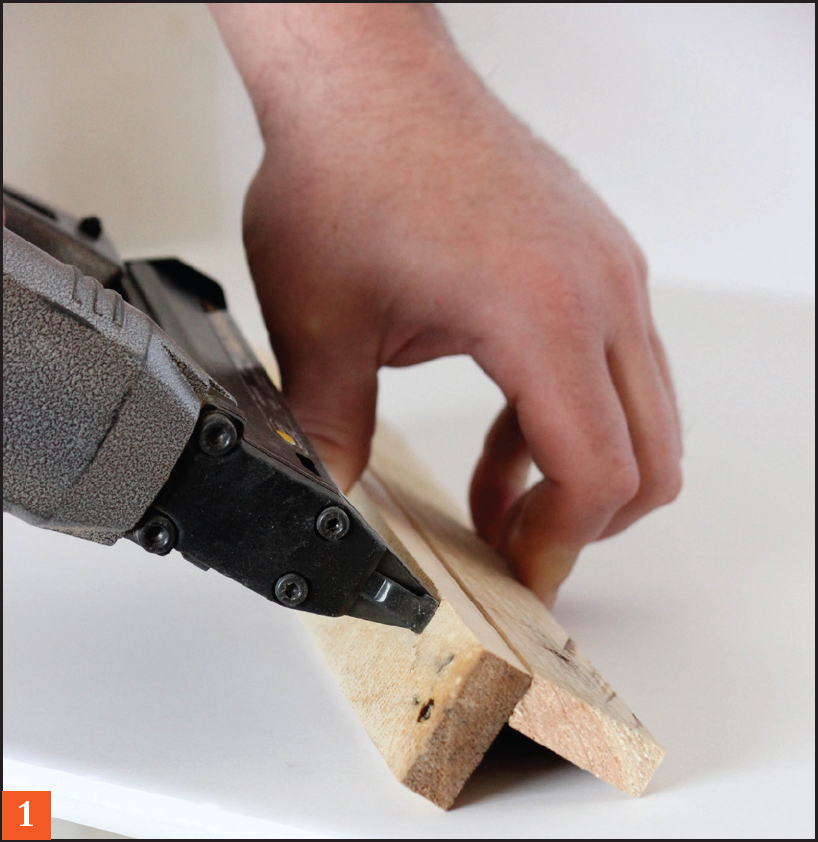
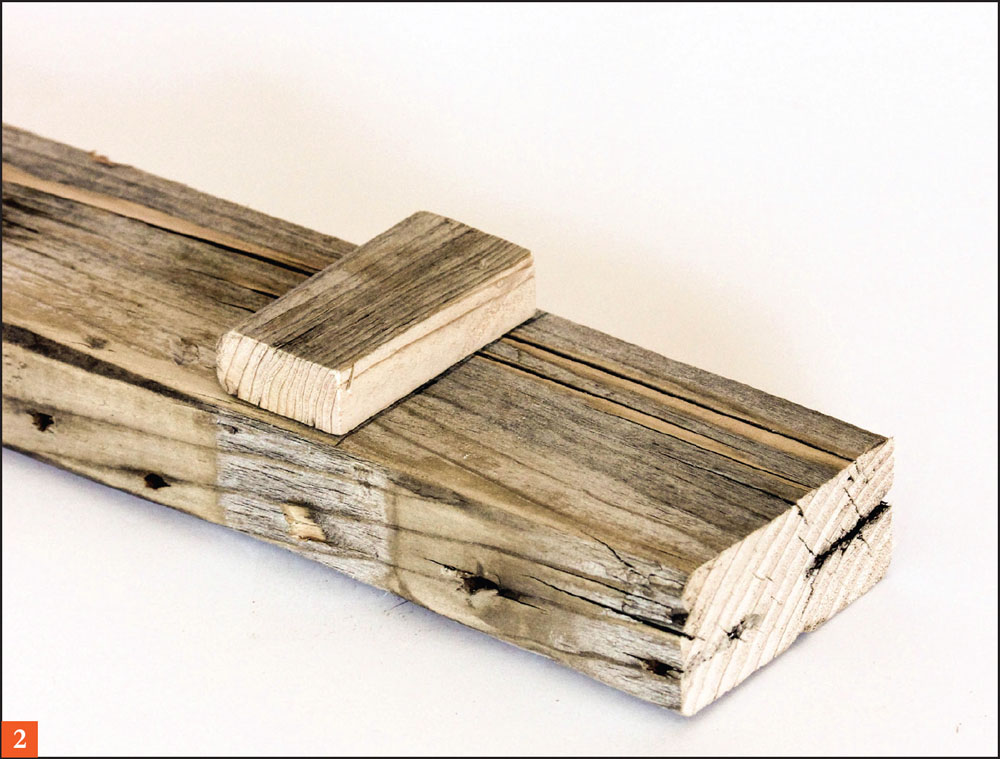
1. Take one of the 8¼" pieces and cut off both ends at a 45-degree angle, making sure that both angles face the same way to create a parallelogram shape. Repeat with the remaining 11 pieces.
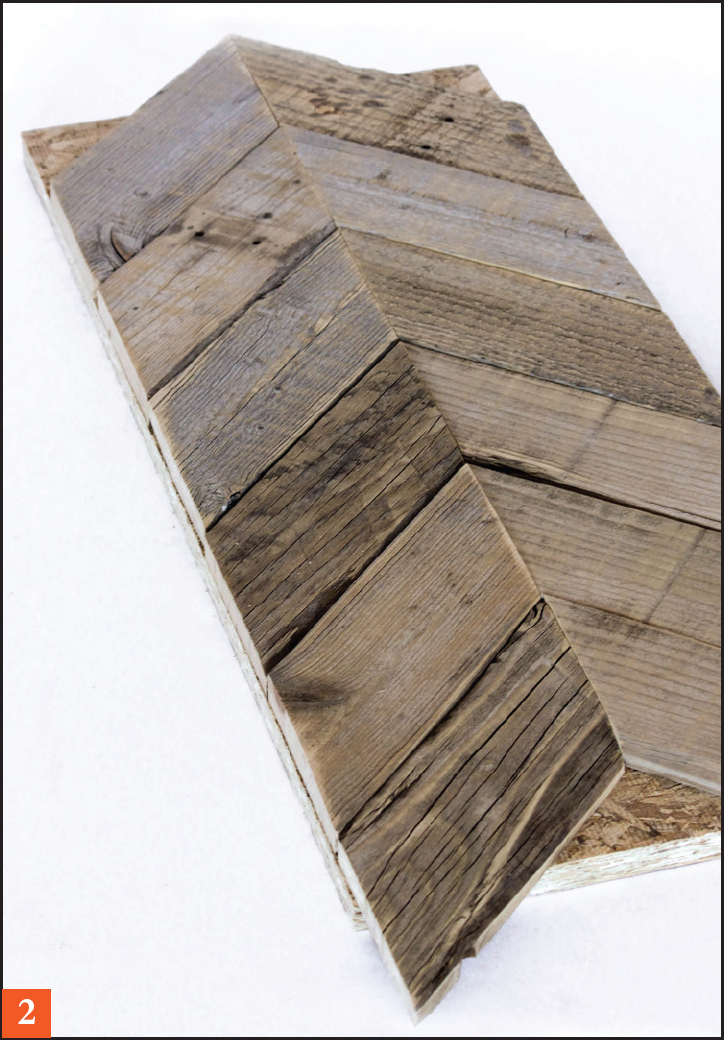
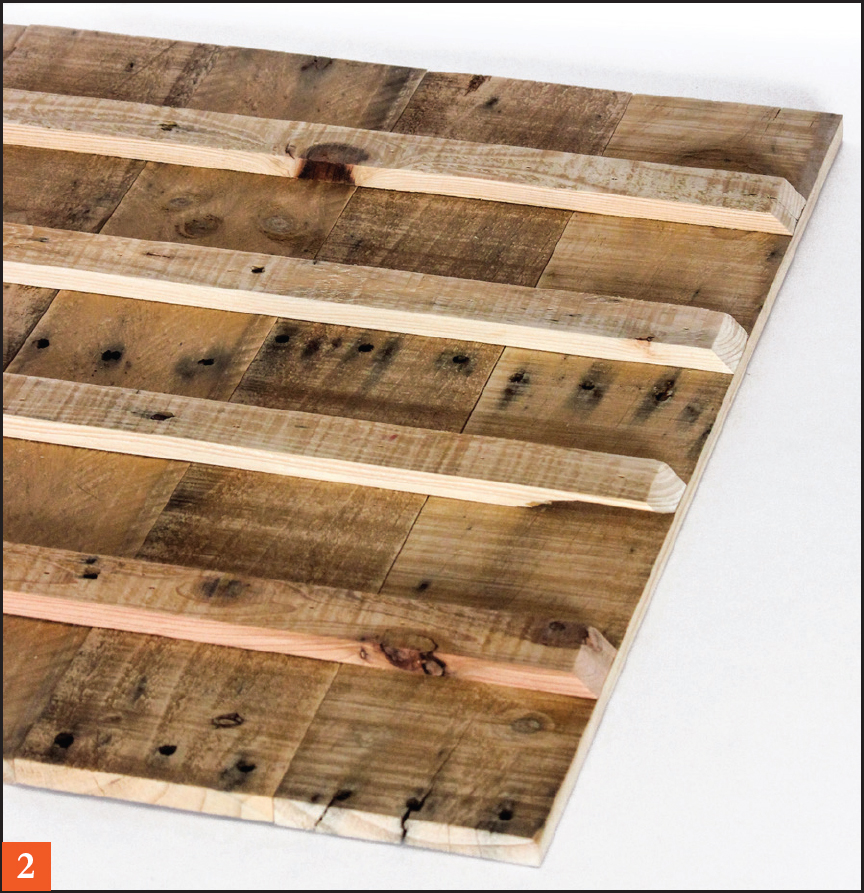
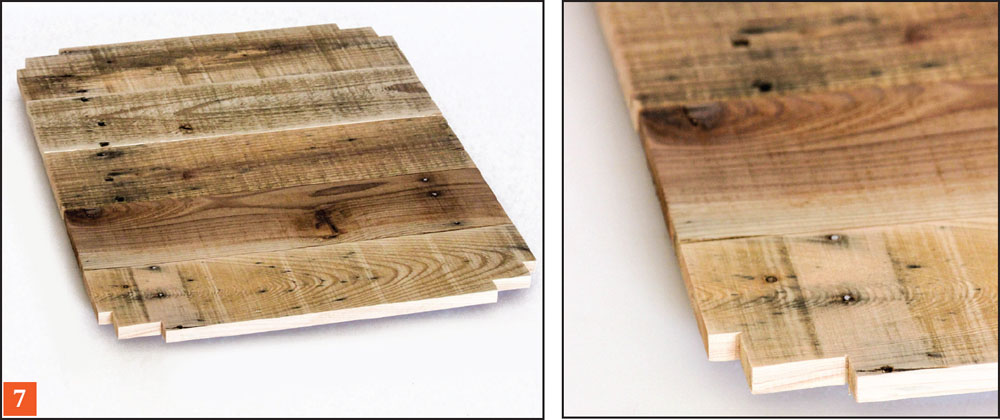
2. Lay the boards out on the piece of plywood in a chevron shape, lining them up in the middle. They will overhang on each end.
3. Once you have the pieces arranged in a pattern you like, lift them up one at a time and apply wood glue underneath. Nail the corners of each board with 1" nails for extra support. Let dry.
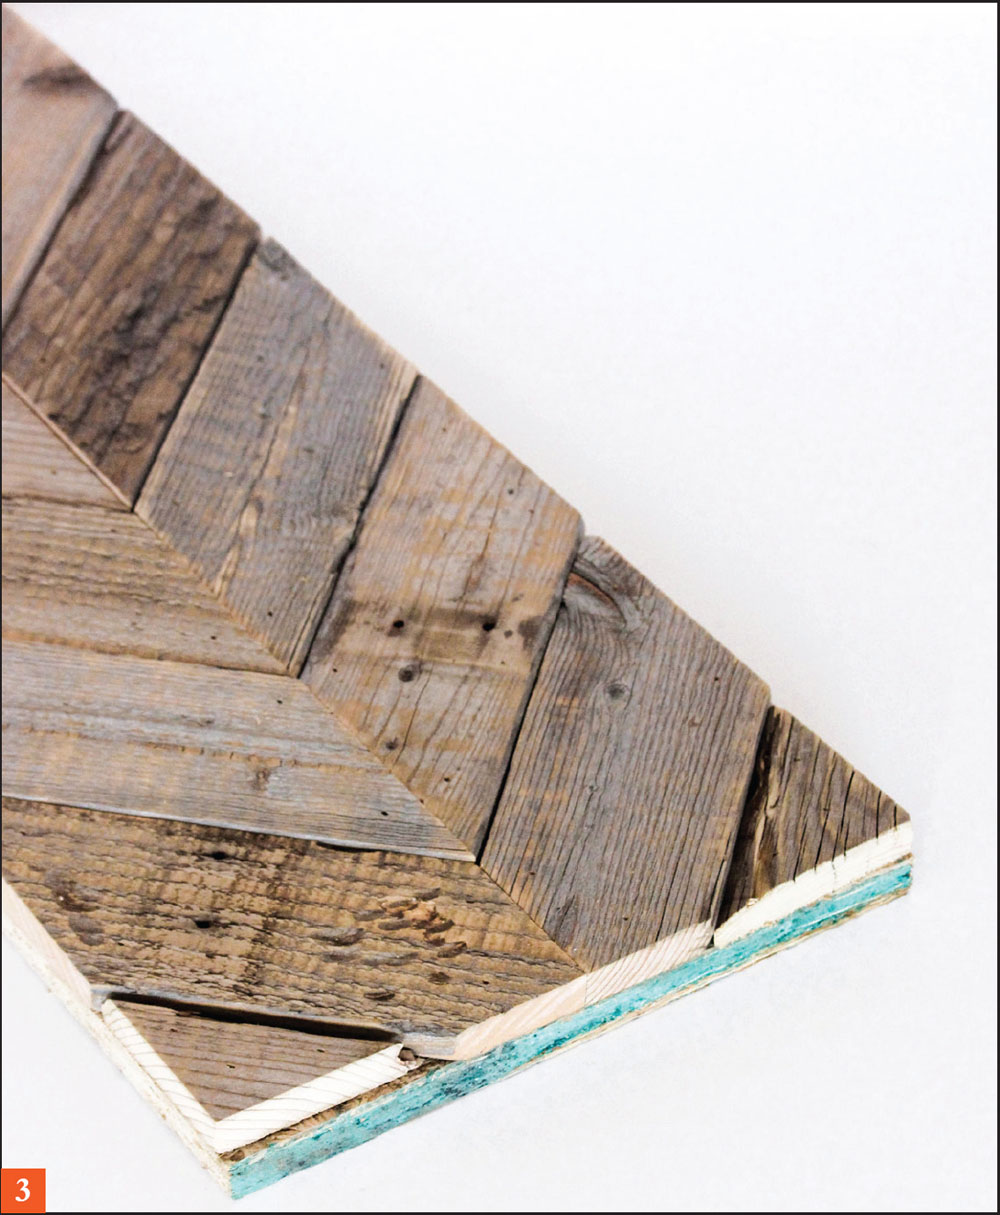
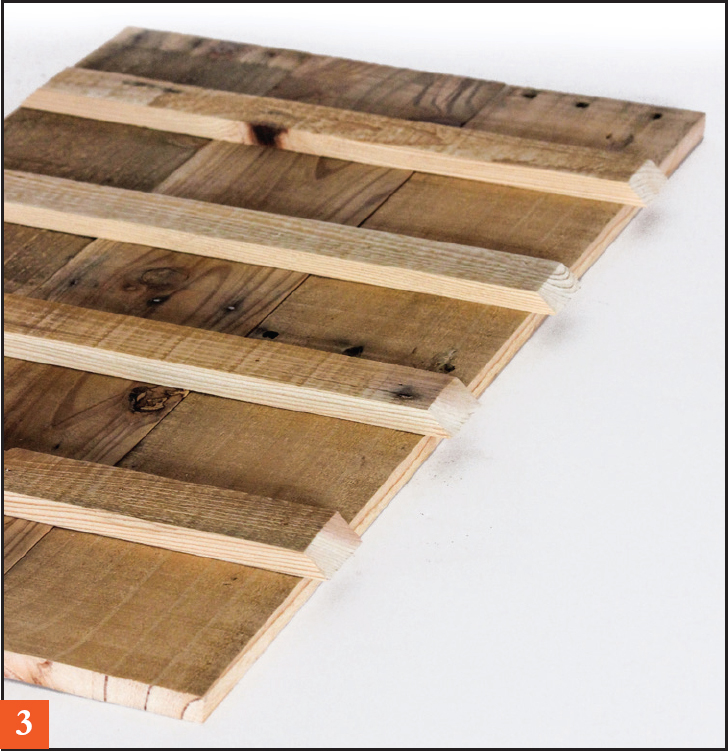
4. Flip the piece over and carefully cut along the plywood on the two short ends to cut off the boards that are hanging over. You can use a jigsaw, bandsaw, or circular saw for this, whichever you’re most comfortable with. Flip the piece back over.
5. Take the extra pieces cut off in Step 4 and fit them into the two empty spots on the top and bottom of the table. The pieces will go on the end opposite to the one they were cut from. Glue and nail into place.

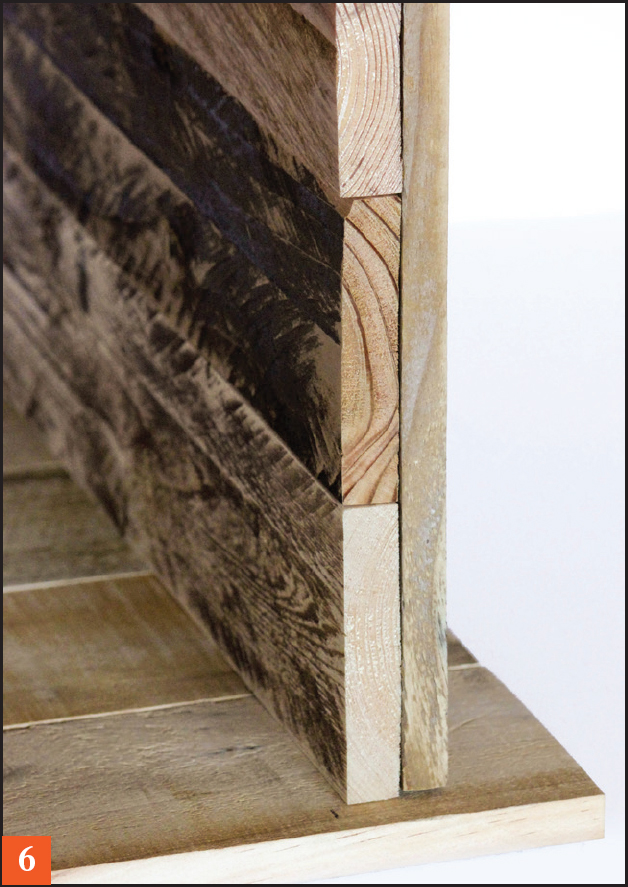
6. Since I used a really old pallet for my project, the texture of the boards was varied and the edges needed trimming. Should that happen to you, flip the piece over and use a ruler or square to draw a straight line, then use the circular saw to trim along the plywood edge and even out the edges.
7. Measure each side of the table and add the width of the trim (¾"). Cut four pieces from the trim boards, two short and two long, and sand them smooth. If you choose to finish them in a different color than the table, do so now; it’s easier to paint or stain them before attaching.
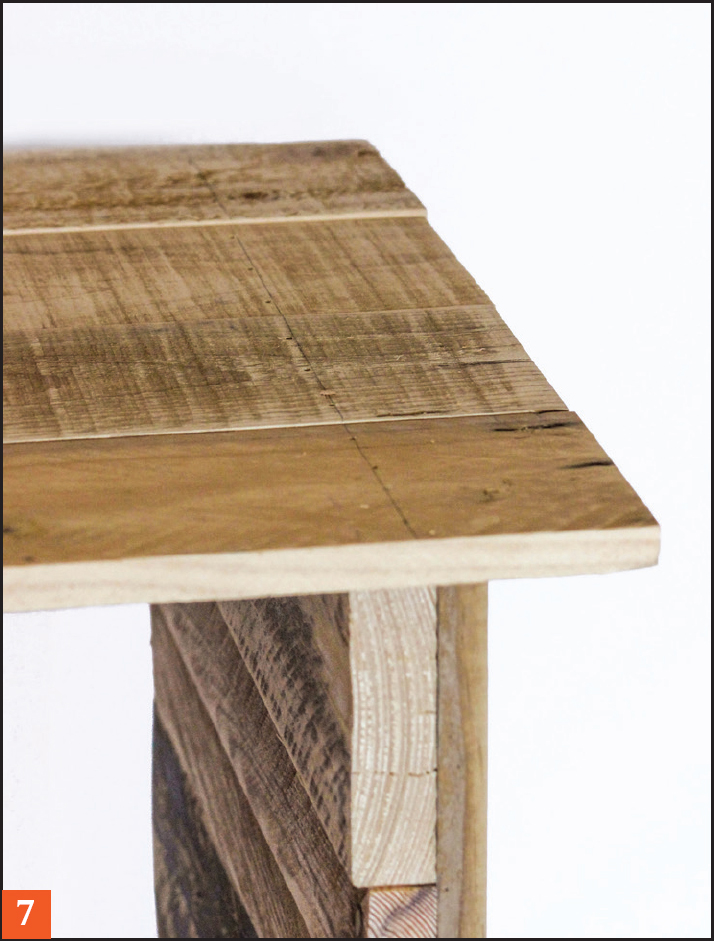
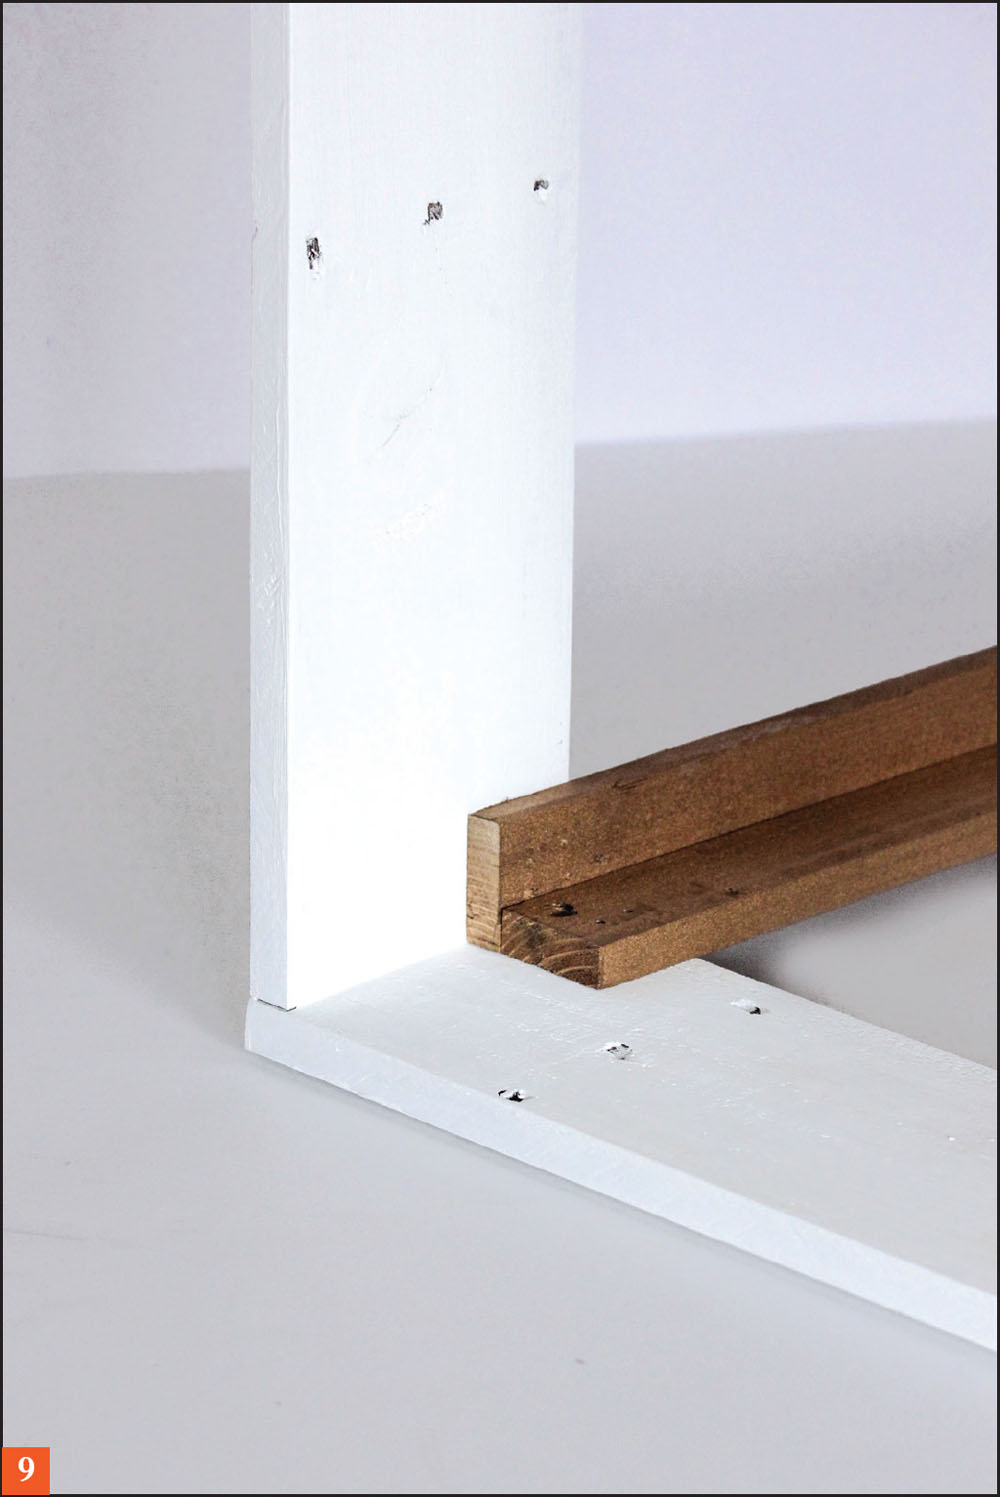
8. Once the trim is dry, take one of the long pieces and place it on one long edge of the table. Line one end up flush so it overhangs ¾" on the other end, and measure ½" from the top so there’s a lip around the table top. It may be tricky to hold all those things in place at once, so I found this to be easiest: line the edges up flush and measure down ½" on the end, inserting a 1½" nail to tack the board in place. Then you can move down to the other end, measure down ½", and insert another nail while the other side is stabilized. Glue and nail the rest of the trim in place.
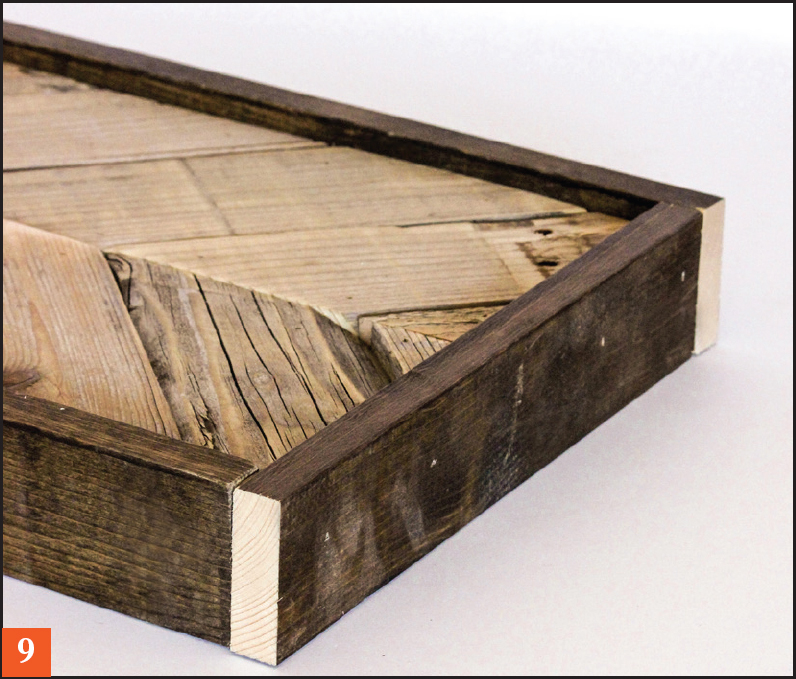
9. Repeat Step 8 with the other three trim pieces, moving around the edges and lining the ends up until it’s all in place.
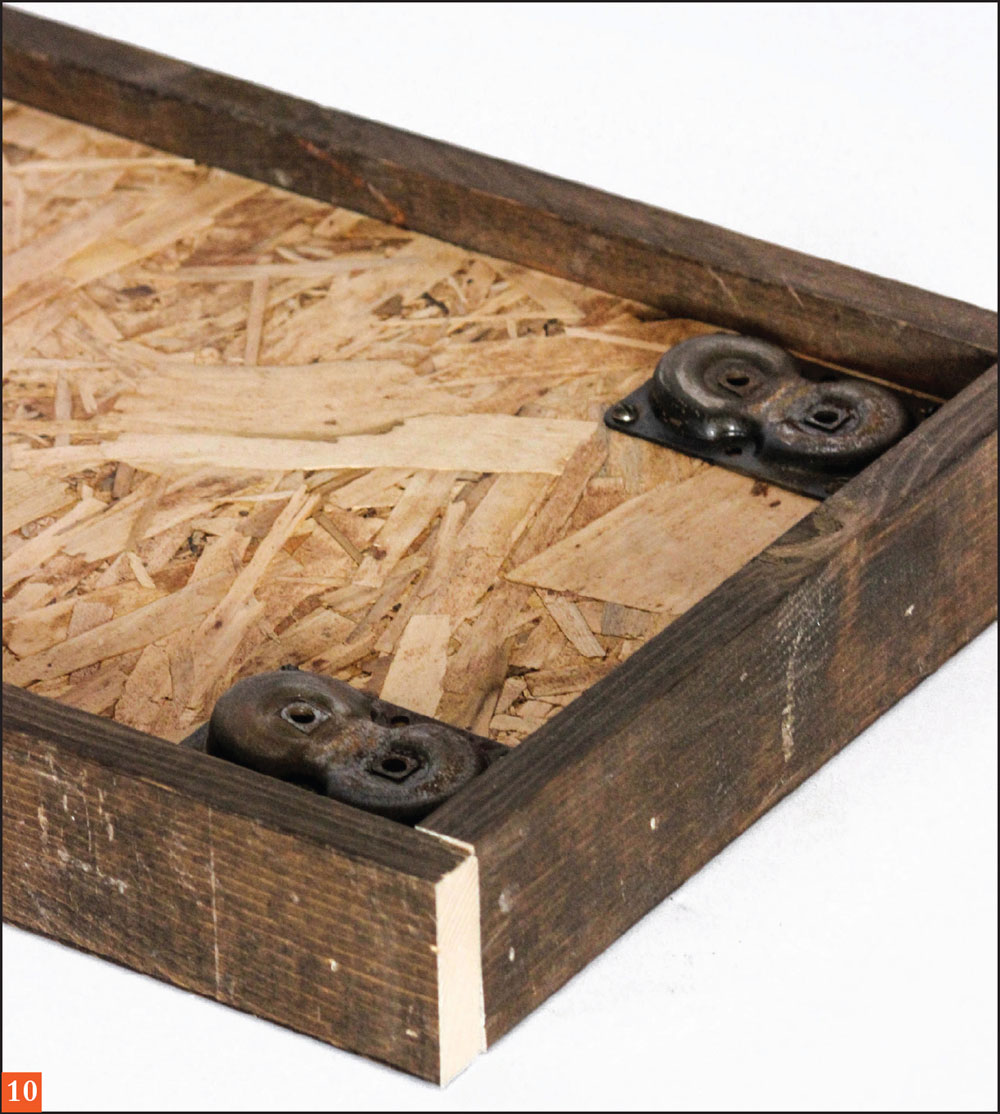
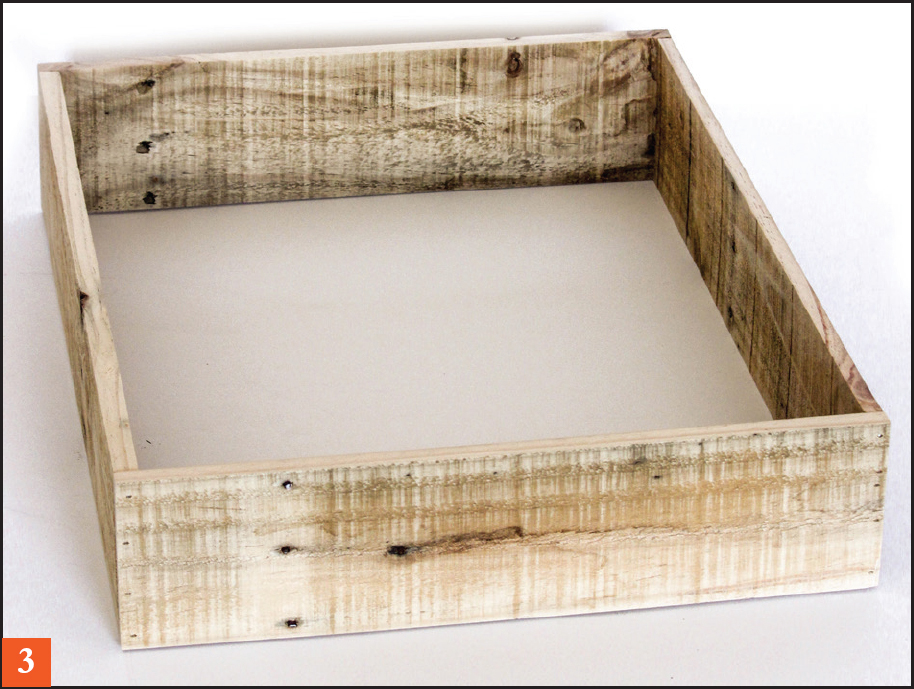
10. Flip the piece over and attach a leg plate to each corner using the included hardware. Check to make sure the included screws aren’t too long; if they are you’ll need to provide your own. Screw in the legs.
11. Finish the table with a few coats of lacquer for a water-resistant surface and to preserve the characteristics of the wood.
|
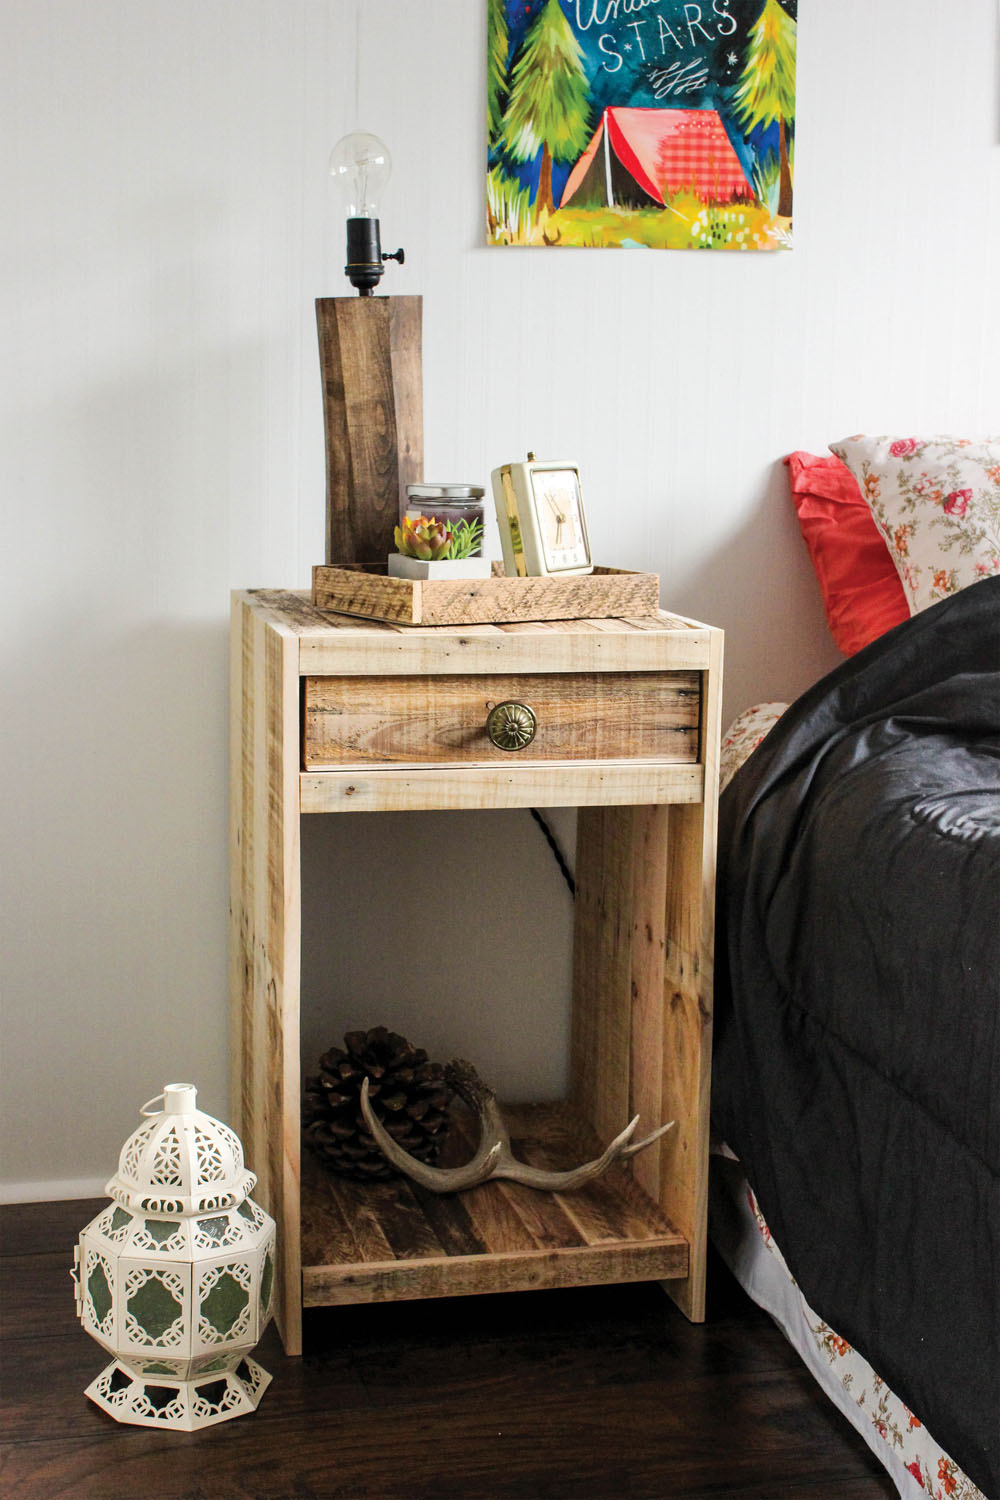
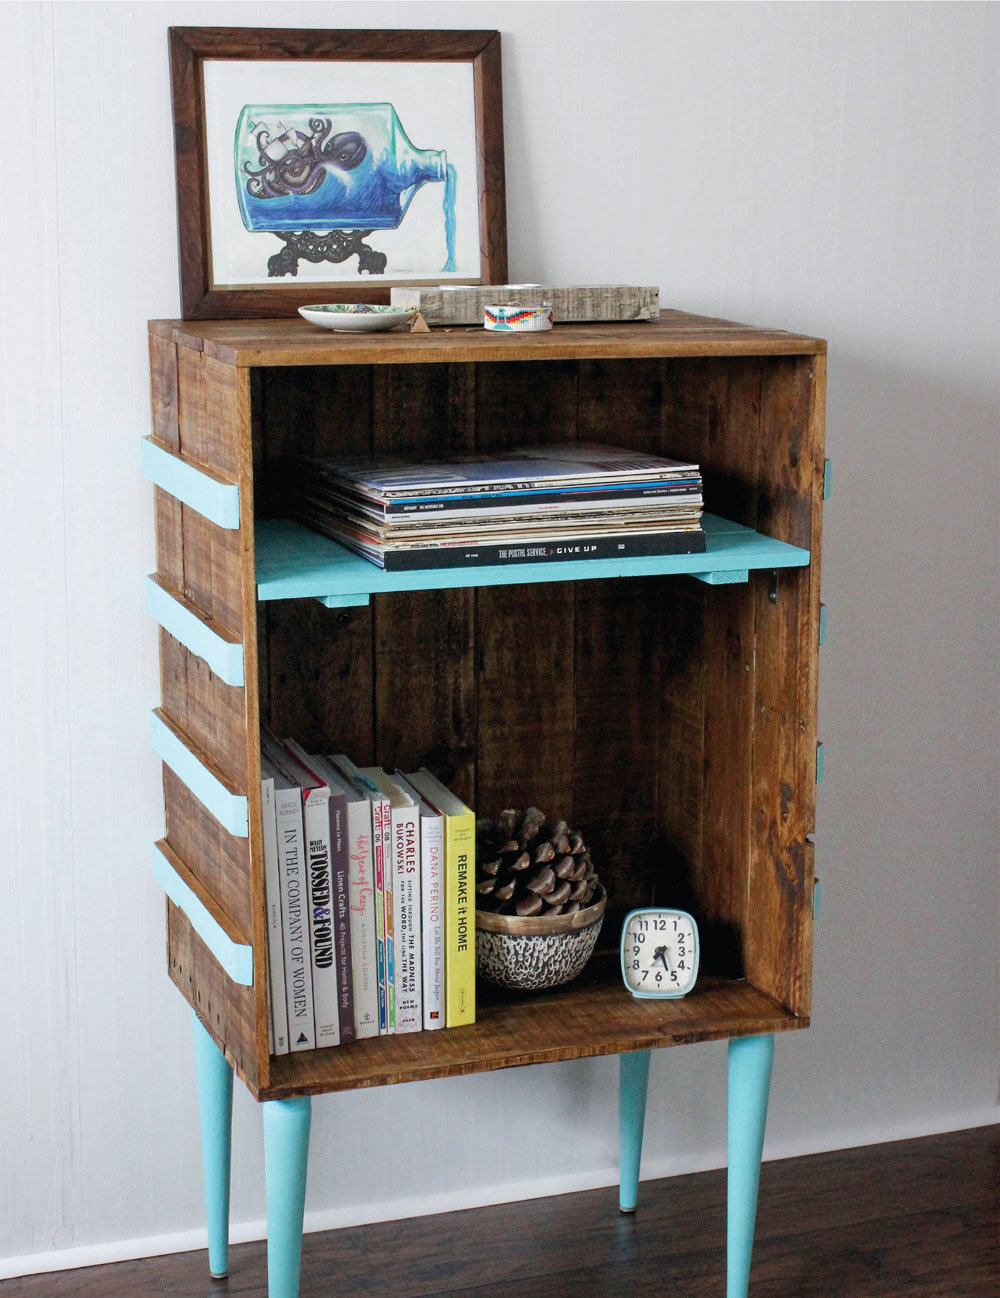
Rustic Nightstand |
|
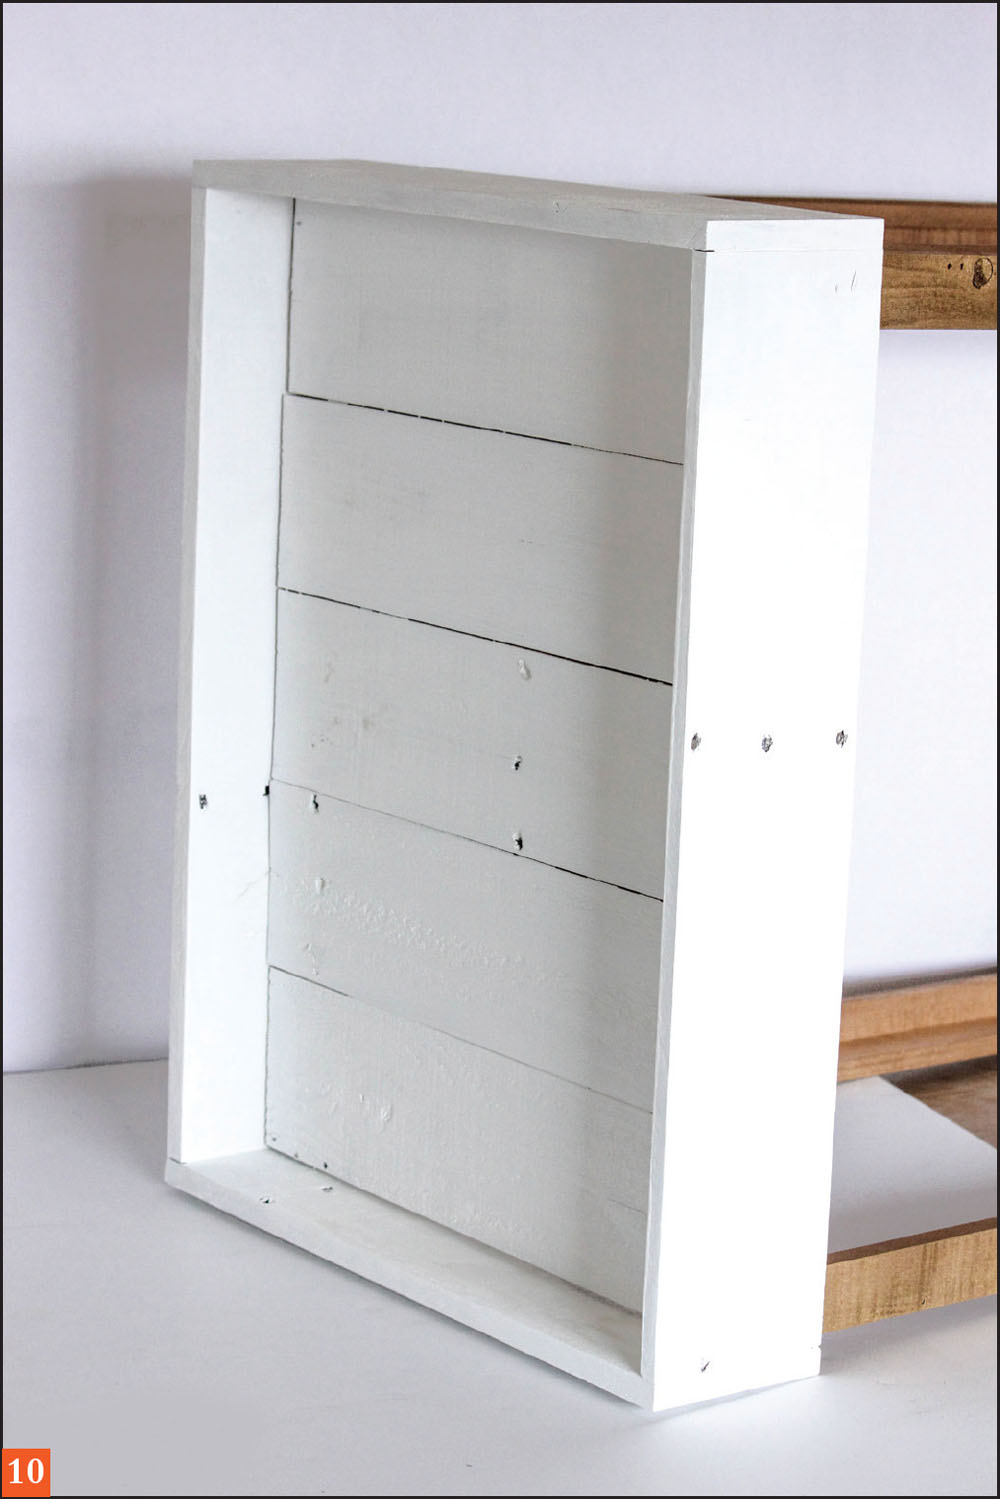
When refurbishing a spare bedroom, I found that the furniture I had on hand didn’t fit the room—the look was off, the pieces were too big, and it just didn’t feel complete. Rather than spend hours searching for something that would work, I decided to build my own, and the Rustic Nightstand was born. Although small in size, this piece has tons of storage space, with a drawer for holding smaller items and a bottom shelf that’s perfect for an extra blanket or a basket of books. Whether you finish it to match a dresser you already have or leave it natural, it’s sure to complement the rest of the room and act as a functional piece of furniture.
Tools • Nail gun or hammer • ¾" nails • 1" nails • 1½" nails • Miter saw • Wood glue • Sandpaper • Table saw • Drill • Drill bit one size smaller than the drawer pull • Ruler or square • Level |
Materials • Pallet pieces • One 13½" × 15" piece of lauan plywood • Drawer pull |
Instructions
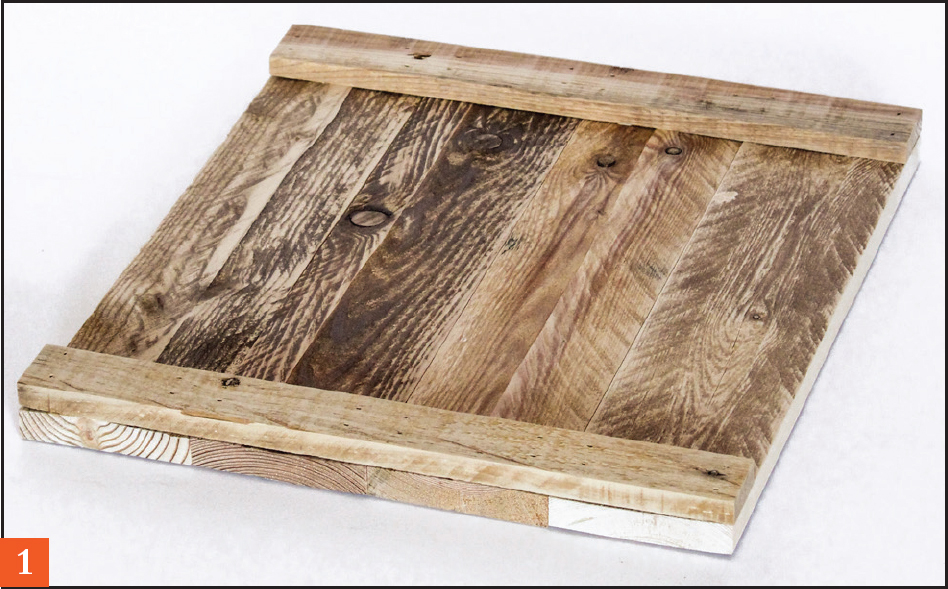
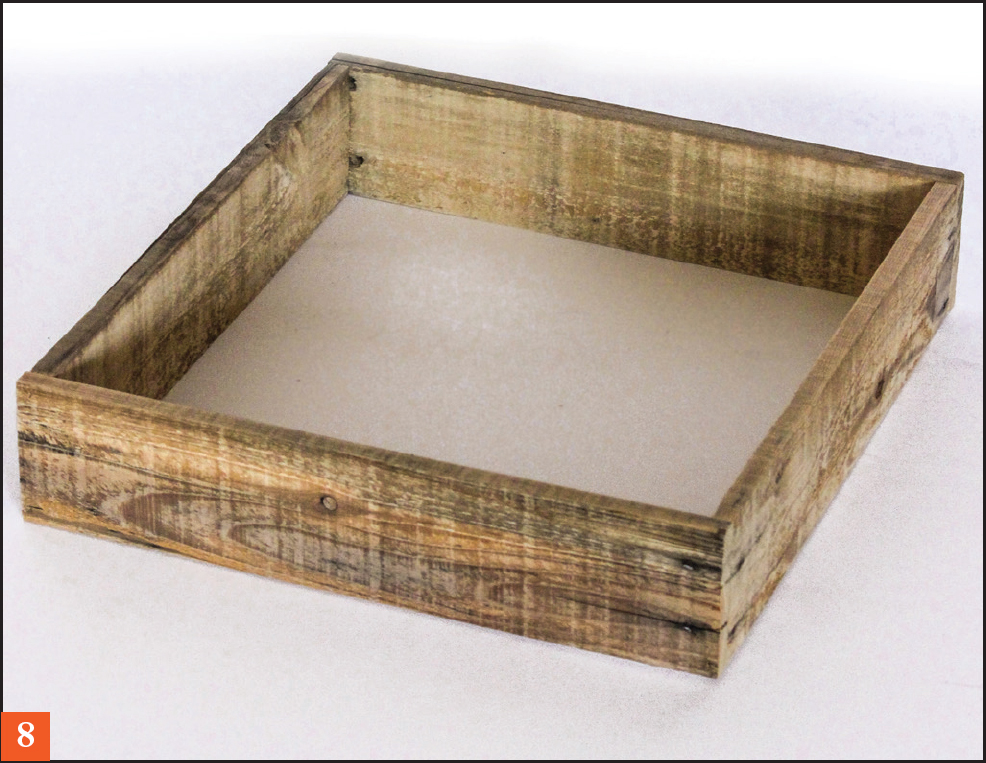
1. Take four of the shelf pieces and lay them out to form the top of the nightstand, with the good sides down. Lay one brace piece on each end to hold the top pieces together and secure in place with glue and ¾" nails. Repeat with the remaining shelf and brace pieces to form three shelves. Sand smooth.
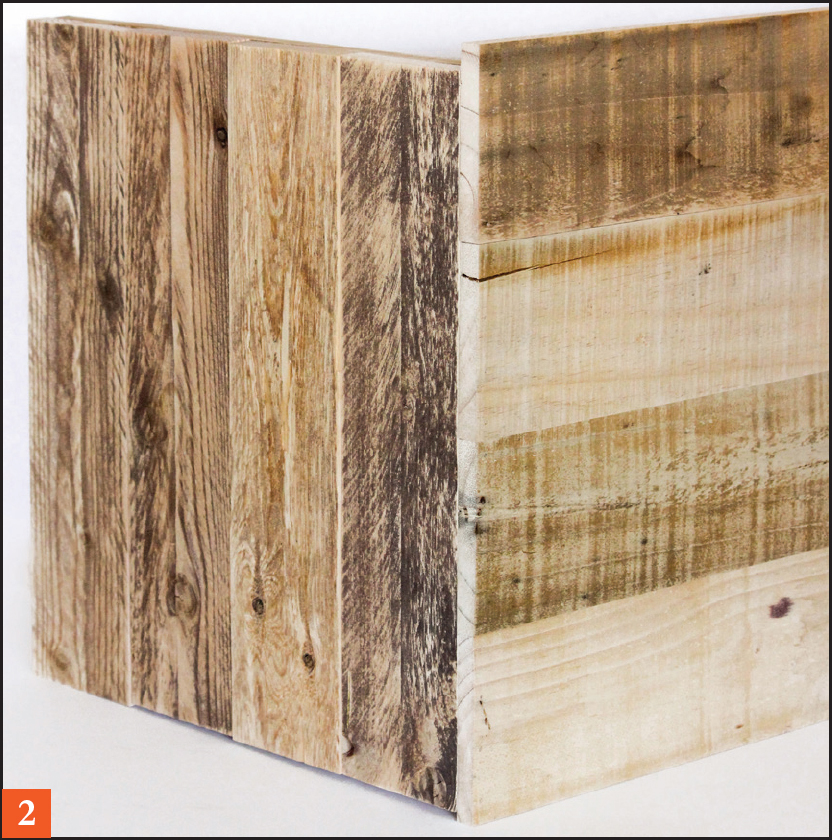
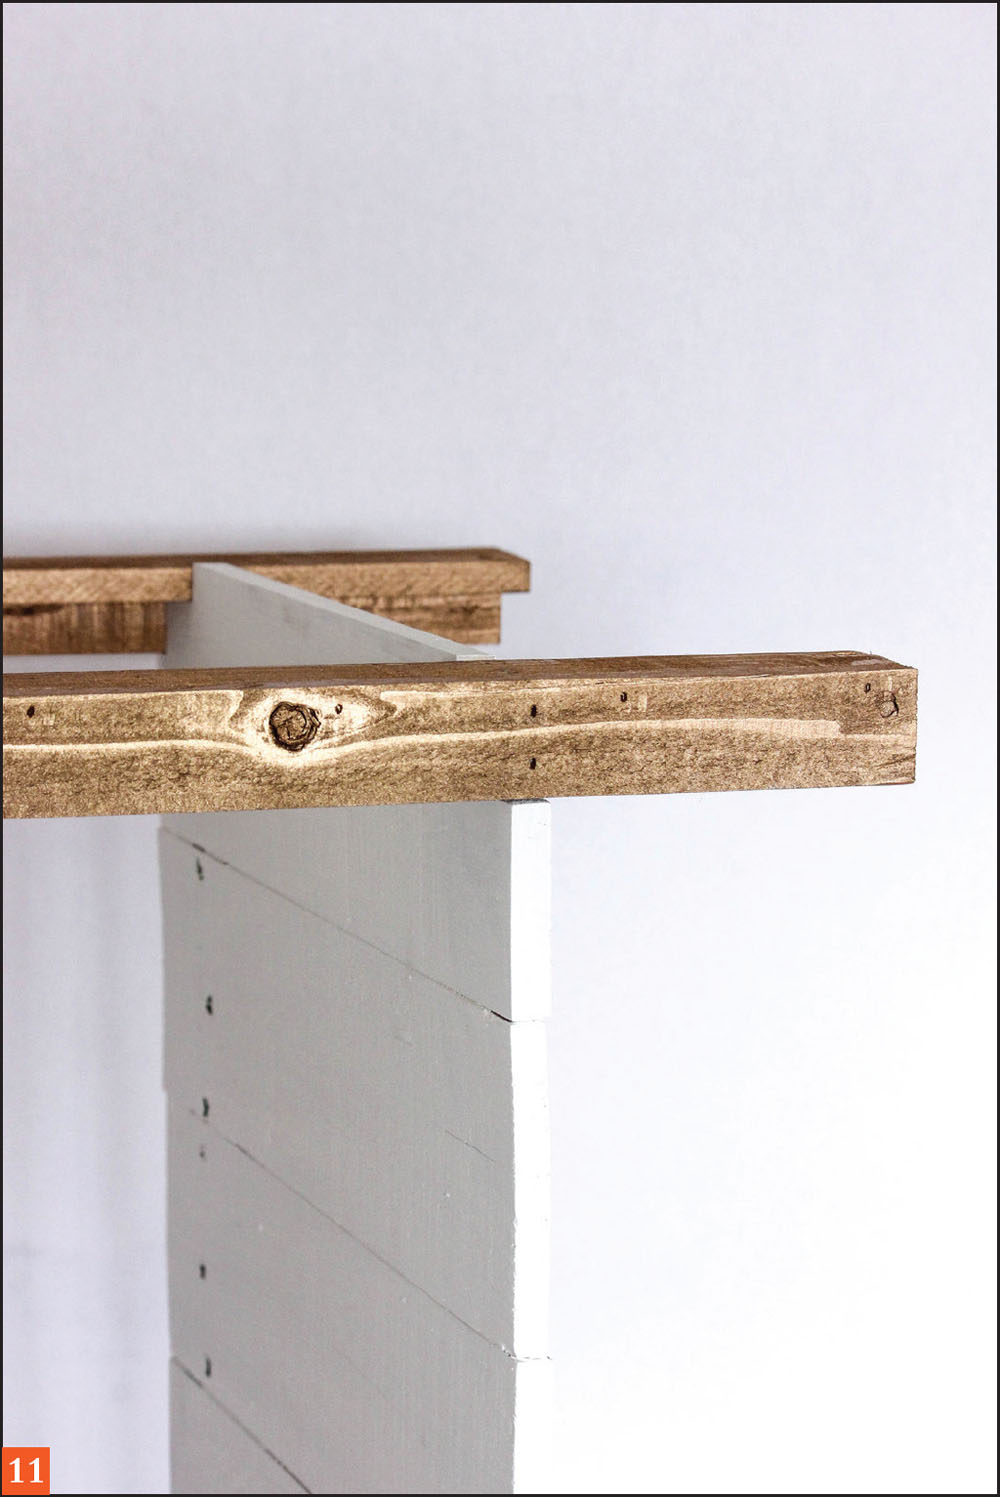
2. To attach the sides to the top of the nightstand, line one of the side boards up with the top edge of one of the shelves created in Step 1, making sure it’s flush with the side and top of one of the brace pieces. Glue and nail in place with 1½" nails. Attach three more side pieces along the edge, leaving a ½" overhang on the front. Repeat with the other side of the nightstand, making sure the overhang is facing in the same direction.

3. On the back of the nightstand, attach the back piece under the top shelf, securing it in place from the top and sides with glue and 1½" nails.
4. Flip the piece over so it’s sitting upside down and insert another one of the shelves. Be sure the brace pieces are flush with the back piece inserted in Step 3. Tack the back two corners in place with two nails from the outside to make the shelf easier to work with. Use a level to make sure the shelf is level and use nails to attach it firmly in place.

5. Use the ruler or square to mark off along the sides where the nails should go to make it easier to attach, and secure all around with glue and 1½" nails.
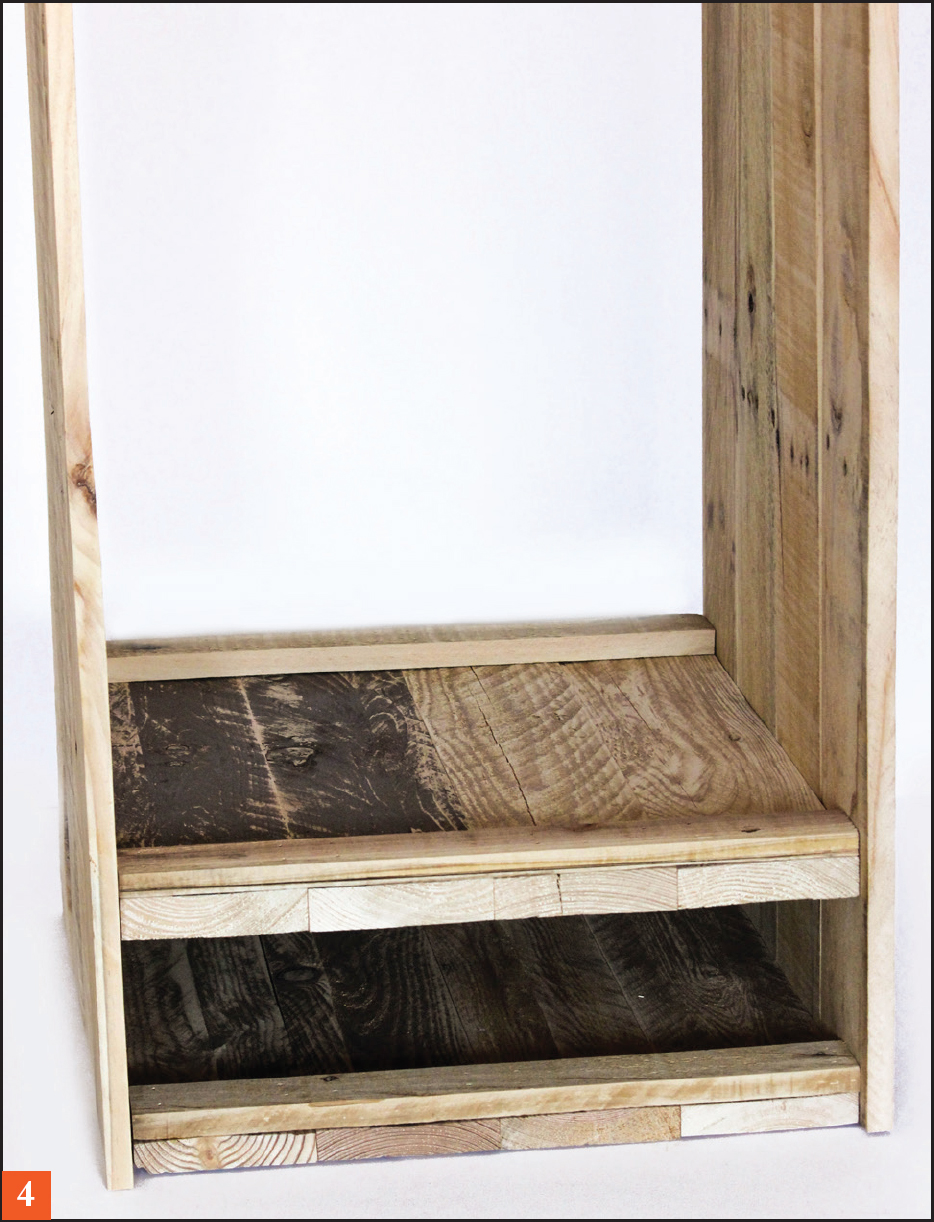
6. Measure 2½" from the bottom of each inside corner to find the placement for the bottom shelf. Place the shelf on the outside of each line and attach it in place with nails, making sure it’s flush with the back of the nightstand and the brace pieces are against the sides.
7. Turn the nightstand with the front facing forward. Attach a front trim piece on each shelf to cover the raw edges.
8. To create the drawer, lay out the front, back, and side pieces to form a box and secure them with wood glue and 1½" nails, making sure the front and back boards are on the outside of the two shorter sides.
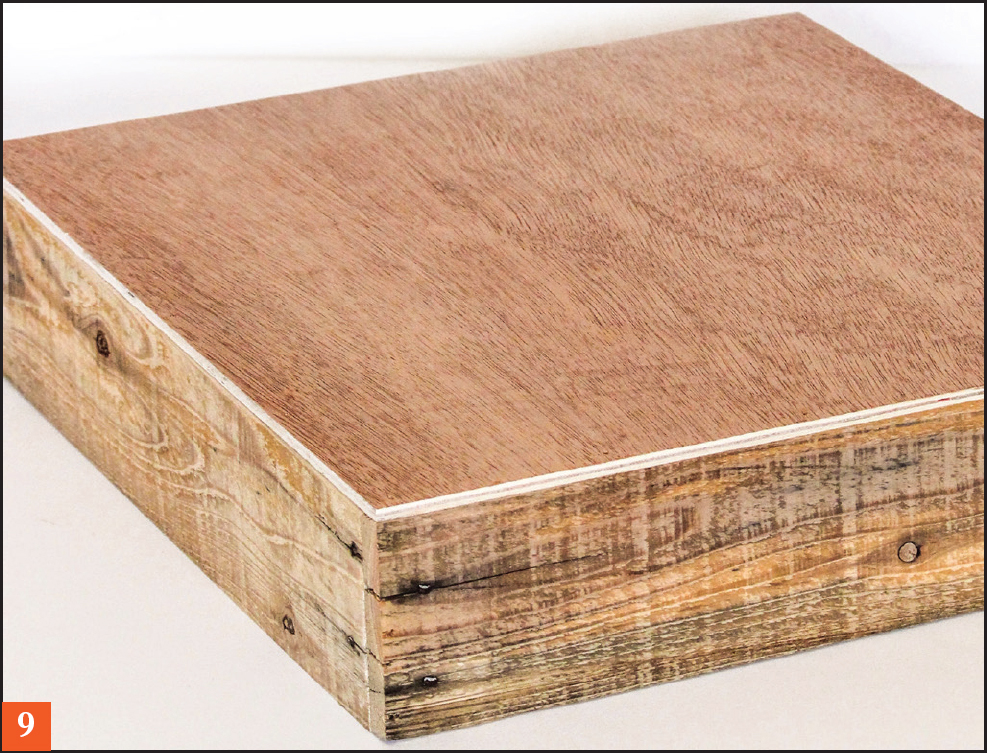
9. Attach the piece of lauan to the bottom by gluing around the edges and nailing in place with 1½" nails.
10. Use a ruler to find the center of the front of the drawer. Pre-drill the hole using a drill bit that is one size smaller than the drawer pull.
11. Sand the nightstand smooth and finish it with your choice of paint or stain. I left mine natural, without any sealant, to show off the color of the wood. Attach and secure the drawer pull.
|
Modern Bookshelf |
|
When visualizing this piece, I wanted to create something with clean lines, yet with a surprise element to draw attention to it. Using a set of Midcentury Modern legs I found at a reclaimed building supply store as a source of inspiration helped me to do just that. Painting the legs and the accent lines on the shelf in the same color will make this piece tie in easily with any room or really stand on its own and become a topic of conversation.
Tools • Nail gun or hammer • ¾" nails • 1½" nails • ⅜" screws • Miter saw • Wood glue • Sandpaper • Table saw |
Materials • Pallet pieces • Four 2" metal corner brace brackets • Four table legs |
Instructions
1. Take the back and side strips and place each one in the miter saw with the 1½" side standing up. Cut each end off at a 45-degree angle, making the two cuts face each other to give each board a short top edge and a long bottom edge. Set aside.
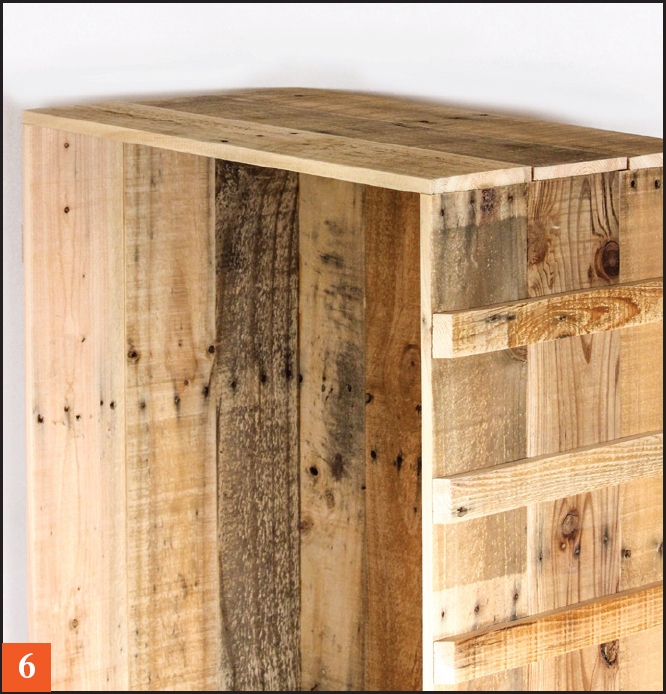
2. Lay out the five back pieces vertically to create the back of the bookshelf. Measure in 4" from each short side and make a mark. Place a back strip on the inside of each mark with the long bottom edge face down. Measure 4" toward the center from those two pieces and place the two remaining back strips. There should be four evenly spaced boards laid across, 4" from each edge and with 4" between each piece. Secure in place using glue and ¾" nails.
3. Lay out three of the side boards and four side strips as in Step 2, lining the strips up flush with one side. They should hang over the other side by ½" to create a lip. Secure in place with glue and ¾" nails. Repeat with the remaining side pieces to create the other side of the bookshelf.
4. Line up one of the side pieces with the back piece, using the overhang from the side piece to create a lip over the back piece. Secure in place with glue and 1½" nails.
5. Connect the other side of the bookshelf in the same way, and then connect the two halves to form the shape of the bookshelf.
6. Take three of the top pieces and lay them across the top of the bookshelf. Attach with glue and 1½" nails. Flip the piece over and repeat with the three bottom pieces.

7. Measure down an equal distance on each side and mark off the location of the shelf. You may wish to place it in the center, off-center to create spaces for smaller and larger books, or add more than one shelf for a variety of items. Attach the metal brackets with ⅜" screws.
8. For the shelf, lay the three shelf boards out and measure over 3" from each short end. Mark a line and lay the two brace pieces on the inside of each line. Attach with glue and ¾" nails.
9. Attach the table legs to the bottom corners of the bookshelf frame using the screws included with the bracket.
10. Insert the shelf inside the bookshelf on top of the brackets.
|
Bar Cart |
|
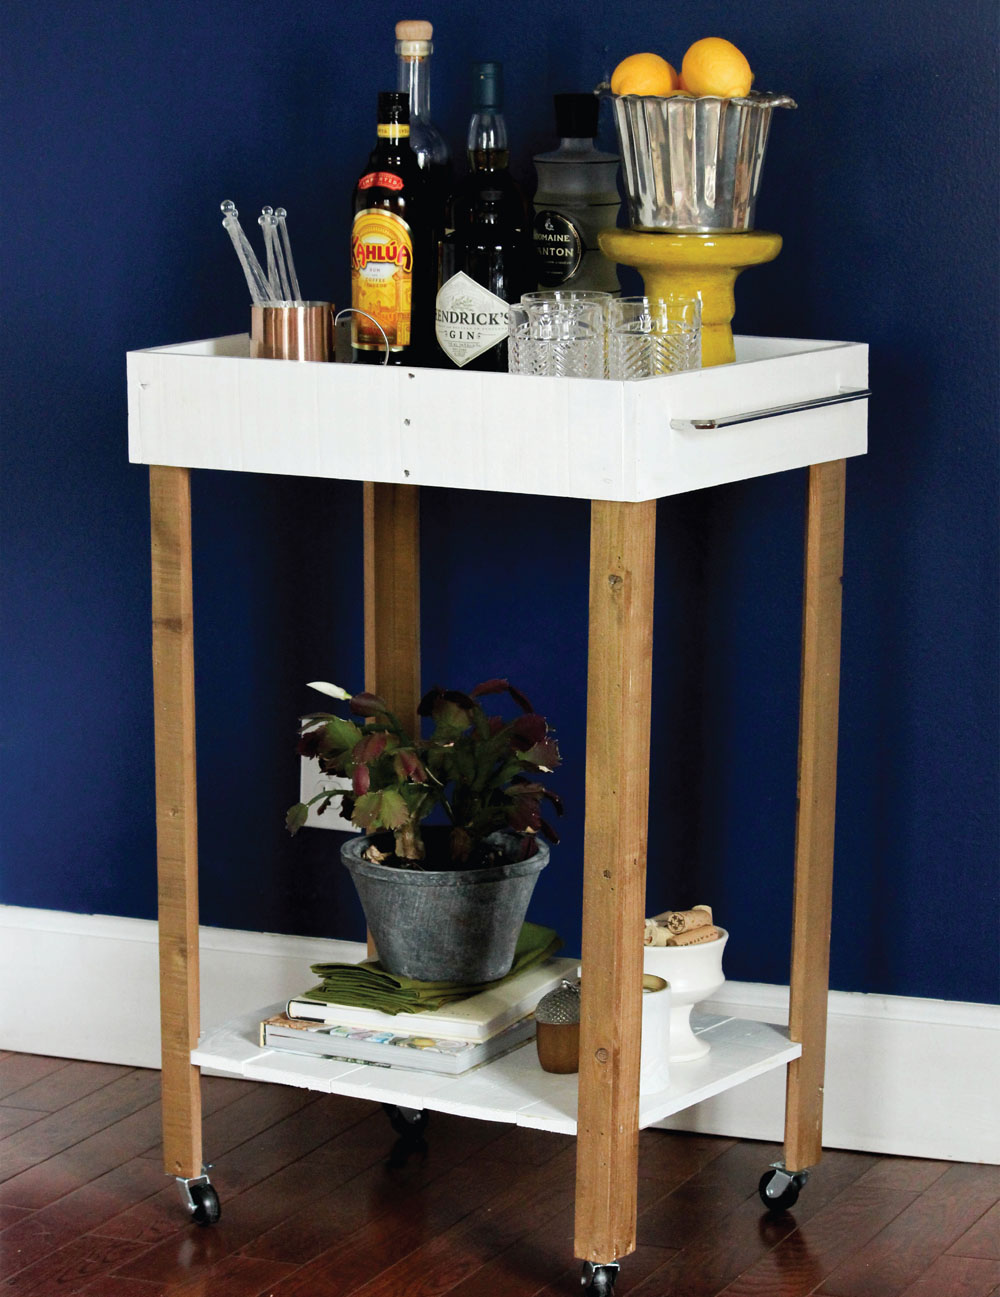
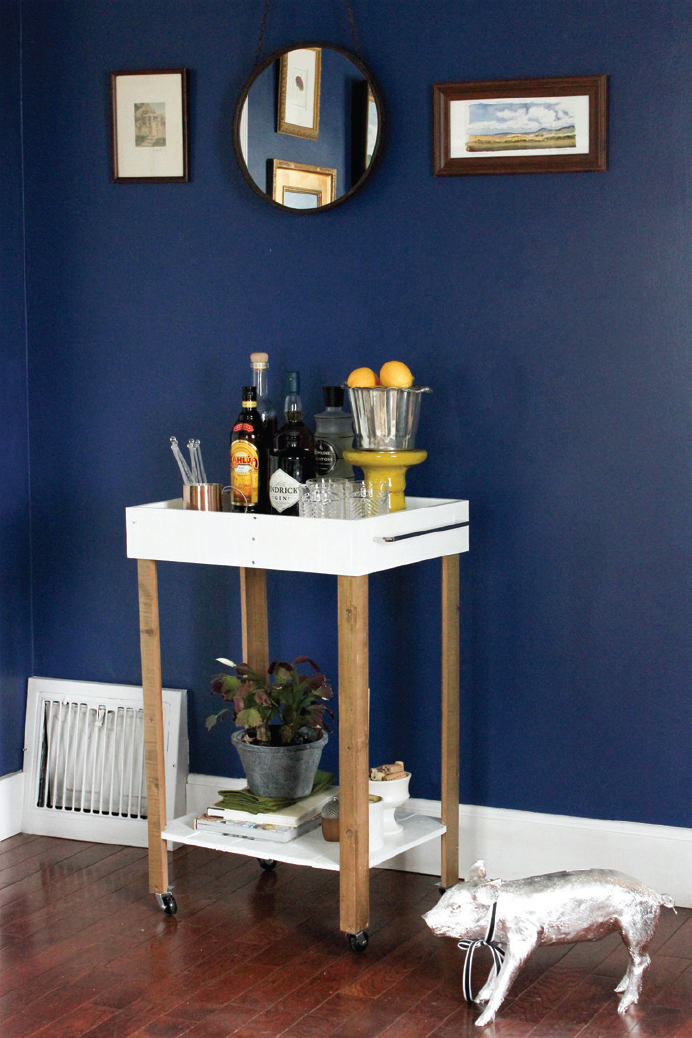
I wanted to create a few projects that one would never imagine building out of wood, and the Bar Cart is just that. However, I still wanted to create a piece with a high-end look to it, so I painted the cart gold and white and finished it with a few coats of glossy lacquer to make it appear more modern. If you choose to attach a handle, some ideas include a bathroom towel rod, building one from wood, or using a dowel rod held in place with unique hooks.
Tools • Nail gun or hammer • 1" nails • 1½" nails • Miter saw • Wood glue • Sandpaper • Table saw • Bandsaw or jigsaw • Phillips screwdriver or drill |
Materials • Pallet pieces • Casters • Handle (optional) |
Instructions
1. Take two of the 28" leg pieces and lay them out in an L shape. Secure together with glue and 1" nails, noting that there is a long edge and short edge to each leg.
2. Repeat with the remaining pieces to create four legs.
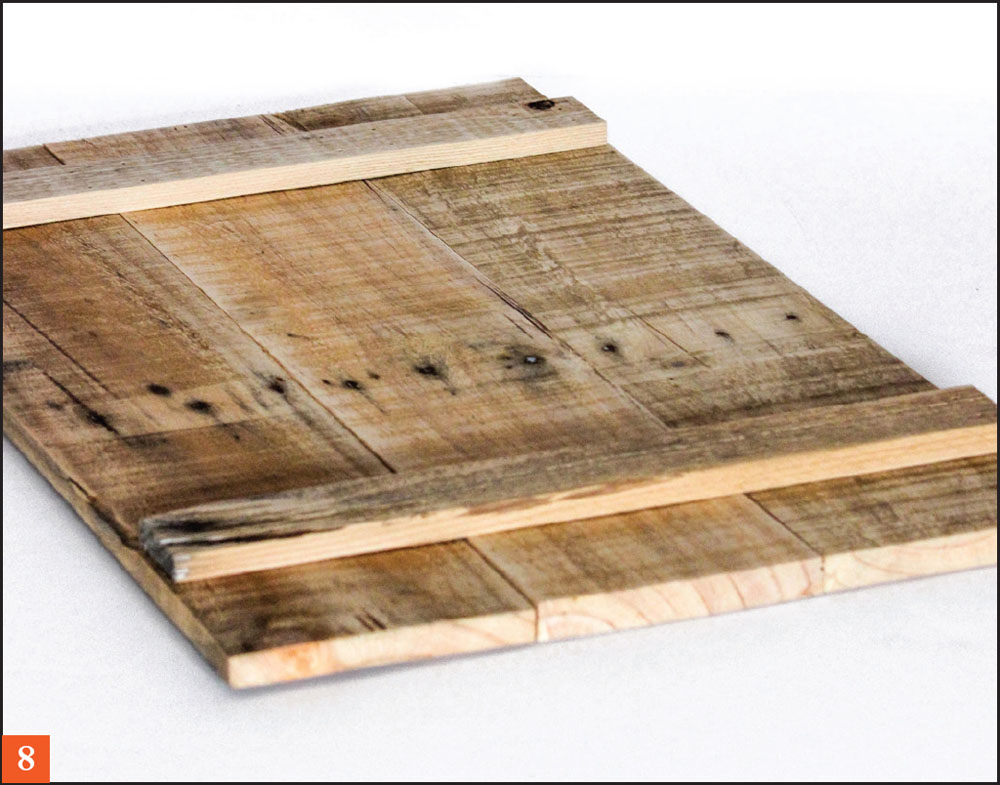
3. Lay out the front, back, and side pieces to form a box and attach with glue and 1½" nails, making sure the long boards are on the outside of the two shorter sides.

4. Take five of the inside pieces and lay them out to form the inside of the tray. Measure 3" toward the center from one side and secure a brace piece in place with glue and ¾" nails. Repeat with another brace on the opposite side.
5. Repeat Step 4 with the remaining five inside pieces and two braces to create the bottom shelf of the cart.
6. Take the shelf created in Step 5 and lay it face down. Take one of the legs and stand it up in one of the corners, making sure the long edge of the leg is facing the long side of the shelf. Trace around it using a pencil and repeat for the other corners, paying careful attention to the way the edges face.
7. Use a bandsaw or jigsaw to cut out the four corners along the lines created in Step 6 and sand smooth. Test fit the legs to make sure they sit flush with the shelf.
8. Sand all of the pieces smooth, paint them, and let them dry. It’s easier to finish the pieces before assembly because of the way they’re put together.
9. Take the sides of the cart tray from Step 3 and measure down 1½" from each corner, making a mark on the inside. Secure the legs in place with glue and ¾" nails, matching up the long edges with the long sides. Repeat with the other three legs.
10. Set the inside of the tray in place with the braces face down. Carefully nail it in place along the corners, shooting in a few 1½" nails from the top.
11. Measure up 5" from the bottom of each leg and make a mark. Hold the bottom shelf in place and attach each corner, nailing into the notches with the 1½" nails.
12. To finish, screw a caster to the bottom of each leg and attach a handle to one short side of the tray part of the cart (if you choose to do so). Seal with a few coats of lacquer to make it water resistant.
|
Herb Garden |
|
Simple and rustic, this Herb Garden really shows off the beautiful color and vibrant life of whatever herbs or flowers you choose to plant in it. Because my planter was to be used on the porch, I opted not to paint the piece and selected old and very weathered pallets for the legs. I really wanted to create a piece that would work well in a small space yet still hold a lot of plants. You can modify this planter with longer shelves, more shelves, or smaller pots to hold more plants.
Tools • Nail gun or hammer • 1½" nails • Miter saw • Wood glue • Sandpaper • Drill or drill press • 3" hole saw blade • Jigsaw (optional) |
Materials • Pallet pieces • Nine 3½" terra cotta pots |

Instructions
1. Remove any remaining nails from the leg pieces and sand smooth. Lay one out with the wider edge facing up and set the other three aside.
2. Measure 4", 18", and 32" from one side, marking off each. Place a brace piece on each mark with the wider edge face up, on the side of the line closest to where you measured from. Attach each piece in place with glue and 1½" nails. Repeat with the other three legs.
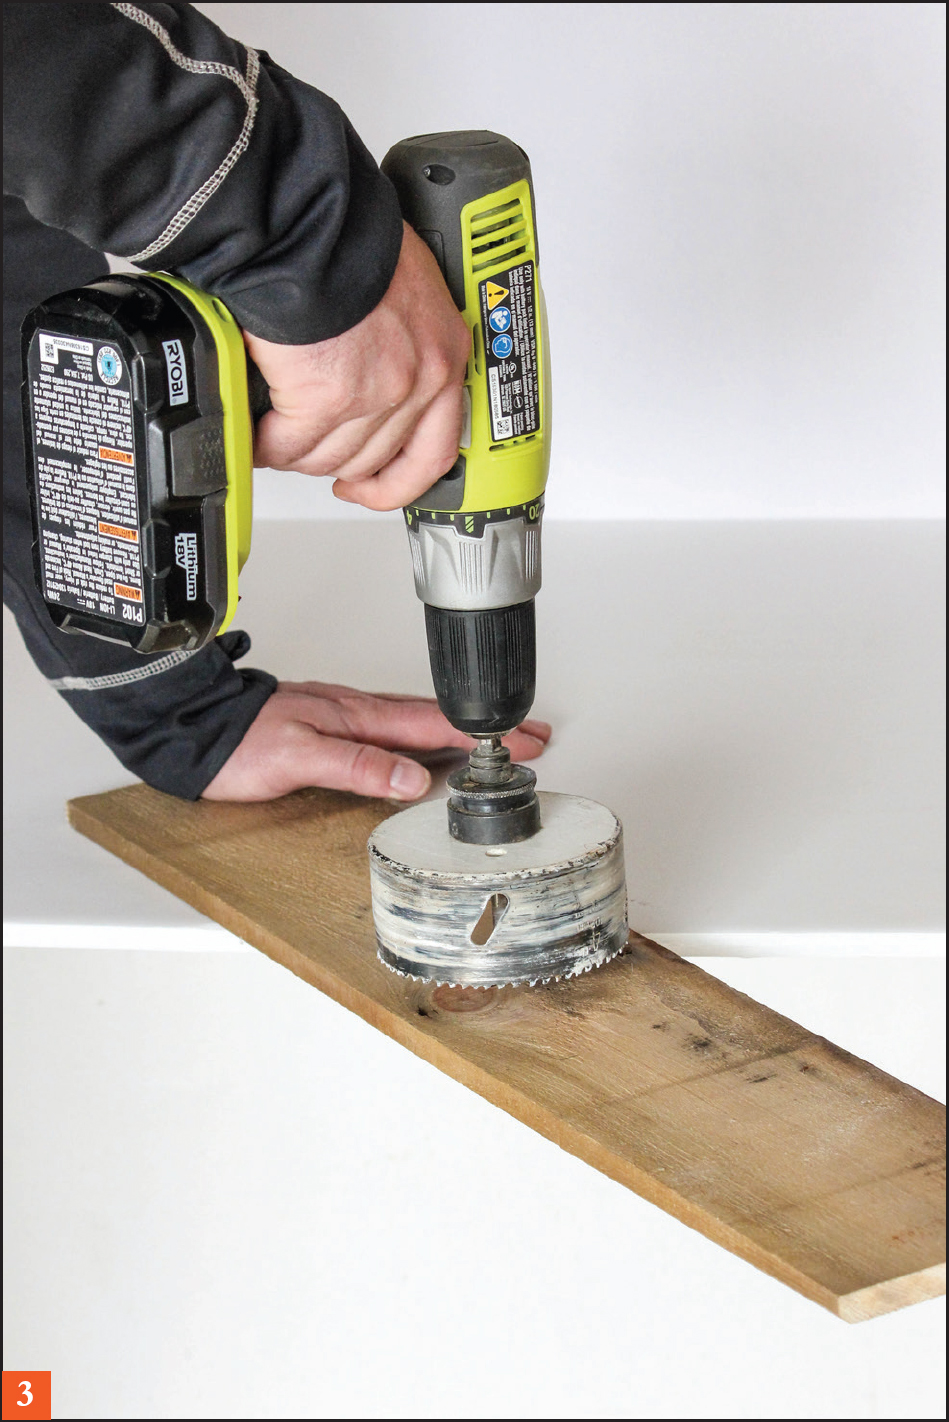
3. Take one of the shelves and mark off the center. Measure over 5½" in each direction and make a mark. Using a drill, or a drill press with the hole saw blade, drill out the three holes to create the spaces where the pots will go, centering the drill bit over the marks. (A jigsaw may also be used if a hole saw is not available. Simply draw a 3" circle, drill a small hole to insert the jigsaw blade, and cut out.)
4. Repeat Step 3 with one more of the shelves.
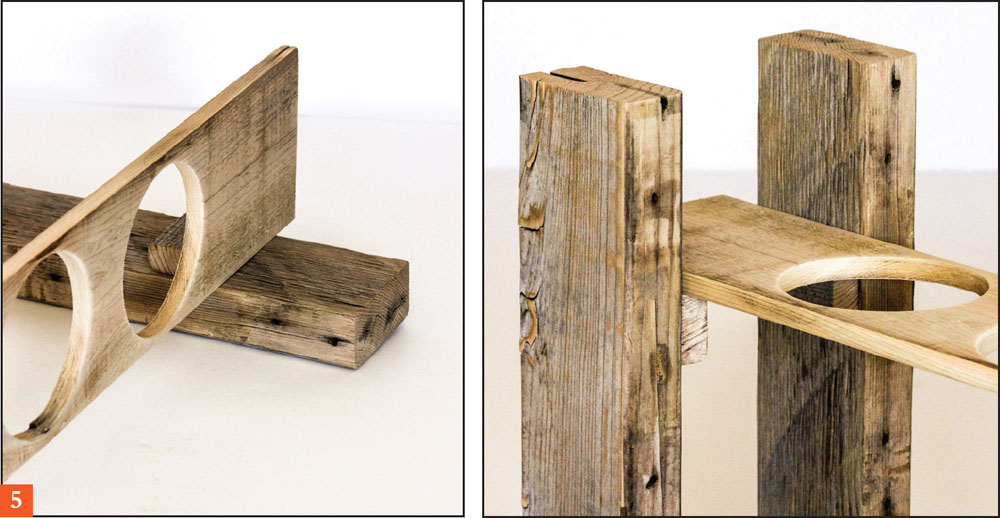
5. Take one of the shelves with the holes and measure over 1" from each side. Set the shelf on the top brace of one leg, lining up the 1½" mark with the edge of the leg to create an overhang. Nail in from the top of the shelf. Repeat this process with the remaining three legs on the other sides of the shelf.

6. Repeat Step 5 to nail the other two shelves in place, keeping in mind that the shelf with no holes goes on the bottom. I chose to use pots with drainage holes in them so when I water the top plants, the water will drip down into the next ones. Using a bottom shelf with no holes will create space for saucers to sit so the water won’t drip onto the floor. If you chose pots without drainage holes, you may drill holes in all three shelves because the water won’t drip out.
7. You may also use narrow strips of wood, pieces of twine, or even thin branches to create a fence around the bottom shelf to hold the pots in place. I love the look of terra cotta so I chose to leave mine open, but another natural element would look great across the bottom.