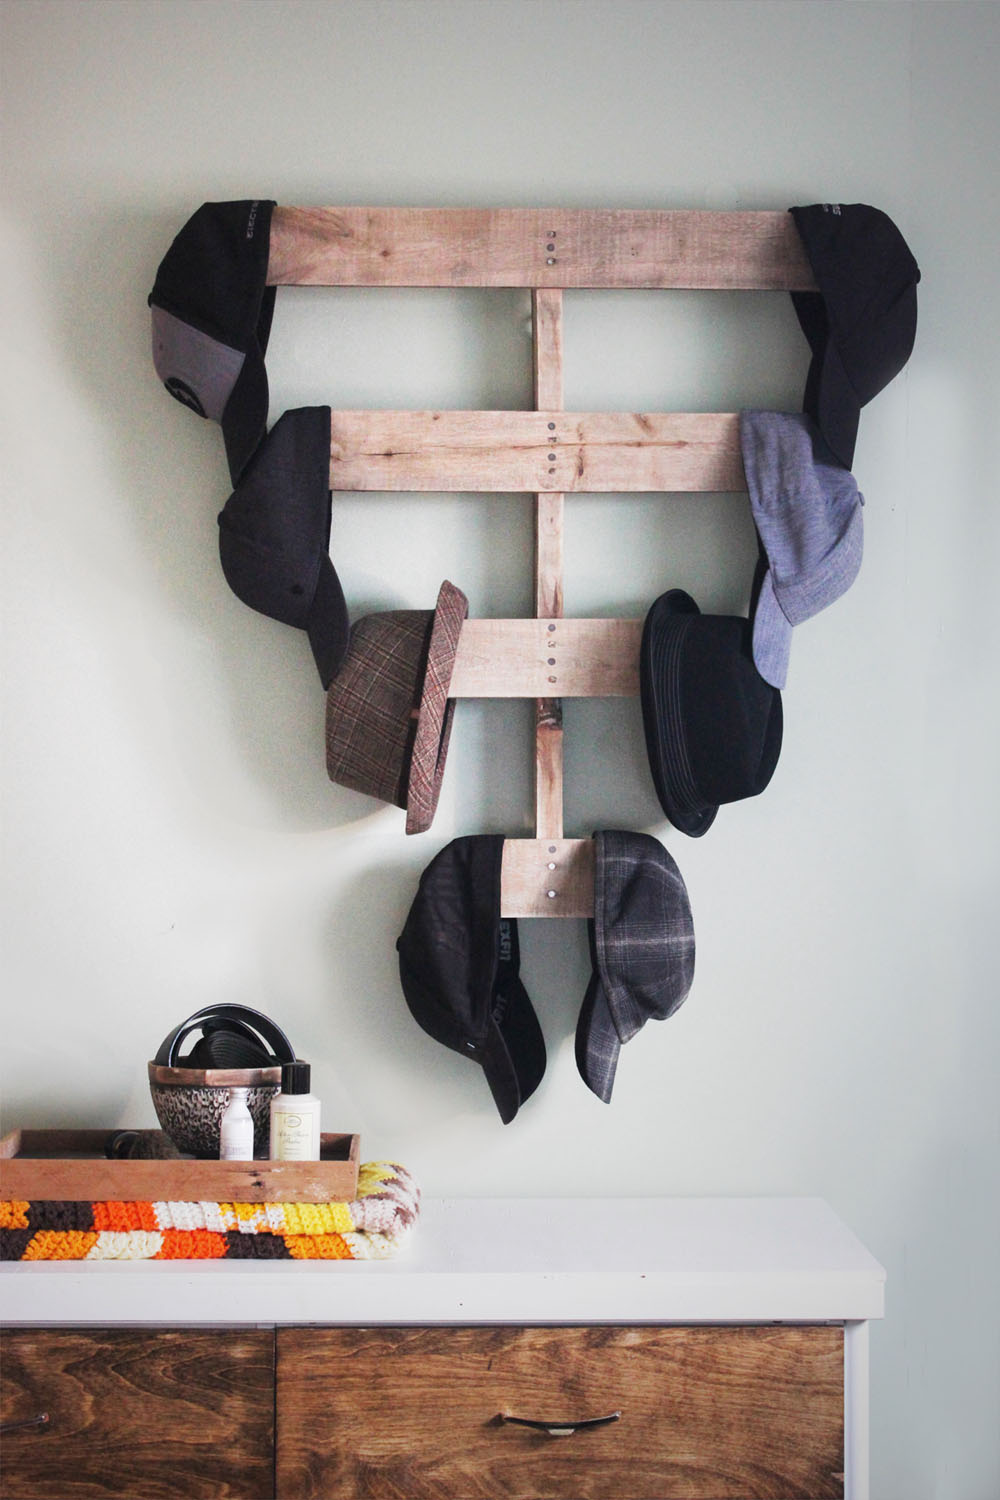
Hat Rack
STAY ORGANIZED
|
Hat Rack |
|
For most of the projects in this book, wood pallets are disassembled and reused in ways that hide their original purpose. However, the Hat Rack uses a whole pallet to create a unique and useful bedroom accessory for displaying hats, scarves, belts, jewelry, or purses. Hooks may be added to the boards on the front for additional items, and using a larger pallet will add extra “shelves” to the piece.
Tools • Hammer • 1½"–2" nails • Reciprocating saw, jigsaw, or circular saw • Sandpaper • Yardstick or 3' level for drawing a long line |
Materials • Whole pallet • Sturdy hook for hanging |
Instructions

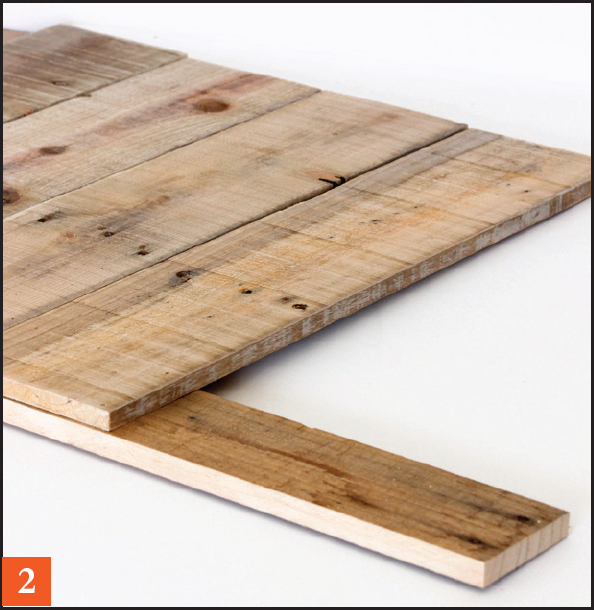
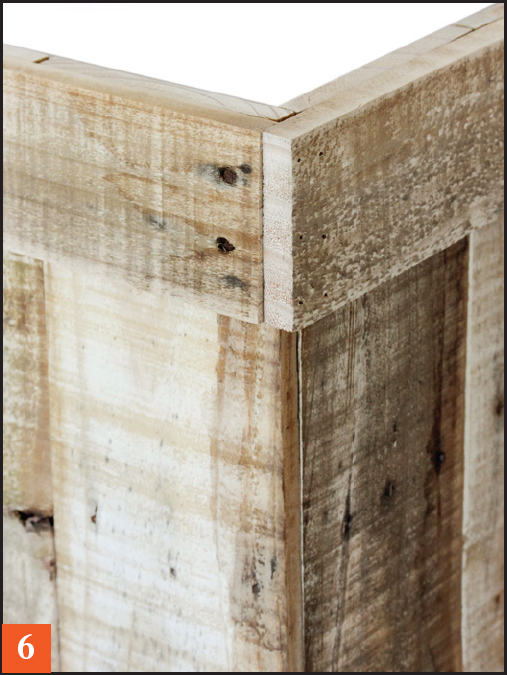
1. Begin this project by choosing a pallet with good bones. The boards should be free of cracks and nails, and a sturdy center brace is essential for hanging.
2. Stand the pallet up with the boards running horizontally. Use the yardstick or long level to draw a line from one top corner down to the bottom center. Repeat on the other side to create a downward-facing arrow shape.
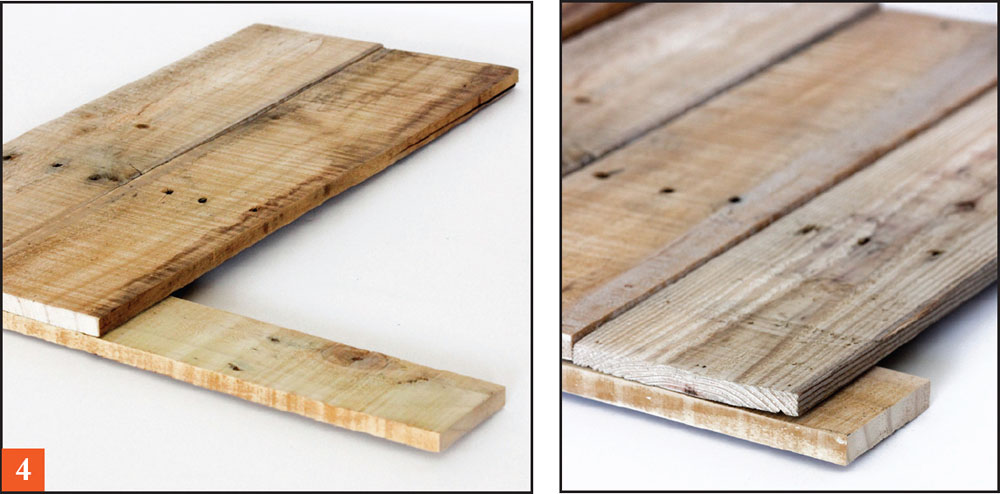
3. Using a reciprocating saw, jigsaw, or circular saw, cut along the lines on the front of the pallet. Any of those tools will work fine; choose the one that will work best with the shape and size of your pallet.
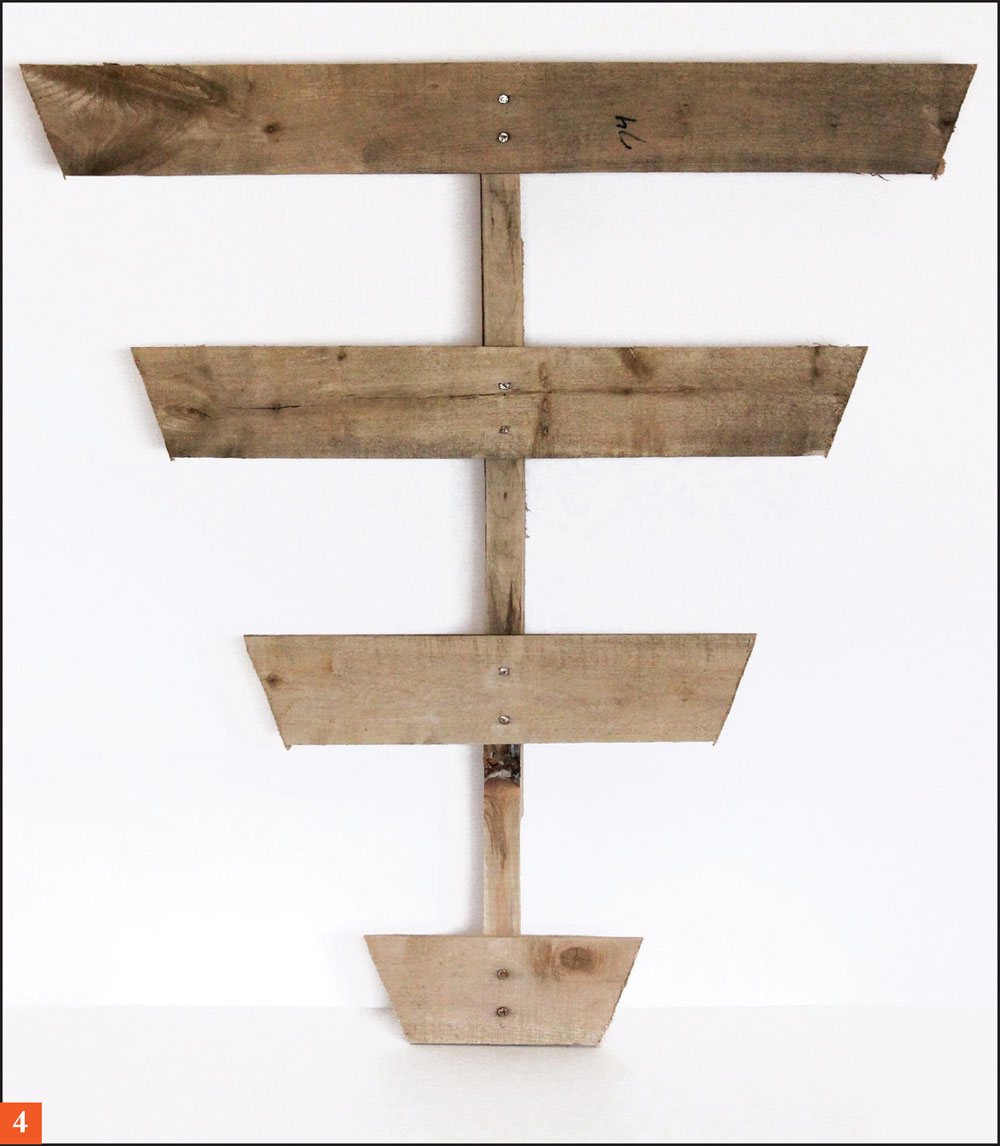
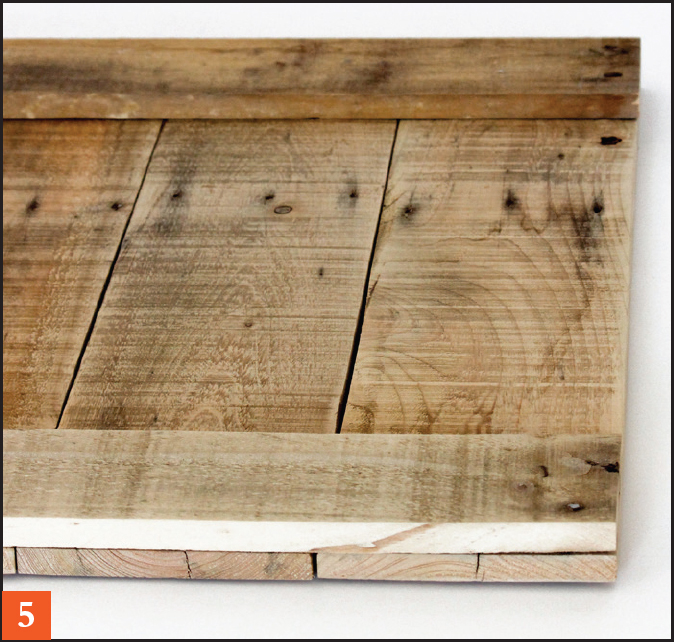
4. Remove the boards from the back of the pallet and trim the center brace where you want the top and bottom of the rack to be. Sand smooth.
5. Hammer a few additional nails into the center brace where the boards cross for added stability. Attach a sturdy hook on the back, and because this piece is heavy, be sure to mount it in a stud.
|
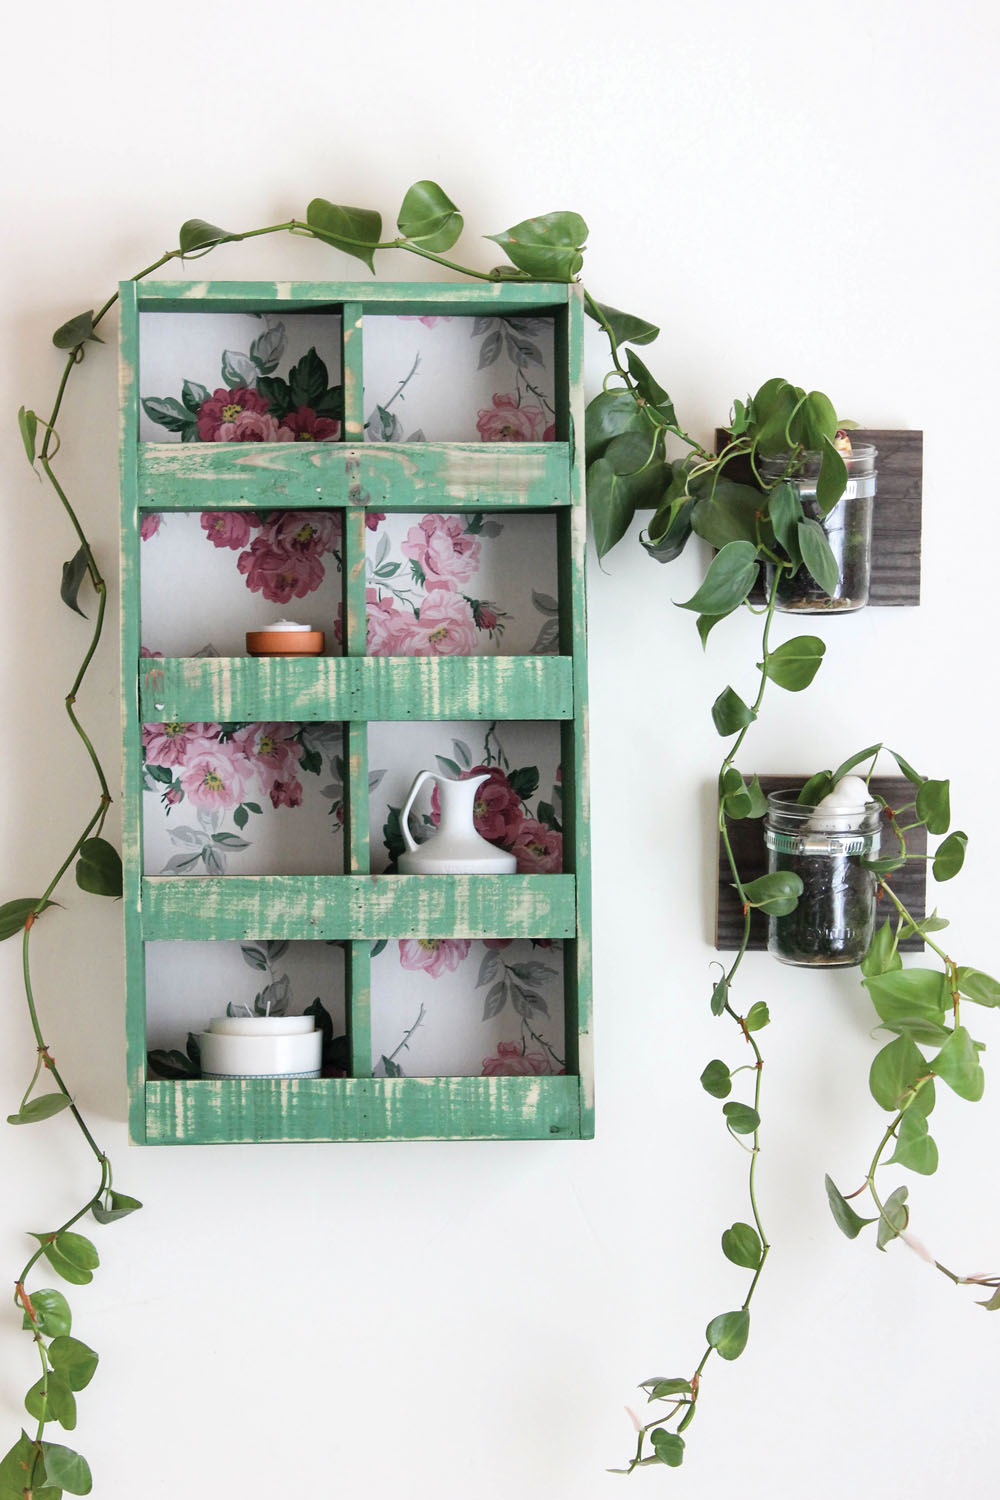
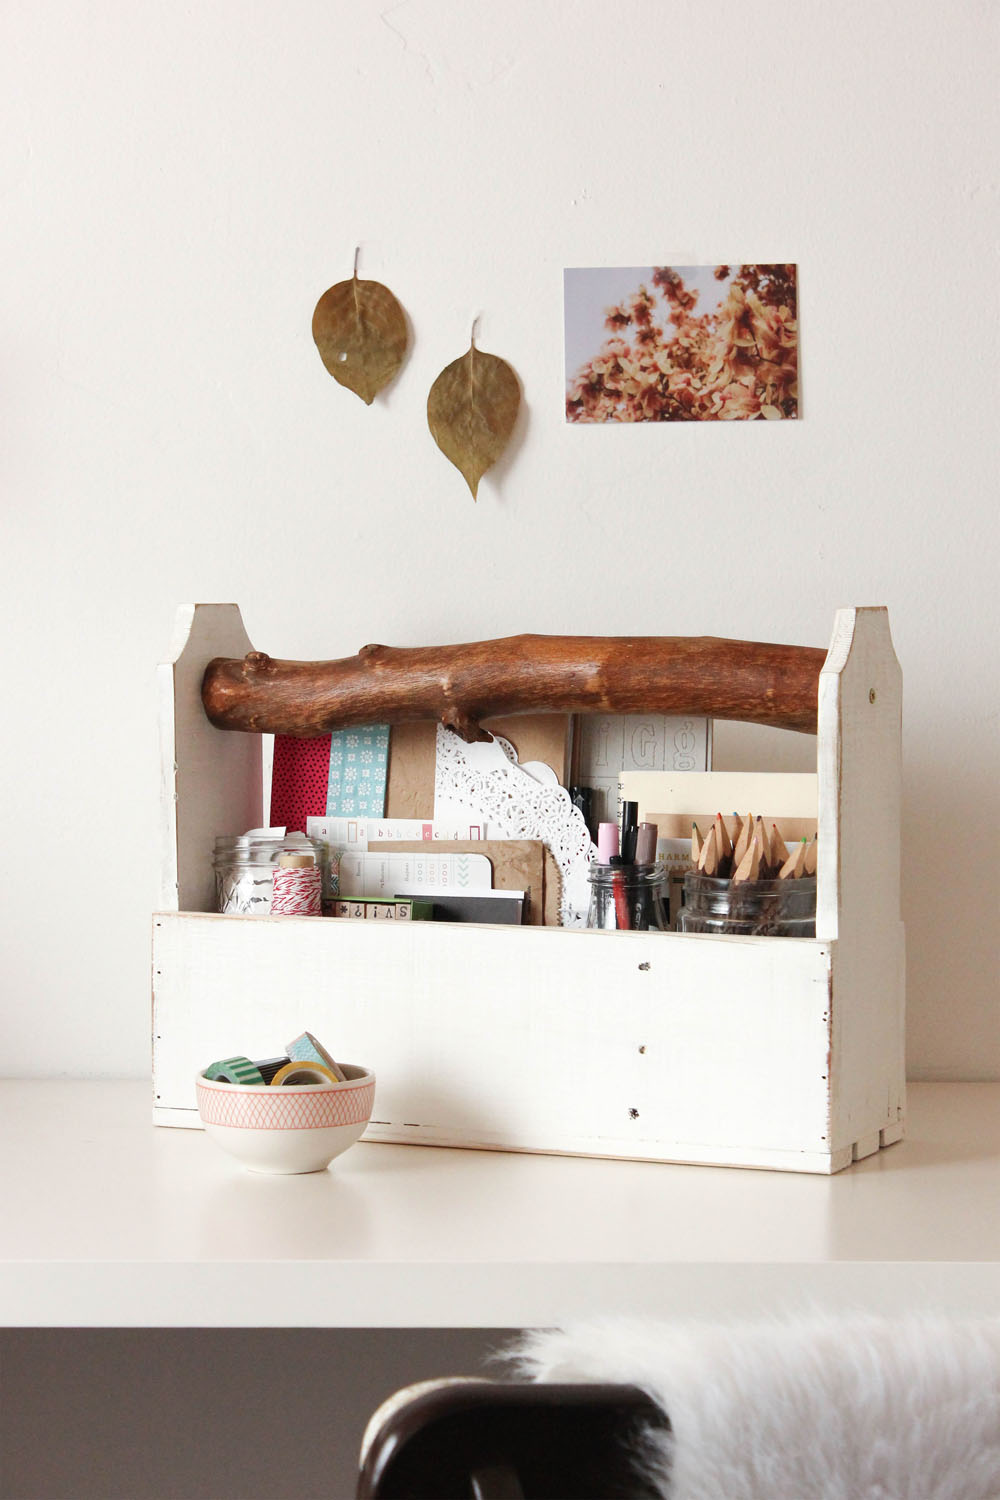
Shabby Chic Toolbox |
|
The Shabby Chic Toolbox is one of my favorite projects. It’s super-versatile and can be used in so many ways, from storing kitchen utensils and organizing art supplies to showing off holiday décor and making a home for your favorite plants. Not only can it be finished in any color, but the handle really makes it stand out from the crowd. I used a thick branch for my project to bring some of the outdoors in. If you’re after a more modern look, a piece of copper pipe would look great with a navy blue painted box.
Tools • Nail gun or hammer • 1½" nails • Miter saw • Wood glue • Sandpaper • Table saw • Jigsaw • Two 2" screws • Drill with drill bit that is one size narrower than your screws • Glass or similar object 2" in diameter for tracing • Marking pencil |
Materials • Five pallet boards at least 17" long • Something unique for the handle, such as a thick branch, dowel rod, piece of pipe, or spindle |
Instructions
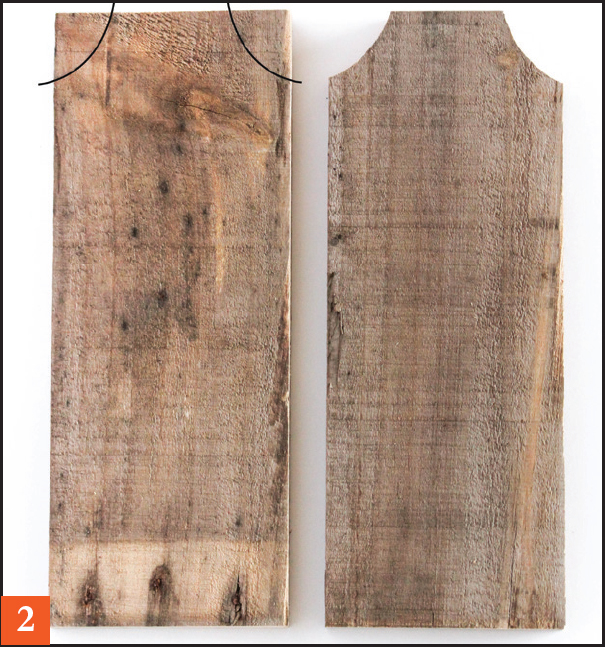
1. Measure and cut two boards to a length of 17" and two to 12". The 12" boards will be placed vertically to form the ends of the toolbox.
2. On the top corners of each of the 12" boards, draw two symmetrical arcs using the glass or other object as a pattern. Cut along the lines with a jigsaw. Sand all four pieces, making sure the curves on the end pieces are smooth.
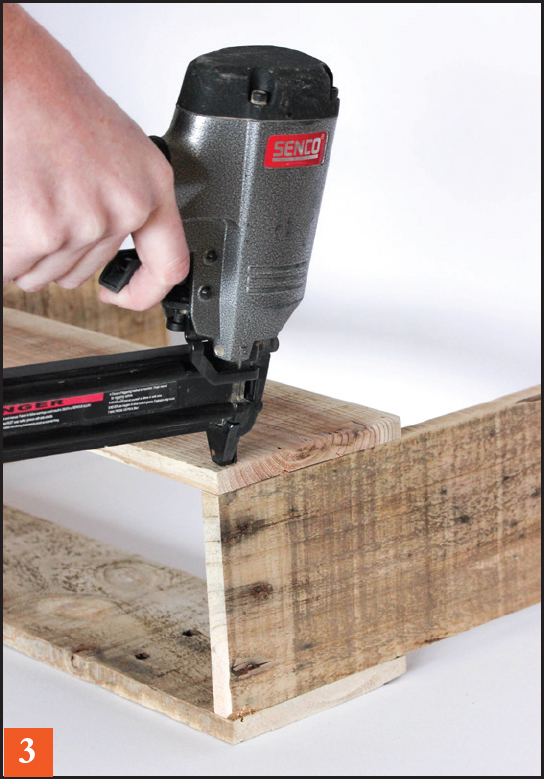
3. Lay out the four boards to form a box, making sure the long boards for the sides line up on the outside of the two ends. Apply glue where the boards meet, then nail the boards together.
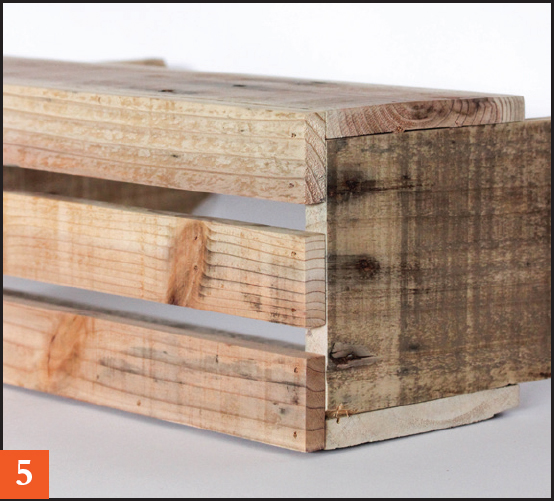
4. Using a table saw, rip the last board down into three 1½"-wide strips. Cut each strip to a length of 17", then sand until smooth.
5. Attach the strips to the bottom of the toolbox using glue; the edges should be flush with the sides. Carefully nail all around the outside of the box.
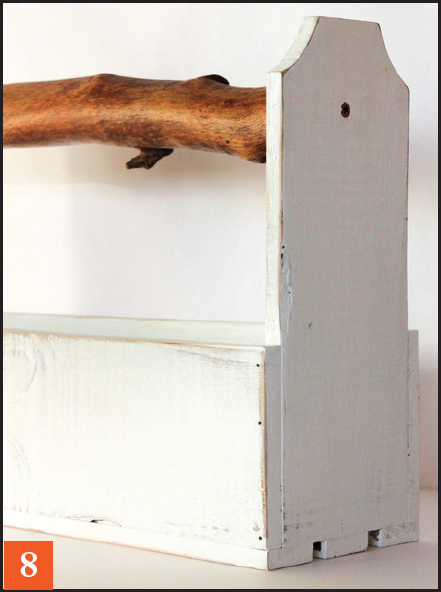
6. Measure the inside distance between the two tall ends of the toolbox and cut the handle to that length. Measure an equal distance down on each end and mark where you want to place the handle. Hold the handle in place and pre-drill two holes. If you chose something such as a dowel rod or piece of pipe, use a paddle bit that is the width of the handle to create two holes to slide it into.
7. Paint the toolbox with a finish of your choosing. I painted mine with two coats of white paint and then sanded down some of the edges to create a distressed look. If your handle needs painting, do that now as well. The handle I chose for the box was a thick branch, so I used a light brown wax to highlight its character and make it smooth to the touch.
8. Once everything is dry, use the two screws to attach the handle.
|
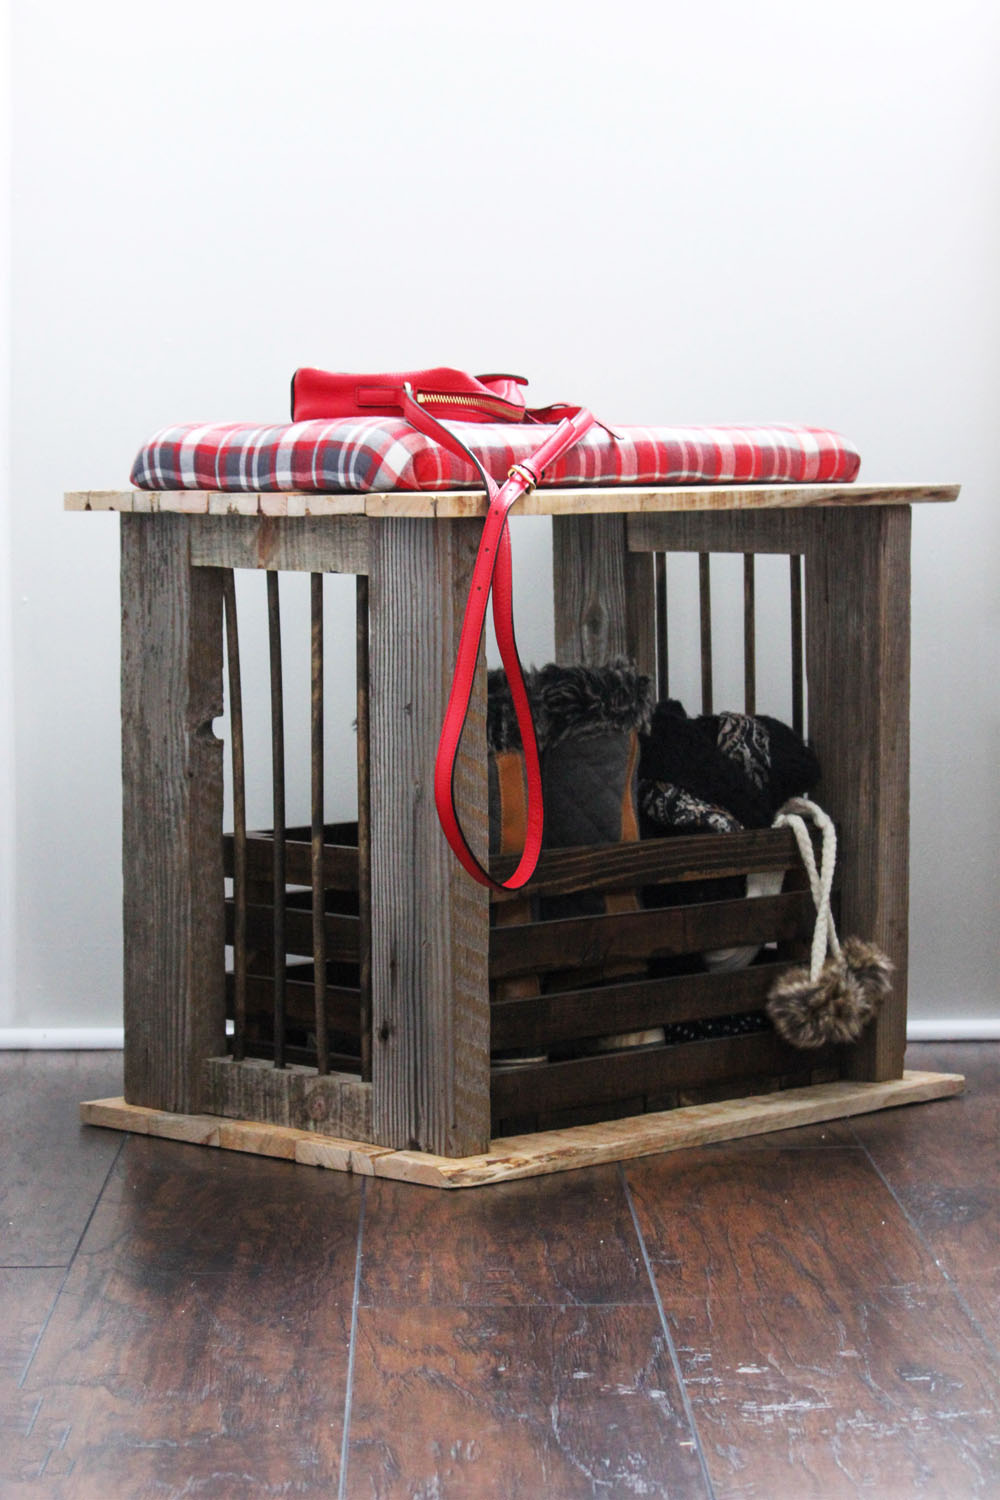
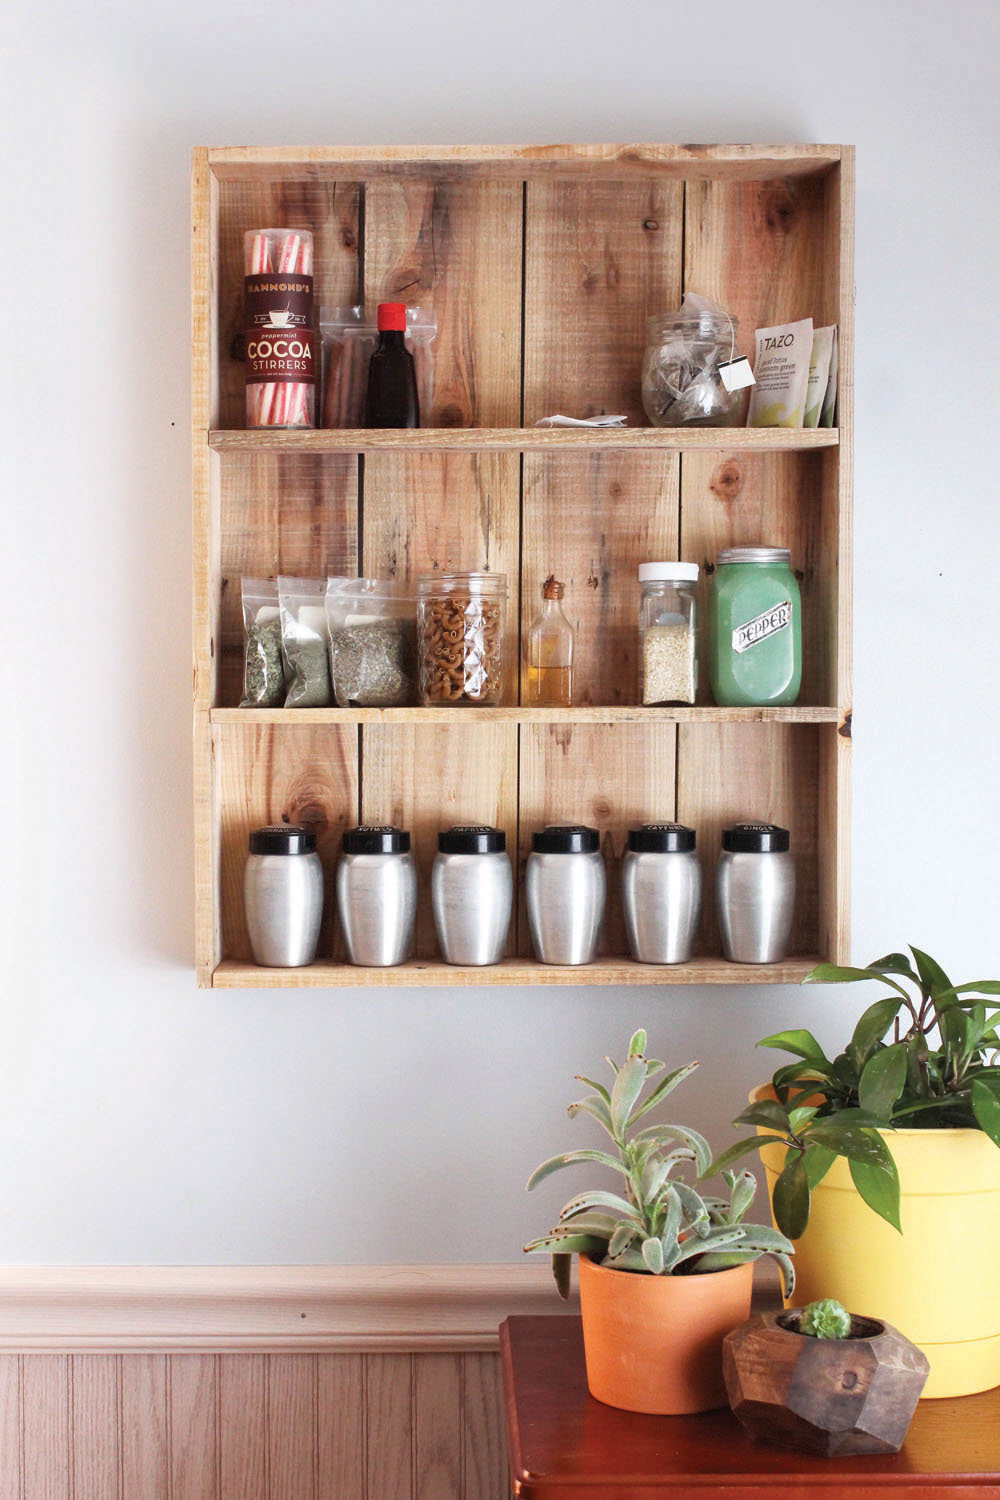
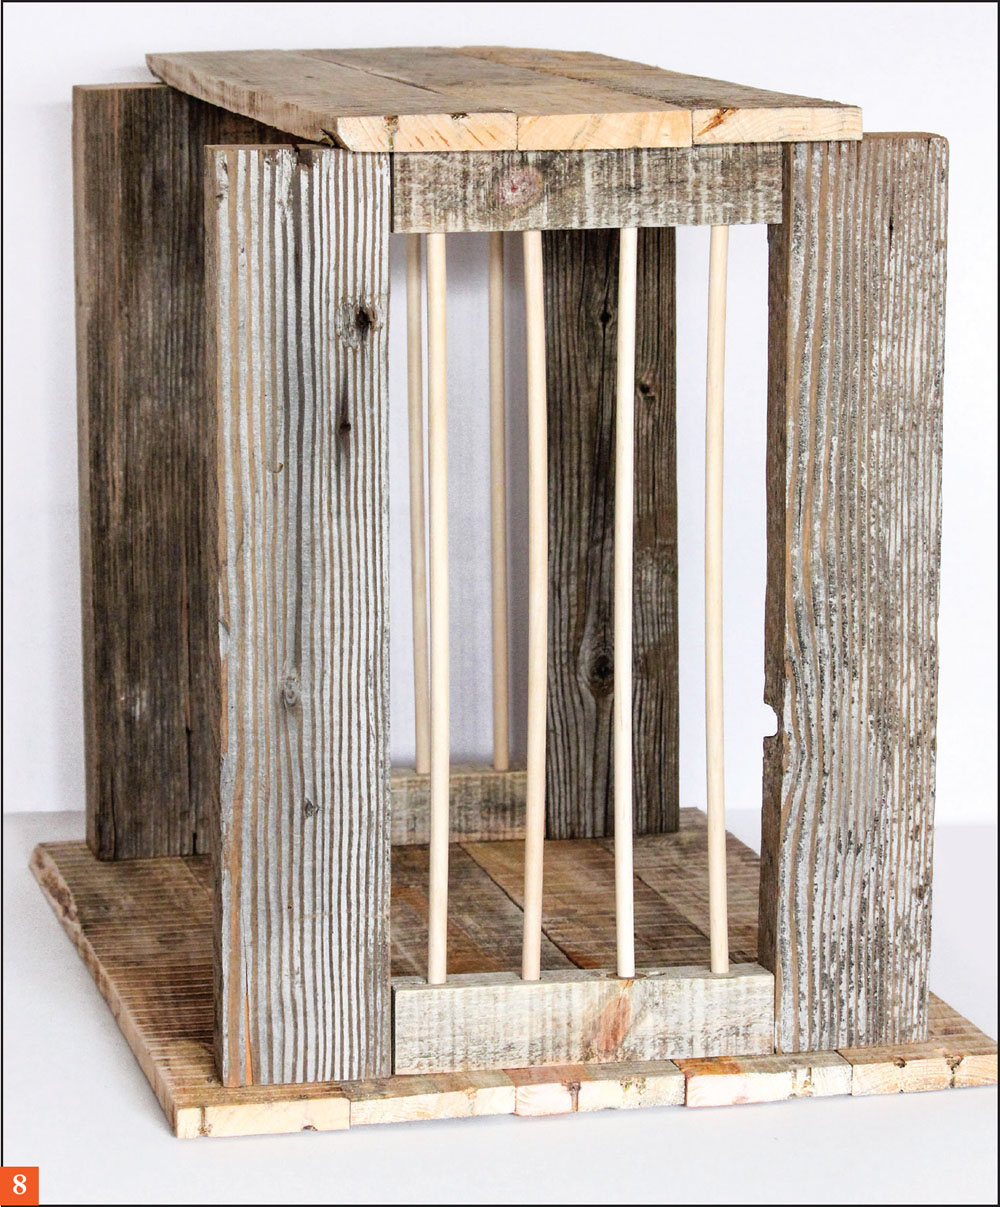
Wooden Crate |
|
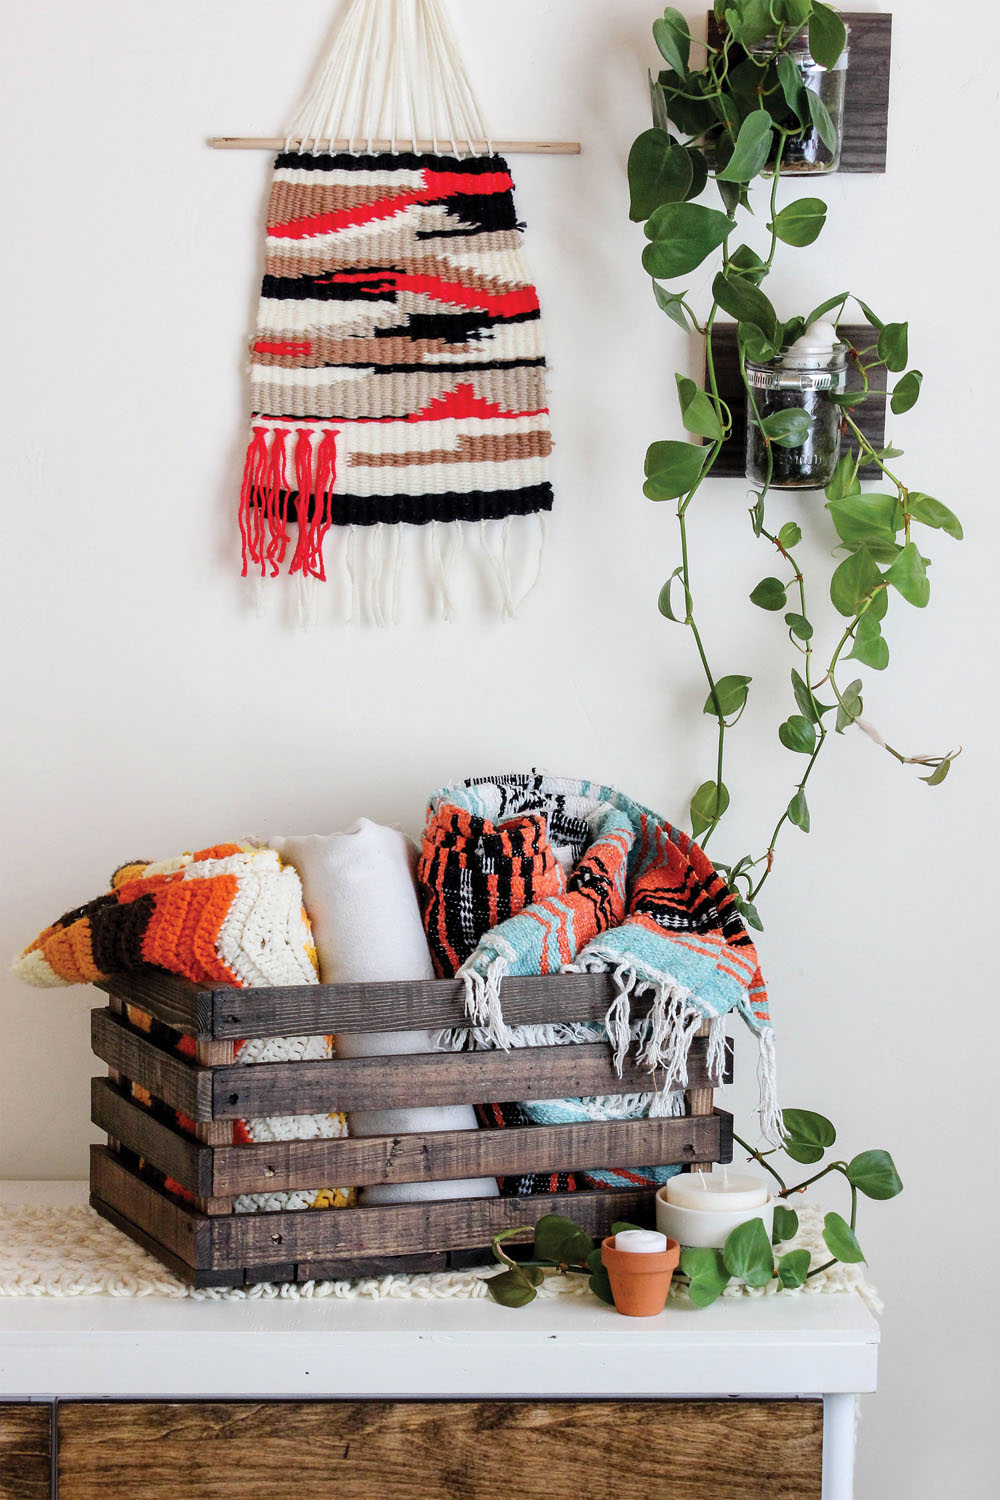
One of the most versatile projects in the book, this Wooden Crate can be customized to any size to allow for a variety of uses. Set them on the floor to hold blankets or dog toys, or use them in conjunction with another project such as the Storage Bench to hold shoes or winter accessories. These instructions result in a crate that’s 16" x 12" x 8" when finished, but it can be altered by shortening or lengthening the sides. This project is great for using up some of the scraps left over from others, and I found I didn’t have to rip down very many boards after digging through my bin of leftovers.
Tools • Nail gun or hammer • 1½" nails • Miter saw • Wood glue • Sandpaper • Table saw |
Materials • Pallet pieces |
Instructions
1. Cut the boards to the listed sizes. Sand them smooth and paint, stain, or wax them, if you choose to finish this piece. Let dry.
2. Take one of the 1" x 2" x 8" scraps. Lay it on a short side and attach four of the 16" boards with a bit of wood glue and nails, spaced out evenly.
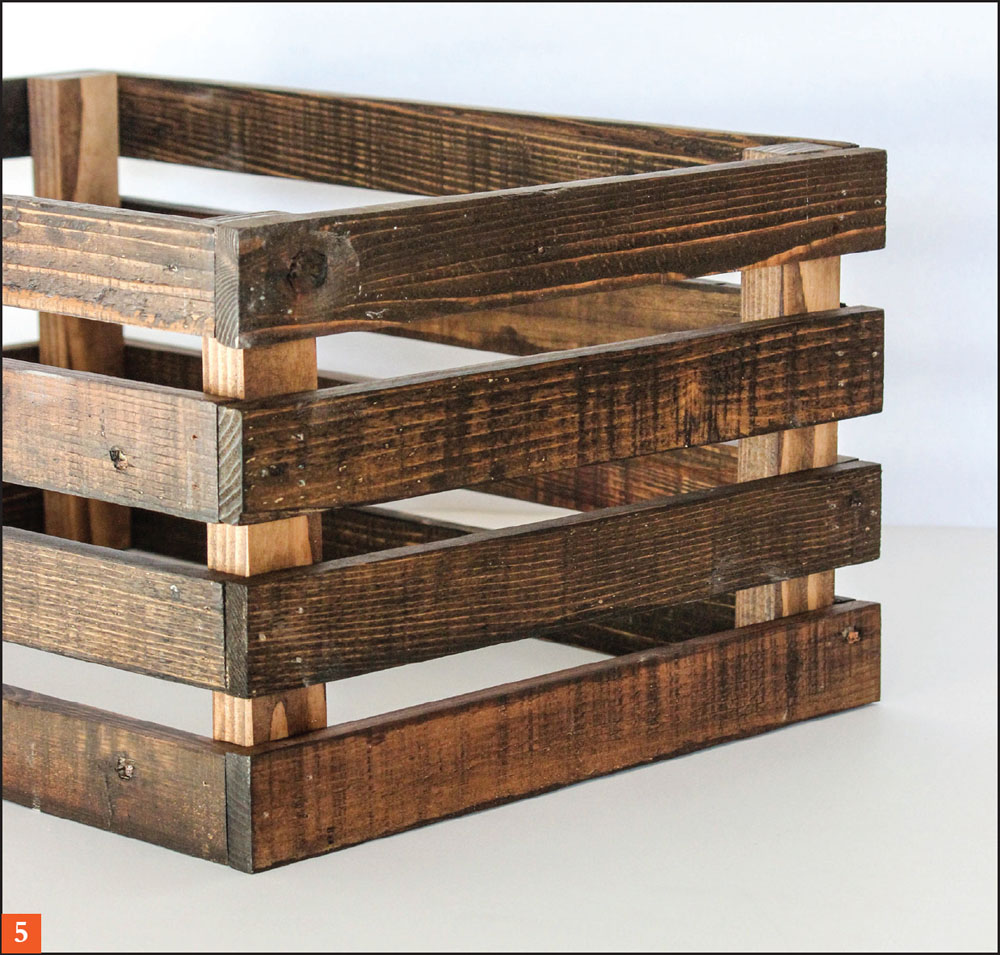
3. Repeat with the other end of the boards, attaching the strips to another one of the scraps.
4. Repeat Steps 3 and 4 with the remaining 16" strips.
5. Take one of the completed sides and attach four of the 12" strips. Repeat with the other completed side.
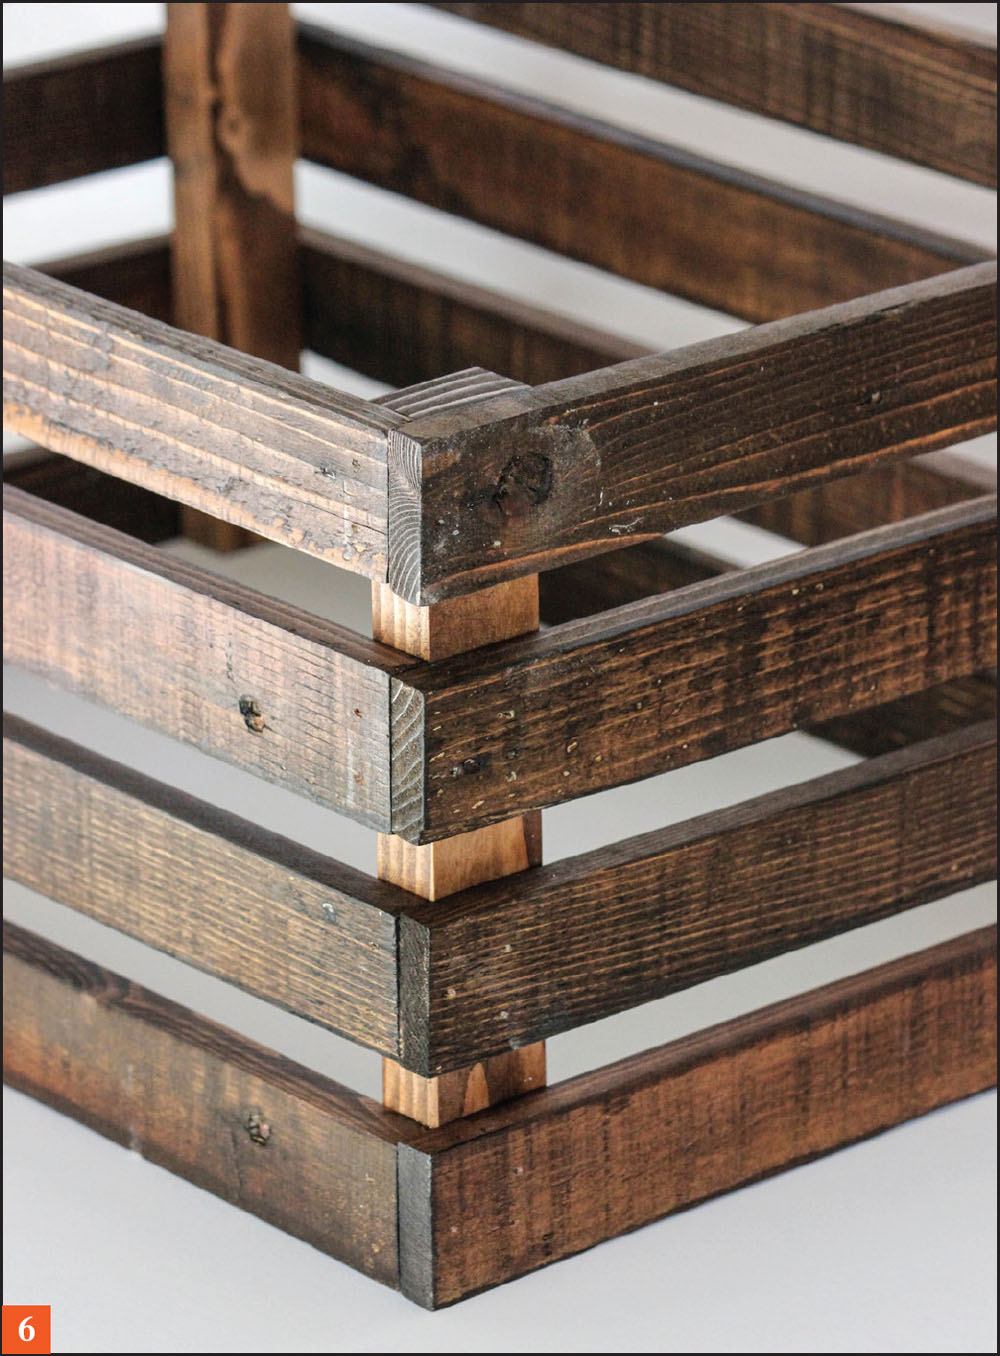
6. Attach the two halves together, gluing and nailing any remaining strips.
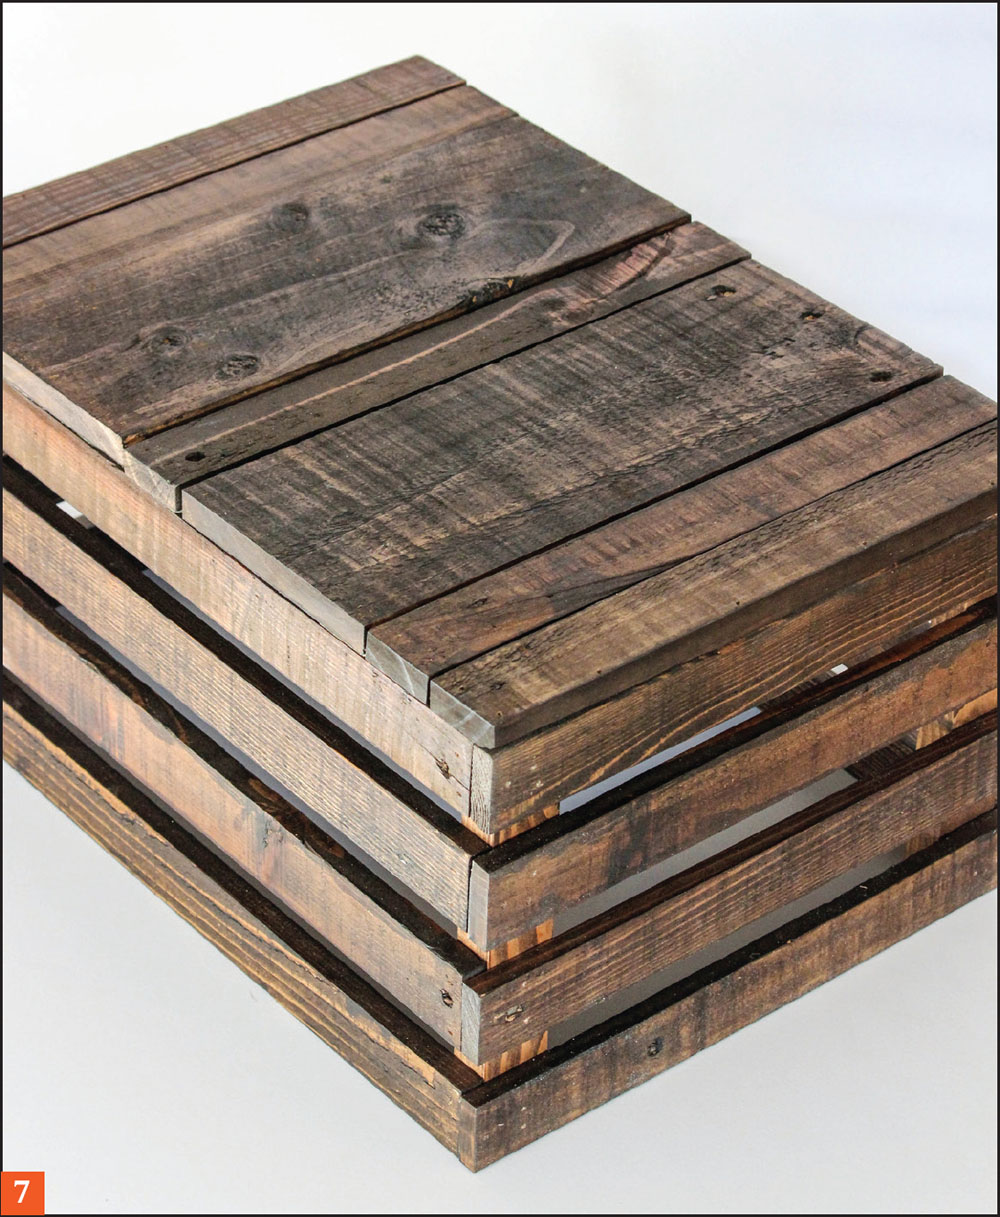
7. Spread a line of glue over the top edge and attach the bottom pieces with nails, alternating the various widths in an appealing pattern.
|
Storage Chest |
|
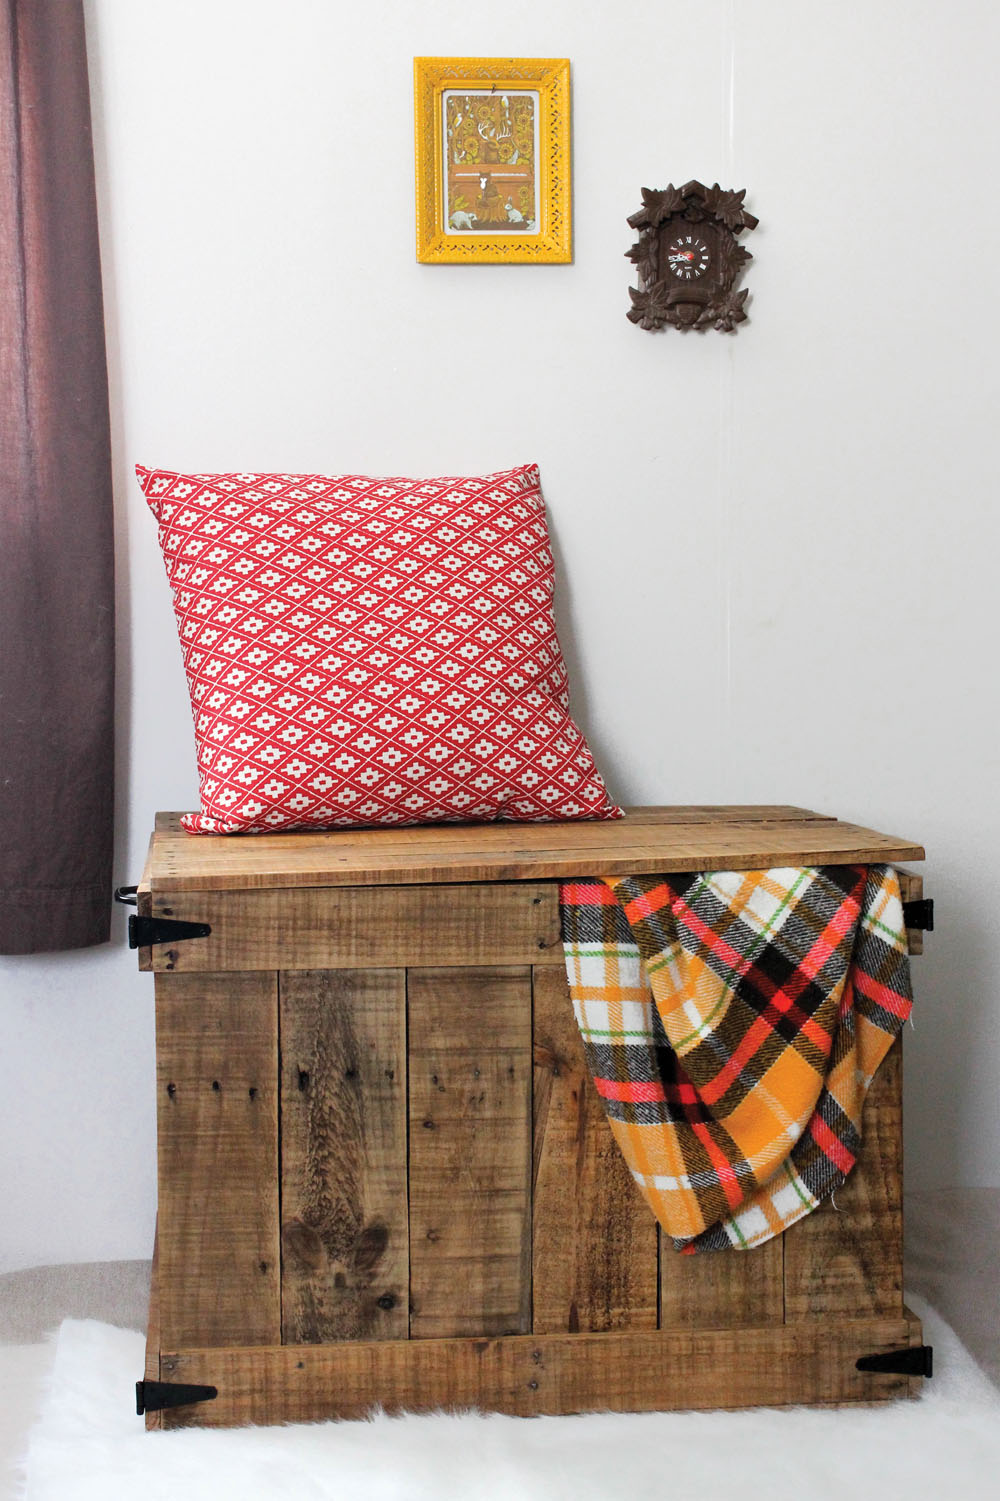
Although the Storage Chest is one of the larger projects in the book, don’t be fooled into thinking it’s one of the more difficult. Perfect for a children’s room or storing away gardening supplies for winter, this chest can be customized to fit any theme or style. For example, a nautical look can be achieved by painting the chest dark blue and drilling holes in the sides for knotted rope handles. You can finish the inside by cutting a few pieces of heavy cardboard ⅛" smaller than the dimensions of each side of the chest, covering one side of the cardboard with spray mount, and wrapping each piece in fabric. Use a staple gun to secure the cardboard pieces to the inside of the chest to give it a more polished look.
Tools • Nail gun or hammer • ¾" nails • 1½" nails • 3" nails • ¾" screws • Miter saw • Wood glue • Sandpaper • Table saw • Phillips screwdriver or drill • Ruler |
Materials • Pallet pieces • Four metal gate brackets • Two metal handles • Two 2" metal hinges • Casters (optional) |
Instructions
1. Sand all pieces smooth.
2. Take one of the 27" accent boards and lay it out with the good side down. Place one of the side boards square with the corner of the accent piece, also with the good side facedown, and then glue and nail it in place with ¾" nails along the top and bottom of the accent board. Repeat with five more side boards, lining them up across the accent board.
3. Repeat Step 2 with the other 27" accent board and six more side boards. These will create the front and back of the chest.
4. The sides of the chest will be created in a similar fashion, using one 20" accent board and four side boards for each. However, the side boards will be centered on the accent piece, leaving 1" on each side to create a lip. Be sure that the bottom edges are flush, and then glue and nail in place. Repeat with the other side.
5. Take all four sides of the chest and repeat Steps 2 through 4, attaching another accent board to the top of each piece.
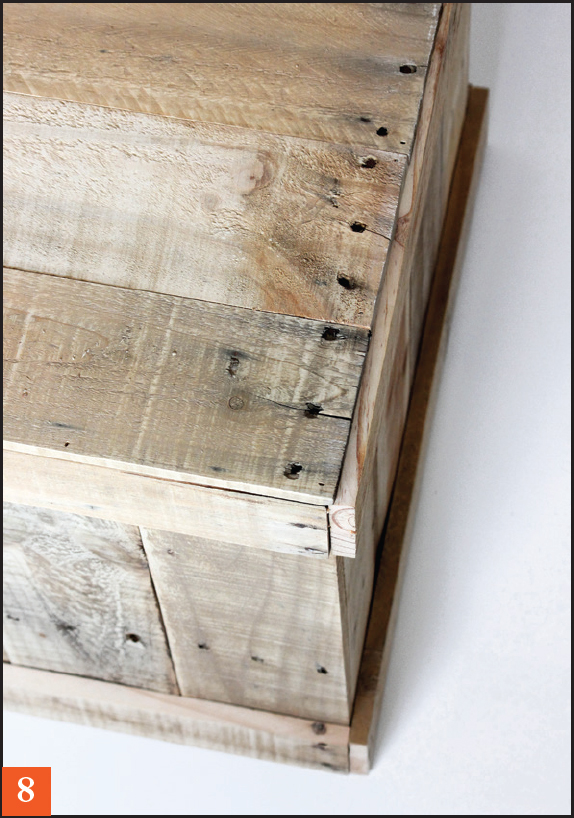
6. Now it’s time to assemble the chest. Take the front and one of the side pieces and stand them up to form a corner. The 1" overhangs created in Step 4 will act as a lip to hold the pieces together more firmly. Carefully attach the two pieces together using glue and the 3" nails along the corners and the 1½" nails along the sides.
7. Repeat Step 6 with the back and remaining side to create the other half of the chest. Line up the two halves and nail them together to create a box.
8. Take the five 27" bottom pieces and lay them across the top of the box with the long edges lining up to create the bottom of the chest. Attach by carefully gluing and nailing all around the edges using 1½" nails. Set aside.

9. Lay out the five lid boards. Measure over 6" from each short side and draw a line all the way across. Place a 16" brace piece on the inside of each line and attach with glue and ¾" nails to hold it in place. Flip the lid over and reinforce the brace boards with ¾" screws across the top.

10. If you wish to paint or stain the chest, do so now. I finished mine using Rustic Pine wax to keep a lighter color and bring out the natural tones of the wood. Set aside to dry.
11. To attach the lid, measure over five inches from each side on the lid, and the same distance on the top edge of the chest. Use the screws that come with the hinge to attach it. Please note that you may need to use smaller screws on the lid so they don’t come through the other side, depending on the size that comes with the hinge.
12. Attach the decorative gate brackets to the four front corners of the chest, and the handles to each side. You may also add casters to the four bottom corners of the chest.
|
Storage Bench |
|
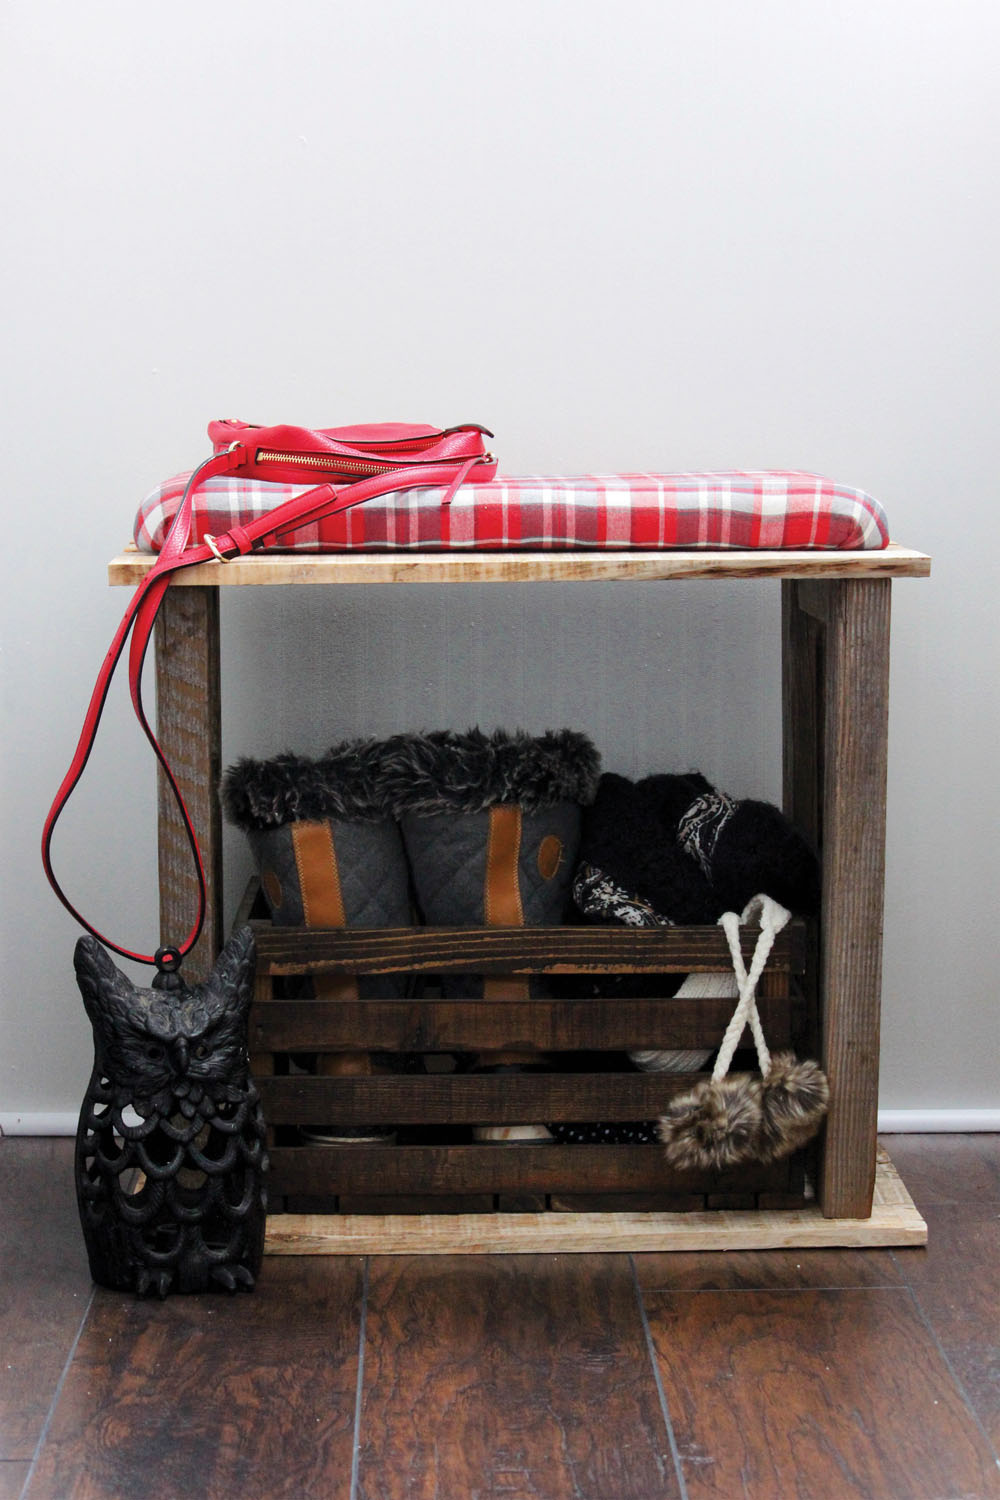
For the Storage Bench, I wanted to create a piece that incorporated one of the Wooden Crates. Using thick pallet boards provides extra support and an interesting visual contrast when placed next to the thin dowel rods on the sides of the bench. When finished, this piece can be used by the front door to hold hats and gloves, in a spare bedroom to hold sheets, or in a children’s room for shoes. This bench was built to hold a 16" x 12" x 8" crate but can be easily adjusted by altering the length and width of the top and bottom boards or the height of the legs.
Tools • Nail gun or hammer • 1" nails • 1½" nails • Miter saw • Wood glue • Sandpaper • Table saw • Drill or drill press • ⅜" drill bit |
Materials • Pallet pieces • Eight 18½" x ⅜" dowel rods |
Instructions
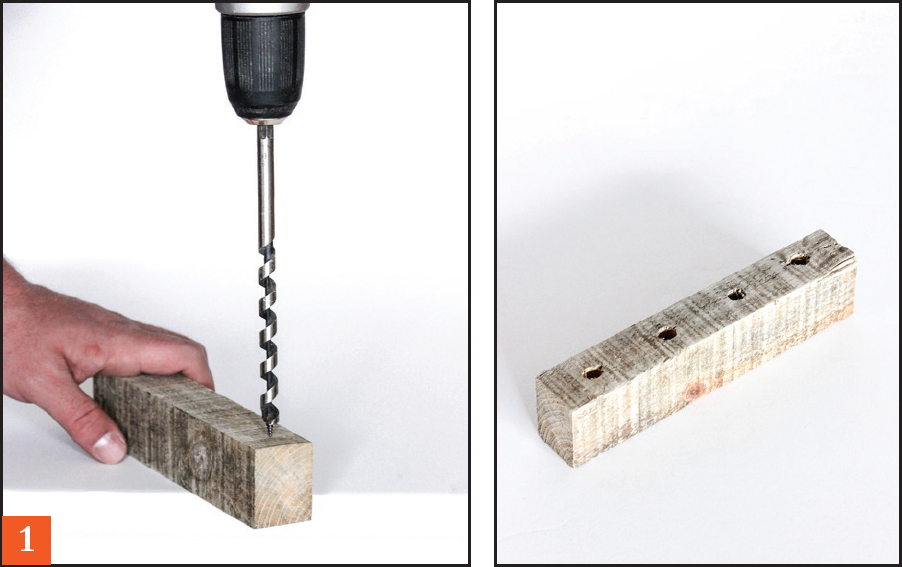
1. Take one of the brace pieces and mark off down the center of the board at 1", 3", 5", and 7". Be sure to position the board so the 1¼" edge is facing up. Drill all the way through the board at each mark using the ⅜" bit. Repeat with the other three brace pieces.
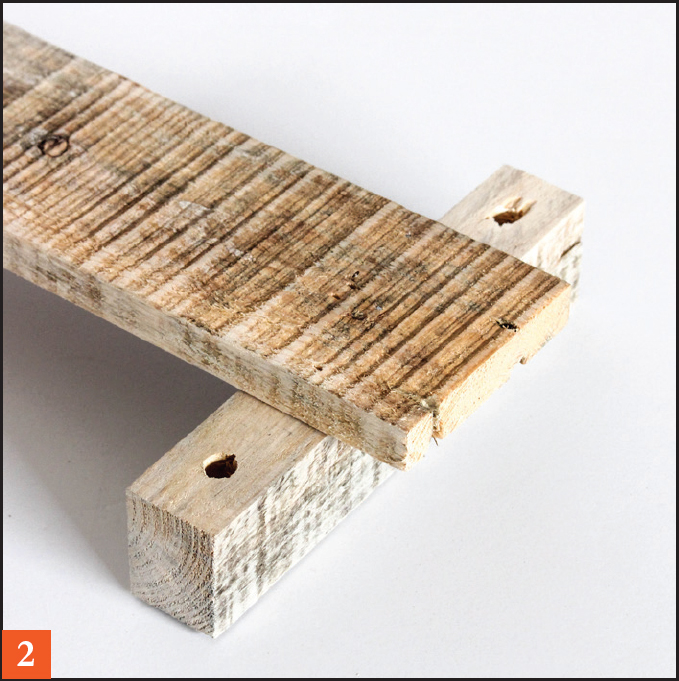
2. Center one of the 24" top pieces over one of the brace pieces in a T shape, with the top piece 1½" from the end. Glue and nail in place with 1" nails. Repeat with the other end of the top piece and another brace piece.
3. Attach two more 24" pieces to the top, one on each side of the center piece.
4. Repeat Steps 3 and 4 with the remaining two brace pieces and three 24" bottom pieces.

5. Take the finished top piece from Step 2 and position one of the legs next to the brace piece, being sure to turn it so the 3½" edge is facing out. Glue and nail in place using 1½" nails. Repeat for the other leg.
6. Attach the two legs on the other side in the same manner, forming all four legs of the bench.
7. Put a dowel rod into each hole, tapping them in with a hammer if needed to make sure they’re snug. If you want them a different color than the bench, you can paint them during this step to make it easier than when the bench is fully assembled.
8. Take the bottom part of the bench and put it in place, carefully lining up all of the dowel rods in the holes.
9. Place two of the remaining 24" pieces on the top and two on the bottom, gluing and nailing them all in place on the legs with 1½" nails.
10. Paint or stain the bench in a color of your choice.