3
Do-It-Yourself Chain Mail
HEATHER BUHLER / YOUTH SERVICES LIBRARIAN
Salt Lake County Library Services
Type of Library Best Suited for: Any
Cost Estimate: $200–$500
Makerspace Necessary? No
PROJECT DESCRIPTION
Making chain mail is a flexible project for many age ranges and groups, and is based around the concept of completing a custom work of chain mail. This project details how to create a European 4-in-1 chain mail weave.
OVERVIEW
Chain mail may seem outdated and irrelevant to a modern makerspace, but it is precisely this uniqueness that gives it its potential. Making chain mail is extremely accommodating and can be modified to any variety of library program ideas. Anime clubs, STEM/STEAM groups, teens, tweens, live-action role-players (LARPers), history enthusiasts, reenactors, medieval/jousting clubs, home businesses, jewelry designers, “lost arts” enthusiasts, and more can find a unique angle to this versatile project material. Making chain mail can also appeal to other niche constituents who may not be normally considered or currently reached by your library. The sky is the limit as new ideas are implemented to fit the needs of individual communities and niches of patrons. Learning to make chain mail can be a single event or it can be designed as a registered series over weeks, months, or a year during which a fully realized project, such as a customized suit of chain mail, is jump-started as a final result. From drop-ins to a fully programmed series, it is as adaptable as your imagination and can be repurposed over and over again.
MATERIALS LIST
- ◦ Chain mail rings (these can be purchased on Amazon as well as from custom suppliers such as Etsy, weavegotmaille.com, and others)
NECESSARY EQUIPMENT
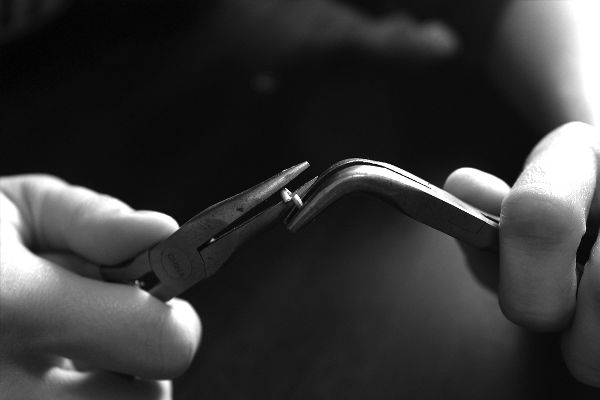
- ◦ Smooth, bent (curved) needle-nose pliers (two per person)
STEP-BY-STEP INSTRUCTIONS
Preparation
Have pliers and chain mail rings available for participants to choose from at the start of the workshop. You also have the option of having them create their own chain mail rings, which will be cut from a wire wound around a rod and cut to make the links. You can certainly have them do this themselves with something as simple as a drill press and dowel to save extra on costs, but you will need another tutorial for that, and there is a time-cost ratio to consider because this will involve a few extra steps. Instead, it is recommended to start them off with the ready-made rings.
Creating Chain Mail
After participants select the gauge of the links and metal type, such as steel, aluminum, or other variety they want to work with, walk them through how to close several rings before linking them together. To close the rings, use toothless, curved, needle-nosed pliers to pull against the two ends of the open ring, twist and line them up, and then press them together so they form as close to a seamless link as possible. This procedure falls into a nice rhythm very quickly. This is also why toothless, curved, needle-nosed pliers are the most recommended tools here (pliers with teeth can nick the rings, which can then catch on skin and clothing), though you are welcome to adapt other pliers as you need.
Once they get the hang of it, this part will go by very quickly. For a novice, over 120 individual rings can be made in less than an hour, which is more than enough for the start and completion of a simple jewelry project, such as a necklace or chain mail bracelet.
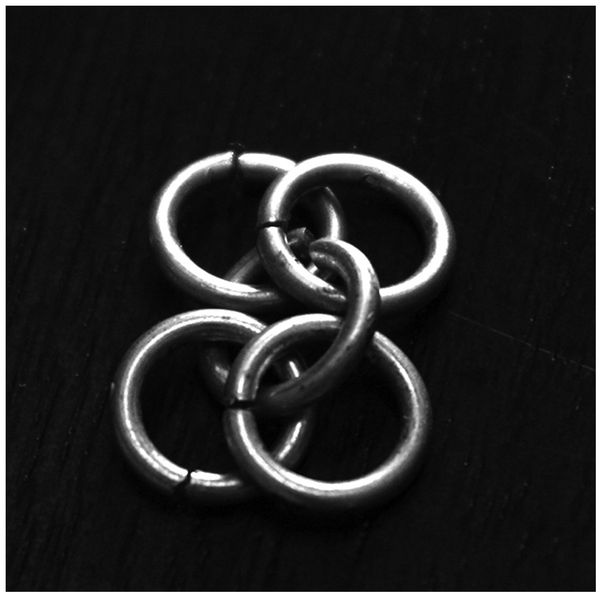
Next, show them how to create a weave by linking the chain mail rings together. Drop four rings inside an opened, fifth ring. Close this fifth ring. Split these four rings in half, lay them down on your surface, and spread them apart. The orientation of the inner and outer rings is absolutely essential here. The first and most important thing you need to know is that the center rings need to be facing the same direction. The outer rings also all need to be facing the same direction. If they do not, the chain mail will not be seamless. Since (from a Western standpoint) we work from left to right, be sure the center rings lean forward while the outer rings all lean back. This will be easier and more intuitive to work with.
Closing the rings

Creating the pattern

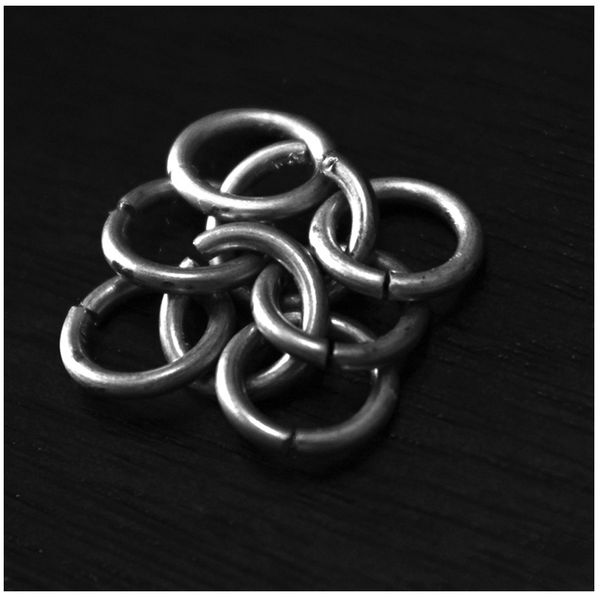
Continuing the pattern

Using the two rings to your right, loop another opened ring (with two new closed rings already attached) through these two rings going down through the first ring and up through the second. Picking up and pinching your chain mail weave together makes the manipulation of linking these easier. Then you will repeat this procedure for as long as necessary to complete the project. This pattern is all it takes. As long as the center rings face one direction while the outer rings face the other, this is how to create a basic, European 4-in-1 chain mail weave.
LEARNING OUTCOMES
- ◦ Participants will learn the foundation of the art of chain mail creation.
- ◦ Participants will also gain skills in mathematics, pattern-making and recognition, self-directed learning, and independent problem-solving.
RECOMMENDED NEXT PROJECTS
There are hundreds of chain mail patterns and tutorials available on websites such as the following ones:
Once participants have the foundation skills mastered, you can follow up with successive workshops on other chain mail weaves, or workshops focused on creating a particular chain mail garment or accessory. Some other chain mail weaves include:
- ◦ Japanese hitoye-gusari (4-in-2 square weave)
- ◦ Japanese hana-gusari (6-in-2 hexagonal weave)
- ◦ Persian 6-in-1 (note: not place of origin; possibly more modern)
- ◦ Etruscan chain mail
- ◦ Byzantine (decorative)
- ◦ Helm chain mail (decorative)
- ◦ Orbital chain mail (decorative)
- ◦ Spiral chain mail (decorative)
- ◦ Celtic chain mail (decorative)
Note: there are many other weaves available.