56
Create Your Own Board Game
JESSICA LOGAN / BRANCH MANAGER
Hamilton Mill Branch, Gwinnett County Public Library
Type of Library Best Suited for: School or Public
Cost Estimate: $1,000–$5,000 for all supplies and equipment
Makerspace Necessary? No
PROJECT DESCRIPTION
The Gwinnett County Public Library hosts a cumulative board game creation series at the Hamilton Mill Branch called Get Your Game On! that incorporates 3D printing and provides an immersive, collaborative learning experience. Participants learn the history of board games and explore various types of games used for entertainment. They discover the importance of design considerations such as theme and mechanics, and reliance on player skill vs. the element of luck. Participants in the series are presented with tips and tricks for success and are encouraged to establish end goals and outline clear game rules prior to construction.
Additionally, students learn how 3D printing can be used to design and create various game pieces and components. The series is held during the summer months and is geared towards middle school and high school students. After the successful creation of their very own board game, participants invite family and friends to a finale event that provides an opportunity for the students to present their game publicly and then compete in an open game play tournament.
OVERVIEW
Get Your Game On! is a cumulative series that consists of six two-hour meetings. Students attending the series meet one day a week, over the course of six weeks. Participants are initially presented with a brief history of board games and given various considerations to help set them up for a successful outcome. Various activities are used to introduce students to 3D printing, including hands-on demonstrations and the use of both Thingiverse and Tinkercad as computer-aided tools for design and printing. Participants work in groups of 2 to 4 and class size is not limited, but each group is prohibited from relying too much on 3D-printed components due to the amount of time it takes to print a three-dimensional object. While our series incorporates the use of 3D-printed components, it would certainly be possible—and less expensive—to re-create this maker project without the use of a 3D printer.
MATERIALS LIST
- ◦ Paper
- ◦ Foam board
- ◦ Cardstock
- ◦ Pens
- ◦ Pencils
- ◦ Markers
- ◦ Paint
- ◦ Paintbrushes
- ◦ Glue and/or tape
- ◦ Tinkercad account
NECESSARY EQUIPMENT
- ◦ Projector or TV
- ◦ Laptops (and wireless connection)
- ◦ 3D printer(s)
- ◦ Filament (various colors preferred)
- ◦ Scissors
- ◦ Rulers
STEP-BY-STEP INSTRUCTIONS
Day 1
Begin by presenting your participants with a brief history of board games illustrating the fact that they have been a source of entertainment for people across the world for thousands of years. Some games that we discuss include the Royal Game of Ur, Chaturanga, Senet, and Mancala. Provide discussion on the various types of board games and the components that will make for a successful final product. Our initial presentation and discussion covers considerations such as theme, mechanics, the number of players the game will accommodate, the desired length of game play, mastery, variance, and randomness.
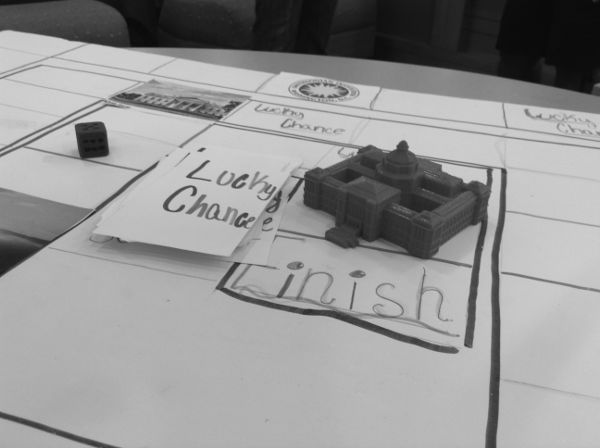
3D printing

Once the students have been provided with this introductory information, they are encouraged to form groups of 2 to 4 based on their interest in a shared theme or game mechanism. We do not require students to work as part of a group and have occasionally encountered a student who wishes to work on a game concept independently. While this is not encouraged due to the time constraints of the project, it is acceptable for dedicated participants, especially if it helps them to feel comfortable during the series.
After forming groups, the students collaborate to determine a set of shared end goals and a clear outline of their games’ rules. A basic concept for the board game and a draft set of rules should be completed by the first day.
Day 2
Groups come back together to share any new ideas that they have thought of during the week and to sketch a diagram of their game. Once the groups have finished their drawing and have come to an agreement on the layout, they then proceed to create a prototype using basic materials such as paper and small objects to represent game pieces. After all of the pieces have been assembled into a rough draft, the participants start testing the game to see how it plays and to determine if there are any alterations that need to be made in either the prototype or the rules.
You may find that some participants initially underestimate the importance of written game rules in favor of board game design and hands-on construction. We provide guidance, but as part of the learning experience, we allow our participants the freedom to follow their own paths to creation. Most quickly learn the value of both preparation and flexibility as their games begin to take shape and eventually evolve through the testing of prototypes.
Day 3
All groups should have a working prototype of their game by the third meeting of the program. Make sure to have your 3D printer set up for this session and familiarize your participants with the equipment by providing a hands-on demonstration. A set of dice makes for a good example because it does not take too long to print, and most groups end up requiring dice for their game. Introduce your participants to Thingiverse and encourage them to search existing designs for desired game components. Commonly requested game pieces include dice, spinner devices, and various small game pieces to represent players; groups can save a considerable amount of time by using existing designs for these. For any group that may wish to design their own game component, have them begin exploring the introductory tutorials on Tinkercad. Make sure that students are aware of common design concerns, such as the need for temporary supports that can be removed after the printing process. Create a list of the desired print jobs from each group and continue printing these between meetings so that everyone has their pieces in time for the finale. This process takes a substantial amount of time, so be sure to plan accordingly and consider limiting the requests per group to a specified amount should the task seem overwhelming or not likely to be completed in time.
While the 3D printing is taking place, the groups begin construction of their final versions of the game by using a foam board to serve as a foundation. We provide a wide range of materials for the groups to use during creation, including cardstock (good for game cards), markers, paint, scissors, rulers, and so on. We also invite the participants to use any recycled materials at their disposal.
Day 4
Participants continue to work together on the construction of game boards and print 3D items as needed. All files for group-designed print jobs are to be submitted by the end of this meeting.
Day 5
Prior to this meeting, library staff review all student 3D print designs to ensure that they will print properly. If changes or alterations are required, staff work with the groups during this final preparation session to finalize the designs. Participants continue to work together on the construction of game boards and to print 3D items as needed. Encourage any group(s) that may have finished early to test their final version thoroughly for any design flaws. Remind participants (and their parents) of the reveal party and open gaming tournament the following week.
Day 6
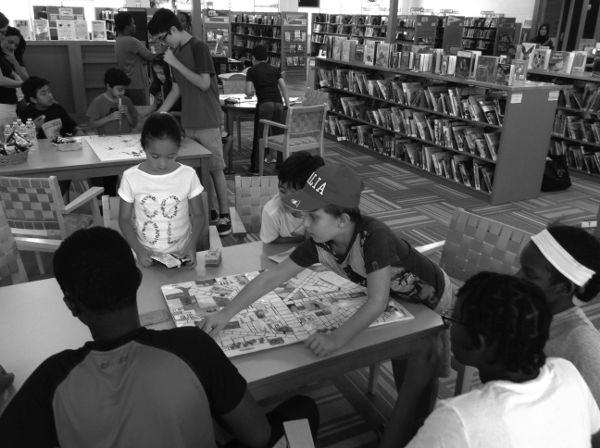
Give each group the opportunity to introduce and explain the rules of their very own board game. Following the reveal, invite friends, family, and the public to play the newly invented games together. Consider adding to the celebratory atmosphere of the event by providing snacks or an awards ceremony (Best Strategy Game, Best Wild Card, Most Unique Theme, etc.). Don’t forget to take lots of pictures and to get a shot of each group with their creation. We find that each finished game ends up having a different theme, mechanism, or twist that makes it unique and intriguing. The games inevitably showcase the creativity of the groups and illustrate their ability to work together and to accomplish goals and objectives . . . all while having fun!
Finale game event

LEARNING OUTCOMES
Through this project, participants will . . .
- ◦ Explore the history of board games and the different types of games commonly used for entertainment.
- ◦ Compare popular gaming strategies and consider important concepts such as theme, mechanics, skill, variance, and randomness.
- ◦ Determine the beginning elements of design and engineering needed to construct a working game board.
- ◦ Learn the basics of operating a 3D printer and develop an understanding of how to use basic computer-aided tools like Thingiverse and Tinkercad to design and/or print small game components.
- ◦ Build teamwork and collaborative skills through the successful invention of a new board game.
RECOMMENDED NEXT PROJECTS
Libraries may consider hosting a 3D MakerCamp that can be held over several days or weeks in which participants learn how to design their own 3D prints using Tinkercad and then print them using the library’s printer. To further expand upon collaborative programming for this age group, libraries could also consider planning a “Pandemic” or “Mystery Box” game series in which a group of students must work together to solve a problem within a specified time limit.