 19. Stamped Mosaic 19. Stamped Mosaic
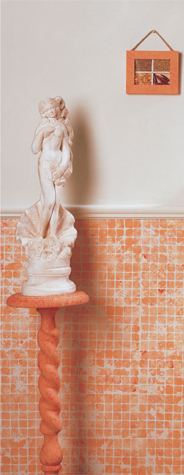
Mosaic tile is a classic choice for walls, but tile can be expensive and time-consuming to install. A painted mosaic is inexpensive and easy to do, and can be changed just as easily as it can be created.
The effect of a tile mosaic is too dramatic to use it in large spaces. Typically, it’s best to choose a small area or the space below a chair rail for this finish. With its irregular coloration and varied pattern, a painted mosaic can cover many flaws, so the preparation steps for this project don’t have to be quite as elaborate as for many other paint projects.
Tools & Materials 
Craft knife
Large paintbrush
Roller and roller tray
Three l" brushes
Small artist’s brush
Repositionable spray glue
Ruler
High-density foam rubber
Low-tack masking tape
Three colors of latex paint
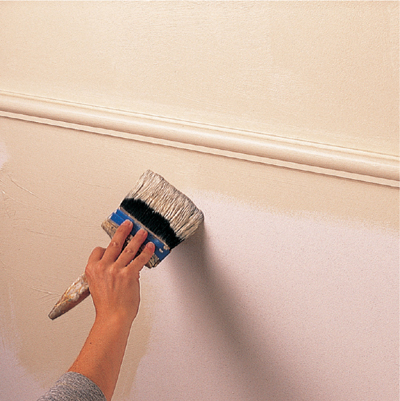
Apply two coats of paint to the entire wall, including the chair rail. Let the second coat dry completely, and then mask off the edges of the chair rail and baseboard.
 How to Create a Stamped Mosaic
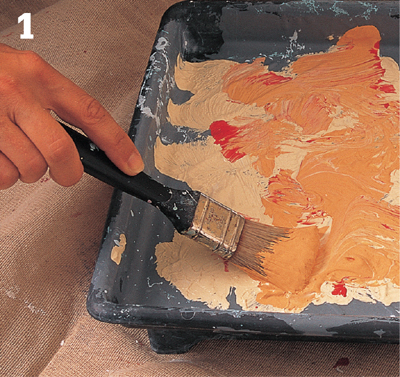
Place some of each paint color into the well of a clean roller tray. Using three clean paintbrushes, dab a generous amount of each color of paint onto the flat surface of the roller tray. It’s fine for the colors to blend a little in a few places, but don’t deliberately mix them.
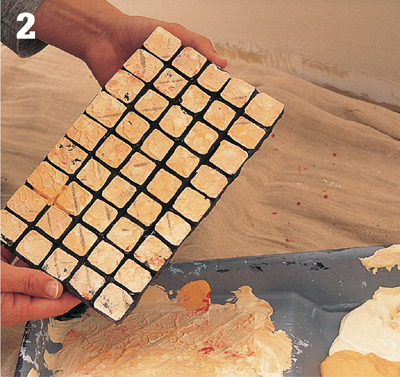
To make a paper template for the stamp, draw a series of tiles divided by quarter-inch grout lines. Round the corners of the squares to resemble tile. Spray the back of the paper with repositionable spray glue and press the pattern onto the high-density foam. Cut around each tile, using a craft knife, and remove the excess pieces. (Try to consistently cut about halfway into the foam.) When the stamp is complete, press it into the paint until it’s well coated but not dripping with paint.
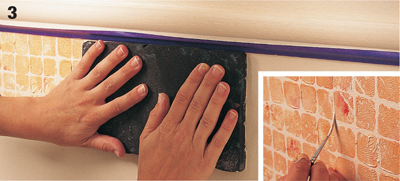
Start in the top, left-hand corner of the area to be decorated. Press the stamp squarely against the wall, being careful not to let it slip. After a moment, peel the stamp away from the wall, pulling it back from one side. Recoat the stamp and position it next to the previous print. Leave a quarter-inch gap to create a grout line. Continue stamping until the project is complete. When stamping below a previous row, align the pattern lines before pressing the stamp to the wall. When adding more paint to the tray, keep the colors separate enough to create the mottled effect you’re working toward. If the tiles bleed together, reestablish the base color with a small artist’s brush (inset).