20. Stenciled Designs 20. Stenciled Designs
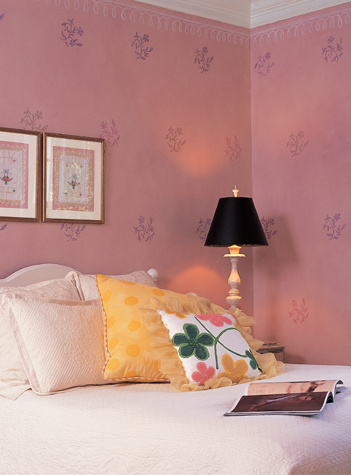
Stenciled motifs can be used to highlight an area or feature of a room or to mimic architectural details such as chair rails or crown molding.
Before beginning a project, carefully plan the placement of the design. Measure the walls and create an arrangement that doesn’t produce any partial repeats. When you’ve come up with a plan, stencil the design on paper and tape it to the wall to make sure it works as planned. Start in the most prominent area, and work outward. If it’s necessary to avoid interruptions, such as windows, doors, or heating vents, you can slightly alter the spacing between repeats to accommodate them.
Most precut stencils have a separate plate for each color and are numbered according to the sequence of use. A single plate sometimes is used for several colors if the spaces between the design areas are large enough to be covered with masking tape. When using stencils of this type, apply the largest part of the design first. When stenciling borders, it’s generally best to apply all the repeats of the first color before applying the second color.
You can make custom stencils by tracing designs onto transparent Mylar sheets and cutting them out. To coordinate stencils with home furnishing such as wallpaper, fabric, or artwork, use a photocopy machine to enlarge or reduce the patterns to the desired size, and then adapt a design from them.
For painting hard surfaces, such as walls and woodwork, use craft acrylic paint or oil-based stencil paint in liquid or solid form. After stenciling over finished wood, apply a coat of clear finish or sealer to the entire surface.

 How to Make a Custom Stencil
Tools & Materials 
Paper
Colored pencils
Transparent Mylar sheets
Masking tape
Fine-point permanent-ink marking pen
Cutting surface, such as a self-healing cutting board or cardboard
Mat knife
Metal ruler
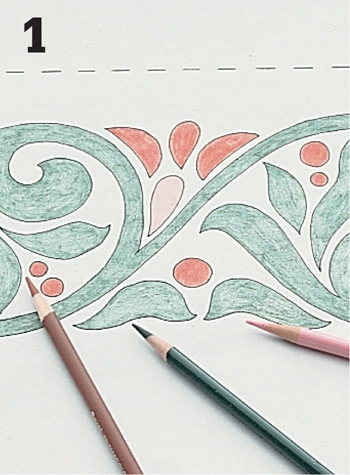
Draw or trace the design onto a sheet of paper. Repeat the design, if necessary, so it is 13" to 18" long, making sure the spacing between repeats is consistent. Color the design, using colored pencils. Mark placement lines to help you position the stencil on the wall.

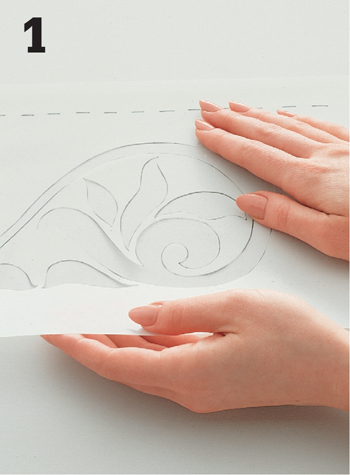
Position a Mylar sheet over the design so the edges of the sheet extend beyond the top and bottom of the design by at least 1". Secure the sheet with masking tape. Trace the areas that will be stenciled in the first color, using a marking pen. Transfer the placement lines.
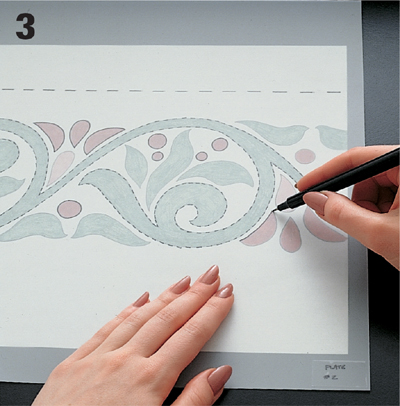
Trace the design areas for each additional color onto a separate Mylar sheet. To help you align the stencil, outline the areas for previous colors with dotted lines. Layer all of the Mylar sheets, and check for accuracy. Using a mat knife and straightedge, trim the outer edges of the stencil plates, leaving a 1" to 3" border around the design.
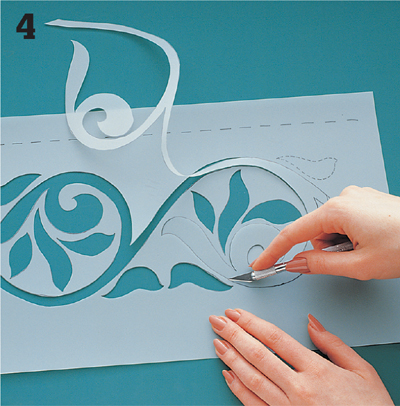
Separate the Mylar sheets. Cut out the traced areas on each sheet, using a mat knife. Cut the smallest shapes first, then cut the larger ones. Pull the knife toward you as you cut, turning the Mylar sheet, rather than the knife, to change the cutting direction.
How to Stencil on Hard SurfacesTools & Materials
Carpenter’s level and pencil
Stencil brushes
Artist’s brush
Precut or custom stencil
Masking tape
Spray adhesive, optional
Craft acrylic paints, or liquid or solid oil-based stencil paints
Clear wood finish and paintbrush if stenciling on wood
Disposable plates
Paper towels
Mark the placement for the stencil on the surface with masking tape. Or, draw a light reference line, using a carpenter’s level and a pencil. Position the stencil plate for the first color, aligning the placement line with the tape or pencil line. Secure the stencil in place, using masking tape or spray adhesive.
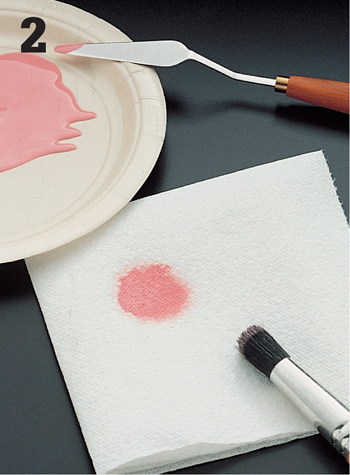
Place 1 to 2 tsp. of acrylic or oil-based paint on a disposable plate. Dip the tip of a stencil brush into the paint. Blot the brush onto a folded paper towel, using a circular motion, until the bristles are almost dry.
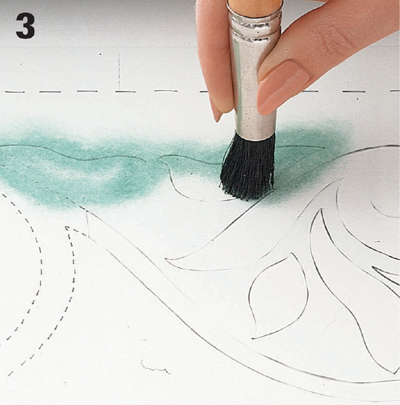
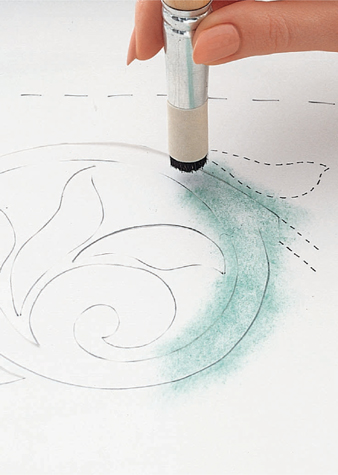
Hold the brush perpendicular to the surface. Apply the paint within the cut areas of the stencil, using a circular motion. Stencil all of the cut areas of the first stencil plate, and allow the paint to dry. Remove the stencil.
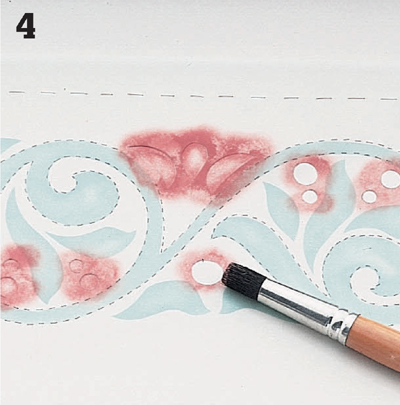
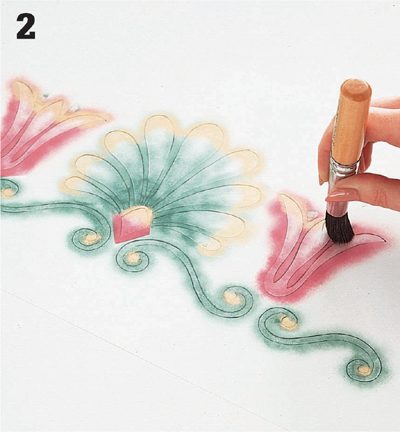
Secure the second plate to the surface, matching the design. Apply the second paint color in all of the cut areas. Repeat the process for any remaining stencils and colors unitl the design is completed. After all of the paints are completely dry, touch up any glitches or smudges on the surface, using background paint and an artist’s brush.
Stenciling Variations
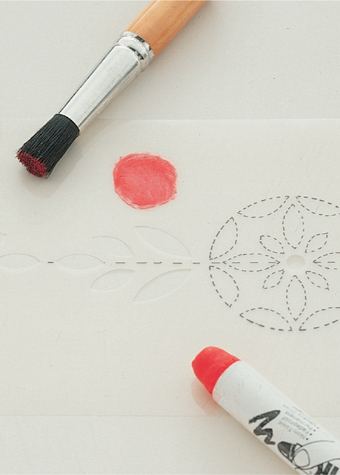
To stencil with solid paint, or crayon paint, remove the protective coating from the crayon tip, using a paper towel. Rub a 1-1/2" circle of paint onto a blank area of the stencil. Load a stencil brush by lightly rubbing the brush over the paint in a circular motion, first in one direction, then in the other direction.
While the circular method of stenciling results in a blended finish, the stippling method produces a deeper, textured appearance. To stipple, wrap masking tape around the bristles of a stenciling brush, 1/4” from the ends. Hold the brush perpendicular to the surface, and apply the paint using a dabbing motion. This method is also used to stencil fabric.
Techniques for Shaded Designs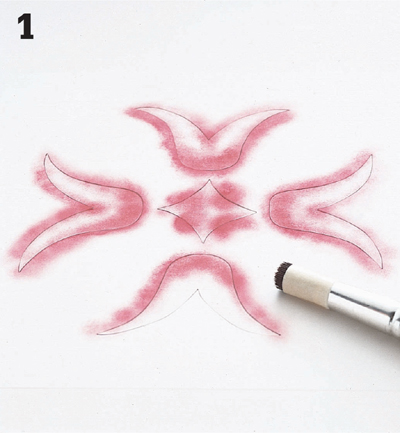
Apply paint within the cut areas of the stencil, leaving the centers lighter than the edges. For an aged, fade-away effect, use a heavier touch at the base of the motif and a lighter touch at the top.
Apply a complementary or darker color of paint, shading the outer edges of the cut areas.
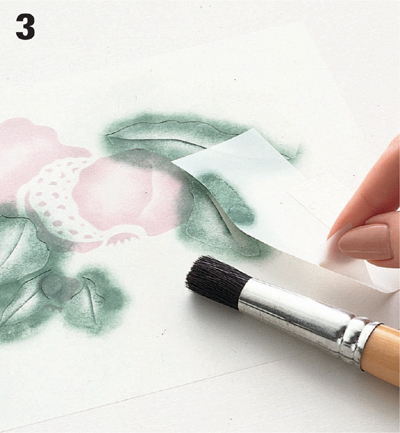
Apply paint to the outer edges of the cut areas and allow it to dry. Hold a piece of Mylar in place to cover a portion of the area, and apply paint next to the edge of the Mylar. For example, cover one-half of a leaf to stencil the veins.
Cleaning Stencil Brushes 
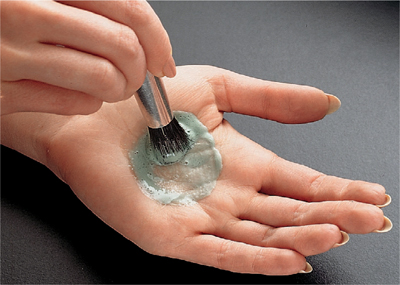
Clean stencil brushes used to apply acrylic paints by applying a small amount of dishwashing detergent to the brush. Rub the bristles in the palm of your hand in a circular motion until all of the paint is removed. Rinse with water and allow the bristles to dry. To remove oil-based paint, first clean the brush with mineral spirits and dry it on paper towels. Then, wash the brush with detergent and rinse with water.