26. Words on Walls 26. Words on Walls
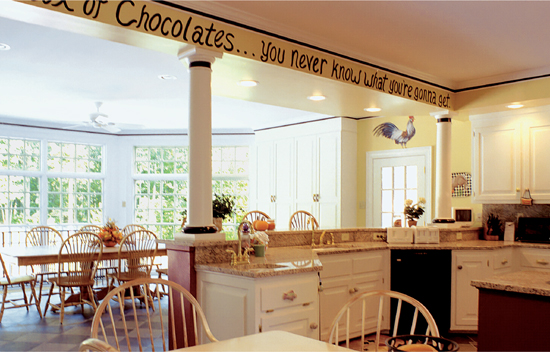
The pages of high-end decorating magazines are filled with pictures of walls that talk. The walls don’t literally speak, of course. Instead, they display favorite folk sayings, bits of poetry, or quotes from famous and infamous people throughout history.
If you have a favorite saying, you’re ready to get to work. If not, spend some quality time with books of quotations, such as the oxford Book of Quotations, Bartlett’s Famous Quotes and the Quotable woman. These books are filled with interesting, inspirational quotes from a wide variety of sources. So, too, are Internet sites that feature quotations. Type “famous quotations” into a search engine and browse until you find something that inspires or amuses you. You’re likely to live with these words for a while, so be sure to choose something that reflects your personality and interests or your sense of humor.
One key to a project like this is making the words proportional to the space where they’re displayed, and that can take some trial and error. (This is where patience comes in handy.) If you’re working with a soffit or other small linear space, try making the letters about two-thirds the height of the soffit. You may prefer to have the words larger or smaller, but two-thirds is a good starting point.
The font you choose should fit the room as well as the saying. A casual font with a little attitude works well for a short, funny saying. Flowing script sets the tone for poetry or sentimental thoughts. Extremely complex fonts are difficult to work with and difficult to read, so it’s often best to avoid them.
Tools & Materials 
Laser or carpenter’s level
Stylus or dull pencil
Graphite paper
Artist’s paintbrushes
Craft paint
Craft paint in a slightly darker color (optional)
 How to Paint Words on Walls
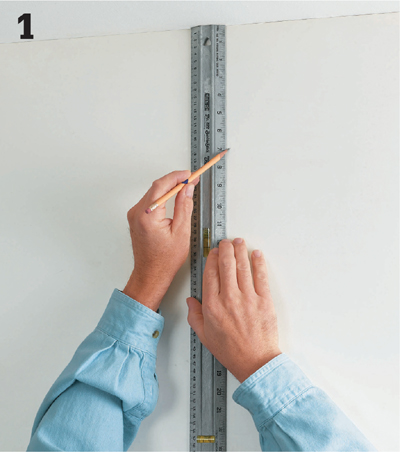
Measure the available space and evaluate the quotations you’re considering. Imagine where you would break the lines and how you want the words stacked or displayed.
Brushes
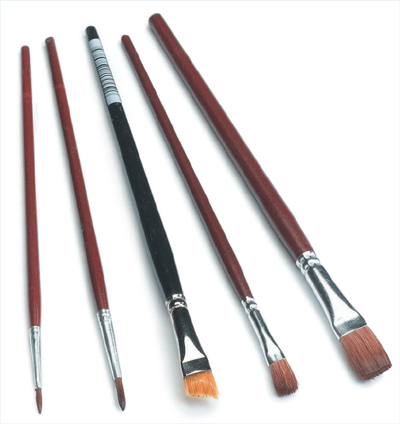
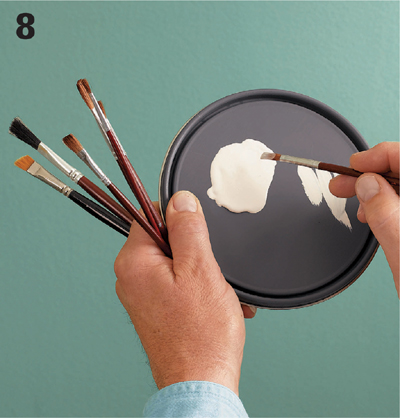
High-quality artist’s brushes create clean lines and can be shaped to create curved lines and shadows.
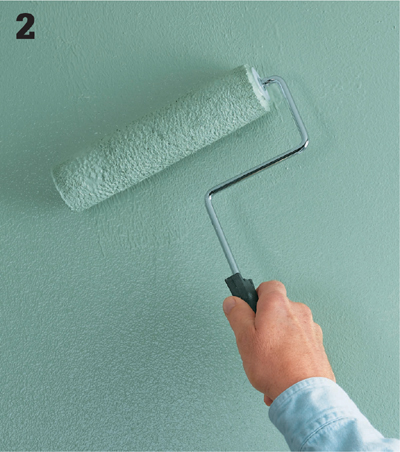
If necessary, fill any holes or dents in the wall and repair any cracks. Prime and paint the wall with two coats of eggshell or flat latex paint.
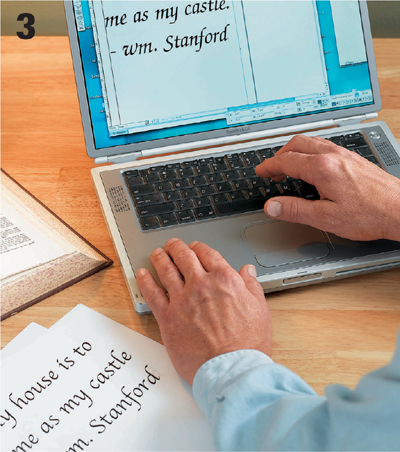
On a computer, select a font and size, and create a design for the words. Refer to the wall measurements taken in Step 1, and arrange the words of the quotation to fit.
Print out the quotation and trim away the edges of the paper. Tape the printouts on the wall and evaluate the size and placement of the words. Keep trying sizes and arrangements until you’re satisfied.
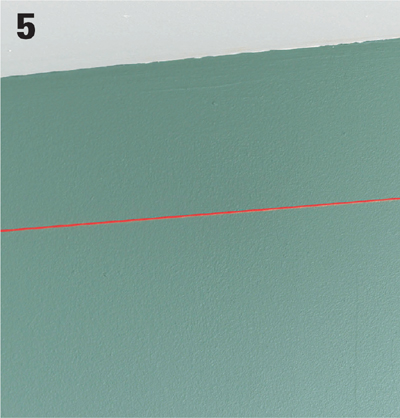
Set up a laser level to shoot a baseline for the words onto the wall. If you don’t have a laser level, use a carpenter’s level or a bubblestick and a pencil to create a faint line.
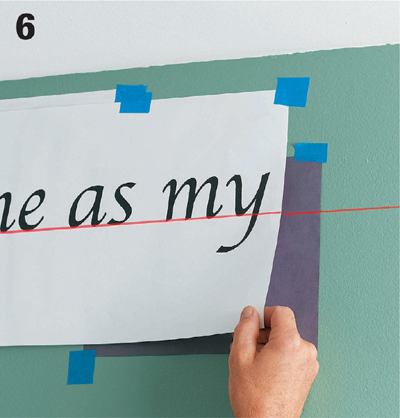
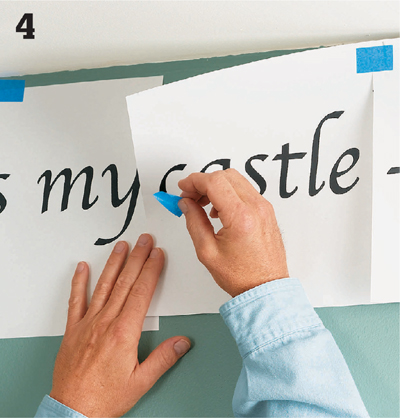
Hold a piece of graphite paper against the wall, and tape the printout over it. (Be sure you’re using graphite paper, not carbon paper. It doesn’t smudge.) Line up the base of the letters with the laser line or pencil guideline.
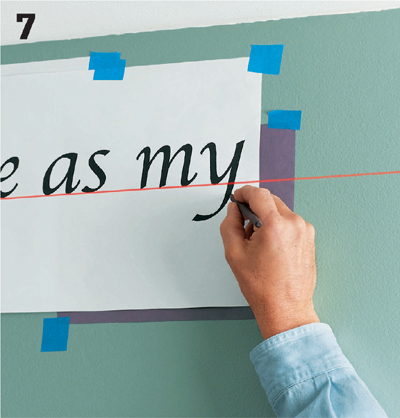
Trace the words, using a stylus or other blunt tool with a blunt end. The goal is to create a pattern line without tearing the printout or the graphite paper. Remove the printouts and graphite paper and check the pattern lines. Fill out any faint lines or skipped areas with a pencil.
Pour a small puddle of the lighter paint color onto a plastic palette. Dampen an angled paintbrush with water and pat it on a clean paper towel. Dip the corner of the long side of the brush into the craft paint and draw it across the palette to get the paint flowing smoothly.
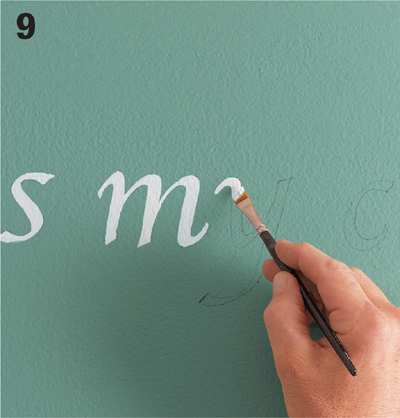
Paint the large, straight, open areas of the letters. Wash out the brush in plain water about every other time you load it, and continue to load only the long side of the brush with paint. If you have to stop in the middle of the project, wash out the brush with soap and water and reshape it before it dries.
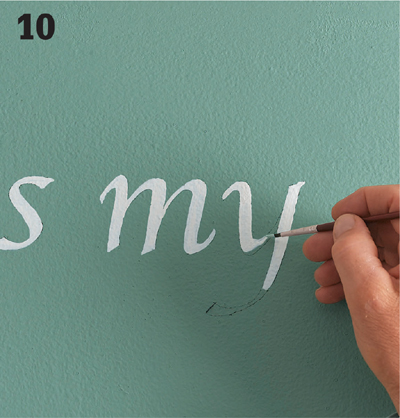
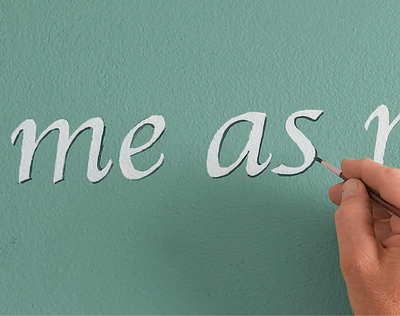
Use a round-tip brush to paint the curved portions of the letters. Dampen the brush and load only one side with paint. Pull the brush across the palette to distribute the paint evenly, as you did with the angled brush. Draw the brush along the pencil lines, pushing down slightly more as you sweep around curves. The brush should flow along the curves and leave graceful, accurate lines.
Variation
Wash the palette and the angled brush. Pour a small puddle of the darker paint onto the palette and load one side of the damp brush with it. Stroke the brush across the palette until the paint blends with the water on the brush and runs from dark on the long side of the brush to light on the other side. Lightly sweep the brush around the inside edges and curves of the letters, creating a slight shadow.