Swift is an elegant language. It mixes the efficiency of a compiled language with the flexibility and modern features of many scripting languages.
This chapter introduces some of the more common concepts in Swift, such as properties and collection classes. It also shows how properties are used from within Xcode when dealing with user interface elements. This sounds like a lot to accomplish, but Swift, the Foundation framework, and the Xcode tool provide a wealth of objects and methods and a way to build applications with ease.
Using let vs. var
Once you define a constant, you cannot change the value.
Caution
Xcode will now warn you if you declare a variable and never change its value. It will recommend using let instead of var.
This will not give you any errors because myName is now a variable. This does not relate to only Strings and Ints, but it can also be used with collections and other objects.
Variables give you more flexibility, so why would anyone ever want to use a constant? The quick answer is performance. If you know that you have a value that will not change, the compiler can optimize that value as a constant.
Understanding Collections
Understanding collections is a fundamental part of learning Swift. In fact, collection objects are fundamental constructs of nearly every modern object-oriented language library (sometimes they are referred to as containers). Simply put, a collection is a type of class that can hold and manage other objects. The whole purpose of a collection is that it provides a common way to store and retrieve objects efficiently.
There are several types of collections. While they all fulfill the same purpose of being able to hold other objects, they differ mostly in the way objects are retrieved. The most common collections used in Swift are the Array and the Dictionary.
Both of these collections can be created as constants or regular variables. If you create a collection as a constant, you must fill it with the objects at the time of creation. It cannot be modified after that point.
Using Arrays
The Array class is like any other collection, in that it allows the programmer to manage a group of objects. An array is an ordered collection, which means that objects are entered in an array in a certain order and retrieved in the same order.
Note
There are some methods for working with arrays that allow you to change the order of the objects or to add an object at a specific location in the array.
Accessing Objects in an Array
In fact, every collection type, including, Array and Dictionary, contains a count property.
Adding Objects to an Array
Adding Multiple Objects to an Array
Adding a String to the Beginning of an Array
The array now contains One, Two, Three.
Fast Enumeration
The magic happens in line 2 of Listing 8-5. You tell Swift to assign each value of myArray to a new constant called myString. You can then do whatever you want to do with myString. In this case, you just print it. It will go through all of the objects in the array without you having to know the total number of objects. This is a fast and effective way to pull items out of an array.
Removing an Object
The output from Listing 8-6 will be One, Three. This is because you removed the object with the index of 1. Remember, this is the second object in the array because array indices always begin at 0.
You have seen how flexible Swift is in letting you interact with arrays. They are powerful collections that you will use on a regular basis as a programmer. This section covered the basics of arrays, but there are many more things arrays can do.
Using the Dictionary Class
The Swift Dictionary class is also a useful type of collection class. It allows the storage of objects, just like the Array class, but Dictionary is different in that it allows a key to be associated with the entry. For example, you could create a dictionary that stores a list of attributes about someone such as a firstName, lastName, and so on. Instead of accessing the attributes with an index like with an array, the dictionary could use a String like "firstName". However, all keys must be unique—that is, "firstName" cannot exist more than once. Depending on your program, finding unique names is normally not a problem.
Iterating Over a Dictionary
Dictionaries are a great way to organize data that does not need to be ordered. It is also a great way to look up data based on a certain key. They are very flexible in Swift and should be used to organize and optimize your code.
Creating the BookStore Application
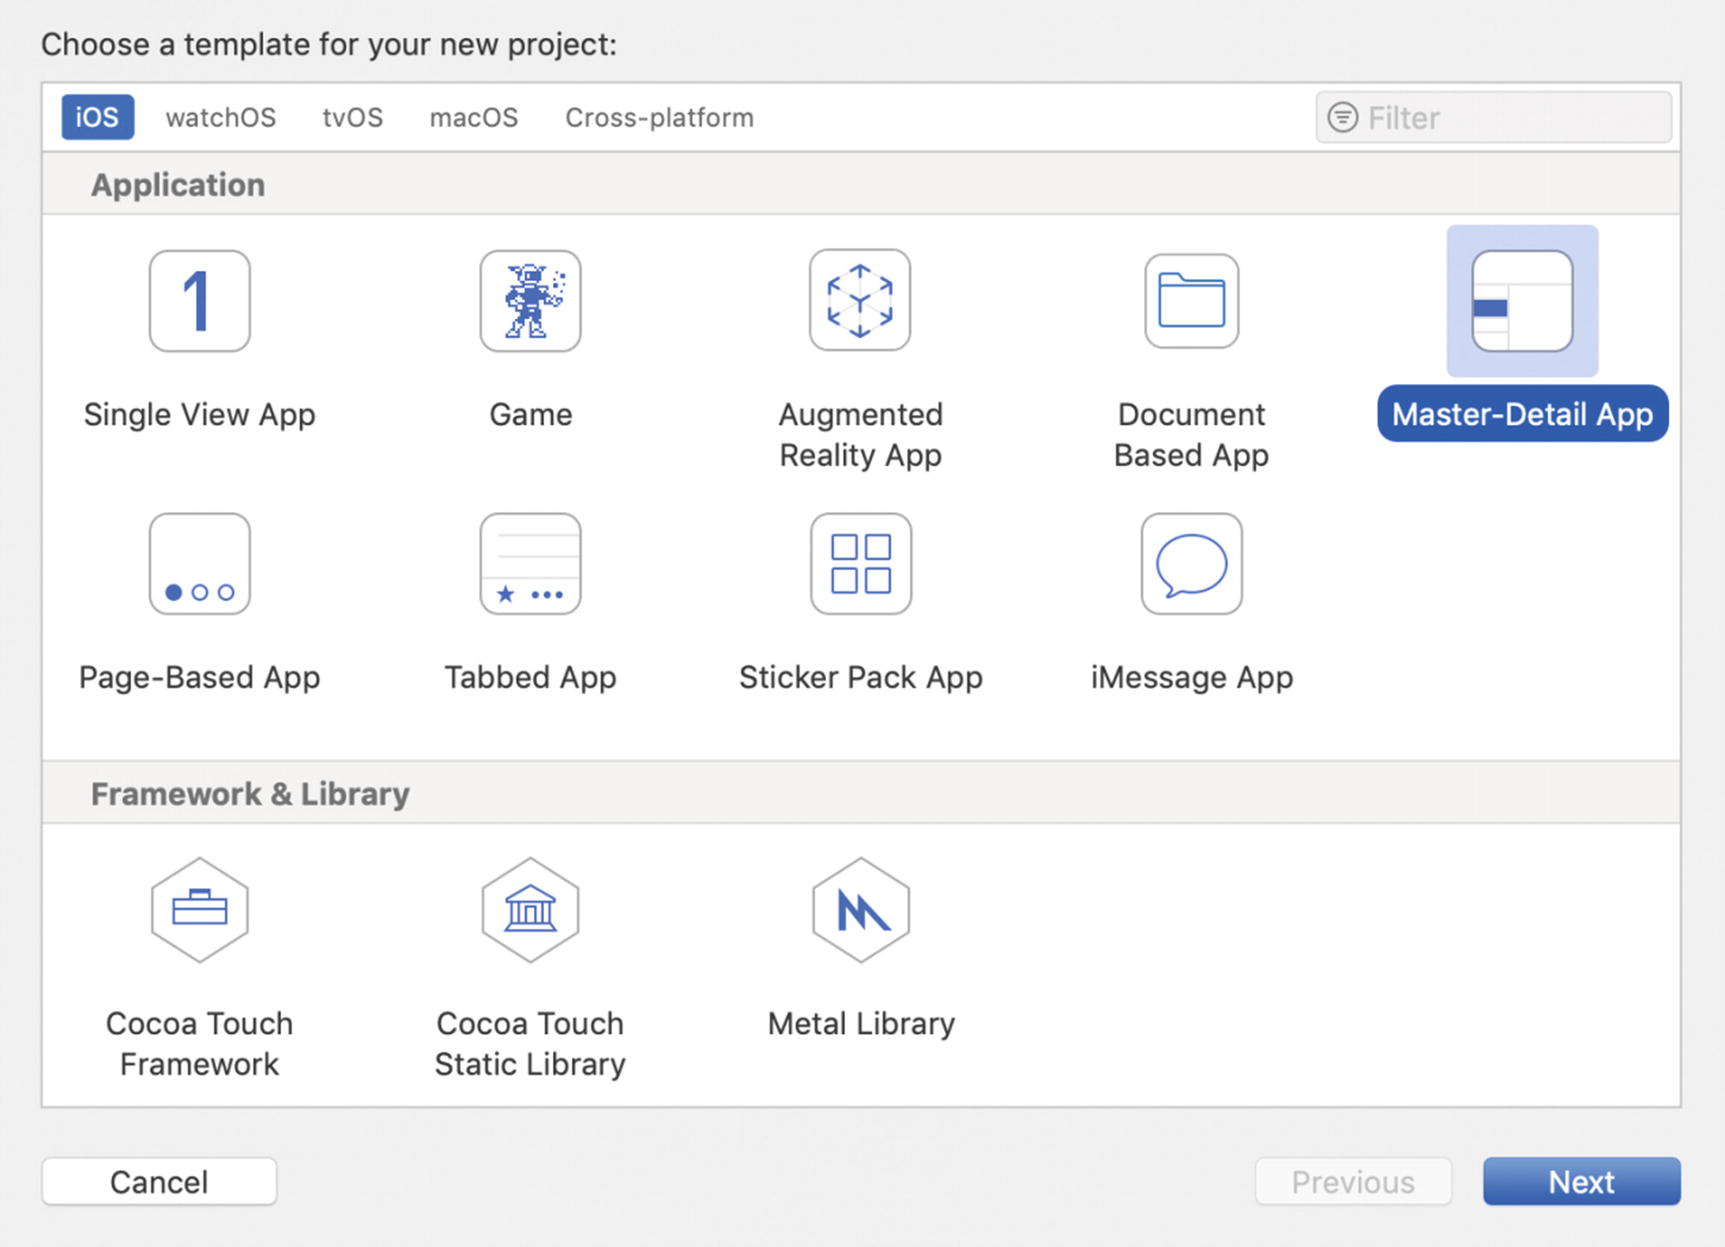
Creating the initial project based on the Master-Detail Application template
- 1.
Click the Next button and name the project BookStore, as shown in Figure 8-2. The company name is required—you can use any company name, real or otherwise. The example uses com.innovativeware, which is perfectly fine. Make sure the Language is set to Swift. Do not check the Use Core Data checkbox.
Note This type of app would be a good candidate for using Core Data, but Core Data is not introduced until Chapter 11. You will use an array for data storage in this app.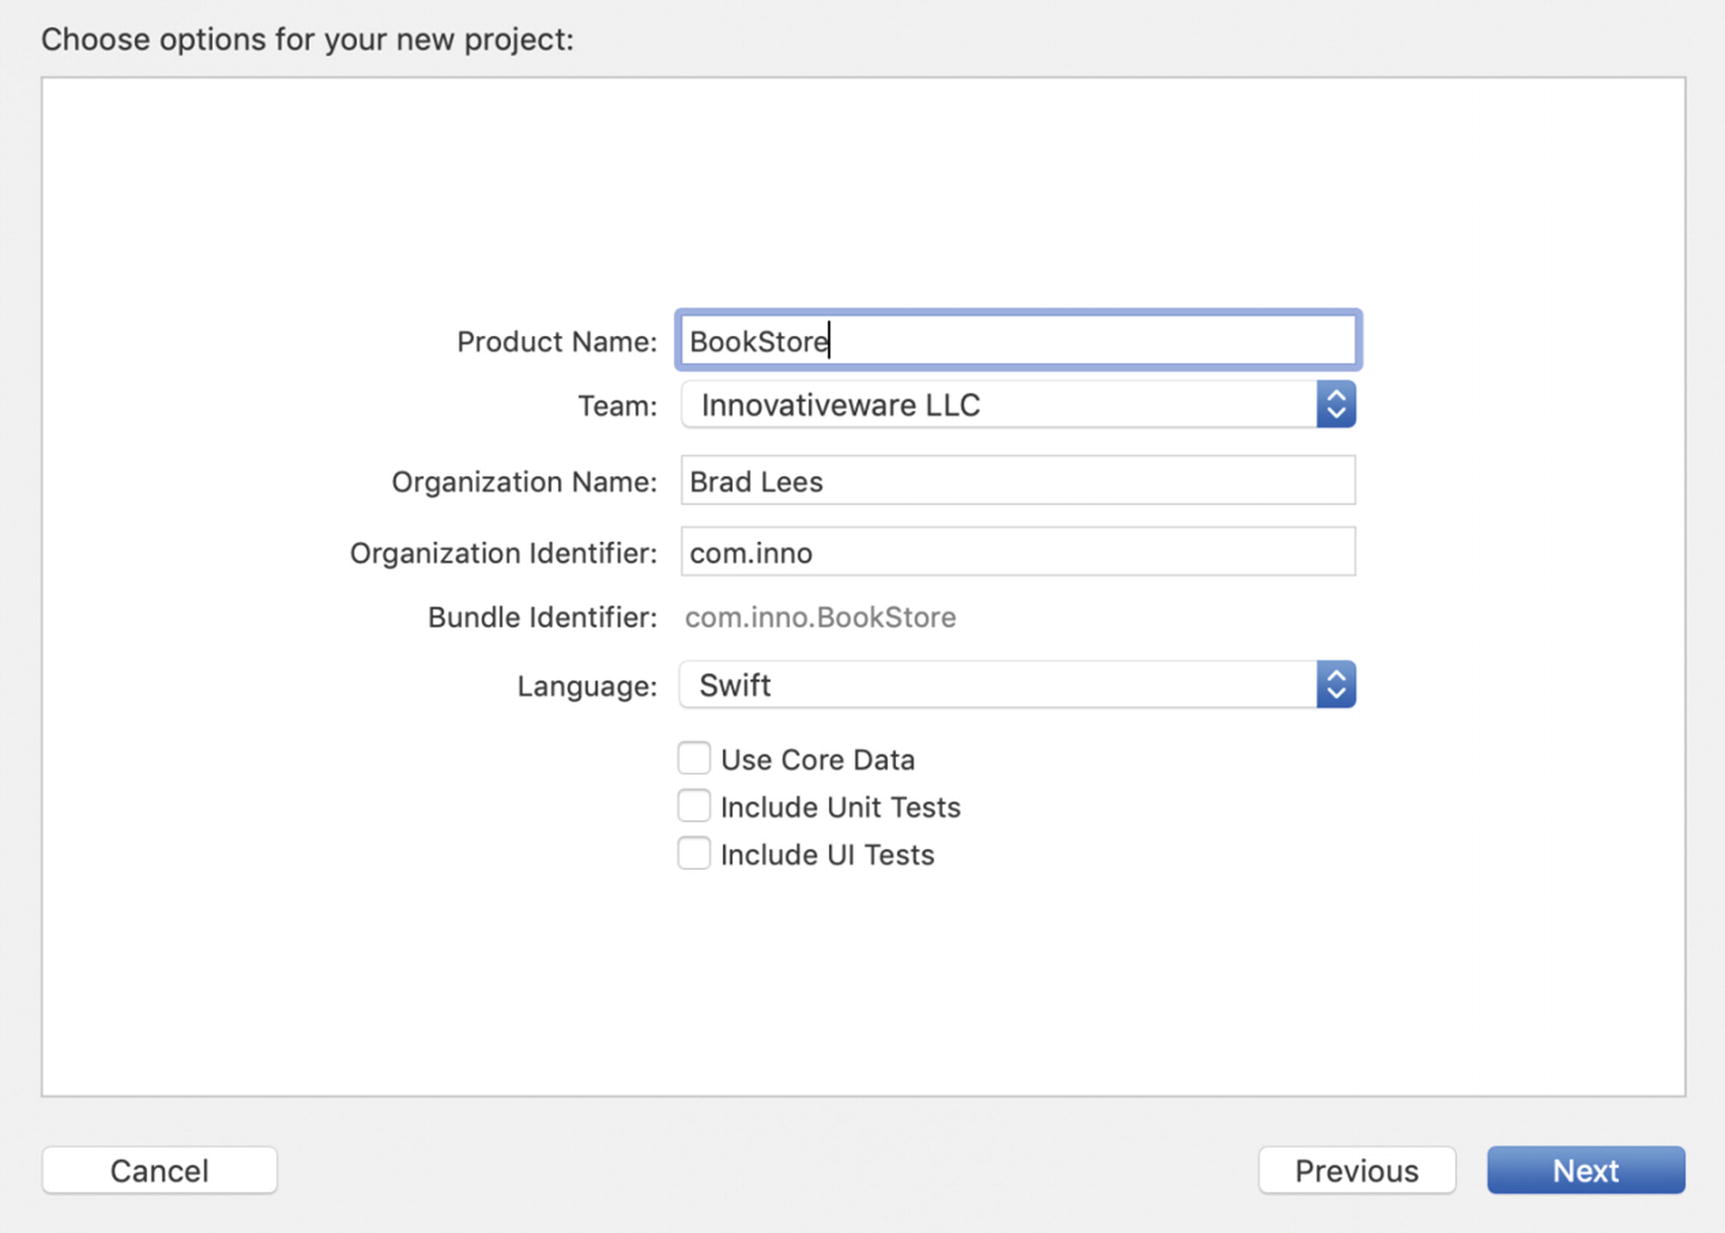 Figure 8-2.
Selecting the product (application) name and options
- 2.
Once everything is filled out, click the Next button. Xcode will prompt you to specify a place to save the project. Anywhere you can remember is fine—the desktop is a good place.
- 3.Once you decide on a location, click the Create button to create the new project. This will create the boilerplate BookStore project, as shown in Figure 8-3.
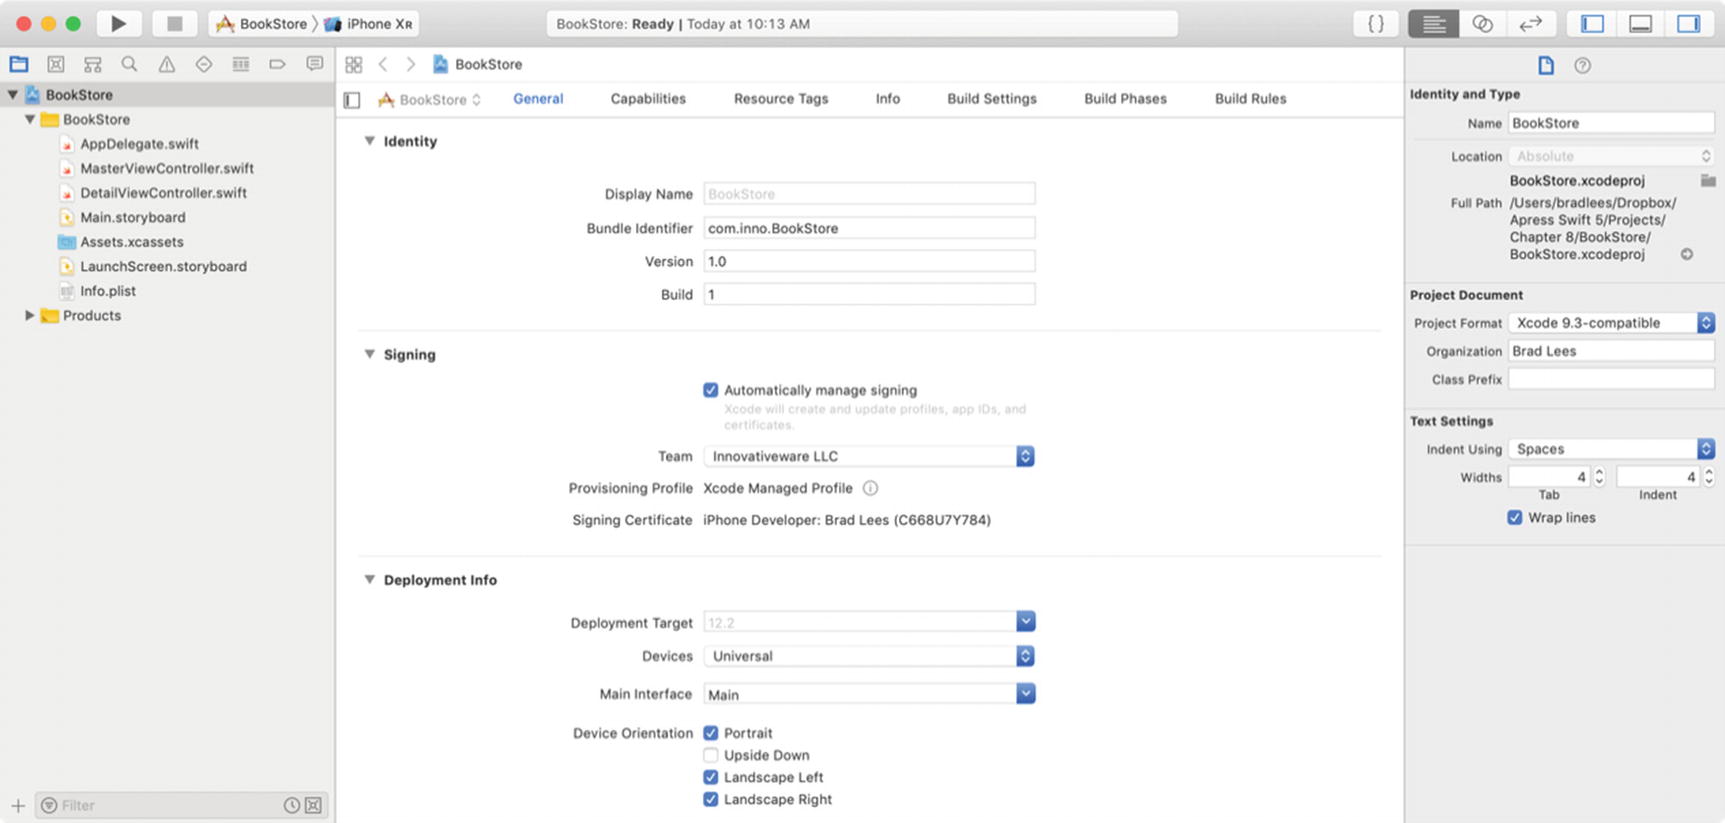 Figure 8-3.
The source listing of the boilerplate project
- 4.Click the plus (+) sign at the lower left of the screen in the Navigator area to add a new object to the project. Choose New File. Then choose the iOS section on the top and choose Swift File on the right, as shown in Figure 8-4. It’s also possible to right-click (or Control-click) the Navigation area and then select the New File menu option. There is no difference between this approach and clicking the plus sign—do whatever feels more natural.
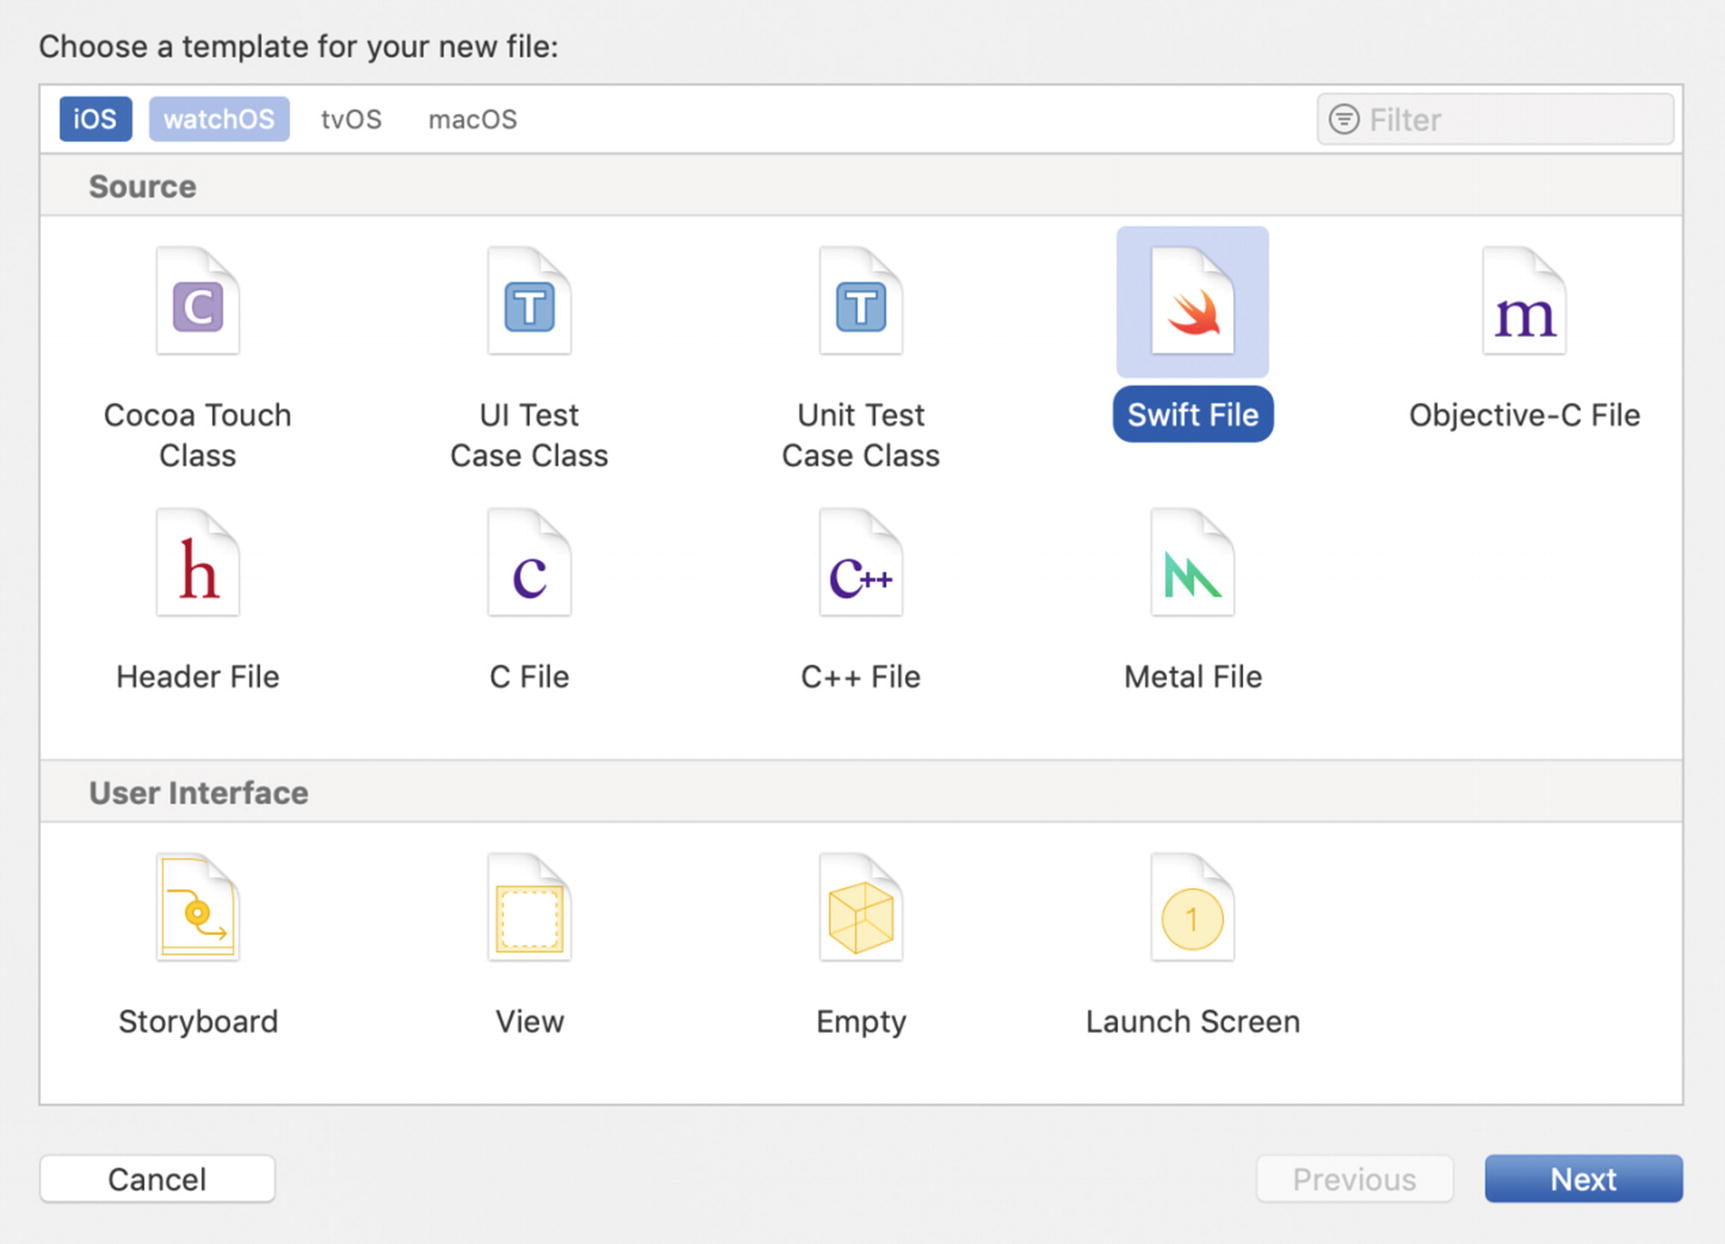 Figure 8-4.
Creating a new Swift file
- 5.
You’re choosing a plain Swift file, which will create a new empty Swift file that you’re going to use for the Book class. After selecting this, click the Next button.
- 6.
Xcode will ask you what to name your file. Use the name Book. Xcode will also ask to which folder it should save the new file. To keep things simple, choose the BookStore folder in your project. This is where all the other class files for the project are stored.
- 7.Double-click the BookStore folder and then click the Create button. You’ll see the main edit window for Xcode and the new file, Book.swift, in the Navigator area, as shown in Figure 8-5.
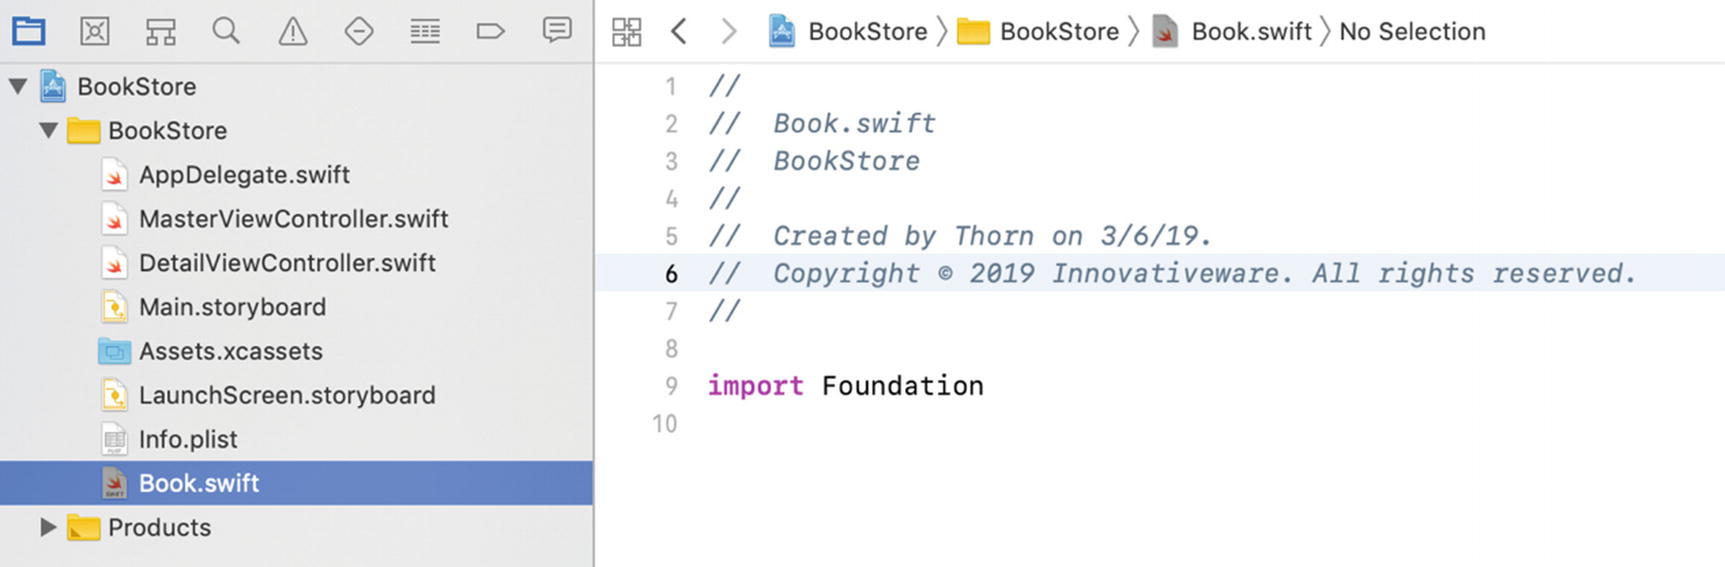 Figure 8-5.
The empty Swift file
- 8.
Repeat the previous steps and create a second object called BookStore. This will create a BookStore.swift file. You’ll be using this class later in this chapter. For now, you’ll concentrate on the Book class.
- 9.
Click the Book.swift file and let’s start defining your new class!
Creating Your Class
By adding a Swift rather than a Cocoa Touch class, Xcode creates an empty Swift file. You can add multiple classes to this file. Swift is more flexible, and it is not necessary to have only one class per file. Xcode allows you to add the classes as you want.
Note
It is still a good idea to keep your Swift classes in separate files. This makes organizing and finding classes easier, especially when you’re dealing with large projects, but there will be cases where a smaller class is only used with another class and it makes sense to keep them in the same file.
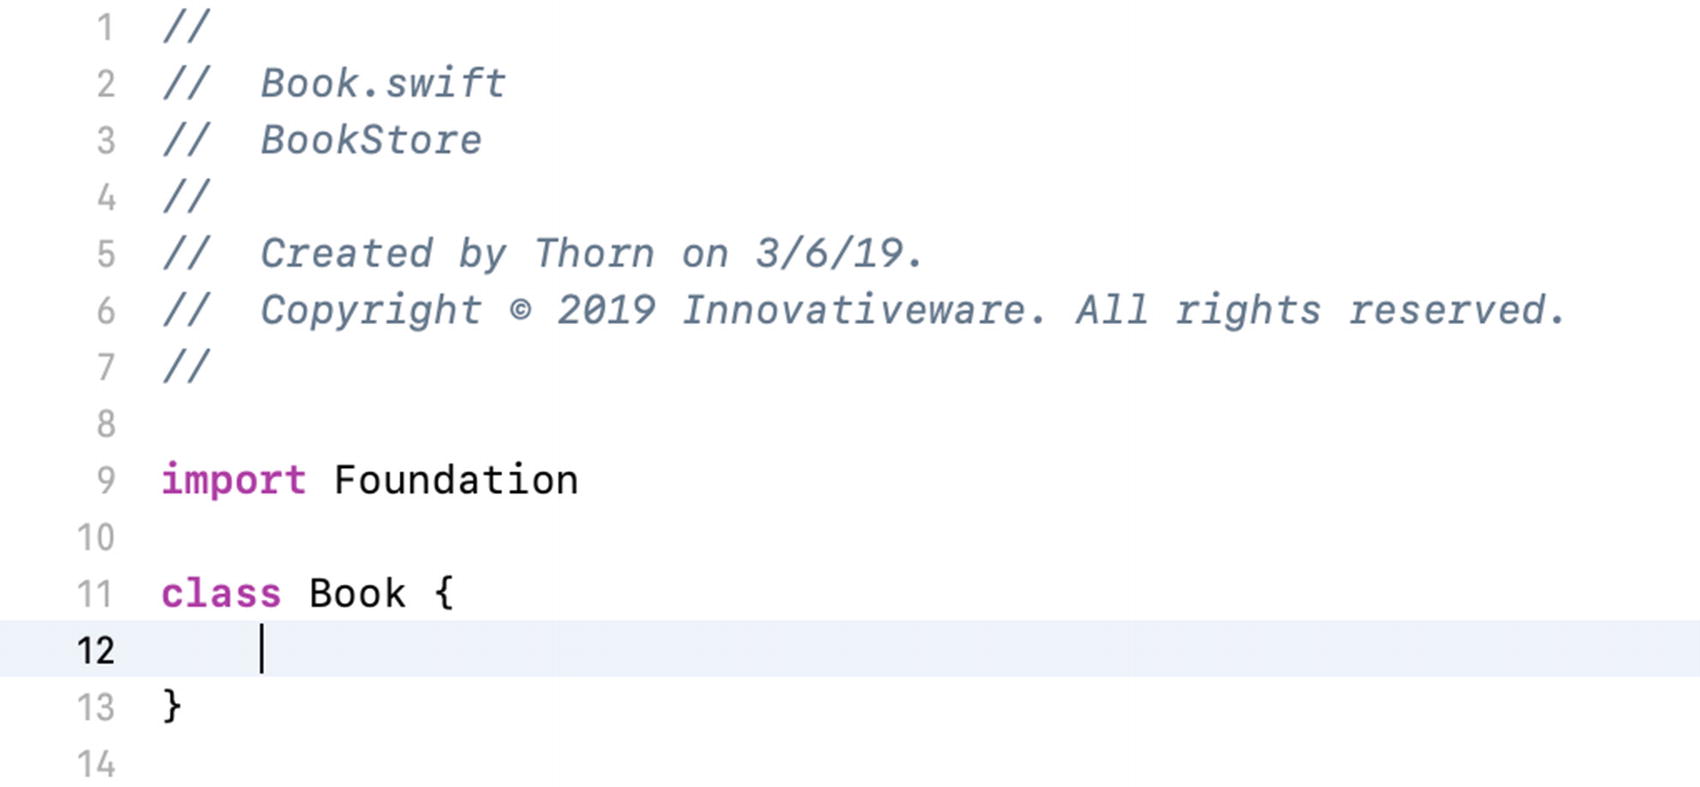
The empty Book class
Introducing Properties
Adding Instance Variables to the Book.swift file
Listing 8-8 shows the same Book object from before, but now there are three new properties placed inside the braces, on lines 12–14. These are all String objects, which means they can hold text information for the Book object. So, the Book object now has a place to store title, author, and description information. Notice, the code assigns an initial value to the property. If an initial value is not assigned, the class would need an init method to assign initial values.
Accessing Properties
One way, of course, is within the Book object.
The second way is from outside the object—that is, another part of the program that uses the Book object.
Finishing the BookStore Program
With the understanding of properties, you are going to now venture forth to create the actual bookstore program. The idea is simple enough—create a class called BookStore that will be stocked with a few Book objects.
Creating the View
- 1.Click the Main.storyboard file in the Navigator area. This will display Xcode’s Interface Builder, as shown in Figure 8-7. You will see five scenes in the Main.storyboard file. Navigate to the right to find the Detail Scene.
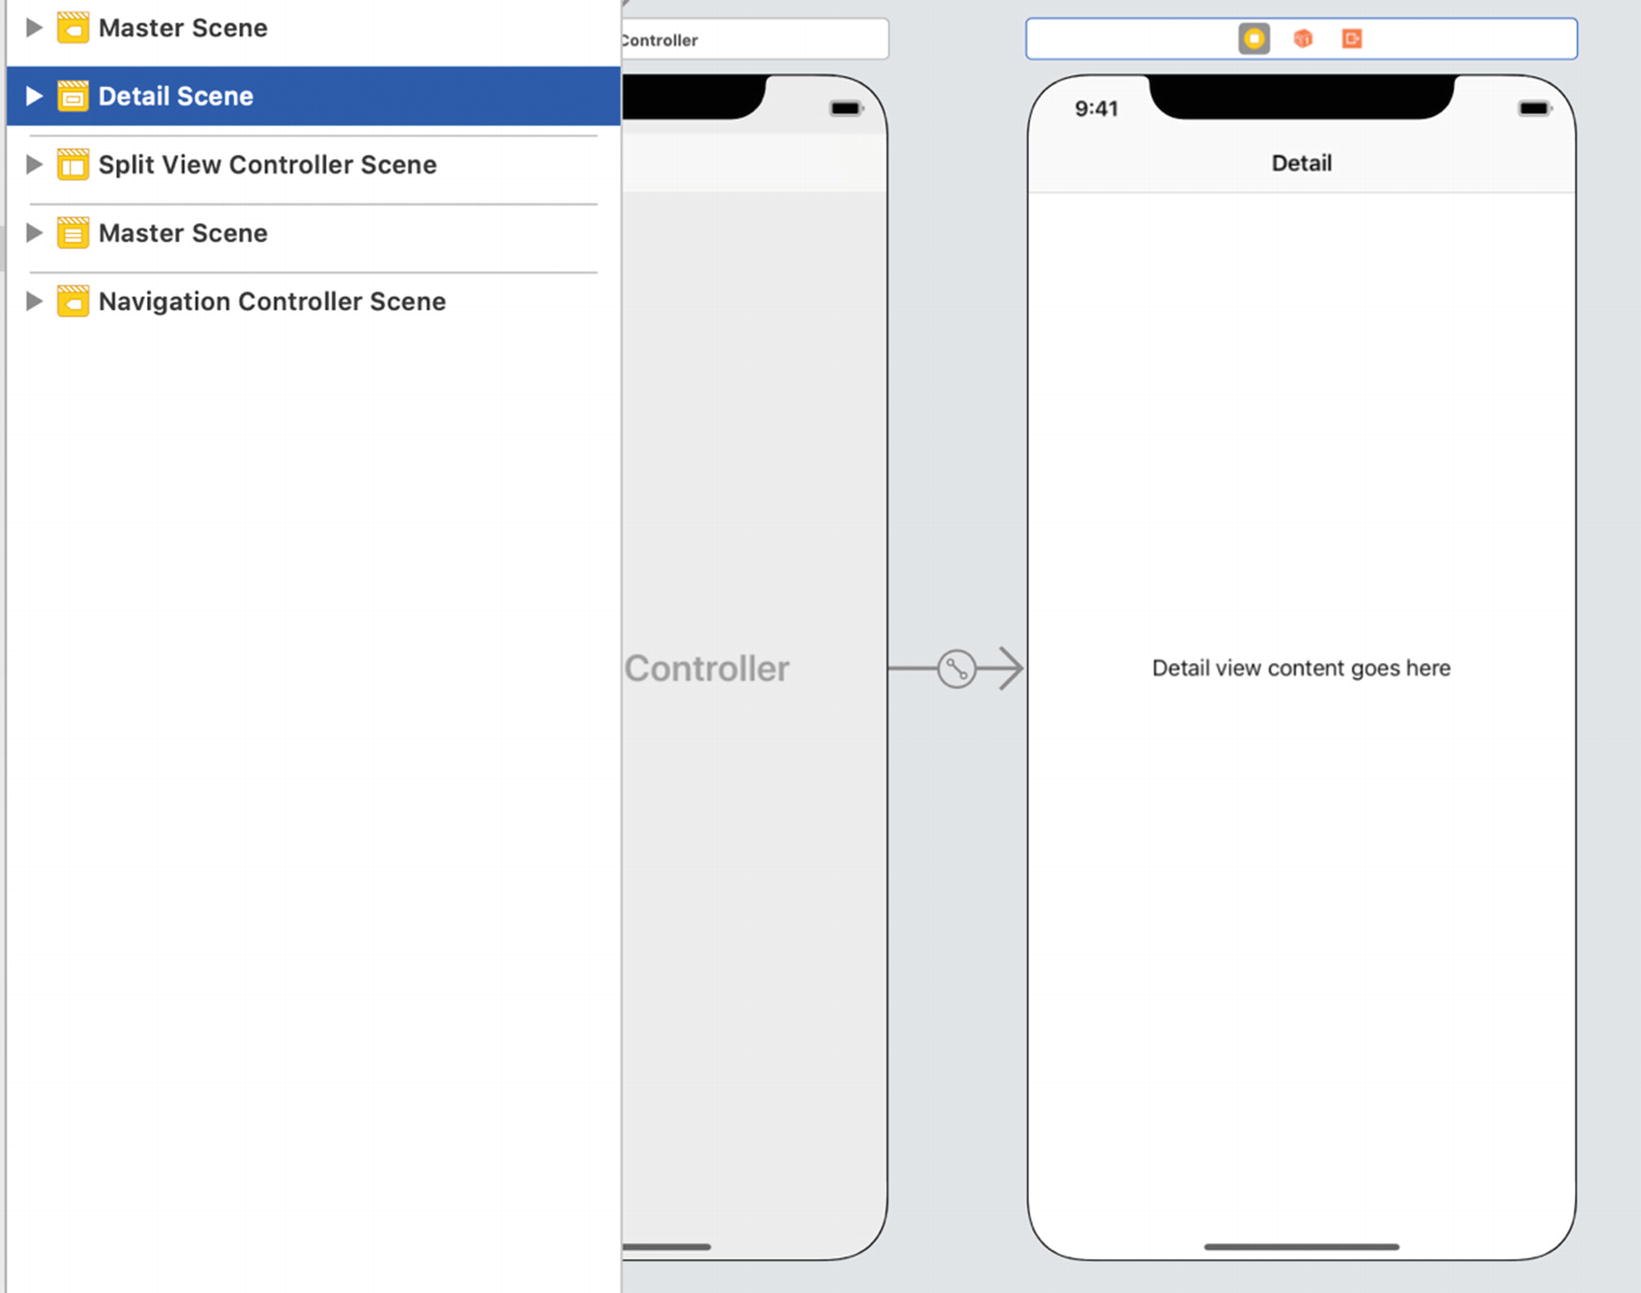 Figure 8-7.
Preparing the Bookstore’s Detail View
- 2.By default, when you create a blank Master-Detail application, Xcode adds a label with the text “Detail View content goes here.” Select and delete this Label object because you are going to add your own. You’re going to add some new fields to display some details about a selected book. Since you deleted this control, you also need to remove the code that references it.
- a.In the DetailViewController.swift file, remove the following line:@IBOutlet weak var detailDescriptionLabel: UILabel!
- b.In the var detailItem: AnyObject? property declaration, remove the following line:configureView()
- c.In the method named configureView, remove the following lines:// Update the user interface for the detail item.if let detail = detailItem {if let label = detailDescriptionLabel {label.text = detail.description}}
Your DetailViewController.swift file should now look like Figure 8-8. Figure 8-8.
Modified DetailViewController
- a.
- 3.Drag some Label objects from the Object Library onto the Detail View, as shown in Figure 8-9. Make sure that the lower Label controls are wider than the default. This is so that they can hold a fairly large amount of text. The two Label objects with the text “Label” in them are the ones you’re going to hook up to hold two of the values from the Book object: Title and Author.
 Figure 8-9.
Adding some Label objects
Adding Properties
- 1.
Click the Assistant Editor icon (it looks like two circles) in the top-right corner of Xcode to open the Assistant editor. Make sure the DetailViewController.swift file is showing in the editor.
- 2.Hold the Control key and drag the first blank Label control to the code on the right side, as shown in Figure 8-10. Name the first one titleLabel (see Figure 8-11) and click Connect, and then repeat the process with the second one, naming it authorLabel. This will add two variables to your DetailViewController class, as seen in Listing 8-9, and hook them to the Label controls in the interface.
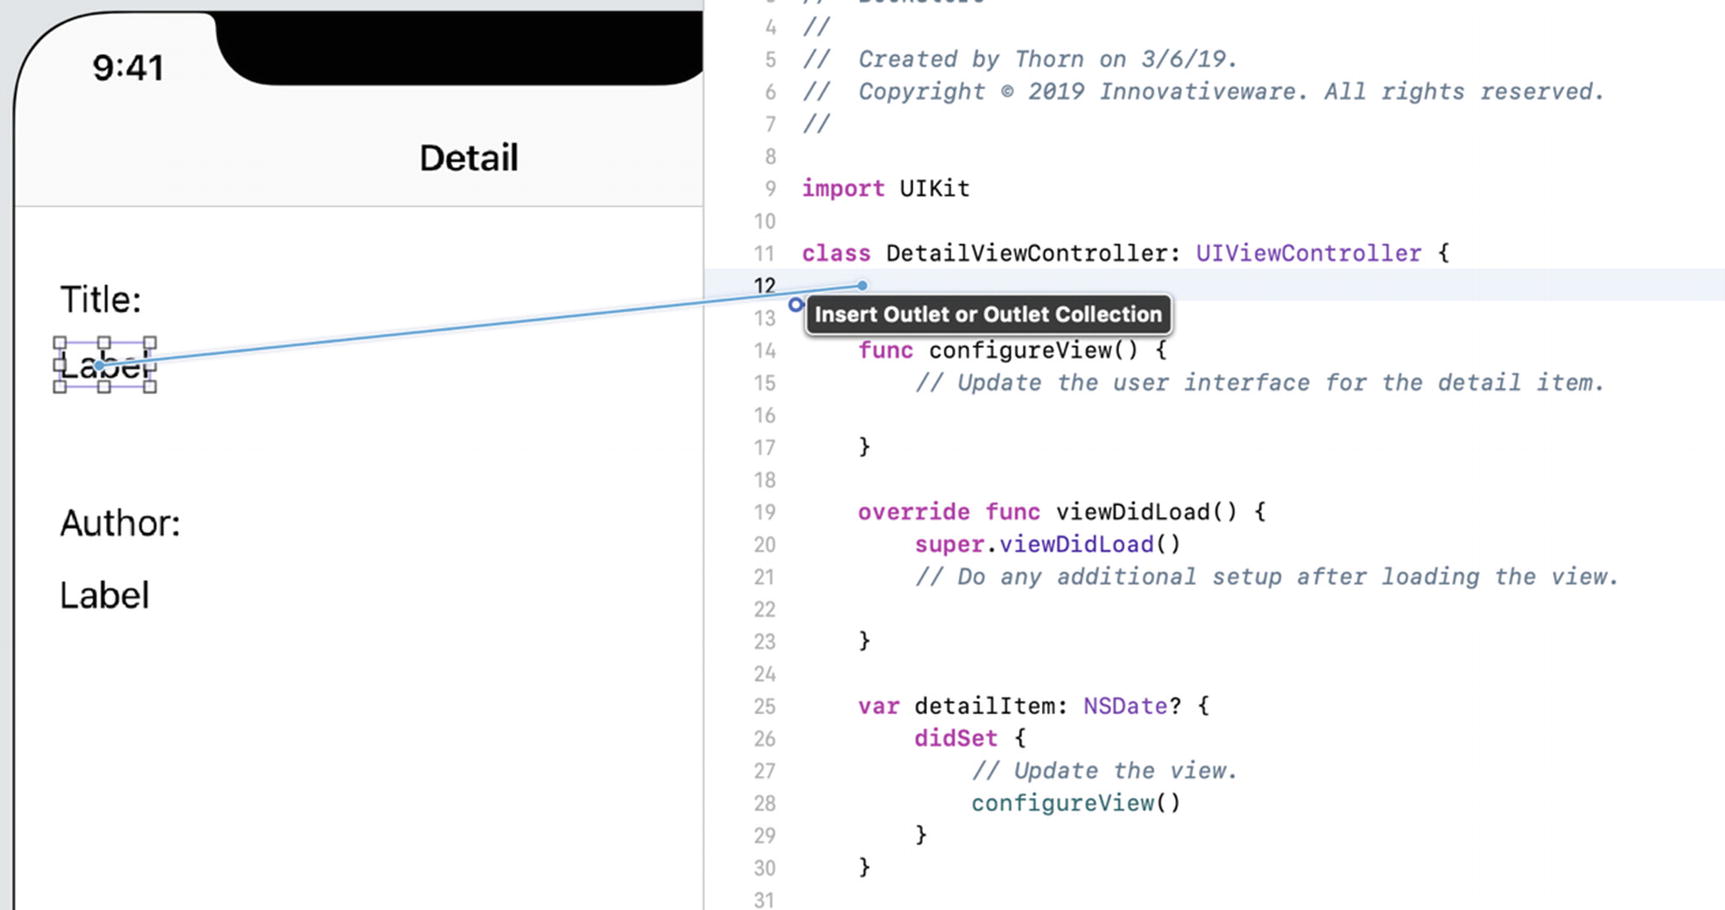 Figure 8-10.
Creating variables
 Figure 8-11.
Naming the new property
Modifying the DetailViewController.swift File to Include the New Labels
Adding a Description
- 1.Start by adding the “Description:” label to the view, as shown in Figure 8-12.
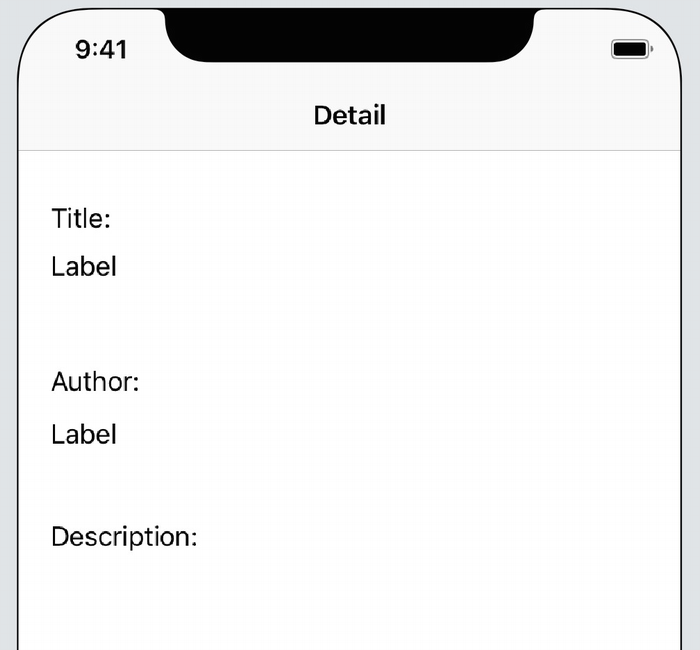 Figure 8-12.
Adding a new Label object for the description
- 2.
Next, add the Text View object to the Detail Scene, as shown in Figure 8-13. The advantage the Text View object has is that it’s easy to display multiple lines of text. While the Label object can display multiple lines, it’s not as clean as the Text View object.
Note By default, the Text View control is filled with all kinds of seemingly random text. This text is called Lorem Ipsum text. If you ever need to fill up a page with text, you can find any number of Lorem Ipsum generators on the Web. As for the Text View control, the text can stay as it is since you’ll remove it during runtime. Plus, if it’s cleared, it becomes a little more difficult spotting exactly where the Text View control is on the screen—it’s white on white!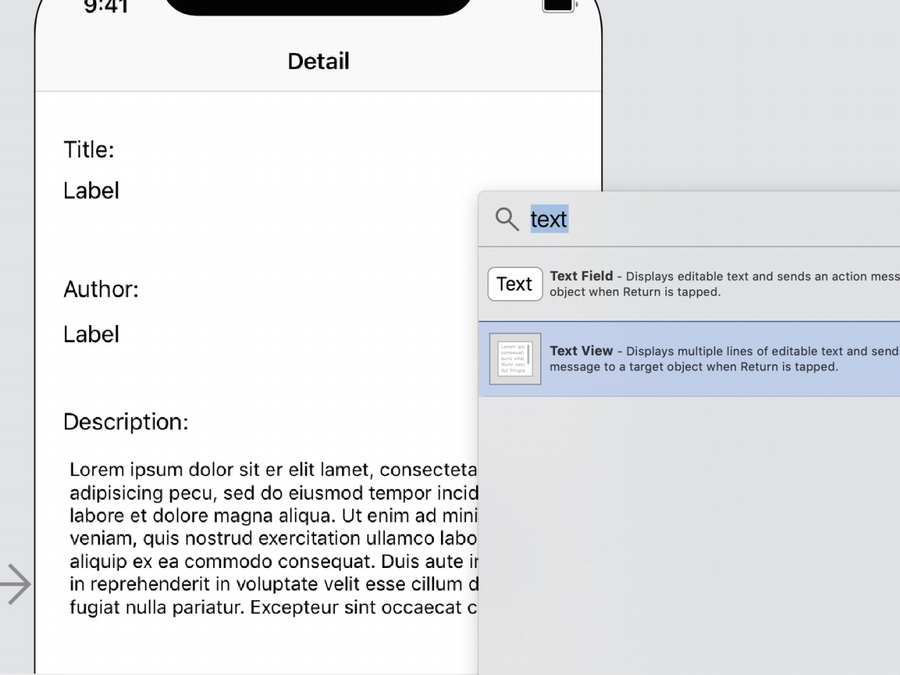 Figure 8-13.
Adding a Text View to the Detail View
- 3.
For the program to take advantage of the Text View, you’ll need to create an outlet for it, just like you did for the title and description. Simply Control-drag the Text View to your DetailViewController file, as you did earlier. Name this variable descriptionTextView. The finished variable portion of DetailViewController will look like Listing 8-10.
Adding an Outlet for the Text View to Hold a Description
- 4.
Notice that the type is UITextView instead of UILabel—this is important.
Caution
As mentioned, it’s important to make the descriptionTextView property a UITextView type . If, for example, it was accidentally made a UILabel object, when trying to connect the Text View from the screen to the outlet, Xcode wouldn’t be able to find the descriptionTextView outlet. Why? Xcode knows that the control is a UITextView and is looking for an outlet that is of type UITextView.
Creating a Simple Data Model Class
For the application to work, it needs to have some data to display. To do this, you’re going to use the BookStore object you created earlier as the data model class. There’s nothing different about a data model class except that its whole purpose is to allow an application to access data via an object.
Modifying the BookStore.swift Class to Include an Array
On line 12, you add a variable that will hold the list of books; the property is simply named bookList. Note that bookList is an array, which will allow you to add a series of objects, in this case, a set of Book objects.
Implementing the BookStore Data Object
In Listing 8-12, lines 14–26 define the init method of the object, which is called whenever the object is first initialized. In this method, you initialize the two books you plan to add to your bookstore. Line 15 is where the first Book object is allocated and initialized. Lines 16–18 add a title, author, and description to your first book. Finally, line 19 adds the new Book object to the bookList array. The important thing to note here is that once the object is added to the array, the code can forget about it; the array now owns that object. Because of this, line 21 is not a problem.
Line 21 allocates a new Book object overwriting the old value. This tells the compiler that you’re no longer interested in using the old value.
Lines 22–25 simply initialize and add the second book to the array.
That’s it! That’s all you need to define a simple data model class. Next, you need to modify MasterViewController to access this class so that it can start displaying some data.
Modifying the MasterViewController
The simple application has two view controllers: the main view controller, which is called MasterViewController, and a secondary one called DetailViewController . View controllers are objects that simply control the behavior of a view. For the application to start displaying data from the data model, you need to first modify the MasterViewController —this is where the navigation of the application begins. The following code is already in place in the template that Xcode has provided. You’re just going to modify it to add your data model.
Adding the BookStore Object
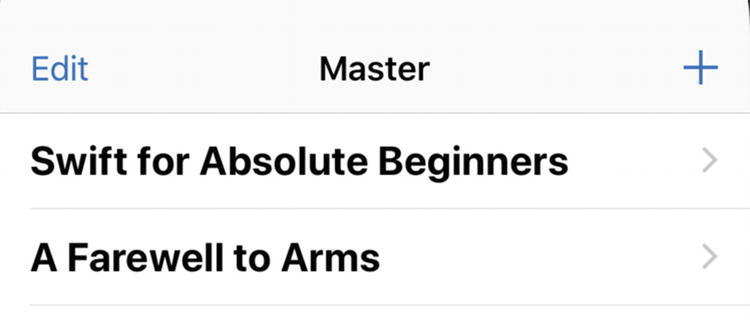
Now that the BookStore object is initialized, you need to tell MasterViewController how to display the list of books—not the detail, just the book titles. To do this, you’ll need to modify a few methods. Fortunately, Xcode has provided a nice template, so the modifications are small.
MasterViewController is a subclass of what’s called a UITableViewController class, which displays rows of data to the screen. In this case, these are rows of book titles (well, just two for this simple program but a list nonetheless).
The first is numberOfSections(in:): Since the application has only one list, or section, this method returns 1.
The second is tableView(_:numberOfRowsInSection:): In this program, you return the number of books in the bookstore array. Since this is the only section, the code is straightforward.
The third is tableView(_:cellForRowAt:): This method is called for each row that is to be displayed on the screen, and it’s called one row at a time.
Setting Up the View to Display the Books
Out of all of this code, you need to modify only a few lines. Everything else can stay the way it is. This is one of the advantages of using the Xcode templates. Line 68 simply returned 1; you needed to change it so that it now returns the count of items in the BookStore class.
Running the application for the first time
But, you’re not done yet. You need to make the application display the book when you click one of them. To make this happen, you need to make one last modification to MasterViewController.
Selecting the Book When Touched
If line 53 looks similar to line 74 in Listing 8-14, that’s because it’s basically the same thing. Based on indexPath.row, you select the specific book from the BookStore object and save it in a constant called selectedBook.
On line 55, you take selectedBook and store it in a property called detailItem that is already part of the existing DetailViewController class. That’s all you need to do in MasterViewController. You’ve basically passed off the book to DetailViewController. You’re almost done. Now you need to make a few small modifications to the DetailViewController so that it displays the Book object properly.
Modifying the DetailViewController
Moving the Book Object Data to the Detail View
The configureView method is one of many convenience methods included in the Xcode template and is called whenever the DetailViewController is being initialized. This is where you will move your selected Book object’s information to the fields in the view.
Lines 20–24 in the DetailViewController.swift file is where you move the information from the Book object to the view. If you recall, line 55 in Listing 8-15 set the selected book into a property on the DetailViewController called detailItem. Line 20 pulls that item out into a Book object called myBook.
Lines 21–23 simply move each of the Book object’s properties to the view controls you built earlier in the chapter.
Changing the detailItem
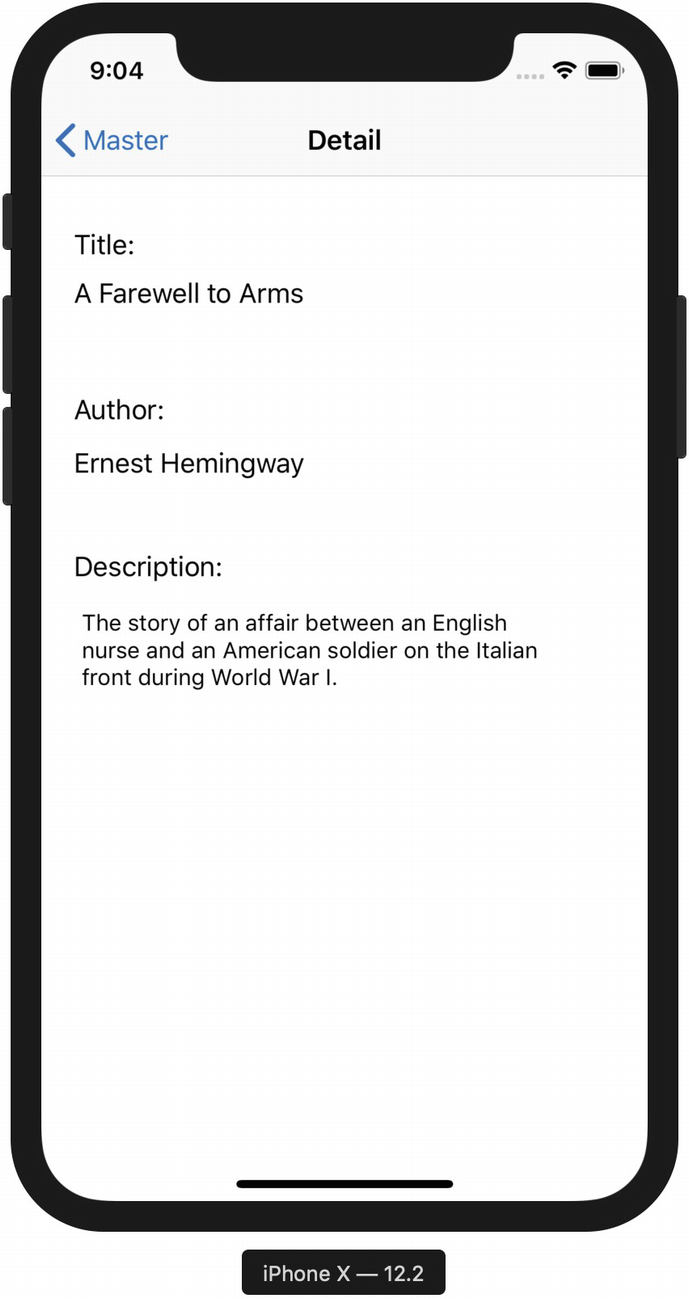
Viewing the book details for the first time
Summary
Understanding collection classes: Collection classes are a powerful set of classes that come with Foundation and allow you to store and retrieve information efficiently.
Using properties: Properties are variables that are accessible once the class has been instantiated.
Looping with for...in: This feature offers a new way to iterate through an enumerated list of items.
Building a Master-Detail application: You used Xcode and the Master-Detail Application template to build a simple bookstore program to display books and the details of an individual book.
Creating a simple data model: Using the collection classes you learned about, you used an array to construct a BookStore object and used it as a data source in the BookStore app.
Connecting data to the view: You connected the Book object’s data to the interface fields using Xcode.
Exercises
Add more books to the bookstore using the original program as a guide.
On the Master Scene, remove the Edit button as we will not be using it in this app.
Enhance the Book class so it can store another attribute—a price or genre, for example.
Modify the DetailViewController so that the new fields are displayed. Remember to connect an interface control to a property.
Change the BookStore object so that a separate method is called to initialize the list of Book objects (instead of putting it all in the init method).
There is another attribute to a UITableViewCell called the detailTextLabel. Try to make use of it by setting its text property to something.
Using Xcode to modify the interface, play with changing the background color of the DetailViewController in the storyboard file.
Sort the books in the BookStore object so they appear in ascending order on the MasterDetailView.