Previously, you learned how to convert colors to multi-dimensional channels, and now we will learn how to change the content of a specific channel in the RGB color scheme to simulate filters from your favorite photo applications.
Let's start by simply loading an image of cats and following these steps:
- We will convert the image of cats to channelview, and set the channels to be the last dimension, as follows:
using Images, ImageView
img = load("sample-images/cats-3061372_640.jpg");
img_ch_view = channelview(img); # extract channels
img_ch_view = permuteddimsview(img_ch_view, (2, 3, 1));
# reorder channels
- We will split the existing image into two parts and use the second part to apply the filter, as follows:
x_coords = Int(size(img, 2) / 2):size(img, 2);
- Let's start by simply increasing the saturation for the first channel by 10% and limiting it to a maximum of 1. This is done by multiplying the existing channel values by 1.1 in combination with the min function. Please also remember that the first channel corresponds to the color red:
img_ch_view[:, x_coords, 1] = min.(img_ch_view[:, x_coords, 1] .* 1.1, 1);
imshow(img)
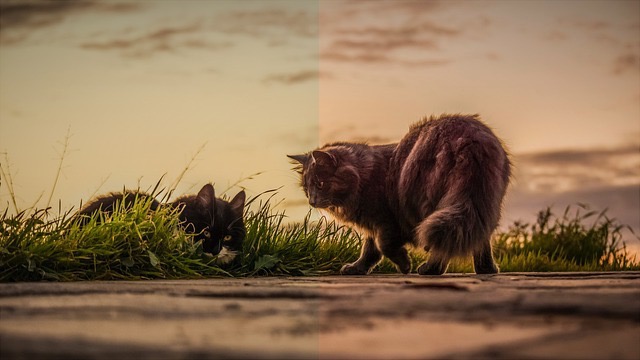
- You should be able to see an image of two cats with the second part of it being more of a red color. This is shown in the following image:

- Let's proceed and update the second channel by increasing its saturation by 20%. The second layer corresponds to the color green:
img_ch_view[:, x_coords, 2] = min.(img_ch_view[:, x_coords, 2] .* 1.2, 1);
imshow(img)
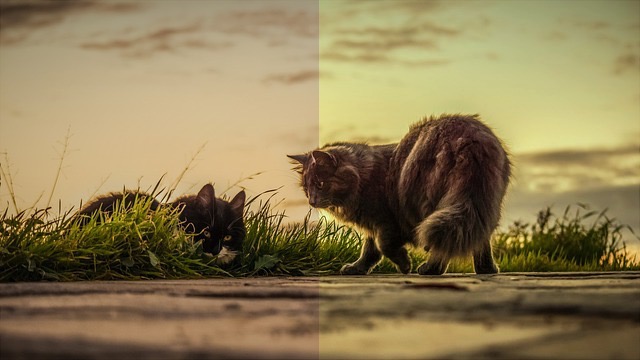
Note that the image has changed and has become yellow. This happens when you mix red and green:

- Now, let's also change the third channel, which corresponds to blue, and increase its intensity by 40%:
img_ch_view[:, x_coords, 3] = min.(img_ch_view[:, x_coords, 3] .* 1.4, 1);
imshow(img)
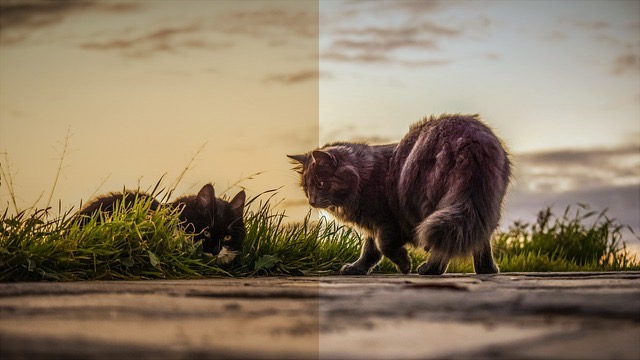
We managed to remove the colorful background and made the image look more realistic:

The final code block will look as follows:
using Images, ImageView
img = load("sample-images/cats-3061372_640.jpg");
img_ch_view = channelview(img);
img_ch_view = permuteddimsview(img_ch_view, (2, 3, 1));

x_coords = Int(size(img, 2) / 2):size(img, 2);

img_ch_view[:, x_coords, 1] = min.(img_ch_view[:, x_coords, 1] .* 1.1, 1);
img_ch_view[:, x_coords, 2] = min.(img_ch_view[:, x_coords, 2] .* 1.2, 1);
img_ch_view[:, x_coords, 3] = min.(img_ch_view[:, x_coords, 3] .* 1.4, 1);
imshow(img)
Keep in mind that the color scale is from 0.0 to 1.0 and other values are not accepted.
Notice that we did not allocate memory and used view to update the content of the original image.