

Peanut Butter and Jelly Cake
Chocolate Doberge Cake
Lady Baltimore Cake
Gingerbread Icebox Cake
German Chocolate Cake
Lemon Doberge Cake
Alabama Little Layer Cake
Orange Layer Cake
Red Velvet Crepe Cake
Appalachian Stack Cake
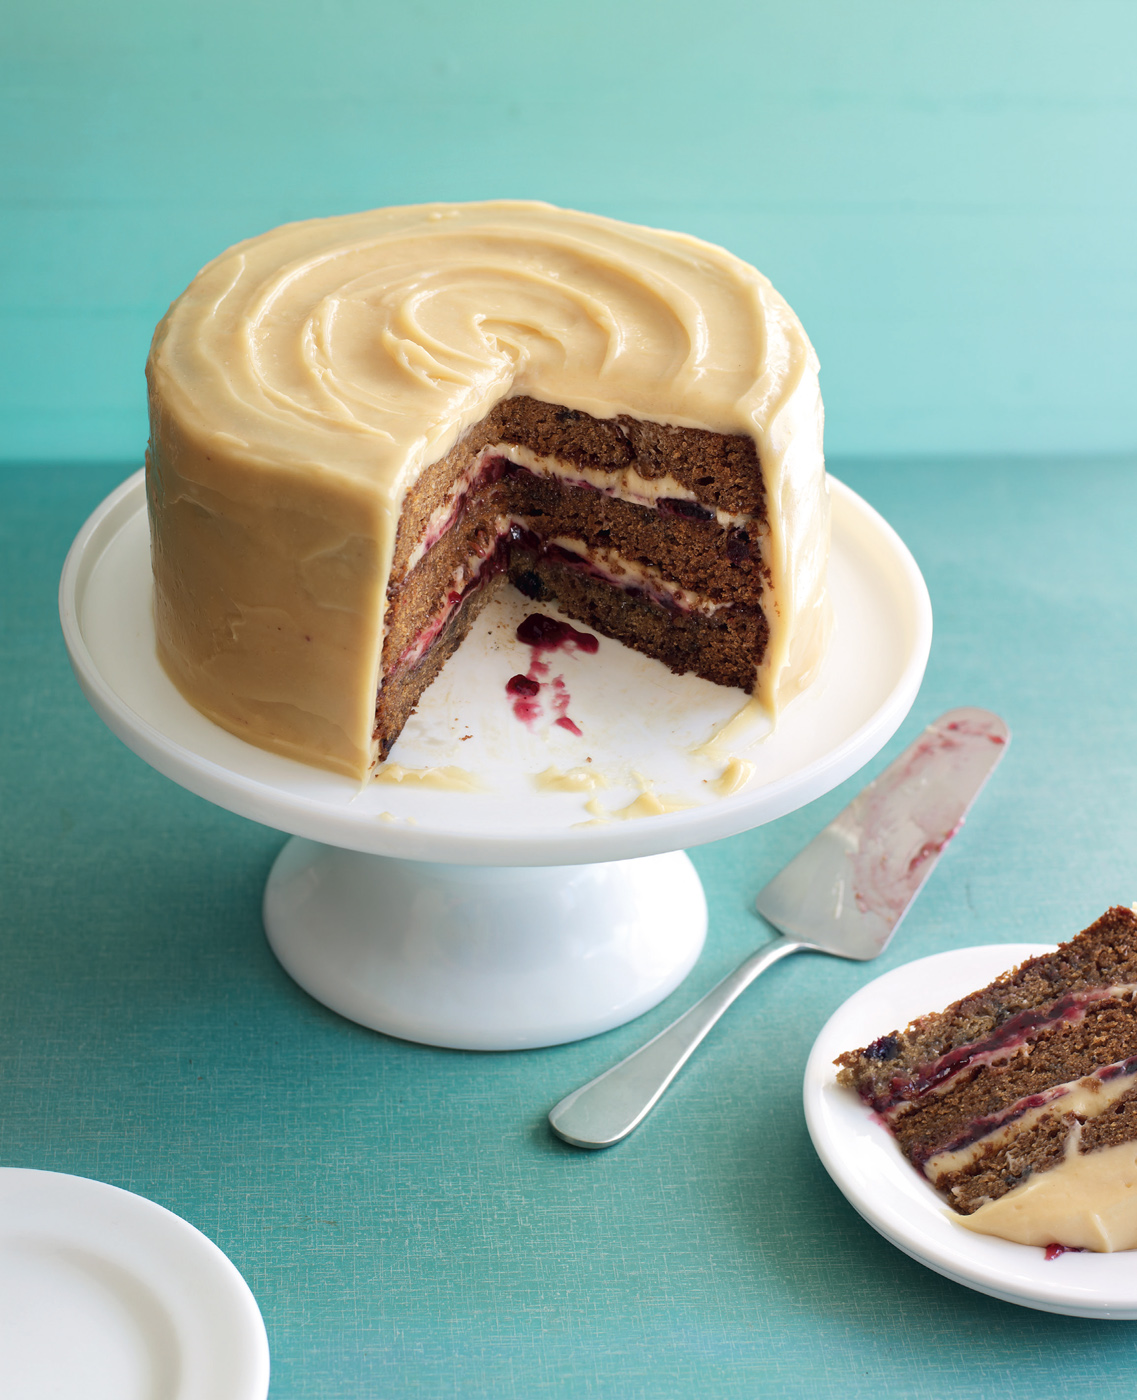
Peanut Butter and Jelly Cake
In America a proper PB&J sandwich is made using grape jelly, which is a seedless grape jam. It’s very hard to find in the UK, but you can use blueberry jam to mimic the purple fruitiness, and strawberry jam will also do at a pinch. A classic American combination in layer cake form!
Makes one 20cm (8in) cake, to slice as desired
For the cake
110g (4oz) unsalted butter, softened
380g (13oz) caster sugar
320g (11oz) plain flour
2 tsp baking powder
2 tsp bicarbonate of soda
255ml (10fl oz) buttermilk
3 large eggs
3½ tbsp blueberry or strawberry jam, plus extra for filling
For the frosting
190g (7oz) smooth peanut butter
455g (1lb) full-fat cream cheese, such as Philadelphia, cold
2 tsp vanilla extract
⅛ tsp salt
450g (1lb) icing sugar, sifted
2-3 tbsp whole milk
Three 20cm (8in) diameter loose-bottomed sandwich tins
1. To make the cake, preheat the oven to 170°C (325°F), Gas mark 3. Line the cake tins with non-stick baking parchment.
2. Using an electric mixer with the paddle attachment or a hand-held electric whisk, cream the butter, sugar, flour, baking powder and bicarbonate together until they form a sandy consistency.
3. In a large jug, mix together the buttermilk, eggs and the jam by hand. With the mixer on a medium speed, slowly pour half the liquid into the crumb mixture and mix together, scraping down the sides of the bowl as you go. When the lumps are gone, add the rest of the liquid and mix until combined.
4. Divide the batter evenly between the three prepared tins. Bake for 20–30 minutes until a deep golden brown and the sponge bounces back when lightly touched. Cool the sponges in the tins for about 10 minutes, and then turn out to cool completely on wire racks.
5. To make the frosting, using a freestanding electric mixer with the paddle attachment or a hand-held electric whisk, beat the peanut butter on a medium speed until light and fluffy. Add the cream cheese, vanilla extract and salt and beat on a low speed for a minute until everything is well mixed and smooth – do not overbeat or the cream cheese will split and become too runny.
6. Gradually add the icing sugar, on a low speed, until it is all incorporated. Add 2 tablespoons of the milk and beat until smooth and easy to spread. Add another tablespoon of milk if the mixture is too thick.
7. Spread a good layer of jam on top of the first and second layers of sponge. Spread 3–4 tablespoons of the frosting on top of the jam, then sandwich the layers together and put the third layer on top. Spread the rest of the frosting over the top and sides of the cake.
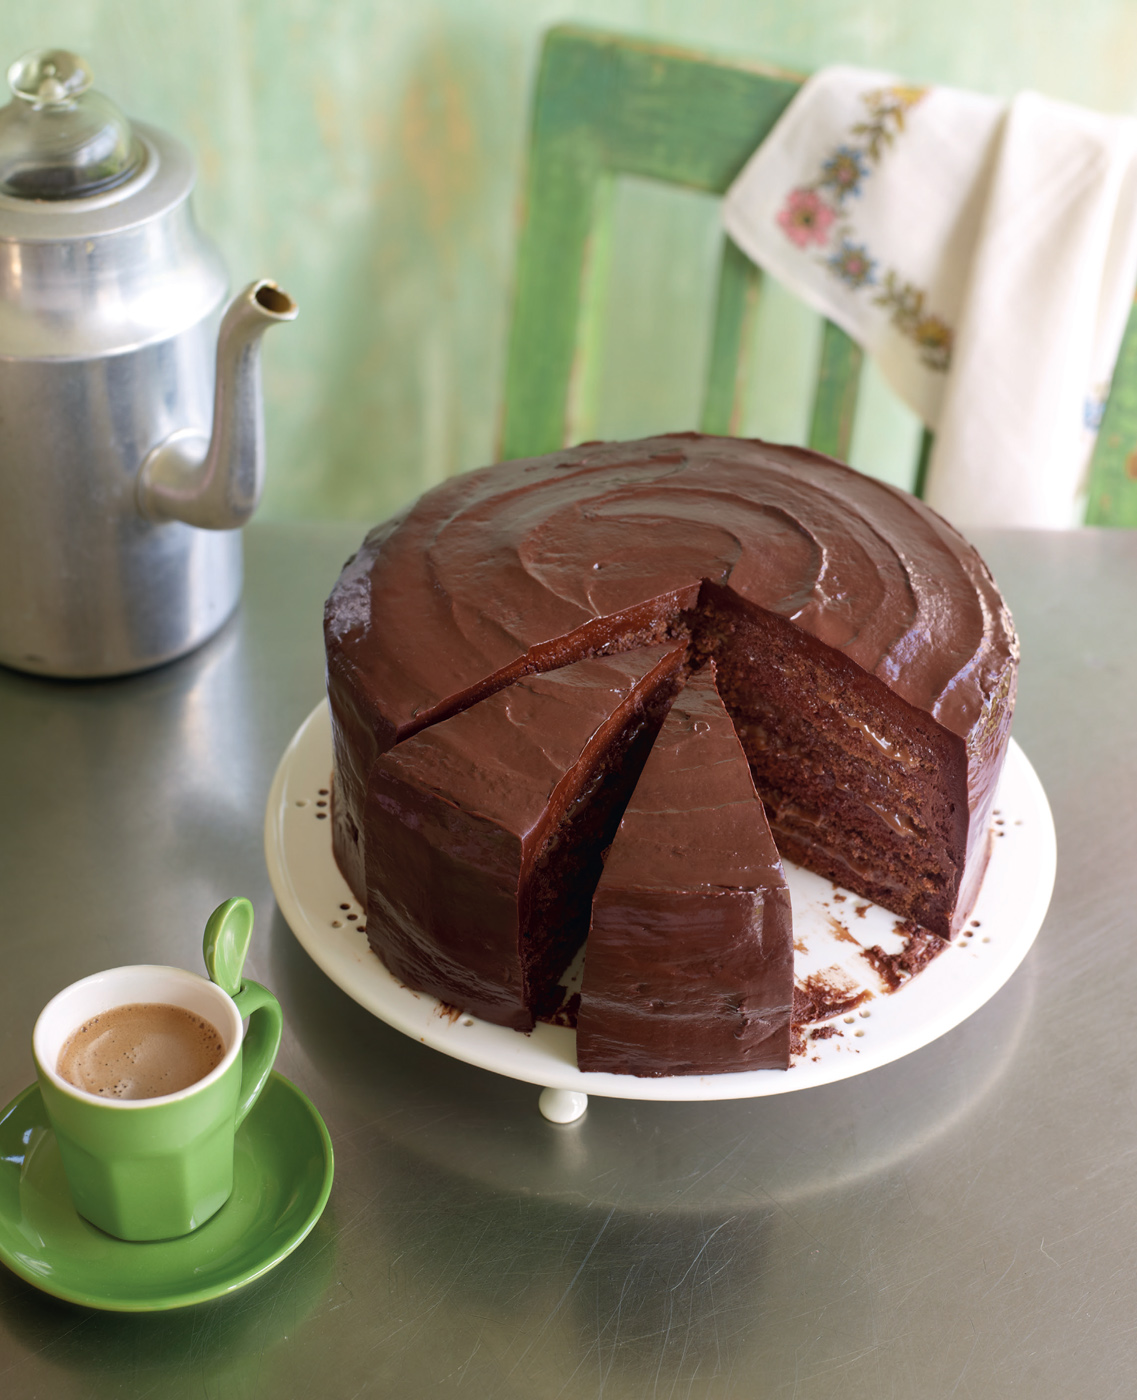
Chocolate Doberge Cake
The Doberge cake is from New Orleans and the locals pronounce it ‘dough-bosh’. This chocolate version consists of layers of thin chocolate sponge filled with chocolate custard, frosted with chocolate buttercream and glazed with a ganache. This recipe definitely needs time, effort and experience, but will be well worth the effort in wowing your friends and family.
Makes one 20cm (8in) cake, to slice as desired
For the cake
3 large eggs, separated
270g (9½oz) plain flour, sifted
1 tsp bicarbonate of soda
1 tsp salt
60g (2oz) very dark chocolate (90–99%cocoa solids, such as Lindt Excellence)
140g (5oz) unsalted butter, softened
320g (11oz) caster sugar
235ml (8fl oz) full-fat buttermilk
1¼ tsp vanilla extract
1 tsp almond extract
For the custard
585ml (1 pint) evaporated milk (unsweetened)
60g (2oz) dark chocolate (minimum 70% cocoa solids)
270g (9½oz) caster sugar
45g (1½oz) plain flour
4 large egg yolks, lightly beaten
30g (1oz) unsalted butter
1¼ tsp vanilla extract
¼ tsp almond extract
For the frosting
335g (12oz) unsalted butter, softened
40g (1½oz) dark chocolate (minimum 70% cocoa solids)
375g (13oz) icing sugar
120g (4oz) cocoa powder
2 tsp vanilla extract
For the ganache
200g (7oz) dark chocolate (minimum 70% cocoa solids), chopped
200ml (7fl oz) double cream
2 tsp vanilla extract
Three 20cm (8in) diameter loose-bottomed sandwich tins
1. To make the cake, preheat the oven to 150°C (300°F), Gas mark 2. Line the tins with non-stick baking parchment.
2. Using a freestanding electric mixer with the whisk attachment or a hand-held electric whisk, beat the egg whites to stiff peak stage, so they curl when the beaters are lifted. Set aside.
3. In a bowl, sift together the flour, bicarbonate of soda and salt three times. Set aside.
4. Melt the chocolate in a microwave-safe bowl in the microwave or in a medium-sized heatproof bowl set over, but not touching, a pan of simmering water.
5. Using the electric mixer with the paddle attachment or a hand-held electric whisk, cream the butter and sugar together for around 5 minutes on a medium–high speed until light and fluffy.
6. Add the egg yolks on a lower speed and mix together well, being sure to scrape down the sides of the bowl as you go to make sure everything is well combined. Add the flour mix and buttermilk in thirds, alternating between the two. Don’t overbeat – only mix after each addition until the flour and buttermilk disappear into the mixture.
7. Add the melted chocolate and beat on the lowest speed to thoroughly mix. Finally, fold the egg whites into the batter by hand, and then mix in the vanilla and almond extracts.
8. Divide the batter between the three prepared tins and bake for 35–40 minutes or until the sponges bounce back when lightly touched. Cool the sponges in the tins for about 10 minutes, and then turn out to cool completely on wire racks.
9. To make the custard, combine the evaporated milk and chocolate in a saucepan and cook over a medium heat until the chocolate melts.
10. In a bowl, combine the sugar and flour, stirring with a fork to mix. Slowly add about a third of the chocolate mixture, tablespoon by tablespoon, to the sugar and flour and stir to make a smooth paste. Scrape the paste back into the saucepan with the rest of the milk and chocolate and cook over a medium heat for about 3 minutes until it thickens.
11. Now, stir about 80ml (3fl oz) of the warm chocolate mix into the beaten egg yolks in order to warm them up – keep stirring so that the eggs don’t scramble. Then add the warmed-up egg yolks to the saucepan with the rest of the mix and stir well so that they are mixed thoroughly and quickly.
12. Cook for a further 5 minutes or until the custard is thick, shiny and smooth. Take off the heat, add the butter, vanilla and almond extracts and stir well until thoroughly mixed. Scrape the custard onto a baking sheet, cover the surface with cling film to prevent a skin forming and refrigerate while you make the frosting.
13. Using a freestanding electric mixer with the paddle attachment or a hand-held electric whisk, beat the butter on a medium-high speed for 2 minutes to loosen it.
14. Melt the chocolate in a microwave-safe bowl in the microwave or in a medium-sized heatproof bowl set over, but not touching, a pan of simmering water.
15. Sift the icing sugar into a bowl with the cocoa powder then add it slowly to the butter, alternating with the vanilla and melted chocolate. Once incorporated, turn up the speed to high and beat for 3 minutes. If the mixture is too thick after about 3 more minutes of beating, then add a few tablespoons of hot water, one at a time, until a spreadable, light consistency is achieved. Set aside at room temperature until ready to use.
16. To make the ganache, place the chocolate in a bowl. Heat the cream and vanilla gently in a small saucepan until barely bubbling, then pour over the chocolate and leave to stand for 5 minutes before stirring until smooth. Leave this at room temperature for about 1 hour to cool to a spreading consistency.
17. To assemble the cake, cut each cake layer in half horizontally so that you end up with six thin layers. It’s best to use a serrated knife and a sawing motion. Gently cut around the edge of the cake first, and then through the centre. Place one layer, top side down, on a plate or cake card, then put 10 tablespoons of custard on top and spread evenly over the layer. Cover with the other half of the same cake, bottom side up. Continue spreading custard between the layers and sandwiching them together, but don’t put the custard on the top of the sixth layer – you should have used up all the custard by now. Cover the cake with cling film and put into the fridge for about 30 minutes.
18. Beat the cooled frosting well and spread over the top and sides of the cake. It’s best if you then refrigerate the cake for a minimum of 1 hour.
19. Finally, spoon most of the ganache onto the top of the cake. Use a palette knife to smooth it over the top and down the sides of the cake, patching as necessary with the reserved ganache. The cake is best if then cooled for a few more hours or overnight, but be sure to remove it from the fridge at least 2 hours before serving.
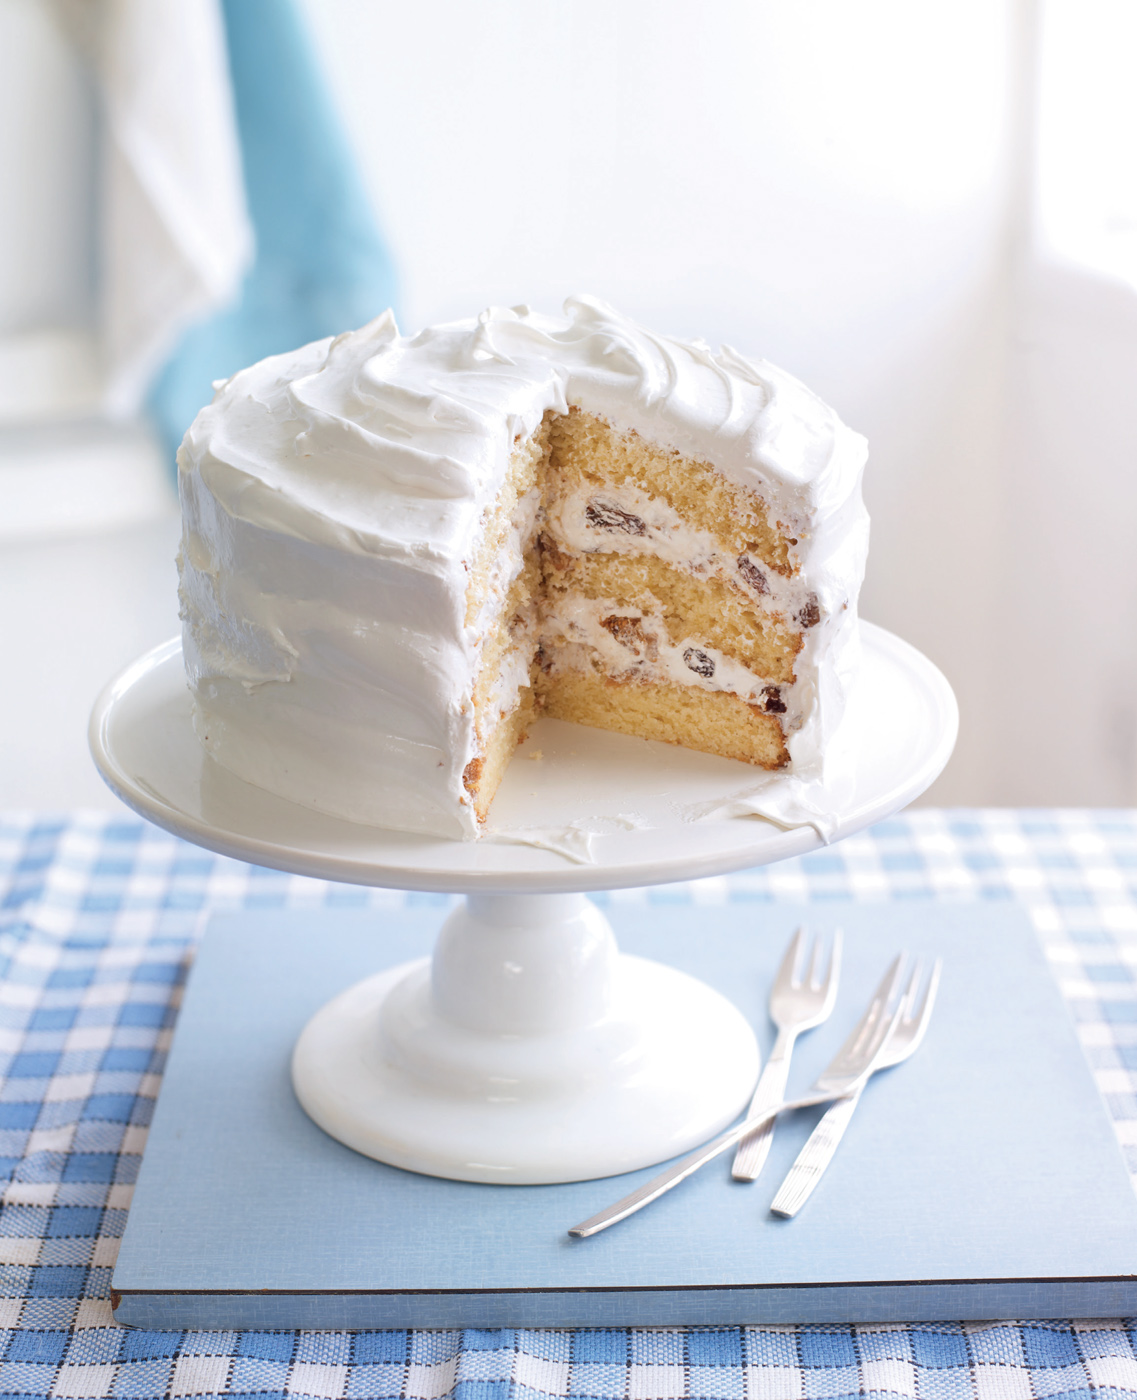
Lady Baltimore Cake
This Southern speciality will definitely make an impression at any party – white, pillowy sponge layers, filled with dried fruits and frosted with the lightest Southern boiled meringue frosting. The unused egg yolks can be frozen individually in ice cube trays; just add a pinch of sugar to each yolk and whisk for a second or two before freezing.
Makes one 20cm (8in) cake, to slice as desired
For the filling
75g (2½oz) raisins or sultanas (or a mix of both)
75g (2½oz) dried figs or dates, finely chopped
70g (2½oz) pecans, finely chopped
50ml (1¾fl oz) rum or brandy
For the cake
270g (9½oz) plain flour
2 tsp baking powder
½ tsp salt
1 tsp vanilla extract
235ml (8fl oz) whole milk
115g (4oz) unsalted butter, softened
320g (11oz) caster sugar
4 large egg whites
For the frosting
430g (15oz) caster sugar
4 large egg whites
120ml (4fl oz) golden syrup
½ tsp salt
½ tsp cream of tartar
2 tsp vanilla extract
Three 20cm (8in) diameter loose-bottomed sandwich tins
1. To make the filling, mix the dried fruits and nuts in a bowl with the alcohol and set aside for at least 1 hour, and preferably 24 hours, to soak the fruits and nuts really well.
2. To make the cake, preheat the oven to 170°C (325°F), Gas mark 3. Line the three tins with non-stick baking parchment.
3. In a bowl, sift together the flour, baking powder and salt. In a large jug, add the vanilla to the milk and set aside.
4. Using a freestanding electric mixer with the paddle attachment, or a hand-held electric whisk, cream together the butter and sugar at a high speed for at least 5 minutes until light and fluffy. Scrape down the sides of the bowl and then add the milk and vanilla at a lower speed mixing until just incorporated. If the mixture starts to split, add a tablespoon of the dry ingredients and continue mixing. With the mixer still running at low speed, add the dry ingredients in one steady stream and stop beating when just incorporated. Take a spatula and mix gently by hand, scraping down the sides of the bowl.
5. Beat the egg whites using a freestanding electric mixer with the whisk attachment or a hand-held electric whisk until at firm peak stage – be careful not to overbeat or they will become dry. Fold the egg whites carefully into the cake mixture by hand, and when all is mixed, divide between the three prepared tins.
6. Bake for about 25 minutes until the sponge is golden on top and bounces back when lightly touched. Cool in the tins for 5 minutes, and then turn out onto wire racks to cool completely.
7. To make the frosting, bring some water to the boil in a small pan. In a heatproof bowl set above, but not touching, the boiling water, mix together the sugar, egg whites, syrup, salt and cream of tartar, beating with a hand-held electric whisk for at least 12 minutes until it holds stiff peaks. When you lift away the beaters, the peaks formed should hold nicely. Remove the bowl from the heat, mix in the vanilla and beat for 1–2 minutes more.
8. To assemble the filling, take a third of the frosting and mix well with the fruit and nut mixture.
9. To assemble the cake, put one layer of sponge onto a plate or cake card. Spoon half the fruit and nut filling onto the sponge and spread evenly. Cover with a second layer of sponge and top with the other half of the fruit and nut filling, spreading it out evenly. Place the third sponge on top and then cover the sides and top of the cake with the remaining two-thirds of the frosting.
10. Use a palette knife to create swirls and peaks, making the most of the glossy smooth frosting for decorative effect.

Gingerbread Icebox Cake
Southern bakers had plenty of time on their hands and many older recipes do have many steps and processes to create that show-stopping star. This icebox cake involves making gingerbread wafers and arranging them into a tower held together with cinnamon whipped cream. We suppose you could buy the ginger biscuits, but making them is half the fun!
For the ginger bread wafer biscuits
670g (1lb 7oz) plain flour
1 tbsp ground ginger
1 tbsp ground cinnamon
1 tsp ground cloves
¾ tsp bicarbonate of soda
¼ tsp baking powder
½ tsp salt
170g (6oz) unsalted butter, softened
160g (5½oz) soft light brown sugar
2 large eggs
175g (6oz) pure cane molasses, such as Meridian
For the cream filling
585ml (1 pint) whipping cream
¾ tsp ground cinnamon
1 tsp vanilla extract
4 tbsp icing sugar
6cm (2½in) round cutter
1. To make the wafers, in a large bowl, sift together the flour, ginger, cinnamon, cloves, bicarbonate of soda, baking powder and salt. Set aside.
2. Using a freestanding electric mixer with the paddle attachment or a hand-held electric whisk, cream the butter and sugar together for around 5 minutes on a medium-high speed until light and fluffy. Add the eggs, one at a time, on a lower speed, scraping down the sides of the bowl between additions. Continue mixing on a low speed and add the molasses. Add the dry ingredients in one go and continue to mix, scraping down the sides of the bowl, until a dough is formed.
3. Divide the dough into four equal amounts and shape each quarter into an oblong about 2.5cm (1in) thick. Wrap in cling film and refrigerate for at least 2 hours until the dough is firm enough to roll out.
4. Preheat the oven to 175°C (350°F), Gas mark 4. Line four baking sheets with non-stick baking parchment.
5. Once the dough is cold and firm, lightly flour a work surface and roll out the dough with a rolling pin to about 3mm (⅛ in) thick. Cut out the wafers using a 6cm (2½in) round cutter. Place the wafers 2–3cm (1in) apart on the lined baking sheets. Use up as much of the dough as possible to make about seventy wafers. If the dough gets too warm, put it back into the fridge to cool down and get harder. If there is leftover dough, you can use it later, as this dough will last several days in the refrigerator or 2–3 months in the freezer.
6. Bake the wafers for 12–14 minutes until the edges are slightly darker and the tops of the wafers are firm to the touch. Cool on the sheets for about 10 minutes, then transfer to wire racks to cool completely while you make the filling.
7. In the bowl of a freestanding electric mixer with the whisk attachment or using a hand-held electric whisk, beat the cream, cinnamon, vanilla and icing sugar on high speed until soft peaks form.
8. To assemble the cake, spread 2 tablespoons of the whipped cream onto your cake plate to hold the first layer down, then place six wafers in a circle with the sides touching each other, and one more wafer in the centre. Put about 8 tablespoons of the cream on top and spread it evenly to cover most of the wafers, leaving the outside edge of the outer wafers uncovered. Repeat with seven more wafers, but this time offset the wafers so that they stack up in between the wafers below and not directly on top. Repeat until you have ten layers of wafers, covering the top with the last of the whipped cream. Refrigerate overnight, covering with an upturned cake tin if you like.
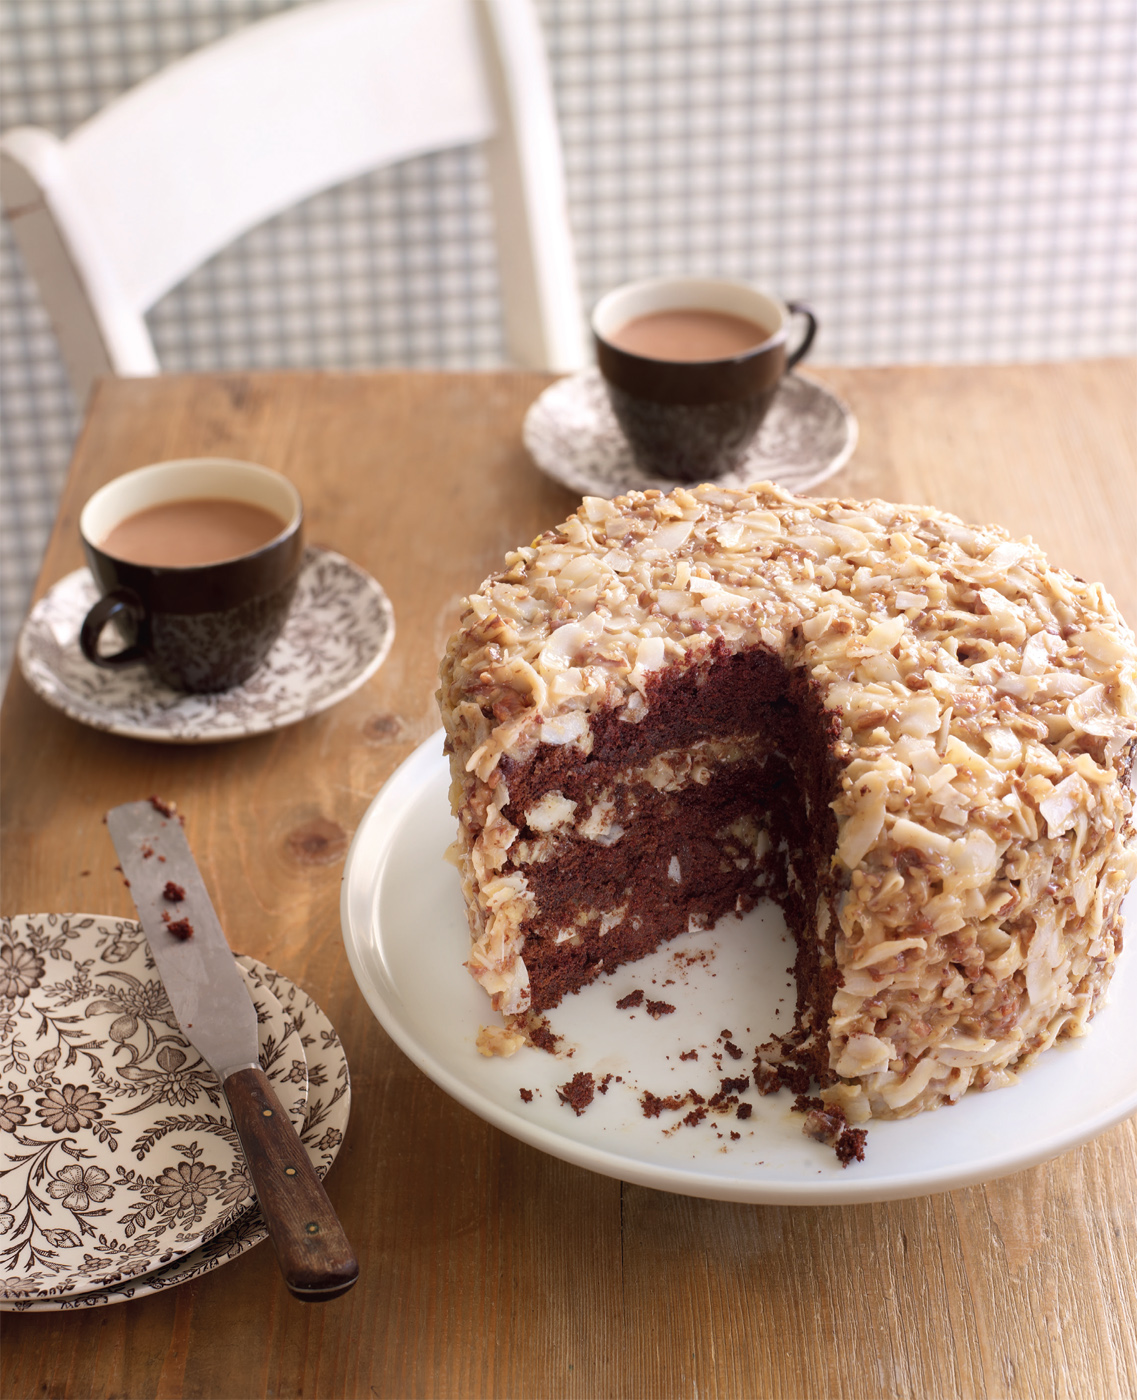
German Chocolate Cake
This cake is not from Germany, but is made in the US with ‘German’s Sweet Chocolate’, named after Samuel German, who developed a baking short-cut: dark chocolate with all the sugar already added.
Makes one 20cm (8in) cake, to slice as desired
For the cake
120ml (4fl oz) boiling water
115g (4oz) 40-50% cooking chocolate (not very bitter)
270g (9½oz) plain flour
1 tsp bicarbonate of soda
1 tsp salt
60g (2oz) cocoa powder
225g (8oz) unsalted butter, softened
430g (15oz) caster sugar
4 large eggs, separated
1 tsp vanilla extract
235ml (8fl oz) buttermilk
For the frosting
190g (7oz) pecans, finely chopped
215g (7½oz) caster sugar
350ml (12fl oz) evaporated milk (unsweetened)
110g (4oz) unsalted butter
3 large egg yolks
1 tsp vanilla extract
200g (7oz) coconut flakes
Three 20cm (8in) diameter loose-bottomed sandwich tins
1. To make the cake, preheat the oven to 175°C (350°F), Gas mark 4. Line the three tins with non-stick baking parchment.
2. In a medium heatproof bowl, pour the boiling water over the chocolate. Stir until smooth and set aside.
3. In a separate bowl, sift together the flour, bicarbonate of soda and salt. Mix in the cocoa powder with a whisk or fork.
4. Using an electric mixer with the paddle attachment or a hand-held electric whisk, cream the butter and sugar together for around 5 minutes on a medium-high speed until light and fluffy. Add the egg yolks, one at a time, scraping down the sides of the bowl after each addition, until well incorporated. Reduce the mixer speed to low and add the cool chocolate mixture and the vanilla. Add the flour mixture, in thirds, alternating with the buttermilk and ending with the flour.
5. Using a freestanding electric mixer with the whisk attachment or a hand-held electric whisk, beat the egg whites to soft peak stage. By hand, gently fold the beaten whites into the batter in about three additions.
6. Divide the batter between the prepared tins, smoothing the tops with the back of a spoon, then bake for 30 minutes until the sponge bounces back when lightly touched. Cool in the tins for about 15 minutes and then turn out to cool completely on wire racks.
7. To make the frosting, first toast the pecans in a dry frying pan on a medium heat. Be careful, as this should only take about 30–60 seconds and they can burn quickly.
8. In a medium saucepan, combine the sugar, milk, butter, egg yolks and vanilla. Cook over a low heat, stirring constantly, for 15–20 minutes until thickened. Stir in the coconut and pecans. Transfer to a bowl and, stirring occasionally, allow to cool to room temperature before frosting the cake.
9. To assemble the cake, place one layer on a plate or cake card and spread with a third of the frosting. Repeat with the next layer, sandwiching them together, then spread the rest of the frosting over the top and sides of the cake.
Lemon Doberge Cake
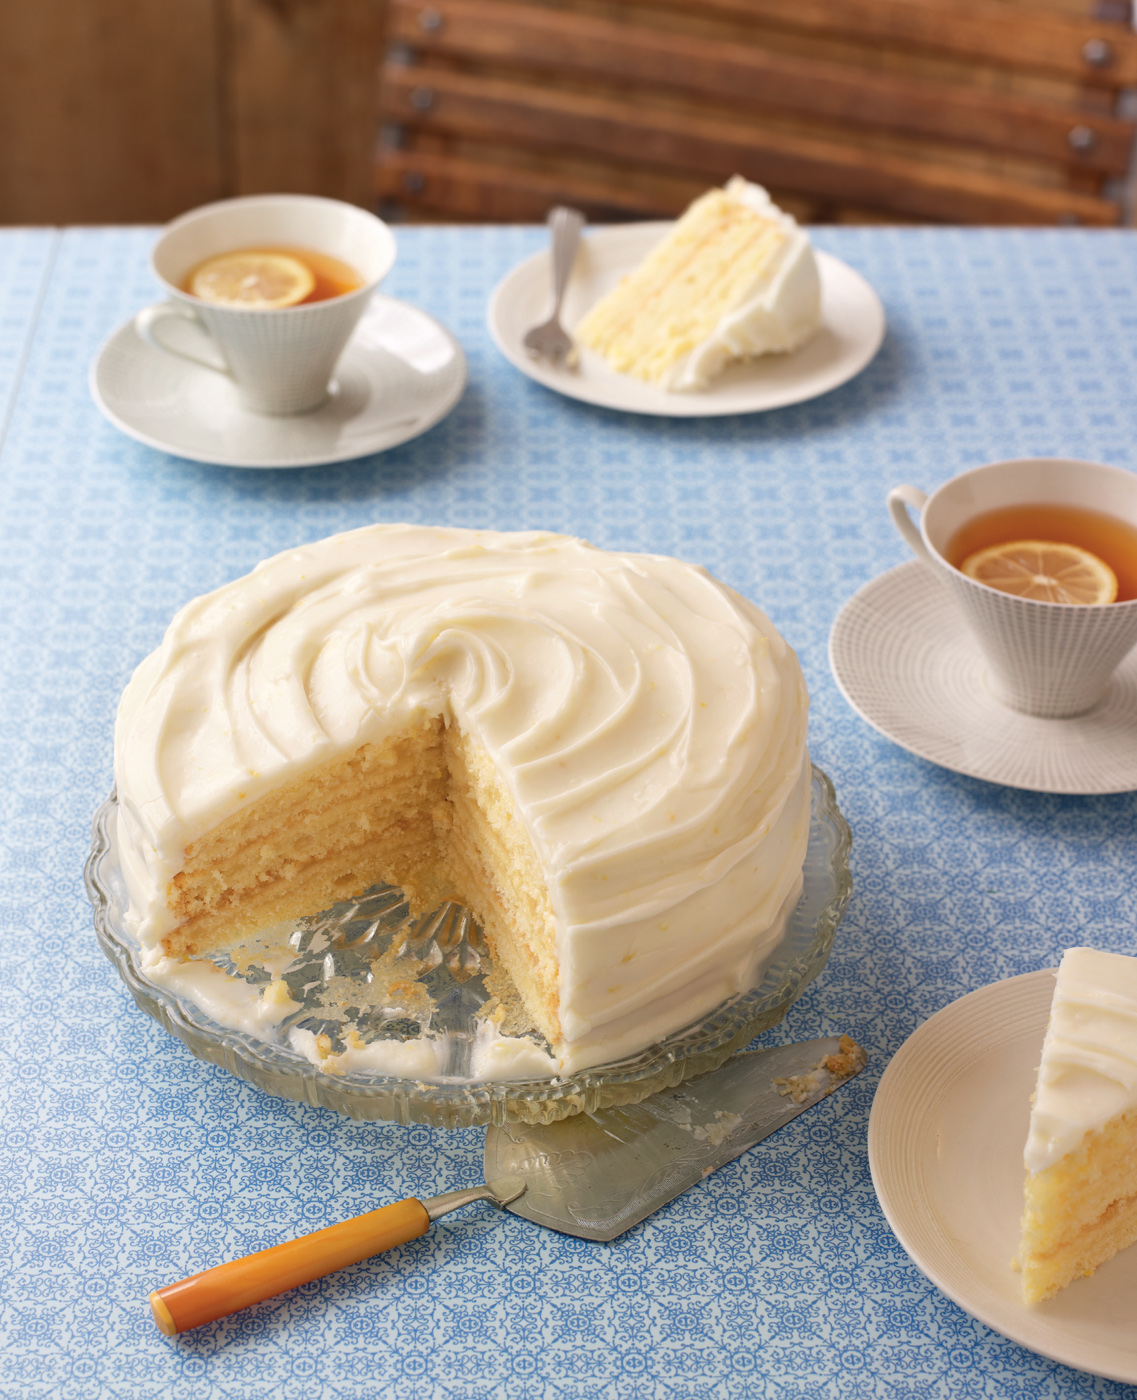
Like the chocolate Doberge, this cake made with lemon also hails from New Orleans, where it’s common for bakeries to sell half a lemon cake and half a chocolate cake placed together, to form a single mix-and-match Doberge.
Makes one 20cm (8in) cake, to slice as desired
For the lemon custard
270g (9½oz) caster sugar
3 tbsp cornflour
3 tbsp plain flour
Pinch of salt
350ml (12fl oz) cold water
3 large egg yolks, lightly beaten
30g (1oz) unsalted butter
Zest of 2 lemons
80ml (3fl oz) fresh lemon juice
For the cake
3 large egg whites
300g (10½oz) plain flour
2 tsp baking powder
¼ tsp salt
170g (6oz) unsalted butter, softened
140g (5oz) caster sugar
1 tsp vanilla extract
1 tsp lemon extract
3 large egg yolks, at room temperature
60ml (2fl oz) fresh lemon juice
120ml (4fl oz) whole milk
For the lemon frosting
255g (9oz) full-fat cream cheese, such as Philadelphia, cold
560g (1lb 3oz) icing sugar, sifted
2 tsp finely chopped lemon zest
½ tsp vanilla extract
½ tsp lemon extract
Three 20cm (8in) diameter loose-bottomed sandwich tins
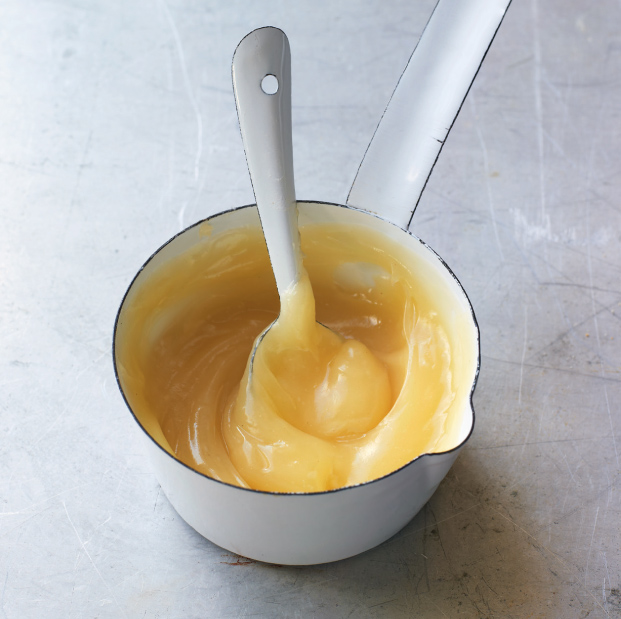
1. To make the lemon custard, combine the sugar, cornflour, plain flour and salt in a saucepan. Stir in the cold water and cook on a medium heat until the mixture thickens and bubbles, stirring frequently, then cook for a further 2 minutes.
2. Put the beaten egg yolks into a bowl and slowly pour in about a third of the hot flour and sugar mixture in order to warm up the egg yolks. Stir quickly so that the yolks do not cook. Pour the warmed-up yolks into the remaining flour and sugar mixture in the saucepan and bring to a gentle boil. Stir constantly and cook for 2–3 more minutes, then remove from the heat. Stir in the butter, lemon zest and fresh lemon juice and mix well. Scrape into a bowl, cover with cling film, pressing it directly onto the surface to prevent a skin forming, and cool to room temperature – do not stir further.

3. To make the cake, preheat the oven to 175°C (350°F), Gas mark 4. Line the three tins with non-stick baking parchment.
4. Using a freestanding electric mixer with the whisk attachment or a hand-held electric whisk, beat the egg whites to stiff peak stage. In a bowl, sift together the flour, baking powder and salt three times.
5. Using the electric mixer with the paddle attachment or a hand-held electric whisk, cream the butter and sugar together for 5 minutes on a medium-high speed until light and fluffy. Add the vanilla and lemon extracts and the egg yolks and mix until well incorporated.
6. In a jug, mix together the lemon juice and milk. Add to the creamed mixture with the dry ingredients, alternating in thirds, mixing after each addition. Only mix until each ingredient is just incorporated. Scrape down the sides of the bowl often. After the final addition, mix well for another minute until smooth and light. Fold in the egg whites by hand.
7. Divide the batter evenly between the three prepared tins and bake for 25–30 minutes or until the sponges are golden brown and bounce back when lightly touched. Cool the sponges in the tins for about 10 minutes, and then turn out to cool completely on wire racks.

8. To make the frosting, using a freestanding electric mixer with the paddle attachment or a hand-held electric whisk, beat the cream cheese and icing sugar together for 2–3 minutes until light and fluffy – do not overbeat or the cream cheese will split. Mix in the lemon zest and vanilla and lemon extracts.
9. To assemble the cake, cut each cake in half horizontally so that you end up with six thin layers. It’s best to use a serrated knife and a sawing motion. Gently cut around the edge of the cake first and then through the centre.
10. Place one layer on a plate or cake card, then put 3–4 tablespoons of custard on top and spread evenly over the layer. Cover with the other half of the same cake. Continue spreading custard between the layers and sandwiching them together, but don’t put custard on the sixth layer. Cover with cling film and put into the fridge for about 30 minutes.
11. Finally, spread the frosting over the top and sides of the cake. The cake is best if cooled for a few more hours or overnight, but remove the cake from the fridge at least 2 hours before serving.
Alabama Little Layer Cake
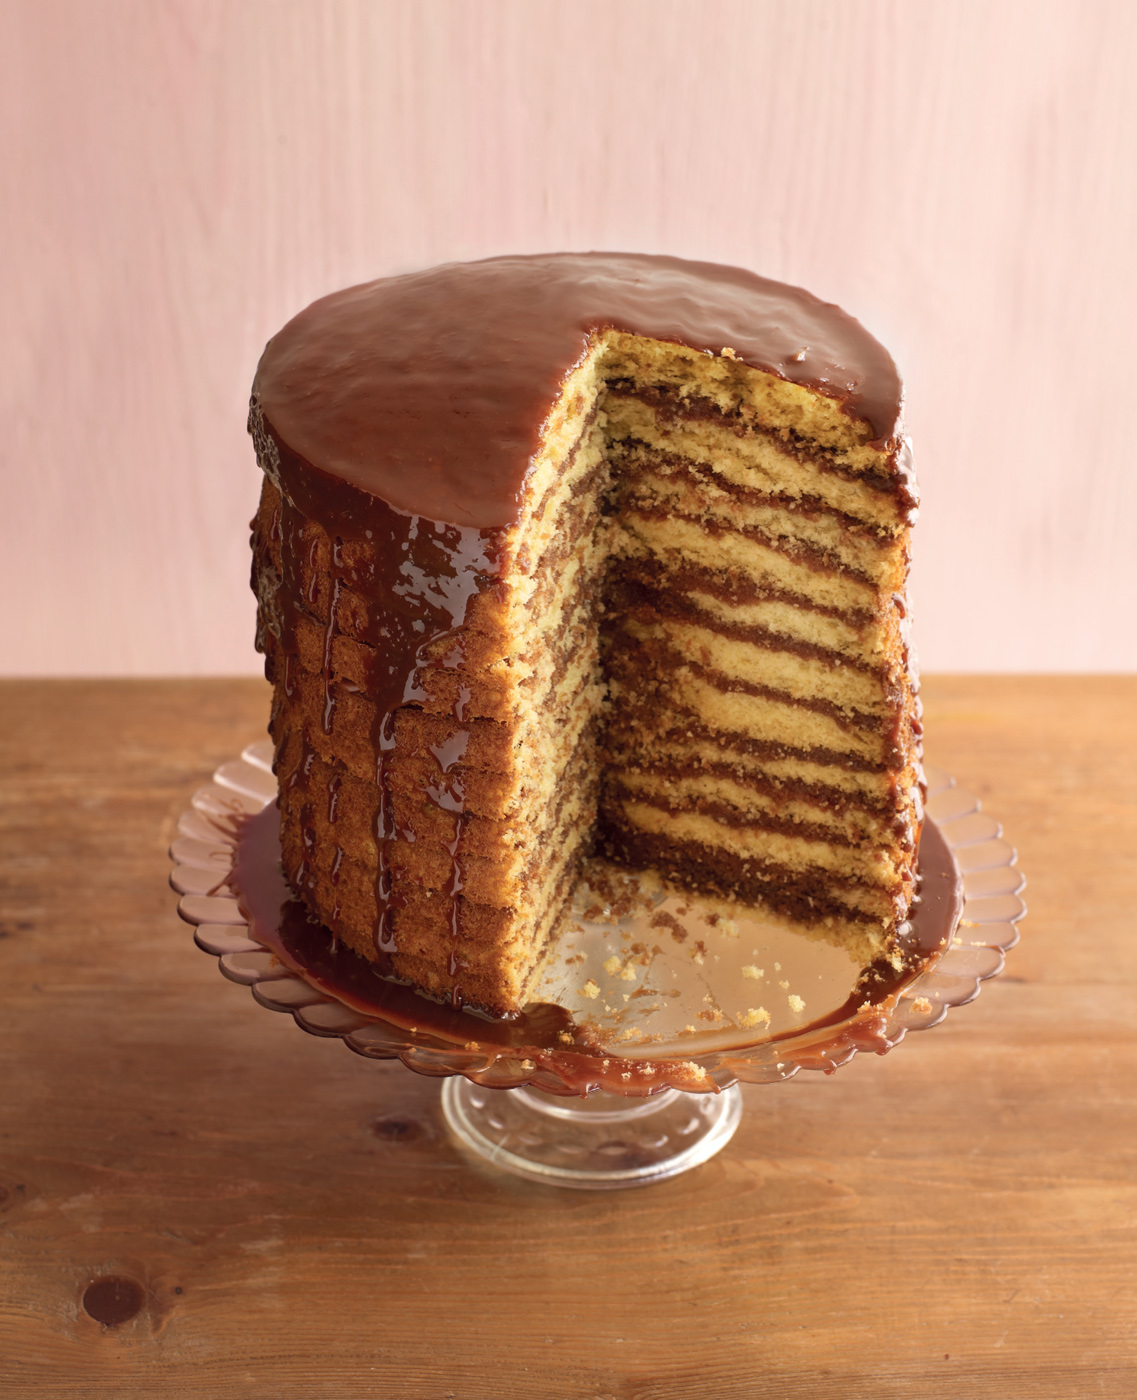
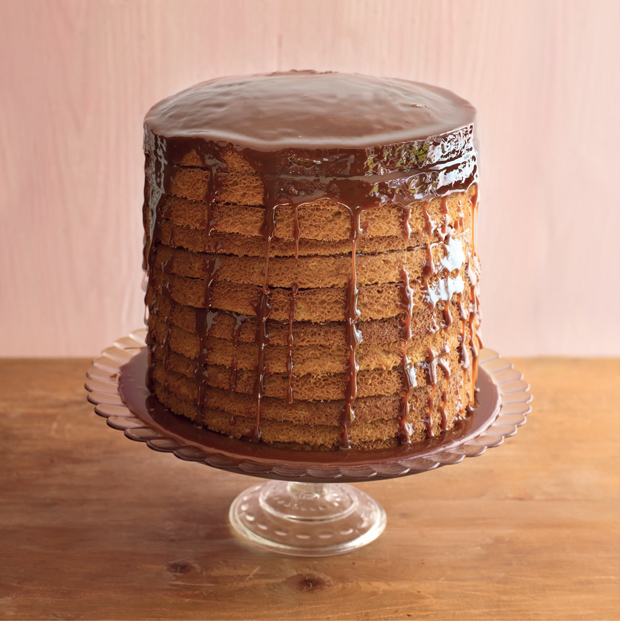
This traditional recipe from south-eastern Alabama is from the days before electric whisks and icing sugar existed. Frostings used to be boiled, and carefully cooking this one correctly is crucial. This recipe needs a lot of time and is not for the novice baker – however, the result will wow everyone!
Makes one 20cm (8in) cake, to slice as desired
For the cake
280g (10oz) unsalted butter
670g (1lb 7oz) caster sugar
100g (3½oz) vegetable shortening (Trex)
6 large eggs
2½ tsp vanilla extract
845g (1¾lb) plain flour
1¼ tsp salt
2½ tsp bicarbonate of soda
6½ tsp baking powder
590ml (1 pint) whole milk
For the frosting
1kg (2lb 3oz) caster sugar
40g (1½oz) cocoa powder
115g (4oz) unsalted butter, cut into pieces
350ml (12fl oz) evaporated milk (unsweetened)
120ml (4fl oz) whole milk
2 tsp vanilla extract
Three 20cm (8in) diameter loose-bottomed sandwich tins and a sugar thermometer
1. To make the cake, preheat the oven to 200°C (400°F), Gas mark 6. Grease the three tins and base line with non-stick baking parchment.
2. Using a freestanding electric mixer with the paddle attachment or a hand-held electric whisk, cream together the butter, sugar and shortening at a high speed for at least 4–5 minutes until light and fluffy. Lower the speed to medium and add the eggs, one at a time, scraping down the sides of the bowl after each addition. When all the eggs have been added, mix until everything is well incorporated. Stir in the vanilla.
3. In a large bowl, sift together the flour, salt, bicarbonate of soda and baking powder twice. You want everything to be light and airy. Add the sifted dry ingredients and the milk to the creamed ingredients in several additions, starting with the dry and alternating with the milk, then finishing with the dry. Beat for a further 2–3 minutes on a medium speed until all is smooth and mixed, scraping down the sides of the bowl as you go. Measure out about 230g (8oz) of batter into each prepared tin, smoothing down lightly with a spatula to get an even layer.
4. Bake for 8–10 minutes, or until the sponge is golden brown and bounces back when lightly touched. Take out of the oven and immediately turn out onto a wire rack. Repeat with the rest of the batter until you’ve got at least twelve layers. You can reuse the parchment, but be sure to clean the tins of any cooked-on batter.
5. While the first layers are in the oven, start to make the frosting. Put the sugar and cocoa in a large, deep saucepan and mix well. Turn the heat to medium–high, then add the butter, evaporated milk and whole milk and bring to a boil. Boil for about 4 minutes, stirring continuously. Be careful and keep watching the saucepan to make sure that the mixture does not boil over. Reduce the heat to low, add the vanilla and simmer, stirring occasionally, for another 7–10 minutes. Using a sugar thermometer, cook to the point just before soft ball stage, or about 110°C (230°F).
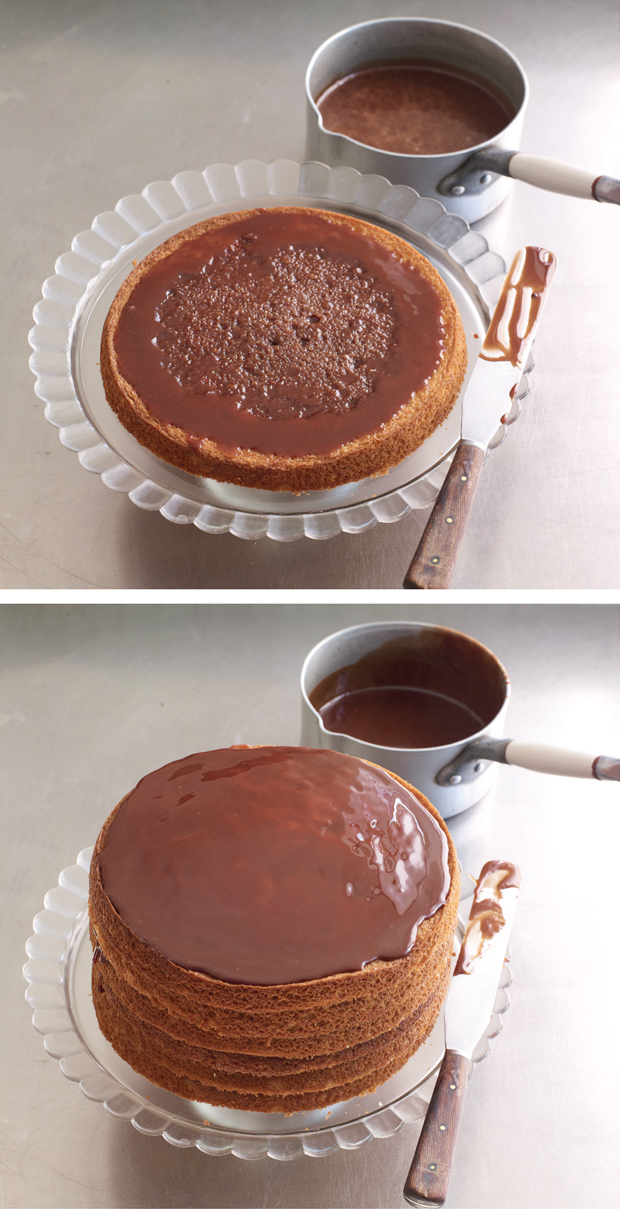
6. While the second batch of layers is in the oven and the first batch is still warm, begin to assemble the cake. Put one layer on a plate or cake card, with the top side facing upwards. Put about 4 tablespoons of the warm frosting on top. This frosting will seem thin, but it thickens as it cools. Spread all over to cover the first layer. Stack on the second layer, again with the top side facing up, and put 4 more tablespoons of frosting on top of that. Continue until you have used all twelve sponges. Cover the top of the cake with the remaining frosting, allowing it to drizzle down the sides of the cake stack.

Orange Layer Cake
Another traditional style recipe from the old South that calls for several processes, including boiling the frosting and filling. Cointreau, Triple Sec or Grand Marnier can be used for the filling.
Makes one 20cm (8in) cake, to slice as desired
For the cake
340g (12oz) plain flour
320g (11oz) caster sugar
2 tsp baking powder
¼ tsp bicarbonate of soda
1 tsp salt
115g (4oz) unsalted butter, softened
Grated zest of 1 orange
60ml (2fl oz) freshly squeezed orange juice
175ml (6fl oz) whole milk
2 large eggs
For the filling
30g (1oz) unsalted butter
50g (1¾oz) caster sugar
2 large eggs, beaten
1 tbsp orange zest
1 tbsp fresh lemon juice
115ml (4fl oz) freshly squeezed orange juice
1 tsp orange liqueur
For the custard frosting
40g (1½oz) caster sugar
1 tbsp cornflour
115ml (4fl oz) evaporated milk (unsweetened)
3 large egg yolks
115ml (4fl oz) freshly squeezed orange juice
1 tsp orange zest
Three 20cm (8in) diameter loose-bottomed sandwich tins
1. Preheat the oven to 175°C (350°F), Gas mark 4. Line the three tins with non-stick baking parchment.
2. To make the cake, sift the dry ingredients into the bowl of a freestanding electric mixer or a bowl you can use a hand-held electric whisk in. Add the butter and, starting with the mixer on a low speed, beat until combined. Add the orange zest and orange juice. Beat for 2 minutes, scraping down the sides of the bowl as you go. Add the milk and eggs and beat for 2 minutes longer.
3. Divide the batter between the three prepared tins. Bake for 25–30 minutes until the sponges are golden and bounce back when lightly touched. Cool in the tins for about 10 minutes, then turn out onto wire racks to cool completely.
4. To make the filling, place all the ingredients in a heatproof bowl set over, but not touching, a pan of simmering water and cook, stirring frequently, for about 20 minutes until the mixture has thickened and coats the back of a spoon. Pour into a bowl, cover the surface with cling film, pressing it directly onto the surface to prevent a skin forming, and chill until needed.
5. To make the custard frosting, mix the sugar and cornflour together in a large heatproof bowl. Add the evaporated milk and whisk together in the bowl set over, but not touching, a pan of simmering water until smooth and slightly thickened. Remove from the heat.
6. Using a freestanding electric mixer with the whisk attachment or a hand-held electric whisk, beat the egg yolks until light and thickened. Add the orange juice and zest and continue beating until combined. Pour the egg yolk mixture into the warm milk mixture, then set the bowl back over the pan of simmering water and continue cooking until the mixture is thickened and coats the back of a spoon. Pour into a bowl, cover the surface with cling film to prevent a skin forming, then chill.
7. To assemble the cake, put one layer of sponge on a plate or cake card. Cover with half of the filling. Place a second layer of sponge on top and cover with the remaining filling. Place the third layer on top. Spoon the custard frosting over the top of the cake, using a palette knife to push the frosting to the edges so that it dribbles over the sides.

Red Velvet Crepe Cake
A lot of ingredients go into this recipe, but once you’ve mixed it all up, assembling the crepes and meringue buttercream is quite simple. Crepe cakes are all the rage, so we naturally wanted to show you how to make a Red Velvet version!
Makes one 22cm (9in) cake, to slice as desired
For the crepe batter
120ml (4fl oz) water
230g (8oz) unsalted butter, cold and cubed
340g (12oz) white chocolate, chopped
110g (4oz) dark chocolate (minimum 70% cocoa solids), chopped
470g (1lb 1oz) plain flour
150g (5½oz) soft light brown sugar
1 tsp salt
940ml (1½ pints) whole milk
230ml (8fl oz) buttermilk
12 large eggs
6 large egg yolks (reserve 3 of the whites for the buttercream)
2 tbsp red gel paste colouring mixed in 2 tbsp water
2 tbsp vanilla extract
For the meringue buttercream
250g (9oz) unsalted butter, softened
125g (4½oz) icing sugar
Seeds scraped from 1 vanilla pod (or 1½ tsp vanilla extract)
340g (12oz) full-fat cream cheese, such as Philadelphia, cold
110g (4oz) caster sugar
110g (4oz) soft light brown sugar
60ml (2fl oz) water
235ml (8fl oz) whipping cream
Sugar thermometer and a 22cm (9in) non-stick frying pan
1. To make the crepes, heat the water in a saucepan until it is almost boiling, then whisk in the cold butter, one cube at a time. Add the white and dark chocolate, shake the saucepan to even out the chocolate at the bottom of the pan, then take off the heat and set aside.
2. Put the dry ingredients into the bowl of a freestanding electric mixer with the paddle attachment, or a bowl you can use a hand-held electric whisk in, and mix together with a fork. Add the milk and buttermilk and mix on a low speed. Add the eggs and extra yolks, one at a time, mixing until just incorporated.
3. Whisk the melted chocolate – it will seem runny. Pour into the rest of the ingredients and mix on slow until all is incorporated – don’t overmix. The mixture will seem relatively runny and will be a light brown (not very nice) colour. Pour all this into a large bowl and mix in the red colouring and vanilla extract. The resulting colour should be a light red or dark pink. Put into the freezer to allow to cool down, thicken and relax for 10 minutes.
4. To make the meringue buttercream, using the electric mixer with the paddle attachment or a hand-held electric whisk, beat the butter, icing sugar and vanilla seeds (or extract) together, then add the cold cream cheese and beat for 2–3 minutes until fluffy. Don’t overbeat or the cream cheese will split and become too runny. Put into a bowl and set aside.
5. In a small saucepan, combine the caster and brown sugars and water over a medium–high heat and cook until it reaches the soft ball stage as measured on a sugar thermometer, about 120°C/248°F.
6. While the sugars are cooking, put the reserved egg whites into the bowl of the electric mixer with the whisk attachment or a bowl you can use a hand-held electric whisk in. When the sugar reaches soft ball stage, turn the mixer on to high speed and slowly pour the hot syrup down the inside of the bowl so that you don’t splash yourself. Beat until stiff peaks form.
7. Add the cream cheese mixture to the meringue about 4 tablespoons at a time while the mixer is on medium speed. Once it is all incorporated, beat for about 2 minutes until fluffy. Whisk the whipping cream until it forms soft peaks and fold into the meringue buttercream mix. Set aside in the fridge.
8. To cook the crepes, take the batter out of the freezer. Grease the non-stick pan with a light cooking oil. With the pan on a medium-high heat, pour 60ml (2fl oz) of batter into the pan. Each crepe takes about 1 minute to cook. When you pour the batter into the greased pan, twirl the pan to get the batter to fill the entire base of the pan. When the edges seem ‘dry’, run a spatula around the edge, turn over and cook on the other side for a few moments. Make at least thirty-two crepes – you may have a few extra. The first one or two crepes can be discarded if they don’t turn out perfectly.
9. To assemble the cake, put the first crepe on a plate and, using a palette knife, smooth 1 heaped tablespoon of the meringue buttercream over the crepe, stopping just before the edge. Place the second crepe on top of the smoothed-on buttercream and repeat until all the crepes have been used up. Remember, you don’t want a very thick layer of buttercream between the crepes, as there will be about thirty-two layers. Smooth the final bit of buttercream on top of the cake to finish.
Appalachian Stack Cake
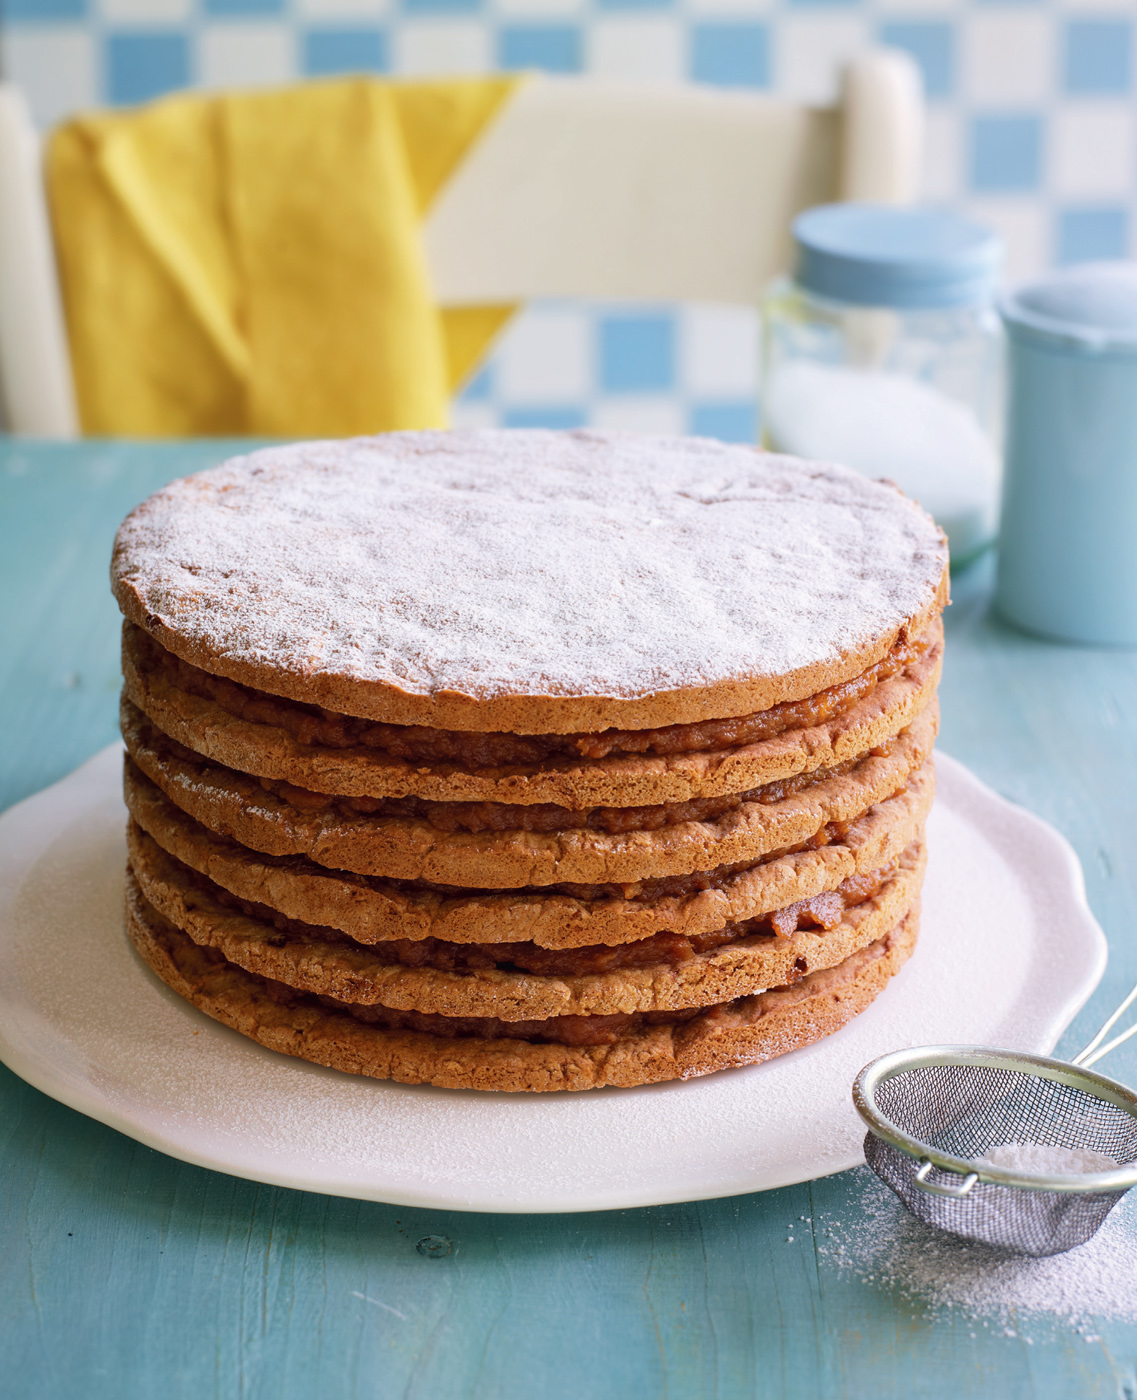
In the Appalachian Mountains, wedding cakes were traditionally a community affair. Where money was short, friends and family would each bring a layer of cake and the most popular brides and grooms would have layer upon layer stacked high and filled with an apple preserve known as apple butter. We’ve only gone with six layers and we’re showing you how to make your own version of apple butter, as it’s not easily bought in the UK. The layers are more akin to cookies in texture than sponge. Well worth the time and effort!
Makes one 20cm (8in) cake, to slice as desired
For the cake
110g (4oz) unsalted butter, softened
110g (4oz) caster sugar
120ml (4fl oz) buttermilk
80g (3oz) pure cane molasses, such as Meridian
1 large egg
1 tsp vanilla extract
470g (1lb 1oz) plain flour
1 tsp ground ginger
½ tsp bicarbonate of soda
½ tsp salt
½ tsp ground cinnamon
Pinch of ground nutmeg
For the apple butter filling
400g (14oz) dried apples, roughly chopped
150g (5½oz) dark brown sugar
1 tsp ground ginger
1 tsp ground cinnamon
½ tsp ground cloves
½ tsp ground nutmeg
1 vanilla pod, split open and seeds reserved
2 tbsp Calvados or apple brandy (optional)
1.4 litres (2 pints 6fl oz) cloudy, pressed apple juice (not clear, from concentrate) Icing sugar, for sprinkling on top
Three 20cm (8in) diameter loose-bottomed sandwich tins
1. To make the cake, preheat the oven to 175°C (350°F), Gas mark 4. Grease the three tins with butter and base line with non-stick baking parchment. You will need to re-use the three cake tins to make the six layers – you can re-use the parchment from each tin.
2. Using a freestanding electric mixer with the paddle attachment or a hand-held electric whisk, cream the butter and sugar together on a high speed for at least 4–5 minutes until light and fluffy. Add the buttermilk, molasses, egg and vanilla and continue to mix well.
3. In a large bowl, sift together the flour, ginger, bicarbonate of soda, salt, cinnamon and nutmeg. On a low speed, add the flour mixture to the creamed mixture and mix until just incorporated – don’t overbeat the dough.
4. On a lightly floured surface, form the dough into a log and cut into six equal portions. Place one portion in each prepared tin. As you are using three tins to make six layers, you will need to do this in stages. Use your fingers to lightly press the dough into the edges of the tins.
5. Bake for 10–12 minutes or until lightly browned. Note that these make cookie-dough-like layers, similar to gingerbread cookies, not sponge layers. Remove the cake layers from the tins and cool completely on wire racks.
6. To make the apple butter, in a large saucepan combine the dried fruit and all the dry ingredients, including the vanilla pod. Add the Calvados or apple brandy, if using, and the pressed apple juice. The fruits will expand as they soak in the liquid, so make sure your saucepan is big enough.
7. Bring the mixture to a low boil and simmer for an hour or two, stirring often. Keep on cooking until you’ve got a dark, stew-like pulp. The apples may have broken down by this point, but this is fine as you’ll be blitzing it afterwards. Remove from the heat, take out the vanilla pod and let stand for 30 minutes.
8. Transfer to a food processor, add the reserved vanilla seeds and process with the metal blade attachment until the mixture is smooth and forms a thick paste. Use while still lukewarm.
9. To assemble the stack cake, place one cake layer on a serving plate or cake card and spread with one-fifth of the warm apple butter filling. Repeat the procedure with the remaining cake layers and fruit butter filling, stacking each on the previous layer. Do not spread the fruit butter filling on the top layer. Cover the cake securely with cling film and refrigerate for at least 24 hours before serving with icing sugar sprinkled over the top.